- Intellij Idea - Home
- Intellij Idea - Introduction
- Installation and Configuration
- Intellij Idea − Getting Familiar
- Create First Java Project
- Intellij Idea − Deep Dive
- Intellij Idea − Deep Dive into Editor
- Intellij Idea − Code Refactoring
- Intellij Idea − Running Projects
- Intellij Idea − Build Tools
- Intellij Idea − Unit Testing
- Intellij Idea − Debugging
- Intellij Idea − Profiling
- Intellij Idea − Version Control
- Intellij Idea − Databases
- Migrating from NetBeans
- Intellij Idea − Migrating from Eclipse
Intellij Idea - Databases
IntelliJ provides database tool which allows you to perform database related operation from the IDE itself. It supports all major databases like MySQL, Oracle, Postgress, SQL server and many more. In this chapter, we will discuss how IntelliJ supports MySQL database.
We assume that the reader is familiar with the database concepts and the required databases tools are installed and configured on your system.
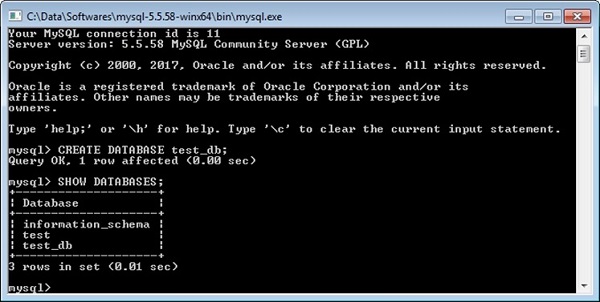
Create Database
To begin with, we will create a database - test_db. Execute the following command in the command prompt −
Connect to Database
Follow these steps to connect to a Database −
Navigate to View → Tool Windows → Database.
Click on the green plus icon and select Data Source → MySQL.
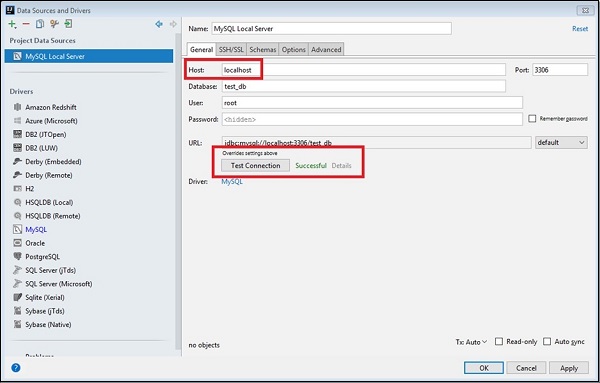
Enter the host address and click on the Test Connection button.
If everything goes well then itll show Successful as shown in above image.
Click on OK button to save connection.
Create table
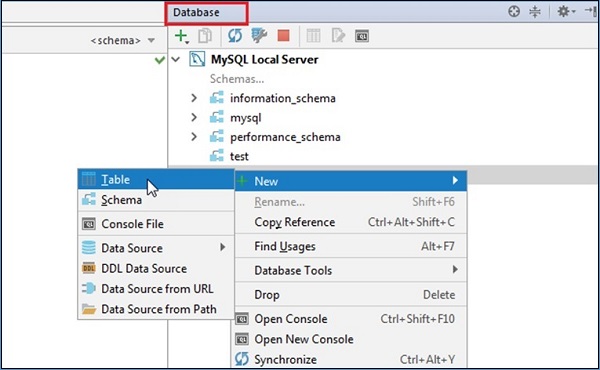
Follow these steps to create a new table −
Right-click on the database pane and select schema.
Select the New → Table option
A new window will appear. Define the table with columns, types and so on.
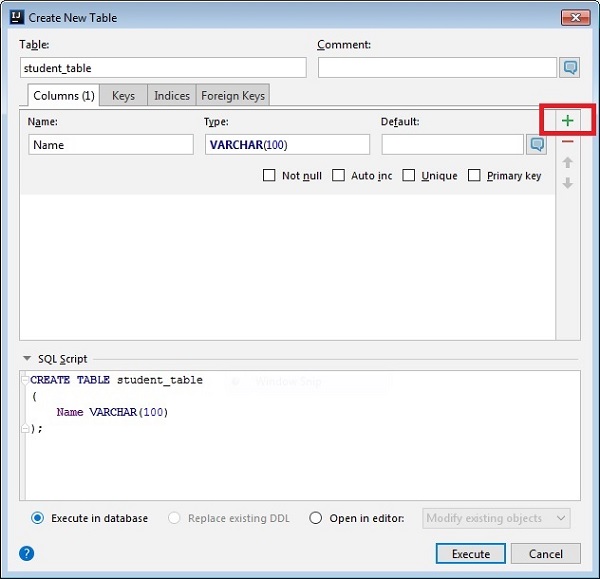
Click on the Execute button
Click on the Execute button
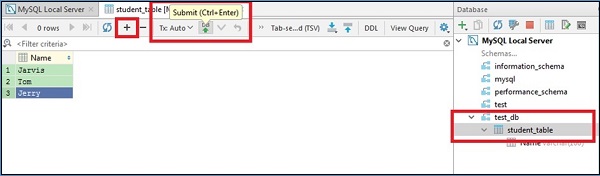
Insert Data
Follow these steps to insert data −
- Select table from the database pane.
- It will open table in the new window.
- Click on the plus icon to insert new row.
- Click on the Submit button to make the changes permanent.
Retrieve Data
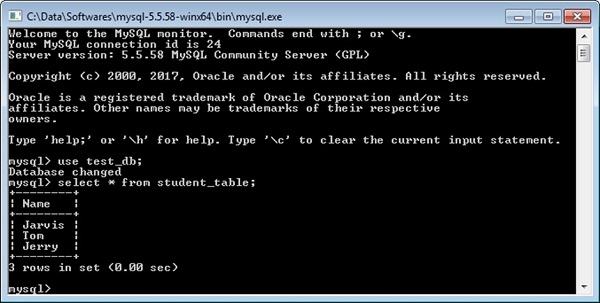
To retrieve data, double-click on student_table from the database pane. It will show table data in new window.
To ensure that the data is inserted into the table, open the command prompt and execute the following commands −