- Intellij Idea - Home
- Intellij Idea - Introduction
- Installation and Configuration
- Intellij Idea − Getting Familiar
- Create First Java Project
- Intellij Idea − Deep Dive
- Intellij Idea − Deep Dive into Editor
- Intellij Idea − Code Refactoring
- Intellij Idea − Running Projects
- Intellij Idea − Build Tools
- Intellij Idea − Unit Testing
- Intellij Idea − Debugging
- Intellij Idea − Profiling
- Intellij Idea − Version Control
- Intellij Idea − Databases
- Migrating from NetBeans
- Intellij Idea − Migrating from Eclipse
Intellij Idea - Running Projects
IntelliJ provides multiple ways to create configuration. This chapter discusses the options to create temporary, permanent configuration. It also discusses method to share configuration among other users.
Create Temporary Configuration
Temporary configuration is created when you run or debug Java class or test case. Consider the following steps to understand how this works −
- Create a Java class.
- Right-click on it and select the Run option.
- After the first Run, temporary configuration is added to the run menu.
Create Permanent Configuration
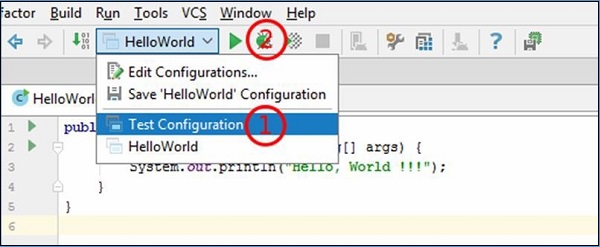
Temporary configuration can be converted to permanent configuration by saving it with IntelliJ. To save configuration, click on the Save Configuration option from the Run menu −
You can also modify the existing configuration by editing it.
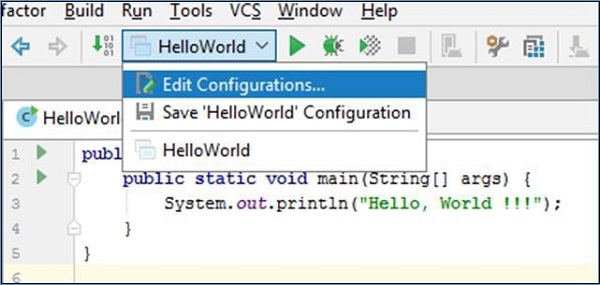
Create New Configuration
In this section, we will understand how to create new configuration. Follow these steps to create new configuration −
Navigate to the Run → Edit Configuration.
Click on the Plus button to add new configuration.
Select Application from the dropdown list.
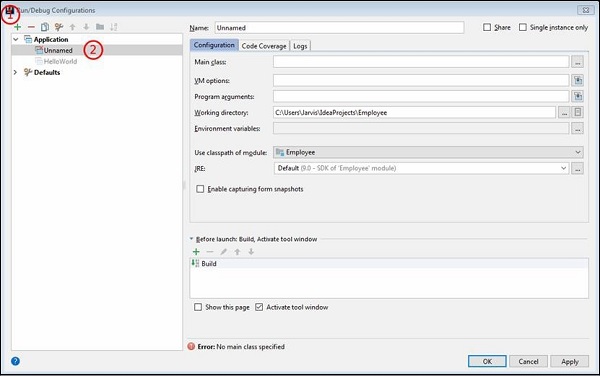
It will create un-named configuration.
Configure it according to your requirements and click on the OK button.
This saved configuration will be accessible from the Run menu along with other configurations.
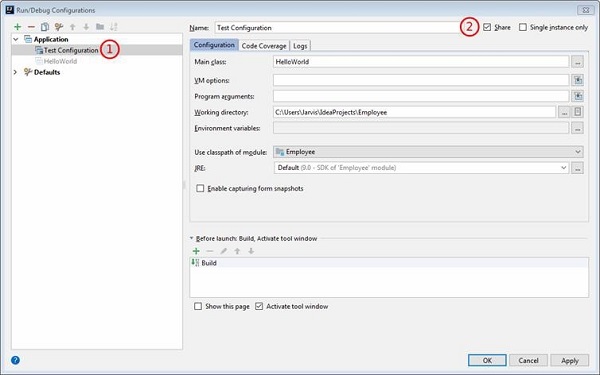
Sharing the Configuration
Follow these steps to share configuration with others −
Navigate to the Run → Edit Configuration.
Select configuration from the left pane and click on the Share checkbox.
It will store configuration on disk.
If directory based format is used, it will save configuration in separate file under runConfiguration folder. Otherwise, it will store configuration in the .ipr file.
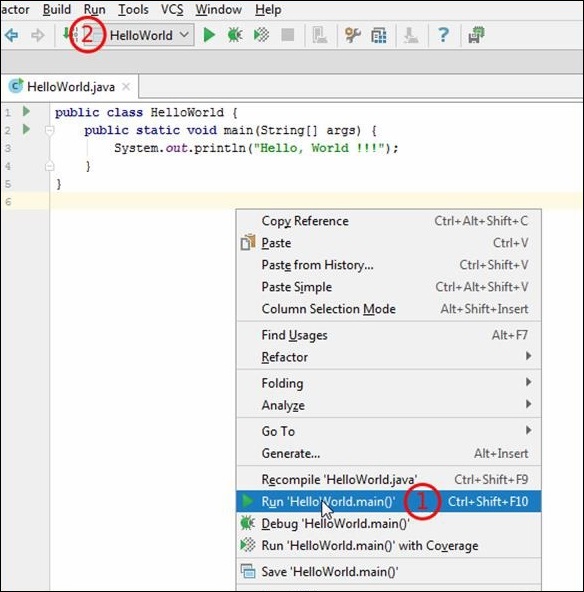
Run Configuration
To run project with specific configuration −
Select configuration from the Run menu.
Run the project as shown in the following screenshot −