- Intellij Idea - Home
- Intellij Idea - Introduction
- Installation and Configuration
- Intellij Idea − Getting Familiar
- Create First Java Project
- Intellij Idea − Deep Dive
- Intellij Idea − Deep Dive into Editor
- Intellij Idea − Code Refactoring
- Intellij Idea − Running Projects
- Intellij Idea − Build Tools
- Intellij Idea − Unit Testing
- Intellij Idea − Debugging
- Intellij Idea − Profiling
- Intellij Idea − Version Control
- Intellij Idea − Databases
- Migrating from NetBeans
- Intellij Idea − Migrating from Eclipse
Intellij Idea - Deep Dive
The first four chapters of this tutorial were designed to give beginners a basic-level overview of IntelliJ. This section dives deep into IntelliJ and discusses more about projects, its format along with other things.
Understanding Projects
A project is an application or software on which you are working. It can contain multiple modules, classes, libraries, configuration, and so on. It is the topmost element in the hierarchy.
Understanding Modules
Modules feature one rung below Project. A module is a separate entity that can be compiled, debugged and run independently of other modules. A single project can contain multiple modules. You may add or remove modules from a project any time.
In addition to this, we can also import the existing modules. Follow these steps to import the existing modules −
- Go to File → Project structure.
- Select modules and click on plus icon.
- It will show the option to import module.

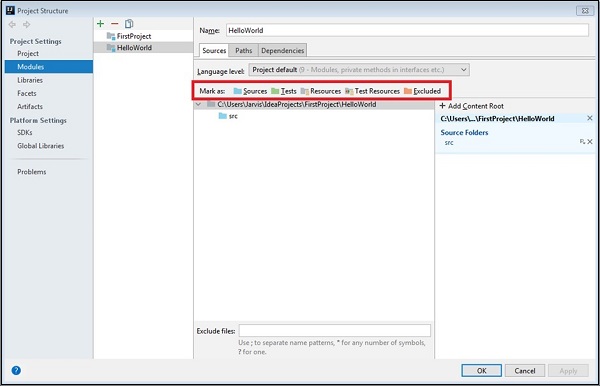
Understanding Folders
Content root is a folder that contains all the files that make up your module. A module can have more than one content folder. Folders are categorized into the following types −
Sources − By assigning this category to folder, we instruct IntelliJ that this and its subfolder contain java source code and it should be compiled as part of the compilation process.
Tests − By assigning this category to folder, we instruct IntelliJ that it is the location for unit tests. This folder can access classes from the Sources folder.
Resources − It represents various resource files used in project, for instance, images, XML and properties files. During the compilation process, contents of this folder is copied as is to the output folder.
Excluded − Contents from the excluded folder will not be indexed by IntelliJ. This means that IntelliJ will not provide the code completion suggestion and other hints. For example, the output directory and the target directory are excluded by default.
Test resources − This is similar to the resources and used for unit tests.
Understanding Libraries
Library is a compilation of different classes. Library enables code reusability. In Java, library can be enclosed in ZIP, Jar or simply folder. We can define libraries at three different levels. The levels are - global, project and module level.
Global level − Shared by all projects.
Project level − Shared by all the modules of project.
Module level − Shared by the classes of those modules.
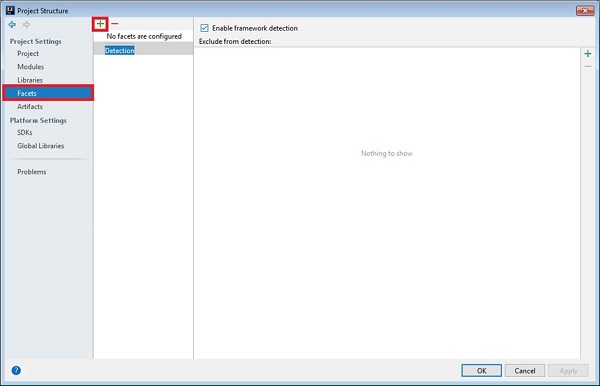
Understanding Facets
Facets are the extensions to the modules. They add support to the frameworks and technologies. When a facet is added to a module, IntelliJ identifies it adds support. For instance, hints and help in editor, new tools in window bar, dependency downloading and so on. You can add facets from the File → Project Structure window as shown below −
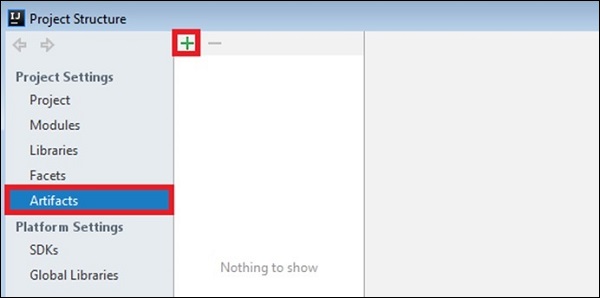
Artifacts
Artifacts are the output of a project. It can be a simple JAR file, Java EE application, or Java EJB application. If we are using external build tools like Gradle or Maven, then IntelliJ will add artifact for them automatically. Artifacts can be created by navigating to the File → Project Structure as shown below −
Importing Existing Project
In this section, we will understand how to import an existing project. We can import a project in two ways −
- Import it from existing source
- Import it from the build model.
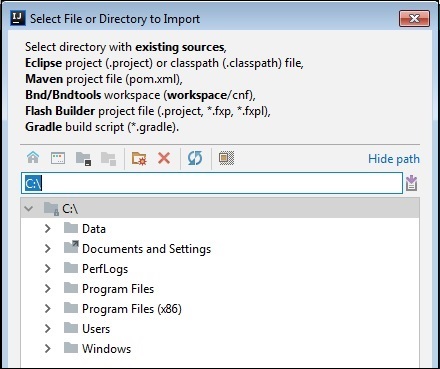
At present, it supports Gradle and Maven build tools. To import project −
- Navigating to File → New → Project from the existing source.
- Select directory of the existing project, Mavens pom.xml or Gradles build script.
- Click on the OK button.
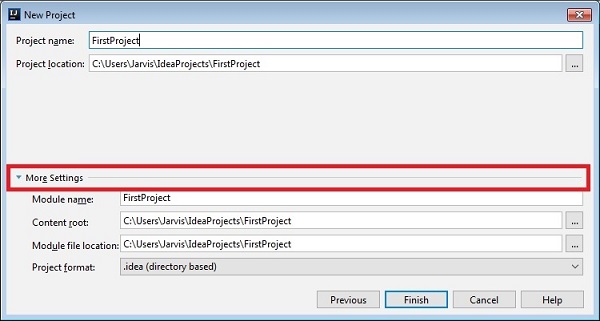
Project Formats
IntelliJ supports two types of project format one is directory-based and other is file-based. Directory based format is newer one it is recommended. By default, IntelliJ creates directory based project format. You can select project format while creating new project. On new project window just click on more settings as show in below image −
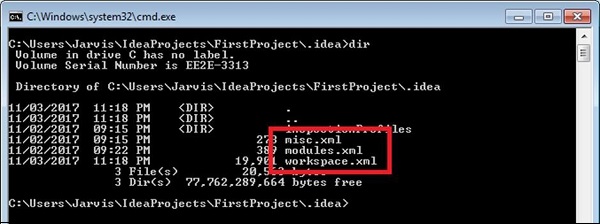
Directory-based Project Format
This format helps create an idea folder in your project and keep all configuration files inside that folder. Settings are grouped into the xml files. For instance, it will create misc.xml, modules.xml, workspace.xml and so on. The following screenshot will help you understand how this works −
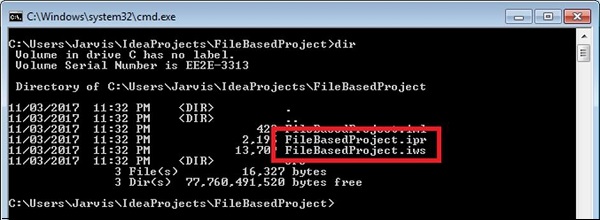
File-based Project Format
It will create two project files with ..ipr and wpr extensions. The ipr file will contain project-specific settings and the wpr file will contain workspace-specific settings.
To convert a file-based project to a directory-based project, go to the File → Save as a Directory-Based format.
Directory-based vs File-based Project Format
Compared to the file-based project format, the directory-based project format stores settings in a separate folder with meaningful names. Other differences are −
Related settings getting stored in a single file makes it easier to manage in directory-based project format.
If folder contains the idea subfolder then IntelliJ recognizes that project. Because of this, you dont have select the ipr project explicitly.
Directory-based project format breaks settings into multiple files hence it is easier to select particular type of setting to store in version control system.
