
Article Categories
- All Categories
-
 Data Structure
-
 Networking
-
 RDBMS
RDBMS
-
 Operating System
-
 Java
Java
-
 MS Excel
-
 iOS
iOS
-
 HTML
HTML
-
 CSS
CSS
-
 Android
-
 Python
-
 C Programming
-
 C++
C++
-
 C#
C#
-
 MongoDB
-
 MySQL
MySQL
-
 Javascript
-
 PHP
PHP
-
 Economics & Finance
Install Guacamole for Remote Linux/Windows Access in Ubuntu
In today's interconnected world, remote access to Linux and Windows machines is essential for efficient system administration and troubleshooting. Apache Guacamole is an open-source clientless remote desktop gateway that allows you to access your machines from anywhere using just a web browser. This tutorial will guide you through installing Guacamole on Ubuntu and configuring it for remote access to both Linux and Windows systems.
Prerequisites
Before beginning the installation, ensure you have the following prerequisites ?
A machine running Ubuntu 18.04 or later with administrative privileges
A stable internet connection for downloading packages
At least 2GB of RAM and adequate disk space
Basic knowledge of Linux command line operations
Step 1 ? Update System Packages
Begin by updating the system packages on your Ubuntu machine ?
sudo apt update
sudo apt upgrade -y
These commands update your package lists and upgrade any outdated packages on your system.
Step 2 ? Install Required Dependencies
Guacamole requires several dependencies to function properly. Install them using the following command ?
sudo apt install -y build-essential libcairo2-dev libjpeg-turbo8-dev \
libpng-dev libtool-bin libossp-uuid-dev libavcodec-dev libavutil-dev \
libswscale-dev freerdp2-dev libpango1.0-dev libssh2-1-dev \
libtelnet-dev libvncserver-dev libpulse-dev libssl-dev libvorbis-dev \
libwebp-dev tomcat9 tomcat9-admin tomcat9-common tomcat9-user
This installs all necessary libraries and tools for building and running Guacamole.
Step 3 ? Download and Build Guacamole Server
Download the Guacamole server source code ?
cd /tmp
wget https://downloads.apache.org/guacamole/1.5.3/source/guacamole-server-1.5.3.tar.gz
--2024-01-15 10:30:00--  https://downloads.apache.org/guacamole/1.5.3/source/guacamole-server-1.5.3.tar.gz
Resolving downloads.apache.org (downloads.apache.org)... 151.101.2.132
Connecting to downloads.apache.org (downloads.apache.org)|151.101.2.132|:443... connected.
HTTP request sent, awaiting response... 200 OK
Length: 1082573 (1.0M) [application/x-gzip]
Saving to: 'guacamole-server-1.5.3.tar.gz'
guacamole-server-1.5.3.tar.gz 100%[===================>] 1.03M  2.45MB/s    in 0.4s
Extract and build the server ?
tar -xzf guacamole-server-1.5.3.tar.gz
cd guacamole-server-1.5.3
./configure --with-init-dir=/etc/init.d
make
sudo make install
sudo ldconfig
Step 4 ? Create Guacamole Configuration Directory
Create the necessary directories for Guacamole configuration ?
sudo mkdir -p /etc/guacamole
sudo mkdir -p /etc/guacamole/extensions
sudo mkdir -p /etc/guacamole/lib
Step 5 ? Deploy Guacamole Web Application
Download and deploy the Guacamole web application ?
cd /tmp
wget https://downloads.apache.org/guacamole/1.5.3/binary/guacamole-1.5.3.war
sudo cp guacamole-1.5.3.war /var/lib/tomcat9/webapps/guacamole.war
Step 6 ? Configure Guacamole Properties
Create the main configuration file ?
sudo nano /etc/guacamole/guacamole.properties
Add the following configuration ?
guacd-hostname: localhost
guacd-port: 4822
auth-provider: net.sourceforge.guacamole.net.basic.BasicFileAuthenticationProvider
basic-user-mapping: /etc/guacamole/user-mapping.xml
Step 7 ? Create User Mapping Configuration
Create the user mapping file that defines users and their connections ?
sudo nano /etc/guacamole/user-mapping.xml
Add the following example configuration for both Linux SSH and Windows RDP connections ?
<?xml version="1.0" encoding="UTF-8"?>
<user-mapping>
    <authorize username="admin" password="admin123">
        <!-- Linux SSH Connection -->
        <connection name="Ubuntu Server">
            <protocol>ssh</protocol>
            <param name="hostname">192.168.1.100</param>
            <param name="port">22</param>
            <param name="username">ubuntu</param>
            <param name="password">your-ssh-password</param>
        </connection>

        <!-- Windows RDP Connection -->
        <connection name="Windows Desktop">
            <protocol>rdp</protocol>
            <param name="hostname">192.168.1.200</param>
            <param name="port">3389</param>
            <param name="username">Administrator</param>
            <param name="password">your-rdp-password</param>
            <param name="security">any</param>
            <param name="ignore-cert">true</param>
        </connection>

        <!-- VNC Connection -->
        <connection name="VNC Desktop">
            <protocol>vnc</protocol>
            <param name="hostname">192.168.1.150</param>
            <param name="port">5901</param>
            <param name="password">vnc-password</param>
        </connection>
    </authorize>
</user-mapping>
Step 8 ? Start Guacamole Services
Start the Guacamole daemon and enable services ?
sudo systemctl start guacd
sudo systemctl enable guacd
sudo systemctl restart tomcat9
sudo systemctl enable tomcat9
Verify that services are running ?
sudo systemctl status guacd
sudo systemctl status tomcat9
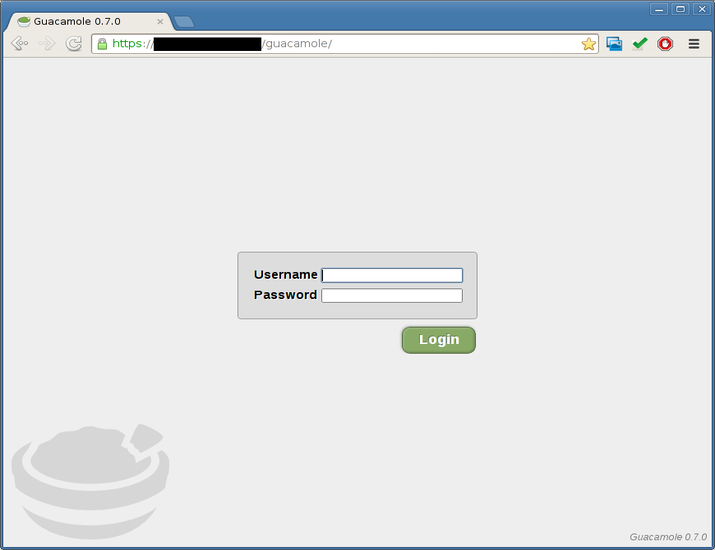
Step 9 ? Access Guacamole Web Interface
Open your web browser and navigate to ?
http://your-server-ip:8080/guacamole/
Replace your-server-ip with the actual IP address of your Ubuntu machine. You should see the Guacamole login screen where you can log in using the credentials defined in your user-mapping.xml file.
Connection Types and Parameters
Guacamole supports multiple connection protocols. Here are the key parameters for each ?
| Protocol | Common Parameters | Use Case |
|---|---|---|
| SSH | hostname, port (22), username, password/private-key | Linux/Unix command line access |
| RDP | hostname, port (3389), username, password, security, domain | Windows desktop remote access |
| VNC | hostname, port (5900+), password, color-depth | Cross-platform desktop sharing |
| Telnet | hostname, port (23), username, password | Legacy terminal access |
Troubleshooting Common Issues
If you encounter connection problems, check the following ?
Guacd service status ? Ensure the daemon is running with
sudo systemctl status guacdTomcat logs ? Check
/var/log/tomcat9/catalina.outfor web application errorsFirewall settings ? Verify that required ports (8080, 22, 3389, 5900+) are open
Target machine accessibility ? Test direct connectivity to remote hosts using ping or telnet
Security Considerations
For production deployment, consider implementing these security measures ?
HTTPS encryption ? Configure SSL/TLS certificates for secure web access
Database authentication ? Replace file-based auth with MySQL or PostgreSQL
Two-factor authentication ? Enable TOTP or LDAP integration for enhanced security
Network segmentation ? Place Guacamole server in a DMZ or restricted network zone
Conclusion
Apache Guacamole provides a powerful, browser-based solution for remote access to Linux, Windows, and other systems. With proper configuration, it enables secure, centralized management of multiple remote connections without requiring client software installation. Regular updates and proper security measures ensure a reliable remote access solution for system administrators.

4K+ Views
