
Article Categories
- All Categories
-
 Data Structure
-
 Networking
-
 RDBMS
RDBMS
-
 Operating System
-
 Java
Java
-
 MS Excel
-
 iOS
iOS
-
 HTML
HTML
-
 CSS
CSS
-
 Android
-
 Python
-
 C Programming
-
 C++
C++
-
 C#
C#
-
 MongoDB
-
 MySQL
MySQL
-
 Javascript
-
 PHP
PHP
-
 Economics & Finance
How to Install VMware Player 7.1.2 on Ubuntu/Linux Mint
VMware Workstation Player is a streamlined desktop virtualization application that runs one or more operating systems on the same computer without rebooting. Using VMware, we can easily interact and exchange data between applications running on the virtual machine and the desktop. It supports hundreds of guest operating systems whether they may be new or old. This article describes how to install VMware Player 7.1.2 on Ubuntu and Linux Mint systems.
Prerequisites
Before installing VMware Player, you need to install the Linux essential headers and build tools. These are required for compiling kernel modules that VMware uses.
sudo apt-get install build-essential linux-headers-`uname -r`
The sample output should be like this −
Reading package lists... Done
Building dependency tree
Reading state information... Done
build-essential is already the newest version.
linux-headers-4.2.0-34-generic is already the newest version.
The following packages were automatically installed and are no longer required:
  libbs2b0 libopusfile0 libqmmp-misc libqmmpui0 libsidplayfp
  linux-headers-4.2.0-27 linux-headers-4.2.0-27-generic
  linux-image-4.2.0-27-generic linux-image-extra-4.2.0-27-generic
  linux-signed-image-4.2.0-27-generic php7.0-opcache
Use 'apt-get autoremove' to remove them.
0 upgraded, 0 newly installed, 0 to remove and 8 not upgraded.
Installing VMware Player 7.1.2
Follow these step-by-step instructions to install VMware Player 7.1.2 on Ubuntu 15.04/14.10 or older versions and Linux Mint.
Step 1 − Create VMware Directory
First, create a dedicated directory for VMware installation files −
mkdir ~/VMware && cd ~/VMware
Step 2 − Download VMware Bundle
Download the VMware Player bundle using wget −
wget -c https://goo.gl/p7z5MG -O VMware-Player-7.1.2.x86_64.bundle.tar
The sample output should be like this −
--2016-03-17 11:34:11-- https://goo.gl/p7z5MG
Resolving goo.gl (goo.gl)... 216.58.196.110, 2404:6800:4007:806::200e
Connecting to goo.gl (goo.gl)|216.58.196.110|:443... connected.
HTTP request sent, awaiting response... 301 Moved Permanently
Location: https://softwareupdate.vmware.com/cds/vmw-desktop/player/7.1.2/2780323/linux/core/VMware-Player-7.1.2-2780323.x86_64.bundle.tar [following]
--2016-03-17 11:34:12-- https://softwareupdate.vmware.com/cds/vmw-desktop/player/7.1.2/2780323/linux/core/VMware-Player-7.1.2-2780323.x86_64.bundle.tar
Resolving softwareupdate.vmware.com (softwareupdate.vmware.com)... 23.44.72.198, 2600:140b:13:395::2ef, 2600:140b:13:38a::2ef
Connecting to softwareupdate.vmware.com (softwareupdate.vmware.com)|23.44.72.198|:443... connected.
HTTP request sent, awaiting response... 200 OK
Length: 211128320 (201M) [application/x-tar]
Saving to: 'VMware-Player-7.1.2.x86_64.bundle.tar'
...................................................................
Step 3 − Extract the Bundle
Use the tar command to extract the bundle files −
tar -xvf VMware-Player-7.1.2.x86_64.bundle.tar
The sample output should be like this −
descriptor.xml
VMware-Player-7.1.2-2780323.x86_64.bundle
Step 4 − Set Executable Permissions
Change the file permissions to make the bundle executable −
chmod +x VMware-Player*.bundle
Step 5 − Run the Installer
Execute the VMware installer bundle with administrative privileges −
sudo sh VMware-Player-7.1.2*.bundle
This will launch the VMware Player installation wizard. The installer will present a graphical interface where you need to −
Accept the terms in the license agreement
Choose the installation directory (default is recommended)
Configure enhanced keyboard support if needed
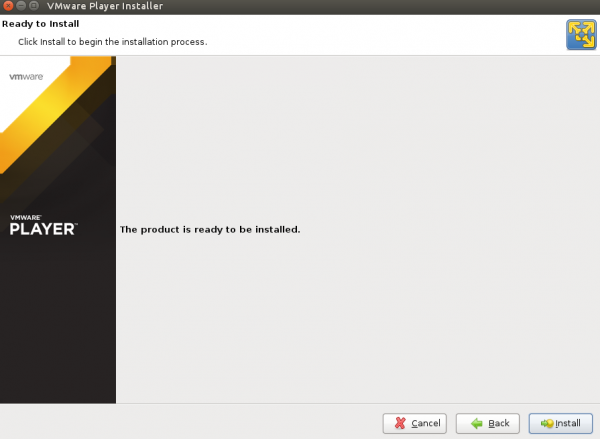
Complete the installation process
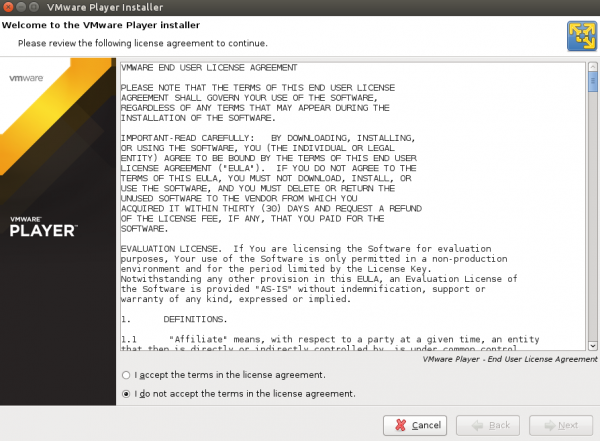
Follow the regular installation process by clicking "Next" through each step. Finally, you will get a completion screen confirming successful installation.
Launching VMware Player
After successful installation, you can launch VMware Player using the following command −
vmplayer
Alternatively, you can find VMware Player in your applications menu under the "System" or "Virtualization" category.
Post-Installation Notes
After installation, VMware Player may require you to −
Compile kernel modules on first run (this happens automatically)
Accept additional license agreements for specific features
Configure network settings for virtual machines
Conclusion
VMware Player 7.1.2 provides a robust virtualization platform for running multiple operating systems on Ubuntu and Linux Mint. The installation process involves downloading the bundle, setting proper permissions, and running the graphical installer. Once installed, you can create and manage virtual machines for development, testing, or running legacy applications.

486 Views
