
Article Categories
- All Categories
-
 Data Structure
-
 Networking
-
 RDBMS
RDBMS
-
 Operating System
-
 Java
Java
-
 MS Excel
-
 iOS
iOS
-
 HTML
HTML
-
 CSS
CSS
-
 Android
-
 Python
-
 C Programming
-
 C++
C++
-
 C#
C#
-
 MongoDB
-
 MySQL
MySQL
-
 Javascript
-
 PHP
PHP
-
 Economics & Finance
How to lock picture/image to or inside cell in Excel?
Locking an image with a cell typically refers to anchoring or fixing an image within a cell of a spreadsheet or document. This action ensures that the image remains in a specific position relative to the cell, even if the surrounding cells are modified or the document is scrolled. It helps maintain the layout and alignment of the image within the cell and prevents accidental movement or displacement. In this article, the user will learn the process of fixing property to ensure that the image will move with the cell. This article briefs two common ways to perform this task.
Example 1: To Lock the picture or image with the cell by using the formatting picture properties.
Step 1
First of all, users need to insert an image into the Excel document. For this case, open the "Insert" tab, and then click on "Illustrations". Further, click on the "Pictures" options and click on "This device?". For proper reference consider the below given image ?

Step 2
The above step will display an option for the "Insert Picture" dialog box. Select the image or list of required images by moving the user to the desired location. Consider the below-given image for reference ?

Step 3
This step will open image in the excel sheet, as shown below ?

Step 4
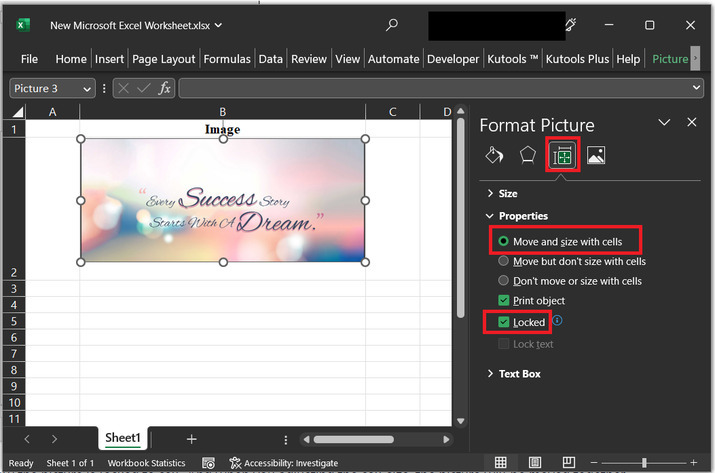
Now, right-click on the image, this will display a list of options, in front of the user. among the listed options select the option "Format Picture?".

Step 5
This will display a side pane dialog box. After that go to the "Properties" section and choose the first radio button "Move and size with cells", and click on the "Locked" option.
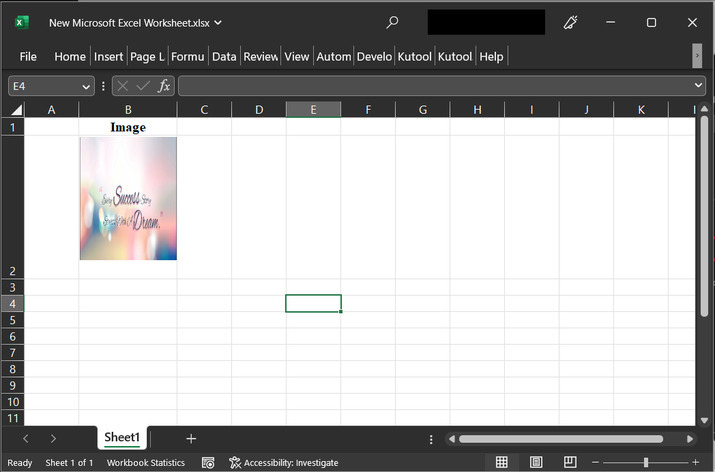
Step 6
After the successful completion of the above step, the user will see that the picture becomes locked along with the cell, and when the user tries to increase or decrease the size of the cell, the size of the image also increases or decreases.
Example 2: To Lock the picture or image with the cell by using the formatting picture properties and by importing the picture with the help of Kutools.
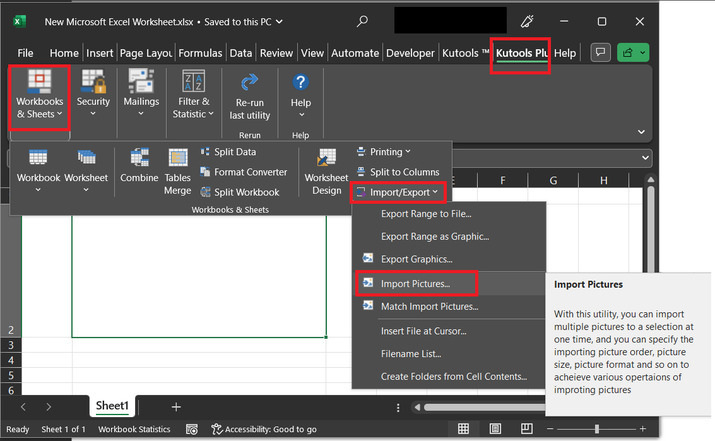
Step 1
In this example will use kutools to import the picture. Open the "Kutools Plus" tab, and then click on "Workbook & Sheets". After that in the third pane section click on "Import/Export". Among the displayed list of options select the option of "Import Pictures?".
Step 2
The above step will open the "Import Pictures" dialog box, as depicted below ?
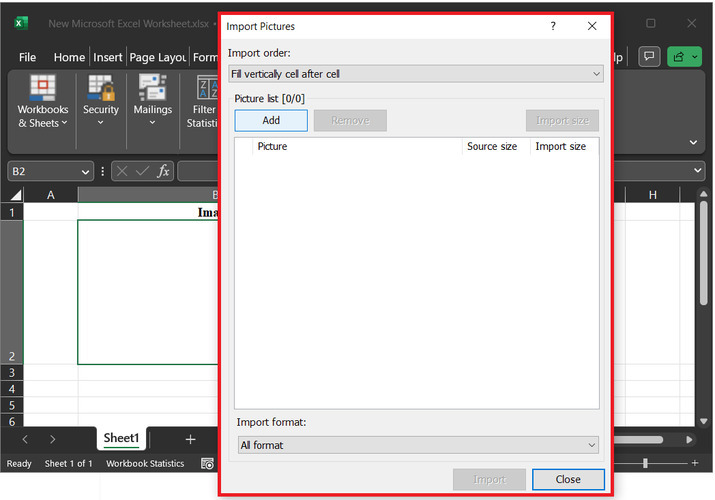
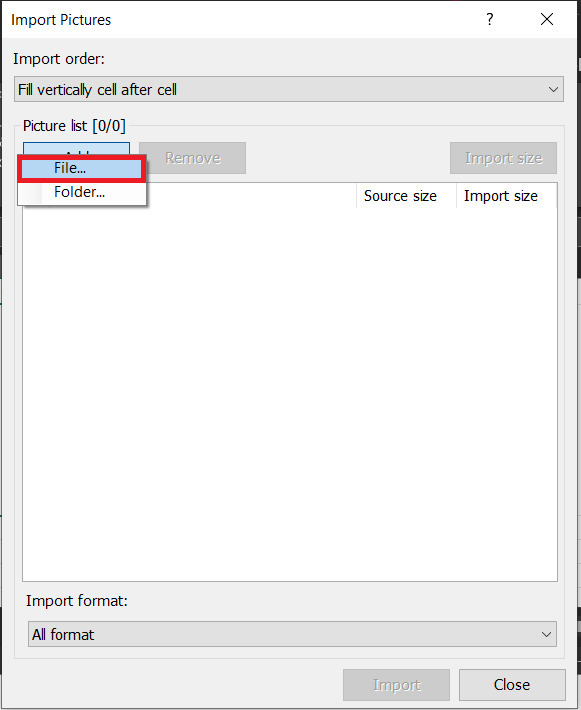
Step 3
In the import pictures dialog box, click on the "Add" button. this will display two options file and folder. Users can opt for any option, and can easily navigate to the required image. In this case, will choose first option "File", and pass the file path to select an image.
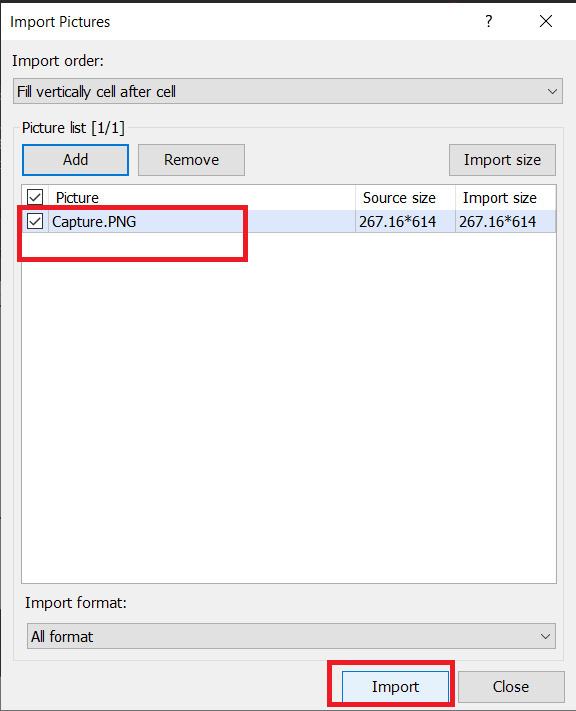
The above will display the selected image. Select the browsed image, and click on "import" button.
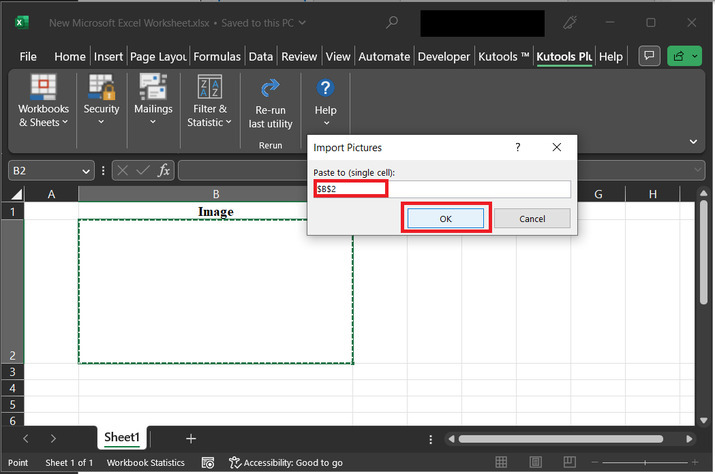
After that, an "Import Pictures" dialog box, is displayed. In the appeared dialog box, select the required cell location, and click on the "OK" button.
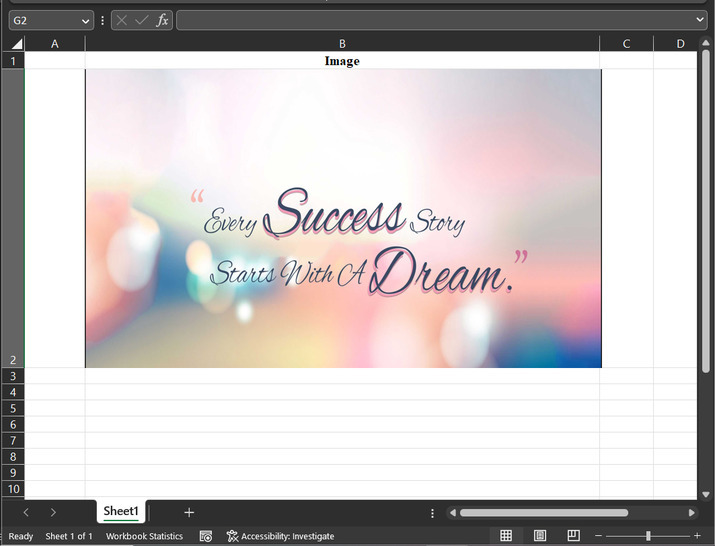
The image will be displayed in the cell, as shown belowm ?
After that right click on the image and follows the same step as done from step 4 to step 6. This will again fix the size of the cell, along with the inserted image.
Conclusion
This article allows the user to lock the picture or image with the cells. This article contains two examples, the first example allows the user to insert a picture normally, while the second example allows the user to insert an image or picture by using the kutool. Both examples fix the same property to ensure that the task will complete itself normally.

7K+ Views
