
Article Categories
- All Categories
-
 Data Structure
-
 Networking
-
 RDBMS
RDBMS
-
 Operating System
-
 Java
Java
-
 MS Excel
-
 iOS
iOS
-
 HTML
HTML
-
 CSS
CSS
-
 Android
-
 Python
-
 C Programming
-
 C++
C++
-
 C#
C#
-
 MongoDB
-
 MySQL
MySQL
-
 Javascript
-
 PHP
PHP
-
 Economics & Finance
How to insert picture into text box?
The steps for placing an image in an Excel text box are covered in this article. The objective of this article is that the text box allows the user to in line with the text put an image. In this manner, the image will function as a (big) text letter. Although the text box in the screenshot has a boundary, the user can obviously eliminate the surrounding area if the user like.
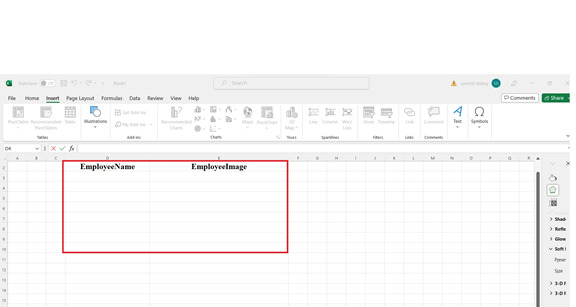
For example, If the user wants data where they can see the employee name as well as their photo in Excel so with the help of inserting the image user can be achieved their functionality.
Example 1: To Insert the Picture in Text Box in Excel by using the Insert Option
Step 1
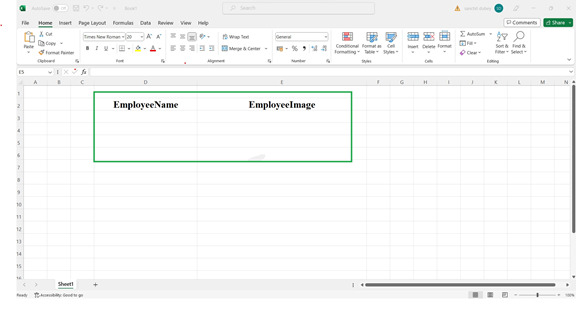
Consider the user wants employee data where they can see the employee name and employee image ,So in this step the user will click on the insert tab that will appears in the top of excel when user open the excel sheet. Consider First column is EmployeeName and Second column is employeeImage in the excelsheet. Following is the screenshoot of this step.
Step 2
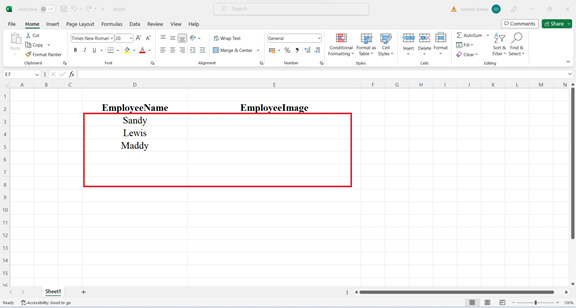
In this step user are entered the data of in the employeename field.Here the user can writing the name of the employee .Following are the screenshoot of this step.
Step 3
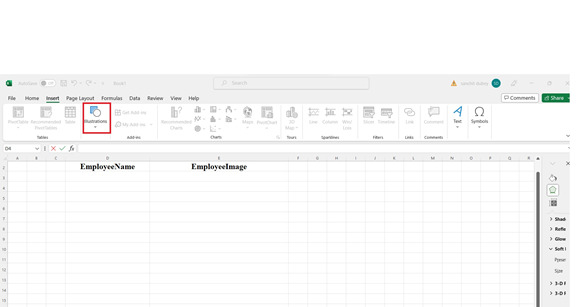
For inserting the image in the textbox user have to choose the Insert from the toolbar then it will select the illustrations option from there. Following are the screenshoot of this step.
Explanation
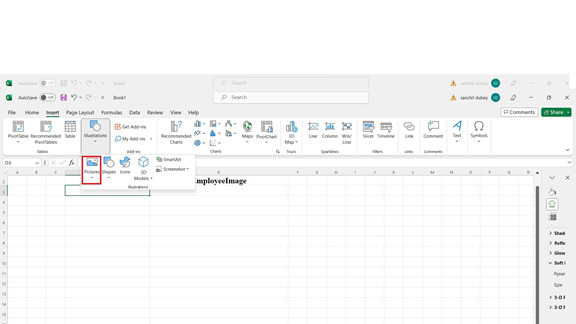
Inside the Insert option there is illustrations options are there that are some different option like Pictures , shapes and soon so the objective of this option to insert the image as per the user need . The shapes option holding different types of shapes like rectangle , circles, etc. The icons options holds different types of icons.
Step 4
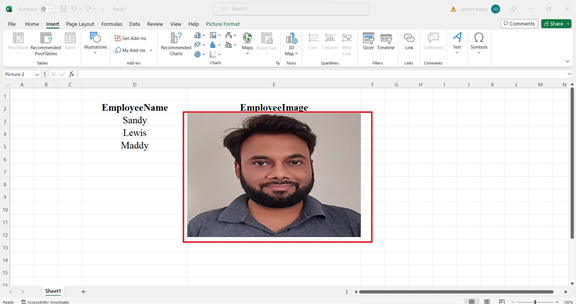
In this step users basically insert the image to the textbox .To do this user Firstly click on the Pictures option . The main objective of this option to browse the image from the device or computer . After that user choose the option this device that can browse the images from the computer. After choosing the image from the computer the image is displayed on the textbox . The image is not showing in proper width and height so user can do this by stretching the border of the image .Following are the screenshoot of this 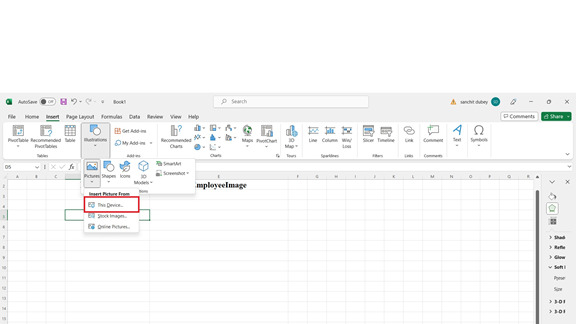 .
.
Step 5
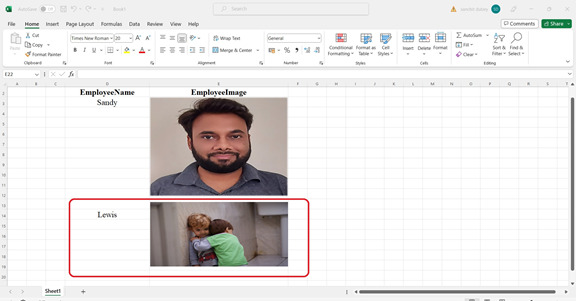
The simillary user follows the same step for inserting the image into the next textbox. User also set the width and position of the image by right click on the image and selecting format picture options from there lots of peroperties are showing there so according to there need they are choosed .Following are the screenshoot of this step.
Conclusion
The instructions are all concise, reliable, as well as straightforward. The user can easily place the image into the textbox to meet its criteria by following the procedures provided in the above steps.

640 Views
