
Article Categories
- All Categories
-
 Data Structure
-
 Networking
-
 RDBMS
RDBMS
-
 Operating System
-
 Java
Java
-
 MS Excel
-
 iOS
iOS
-
 HTML
HTML
-
 CSS
CSS
-
 Android
-
 Python
-
 C Programming
-
 C++
C++
-
 C#
C#
-
 MongoDB
-
 MySQL
MySQL
-
 Javascript
-
 PHP
PHP
-
 Economics & Finance
How to get or return column header based on specific row value in Excel?
This article contains an example to demonstrate the process of returning a column header from a specific row in excel. The provided is based on VBA code. The mentioned VBA code can successfully perform the required operation. To execute the code, firstly open the developer section, and then execute the code editor to write the required VBA code. Article contains stepwise explanations to justify the requirement of all the steps precisely and accurately. Column header is a simple term used to represent the main heading provided for any particular column.
Example 1: To get or return the column header based on some specific row value in excel by using the VBA code
Step 1
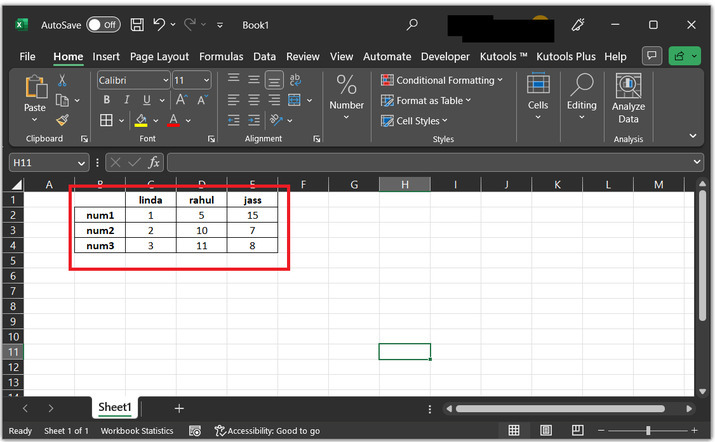
In this example user will learn the process to write VBA code to obtain the column based on some specific row data value in excel. In the example will consider three row and three column based table. Total number of data values are 9, with 3 row headers, and 3 column header.
Step 2
To execute the VBA code, user need to open the "Developer" tab, and then under the code section, select the option for "Visual Basic". Consider below snapshot for reference:

Step 3
The above step will open a "Microsoft Visual Basic for Applications" dialog box. This dialog box open as a blank. Go open the code editing window. Go to the "Insert" option, and then choose "Module" option. Consider be

Step 4
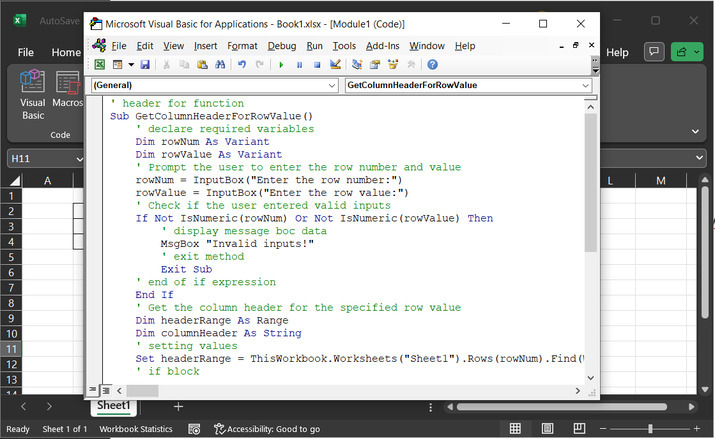
In the opened code area, type below given code:
' header for function
Sub GetColumnHeaderForRowValue()
    ' declare required variables
    Dim rowNum As Variant
    Dim rowValue As Variant
    ' Prompt the user to enter the row number and value
    rowNum = InputBox("Enter the row number:")
    rowValue = InputBox("Enter the row value:")
    ' Check if the user entered valid inputs
    If Not IsNumeric(rowNum) Or Not IsNumeric(rowValue) Then
        ' display message boc data
        MsgBox "Invalid inputs!"
        ' exit method
        Exit Sub
    ' end of if expression
    End If
    ' Get the column header for the specified row value
    Dim headerRange As Range
    Dim columnHeader As String
    ' setting values
    Set headerRange = ThisWorkbook.Worksheets("Sheet1").Rows(rowNum).Find(What:=rowValue, LookIn:=xlValues, LookAt:=xlWhole, MatchCase:=False)
    ' if block
    If headerRange Is Nothing Then
        ' message box, to display data
        MsgBox "The row value was not found in the specified row."
        ' exit expression
        Exit Sub
    ' else block
    Else
        ' column header
        columnHeader = headerRange.EntireColumn.Cells(1, 1).Value

    ' end of if statement
    End If
    ' Display the column header in a message box
    MsgBox "The column header for the row value " & rowValue & " in row " & rowNum & " is: " & columnHeader
' end of sub method
End Sub
Please use proper code indentation, otherwise code will definitely display error. Consider code snapshot provided below:
Step 5
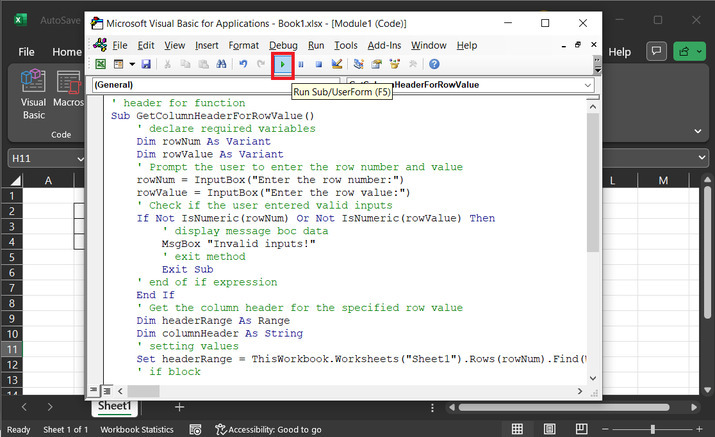
After that go to the above menu bar of dialog box, and then click on "Run" option.
Step 6
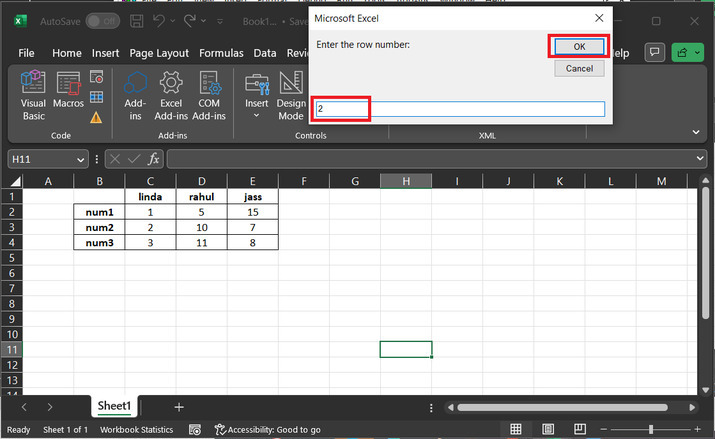
The above step will open the below given code window. Here, user need to input the row number where data needs to be searched. In this example, will enter 2, to generate the required output results. Finally, click on "OK" button.
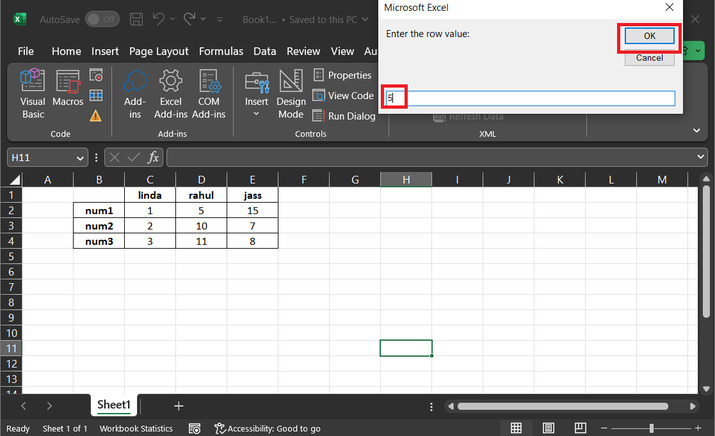
Step 7
The above step will open the below-given code window. Here, the user needs to input the data value that needs to be searched inside the above-provided row number. In this example, will enter 5, to generate the required output results. Finally, click on the "OK" button. here, the user is searching number 5 in the 2nd row, if obtained column header will be displayed else an error message will be displayed.
Step 8
Since 5 is available in the 2nd row, therefore, column header "rahul" is displayed in the dialog box. Consider the below-given snapshot for proper reference:

Conclusion
The available article contains a single example to demonstrate the use of VBA code to execute the results. This example is based on the use of the VBA code. VBA code is an important practice and is used precisely once the user will be able to execute the code without any error. This article contains a stepwise explanation for all the steps. All the provided snapshots are clear and precise. Comments are well described within the code, to ensure that the user will be able to understand the code processing for all steps.

1K+ Views
