
Article Categories
- All Categories
-
 Data Structure
-
 Networking
-
 RDBMS
RDBMS
-
 Operating System
-
 Java
Java
-
 MS Excel
-
 iOS
iOS
-
 HTML
HTML
-
 CSS
CSS
-
 Android
-
 Python
-
 C Programming
-
 C++
C++
-
 C#
C#
-
 MongoDB
-
 MySQL
MySQL
-
 Javascript
-
 PHP
PHP
-
 Economics & Finance
How to Export Excel Data to CSV
CSV (Comma?Separated Values) is a plain text file format used to store tabular data. It is a widely supported and commonly used format for exchanging data between different applications, particularly in spreadsheet software like Microsoft Excel, Google Sheets, and others. When working with CSV files, it's essential to be mindful of the delimiter used, handle special characters appropriately, and ensure data integrity and consistency.
Steps to Export Excel Data to CSV
To export Excel data to CSV (Comma?Separated Values) format, you can follow these steps:
Method 1: Save As CSV
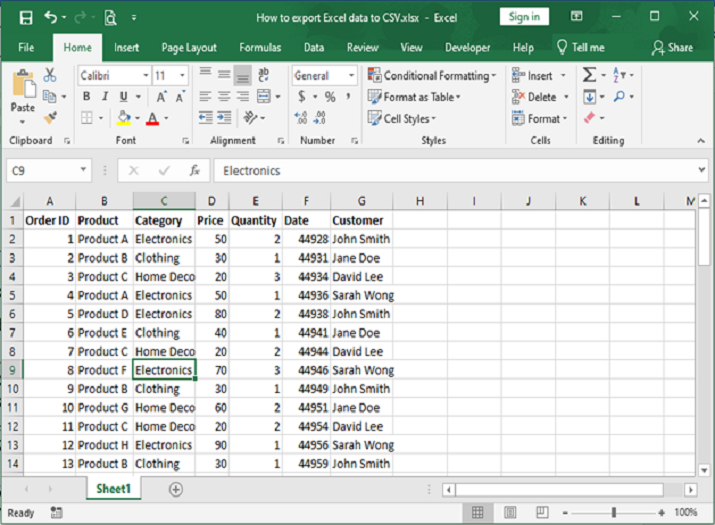
Step 1: Open the Excel file containing the data you want to export. Select the worksheet that you want to export. Here my worksheet looks like this.
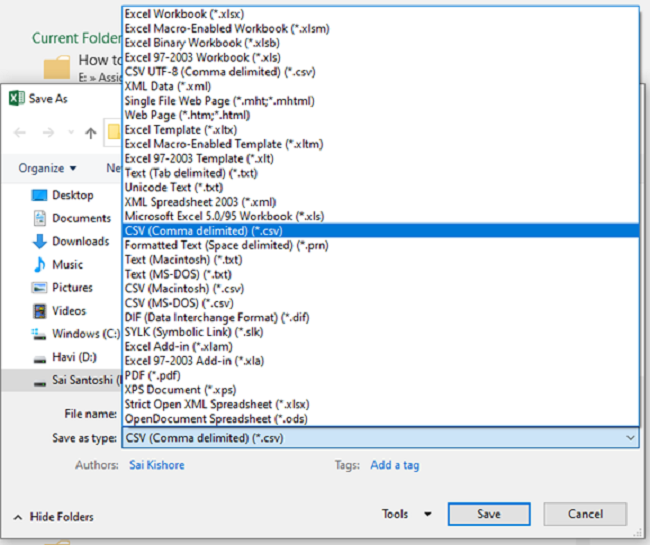
Step 2: Click on the "File" tab in the top?left corner of Excel.
Choose "Save As" from the menu. In the "Save As" dialog box, navigate to the location where you want to save the CSV file. In the "Save as type" dropdown, select "CSV (Comma delimited) (*.csv)".
Step 3: Provide a name for the CSV file and click "Save". If prompted with a warning message, click "Yes" to continue. Excel will export the selected data to a CSV file with the chosen name and save it in the specified location.
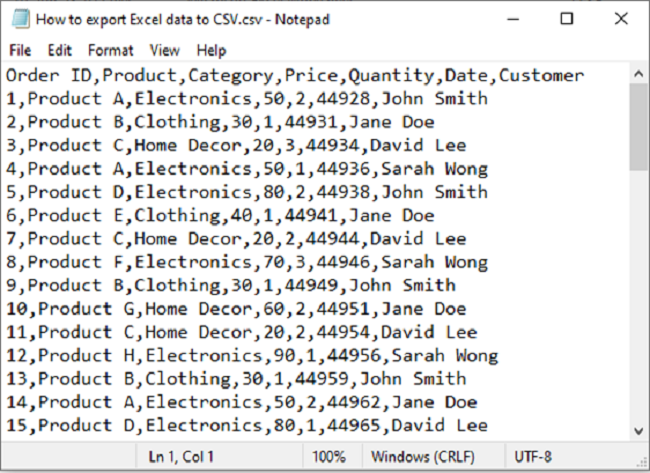
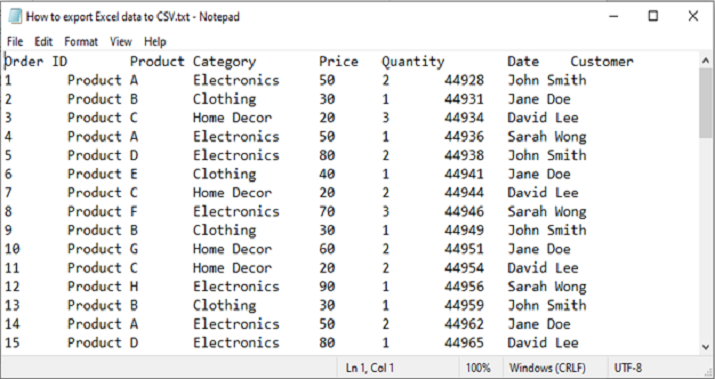
Step 4: The file will be saved in the CSV format. You can open it either with excel or notepad. Here I have opened the file in the notepad app, the data looks like as follows.
Method 2: Save As Text (Tab delimited) and Convert to CSV
Step 1: Open the Excel file containing the data you want to export. Select the worksheet that you want to export. Here my worksheet looks like this.
Step 2: Click on the "File" tab in the top?left corner of Excel. Choose "Save As" from the menu. In the "Save As" dialog box, navigate to the location where you want to save the CSV file. In the "Save as type" dropdown, select "Text (Tab delimited) (*.txt)".
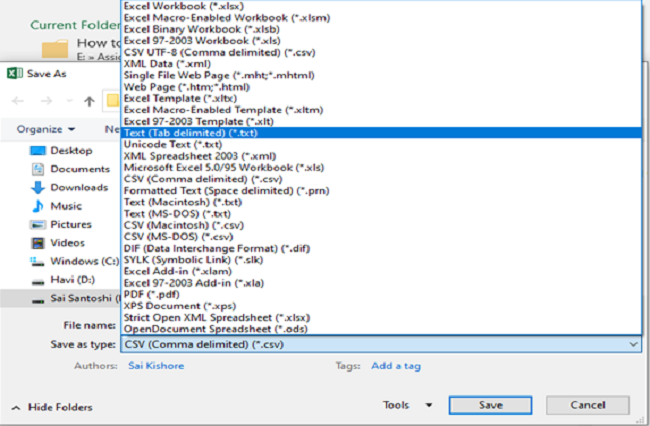
Step 3: Provide a name for the text file and click "Save". If prompted with a warning message, click "Yes" to continue.
Excel will export the selected data to a txt file with the chosen name and save it in the specified location.
Step 4: Open the saved text file using a text editor (e.g., Notepad, Sublime Text, or any other text editor).
By following these methods, you can export Excel data to a CSV file, which can be easily opened and manipulated in various applications that support CSV format.
Conclusion
CSV (Comma?Separated Values) is a plain text file format widely used for storing and exchanging tabular data. It offers simplicity, compatibility, and human?readability, making it ideal for data interchange between different applications, though it lacks advanced features like formatting and complex data structures.

3K+ Views
