 Data Structure
 Networking
 RDBMS
RDBMS Operating System
 Java
Java MS Excel
 iOS
iOS HTML
HTML CSS
CSS Android
 Python
 C Programming
 C++
C++ C#
C# MongoDB
 MySQL
MySQL Javascript
 PHP
PHP
- Selected Reading
- UPSC IAS Exams Notes
- Developer's Best Practices
- Questions and Answers
- Effective Resume Writing
- HR Interview Questions
- Computer Glossary
- Who is Who
How to Delete Blank Cells and Shift Data Up in Excel
Blank cells that disturb the continuity of your data are typical in every data analysis or spreadsheet management operation. These empty cells can stymie calculating, sorting, and filtering procedures, as well as making your data appear disorganised and inconsistent. Fortunately, Excel has numerous quick methods for deleting these blank cells and shifting the data up, allowing you to keep your spreadsheet's integrity and consistency. This lesson will walk you through the step?by?step process of efficiently handling blank cells, whether you are a newbie or an experienced Excel user.
In this tutorial, we will look at different methods for removing blank cells and shifting data up, so that your data is tidy, compact, and ready for further analysis. We'll go through both a advanced ways that make use of Excel's built?in capabilities. By the end of this session, you will have a thorough understanding of how to effectively deal with blank cells and improve the quality of your Excel spreadsheets.
Delete Blank Cells and Shift Data Up in Excel
Here, we will use the filter to hide the data. So let us see a simple process to learn how you can delete blank cells and shift data up in Excel.
Step 1
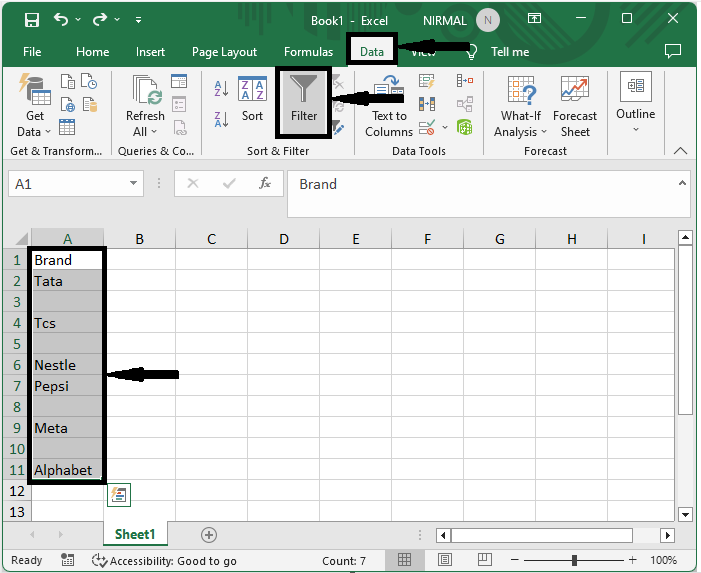
Consider any Excel sheet where you have a list of items along with blank cells.
First, select the range of cells, then click on filter under data.
Data > Filter.

Step 2
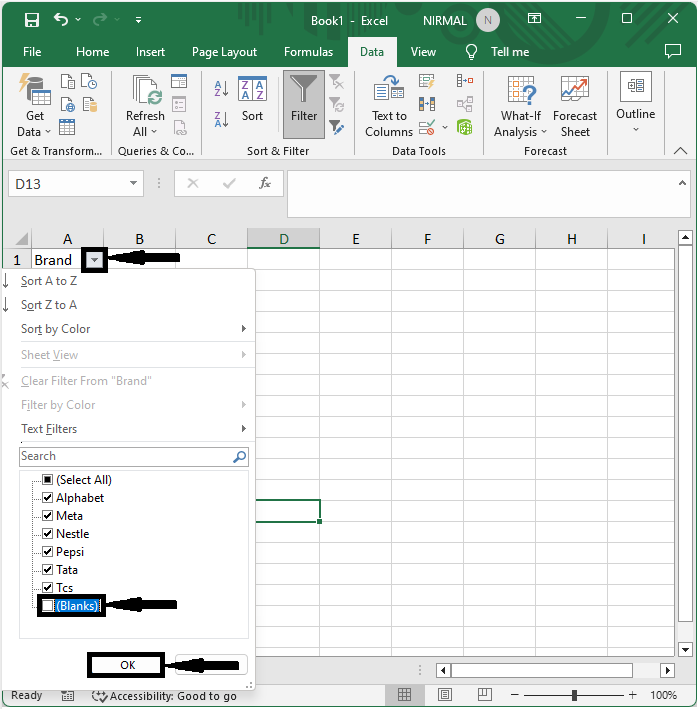
Then, click on the arrow mark, uncheck the box named "Blank," and click "OK" to complete the task.
Arrow > Uncheck Box > Ok.

This is how you can delete blank cells and shift up in Excel.
Conclusion
In this tutorial, we have used a simple example to demonstrate how you can delete blank cells and shift data up in Excel to highlight a particular set of data.

