
Article Categories
- All Categories
-
 Data Structure
-
 Networking
-
 RDBMS
RDBMS
-
 Operating System
-
 Java
Java
-
 MS Excel
-
 iOS
iOS
-
 HTML
HTML
-
 CSS
CSS
-
 Android
-
 Python
-
 C Programming
-
 C++
C++
-
 C#
C#
-
 MongoDB
-
 MySQL
MySQL
-
 Javascript
-
 PHP
PHP
-
 Economics & Finance
How to Delete Extra Empty or Blank Pages in a Worksheet in Excel
Have you ever been frustrated because your Excel workbook has unneeded empty or blank pages? These extra pages not only make your workbook look cluttered, but they also complicate printing and navigation. But don't be alarmed! In this tutorial, we will walk you through the process of finding and eliminating these unnecessary pages, allowing you to have a clean and organised Excel spreadsheet.
This tutorial will equip you with the necessary knowledge and skills to successfully manage and optimize your spreadsheets, whether you are a beginner or an experienced Excel user. So, let's get started and learn how to get rid of those annoying empty or blank pages in Excel!
Delete Extra Empty or Blank Pages in a Worksheet
Here we will use the set print area function to complete the task. So let us see a simple process to know how you can delete extra empty or blank pages in a worksheet in Excel.
Step 1
Consider an Excel sheet. First, select the number of cells you want to keep. To select cells in multiple areas, hold the Ctrl key and select the cells.
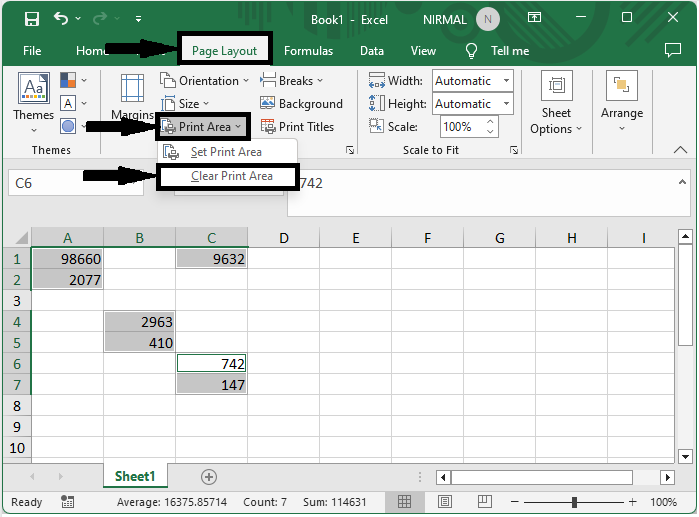
Step 2
Then select "page layout", go to "print area", and select "set print area".
Page layout > Print area > Set print area.
Step 3
Then use the command Ctrl + P to print the sheet, and you can see that the cells that we selected in the above step will be printed.

This is how you can delete extra empty or blank pages from a worksheet in Excel.
Conclusion
In this tutorial, we have used a simple example to demonstrate how you can delete extra empty or blank pages in a worksheet in Excel to highlight a particular set of data.

1K+ Views
