- Set Up SSH Keys in Gerrit
- Generate New SSH Key
- Add Your SSH Key
- Add SSH Key to your Gerrit Account
- Add SSH Key to use with Git
- Download Extension Using Git
- Prepare to work with Gerrit
- Installing Git-Review
- Configuring Git-Review
- Setting up Git-Review
- How to Submit a Patch
- Gerrit - Update Master
- Gerrit - Create Branch
- Make & Commit Your Change
- Prepare Push change set to Gerrit
- Push your change set to Gerrit
- View the Change / Next Steps
- Editing via the Web-Interface
- How Code is reviewed in Gerrit
- Review Before Merge
- Gerrit - Project Owners
- How to Comment on, review, merge
- Gerrit Useful Resources
- Gerrit - Quick Guide
- Gerrit - Useful Resources
- Gerrit - Discussion
Selected Reading
Gerrit - Add SSH Key to your Gerrit Account
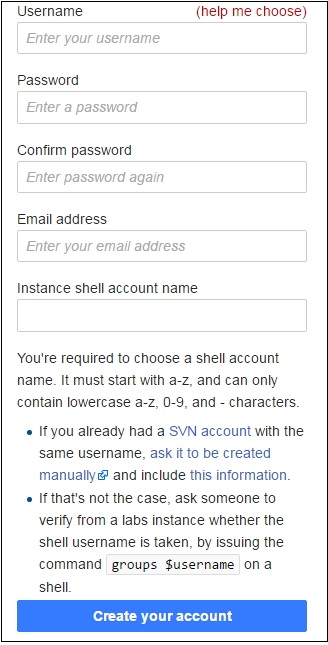
SSH key can be added to the Gerrit account using the following steps −
Step 1 − First create an account at wikimedia.org services.
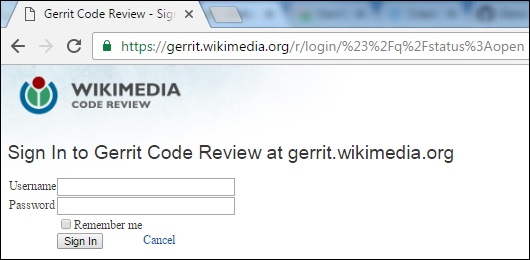
Step 2 − Next sign in to the web interface for Gerrit.
Step 3 − Then in the top right corner, click your username and select the Settings option.
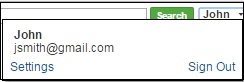
Here, we have created an account with the name John to make use of Gerrit
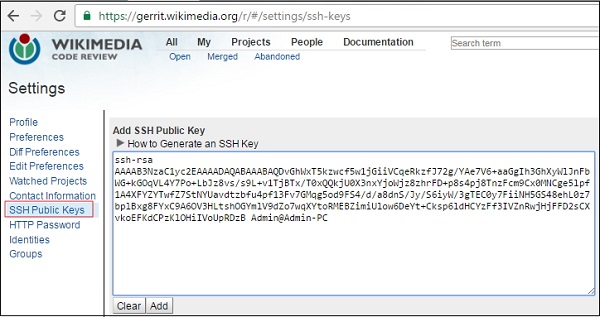
Step 4 − Click the "SSH Public keys" option on the left-side menu and paste the SSH Public key in the field.

Advertisements