- Dialogflow - Home
- Dialogflow - Overview
- Dialogflow - Getting Started
- Dialogflow - Components
- Dialogflow - Creating First Agent
- Dialogflow - Creating Parameters
- Dialogflow - Creating Custom Entities
- Dialogflow - Contexts
- Dialogflow - Creating a Custom Intent
- Dialogflow - Training
- Dialogflow - Intent Matching
- Dialogflow - Integration
- Dialogflow - Building a Chatbot
- Dialogflow - Knowledge Base
- Dialogflow Useful Resources
- Dialogflow - Useful Resources
- Dialogflow - Discussion
Dialogflow - Creating First Agent
Creating your own Dialogflow agent is easy. Dialogflow is a technology provided by Google for building chatbots that can understand and reply to user messages. This chapter will let you write your first agent.
Steps to Create an Agent
Use these steps to create your first Dialogflow agent −
Step 1:
First, we need to sign into Dialogflow. We can reach the Dialogflow and log in by using the URL https://dialogflow.cloud.google.com. After logging in successfully, we need to choose Sign up for free.
Next, you need to get into the Google account. To use a Dialogflow, you need to have a Google account.
Step 2:
To create a new agent, we then need to click on the create agent button. First choose the three options: language, your new bot's name and the default time zone.

Step 3:
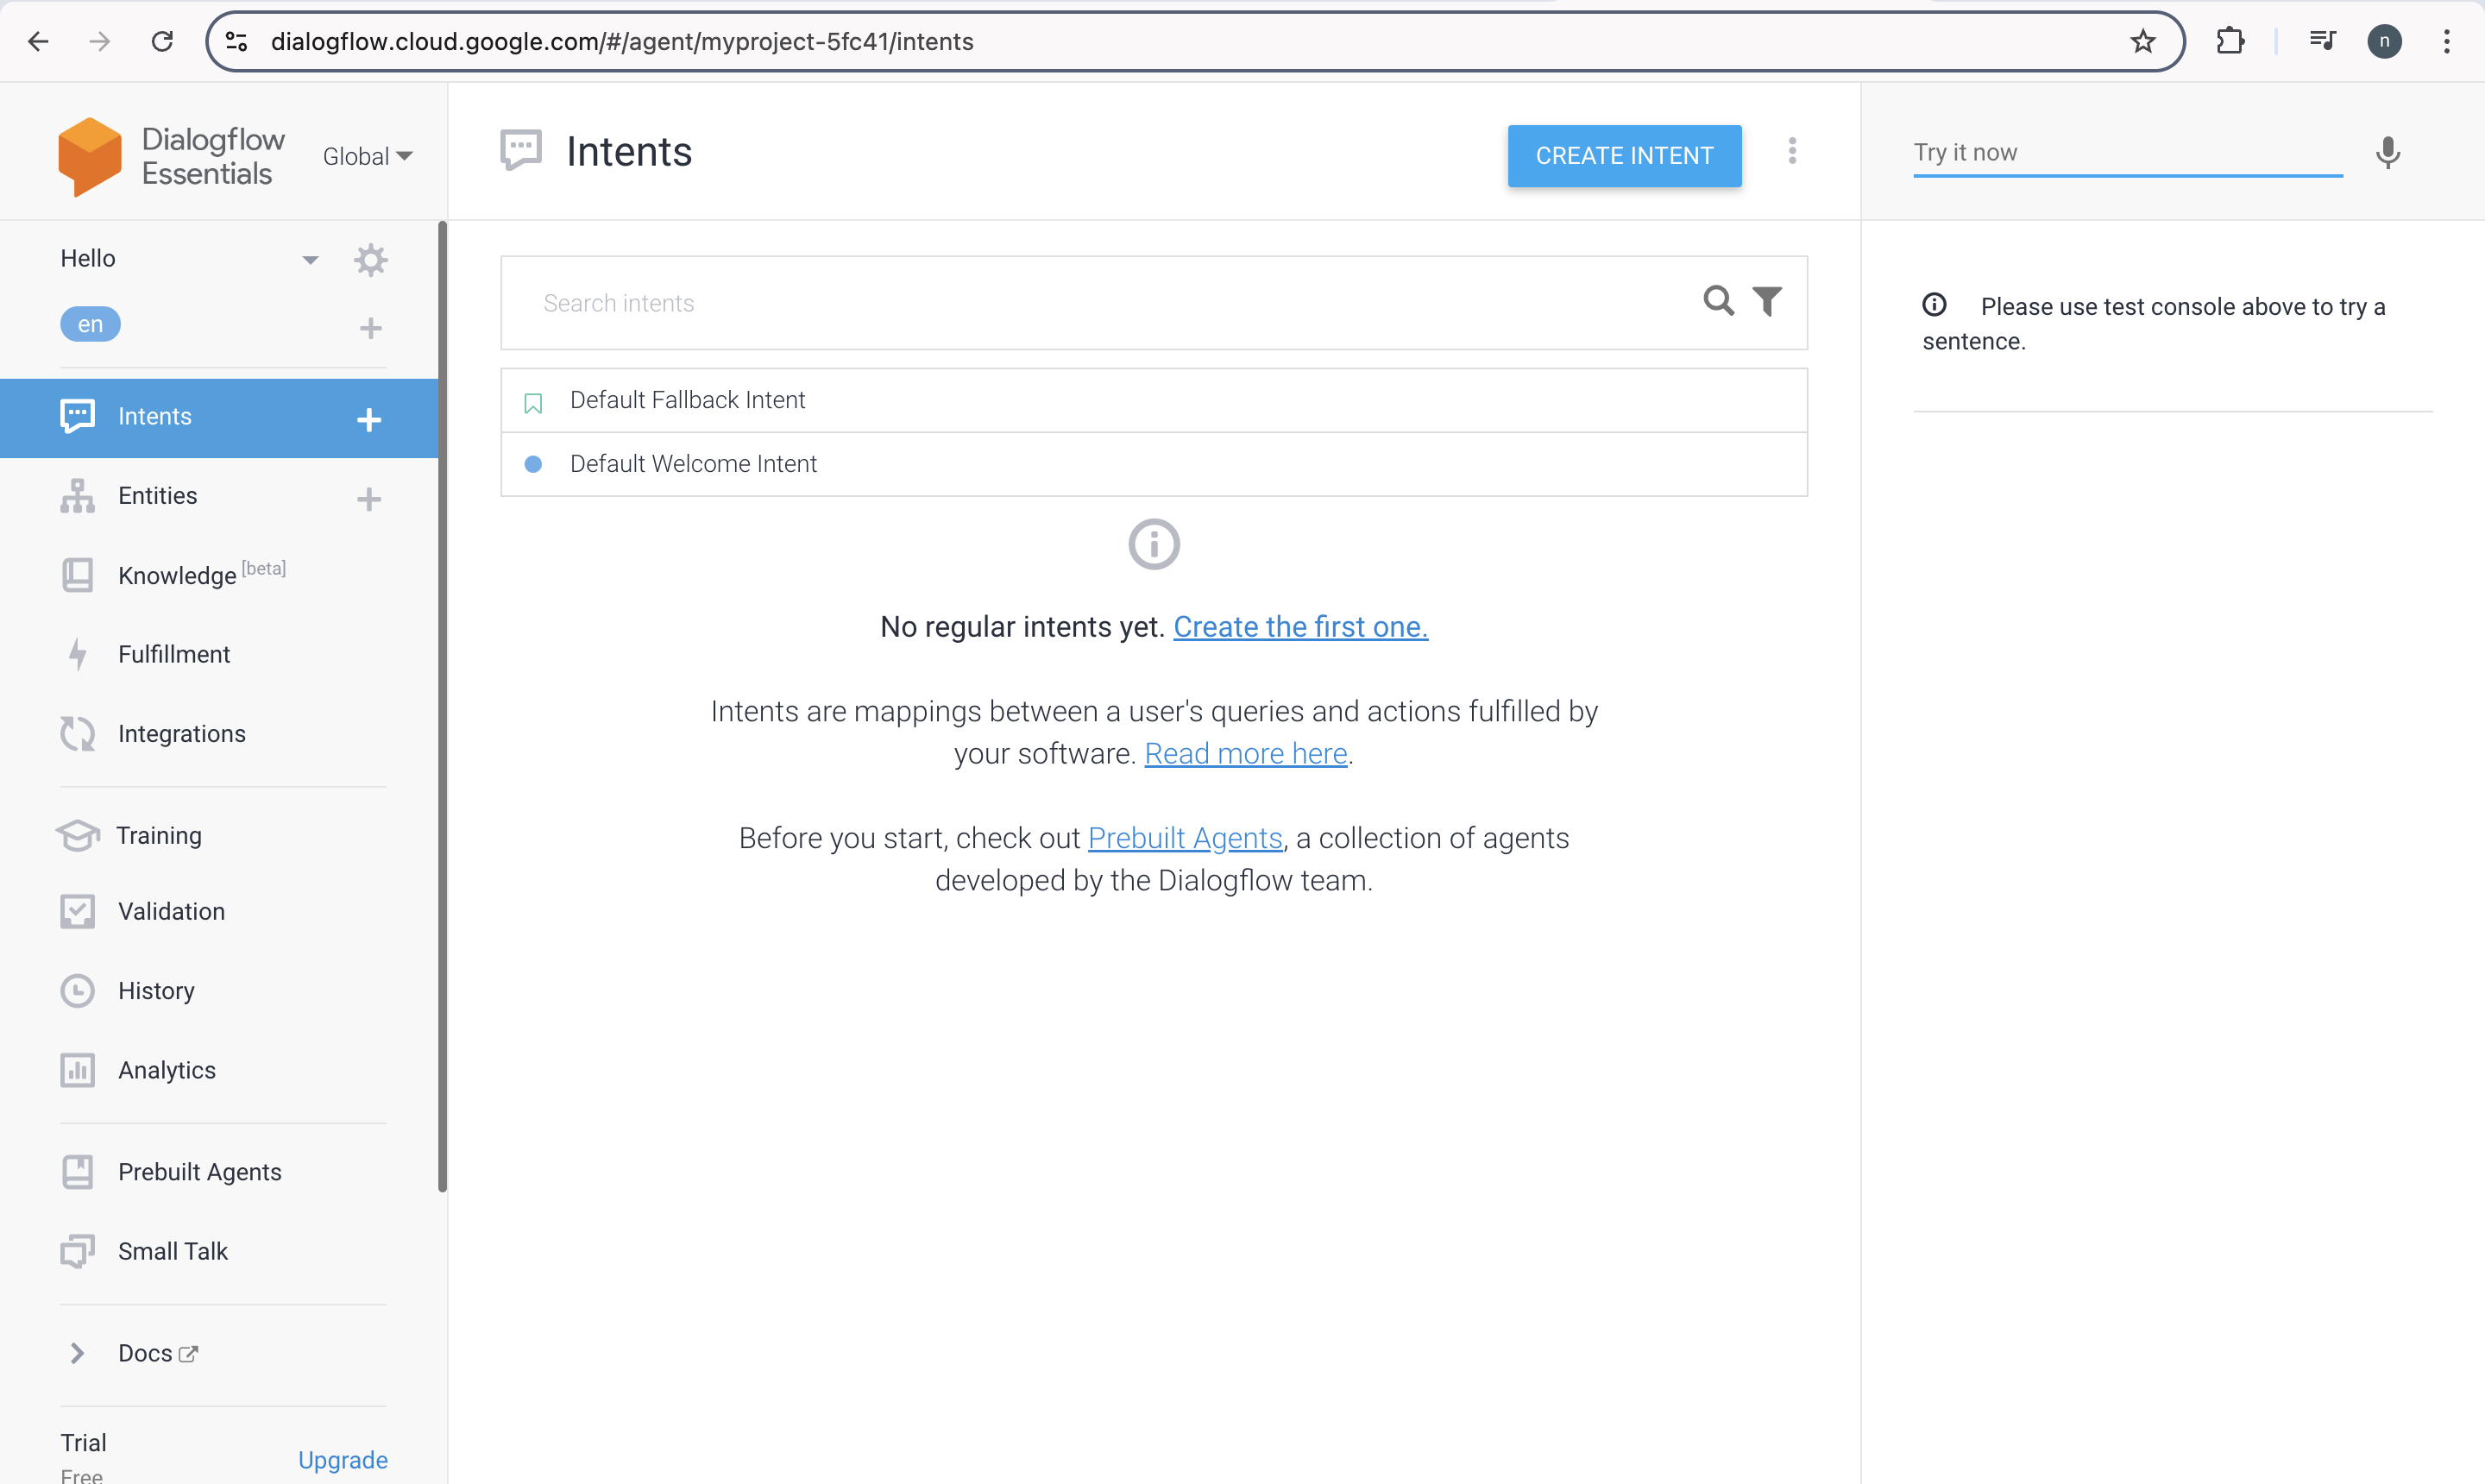
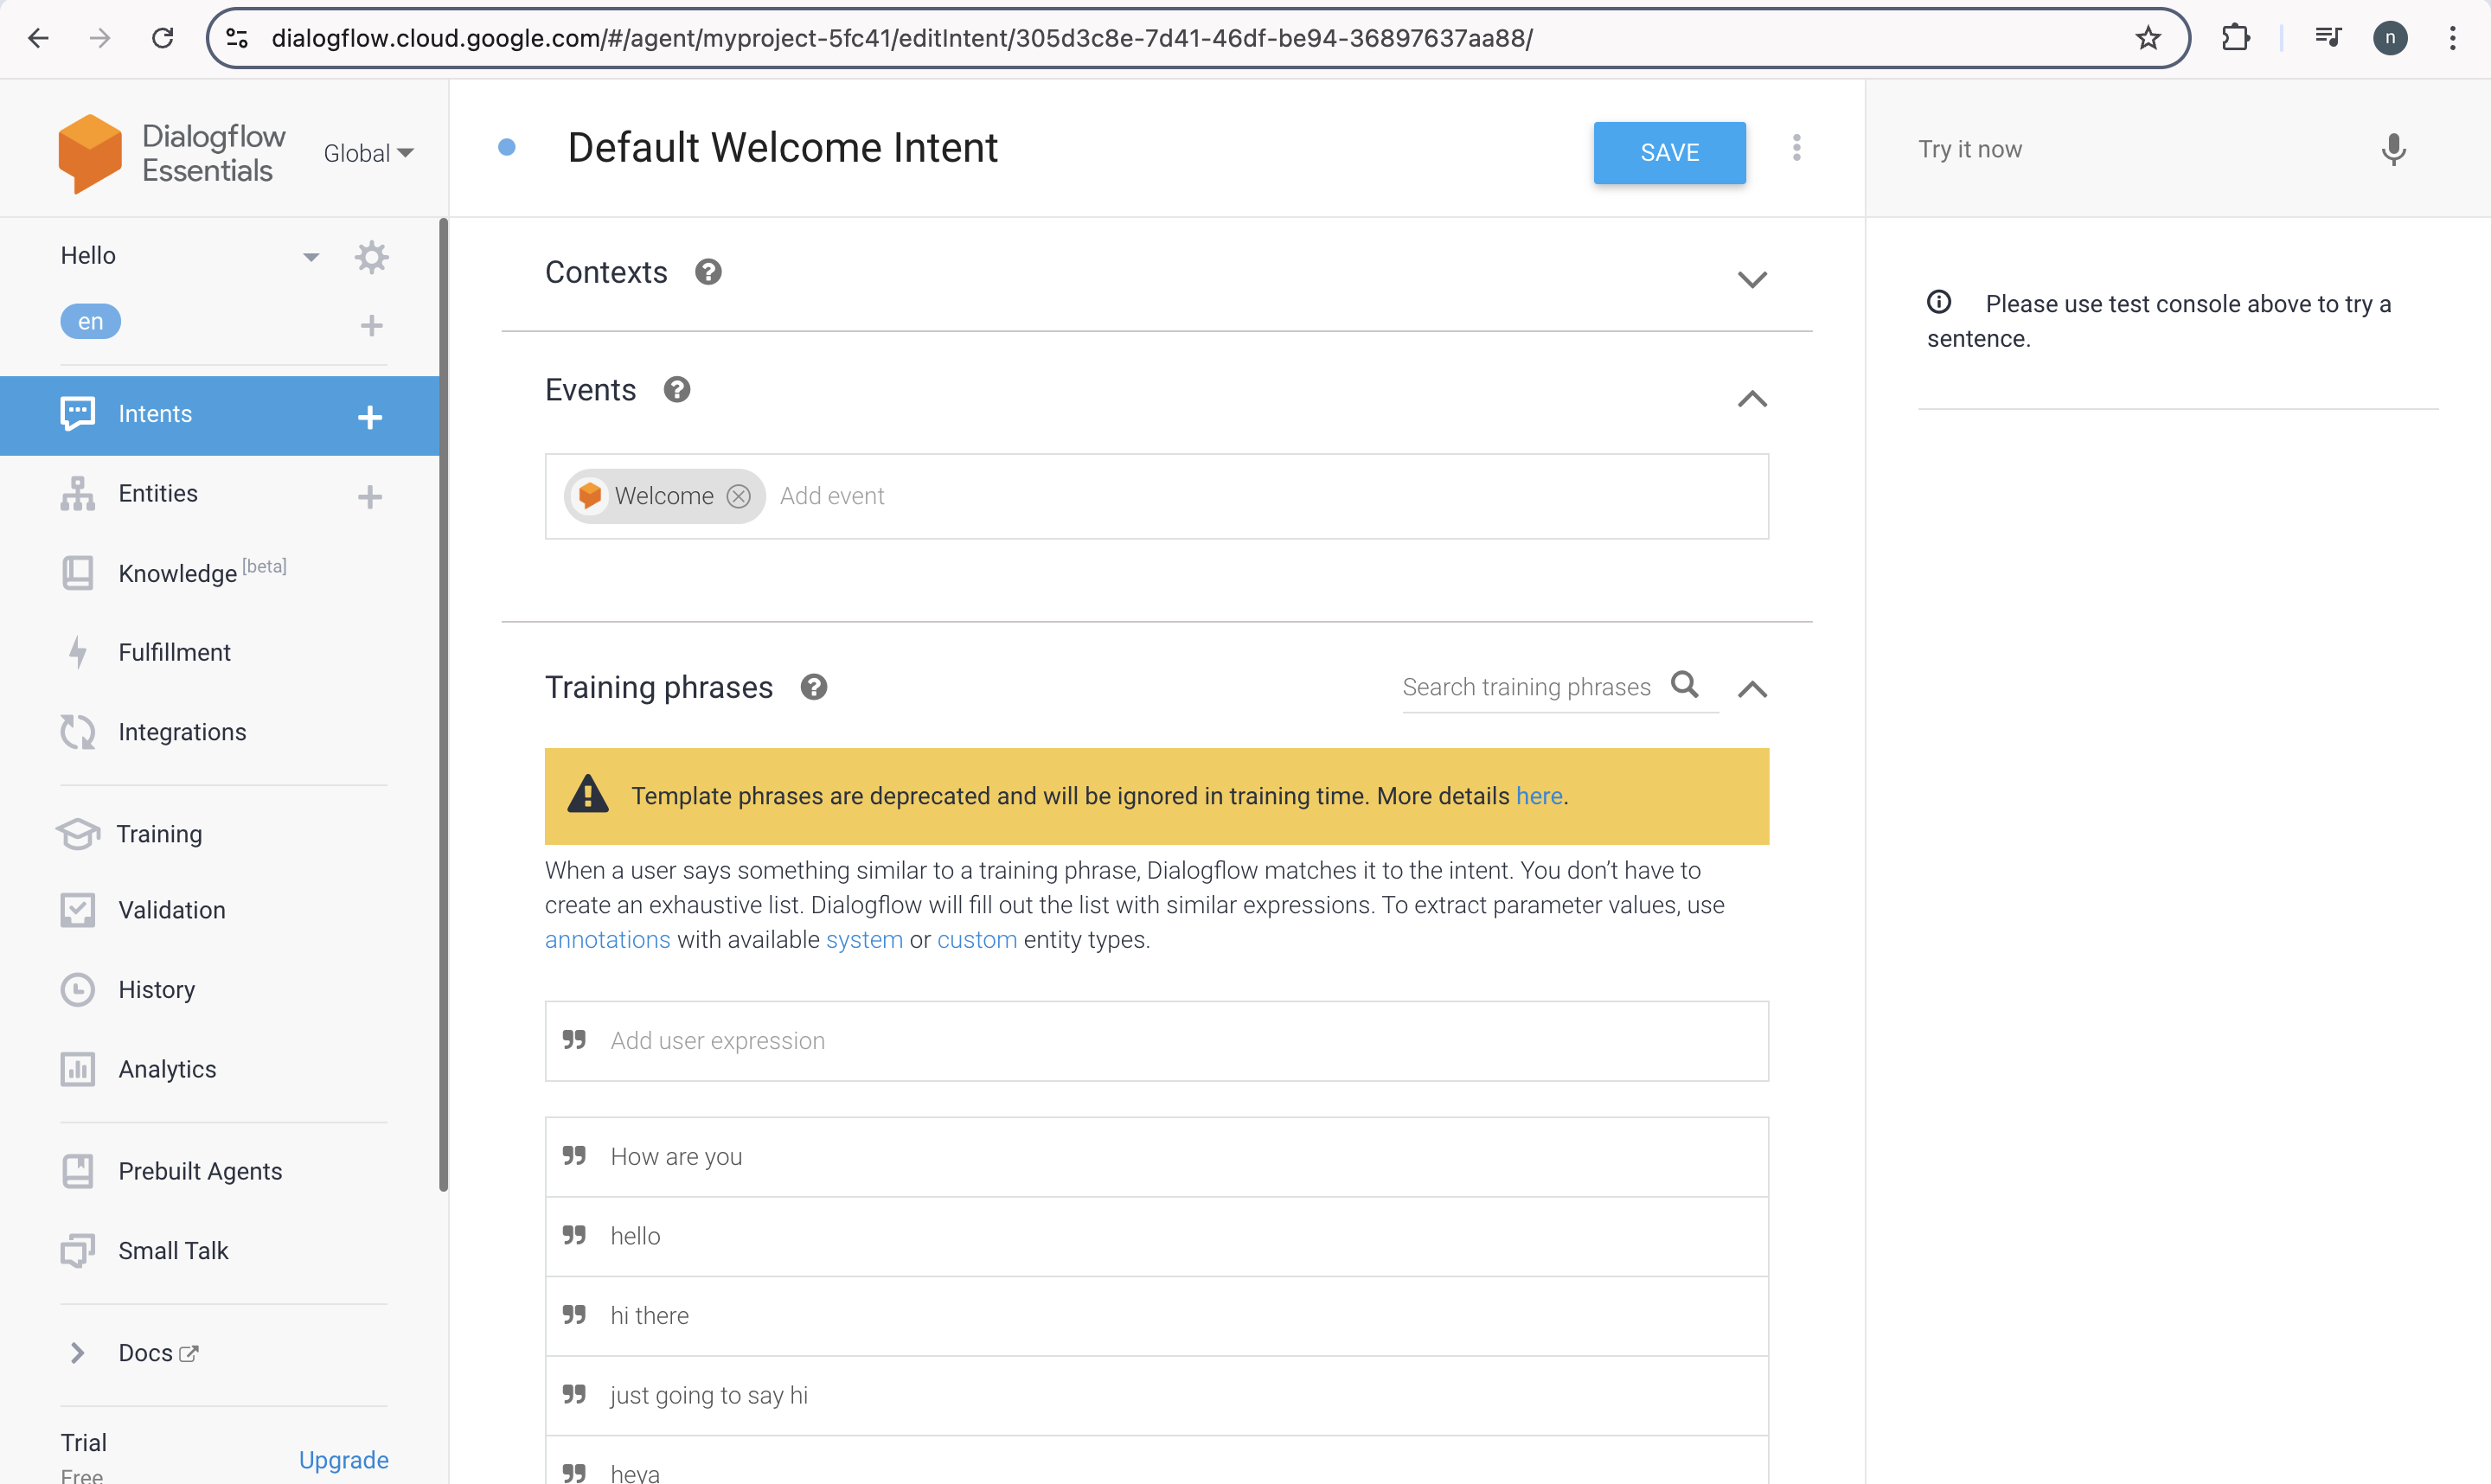
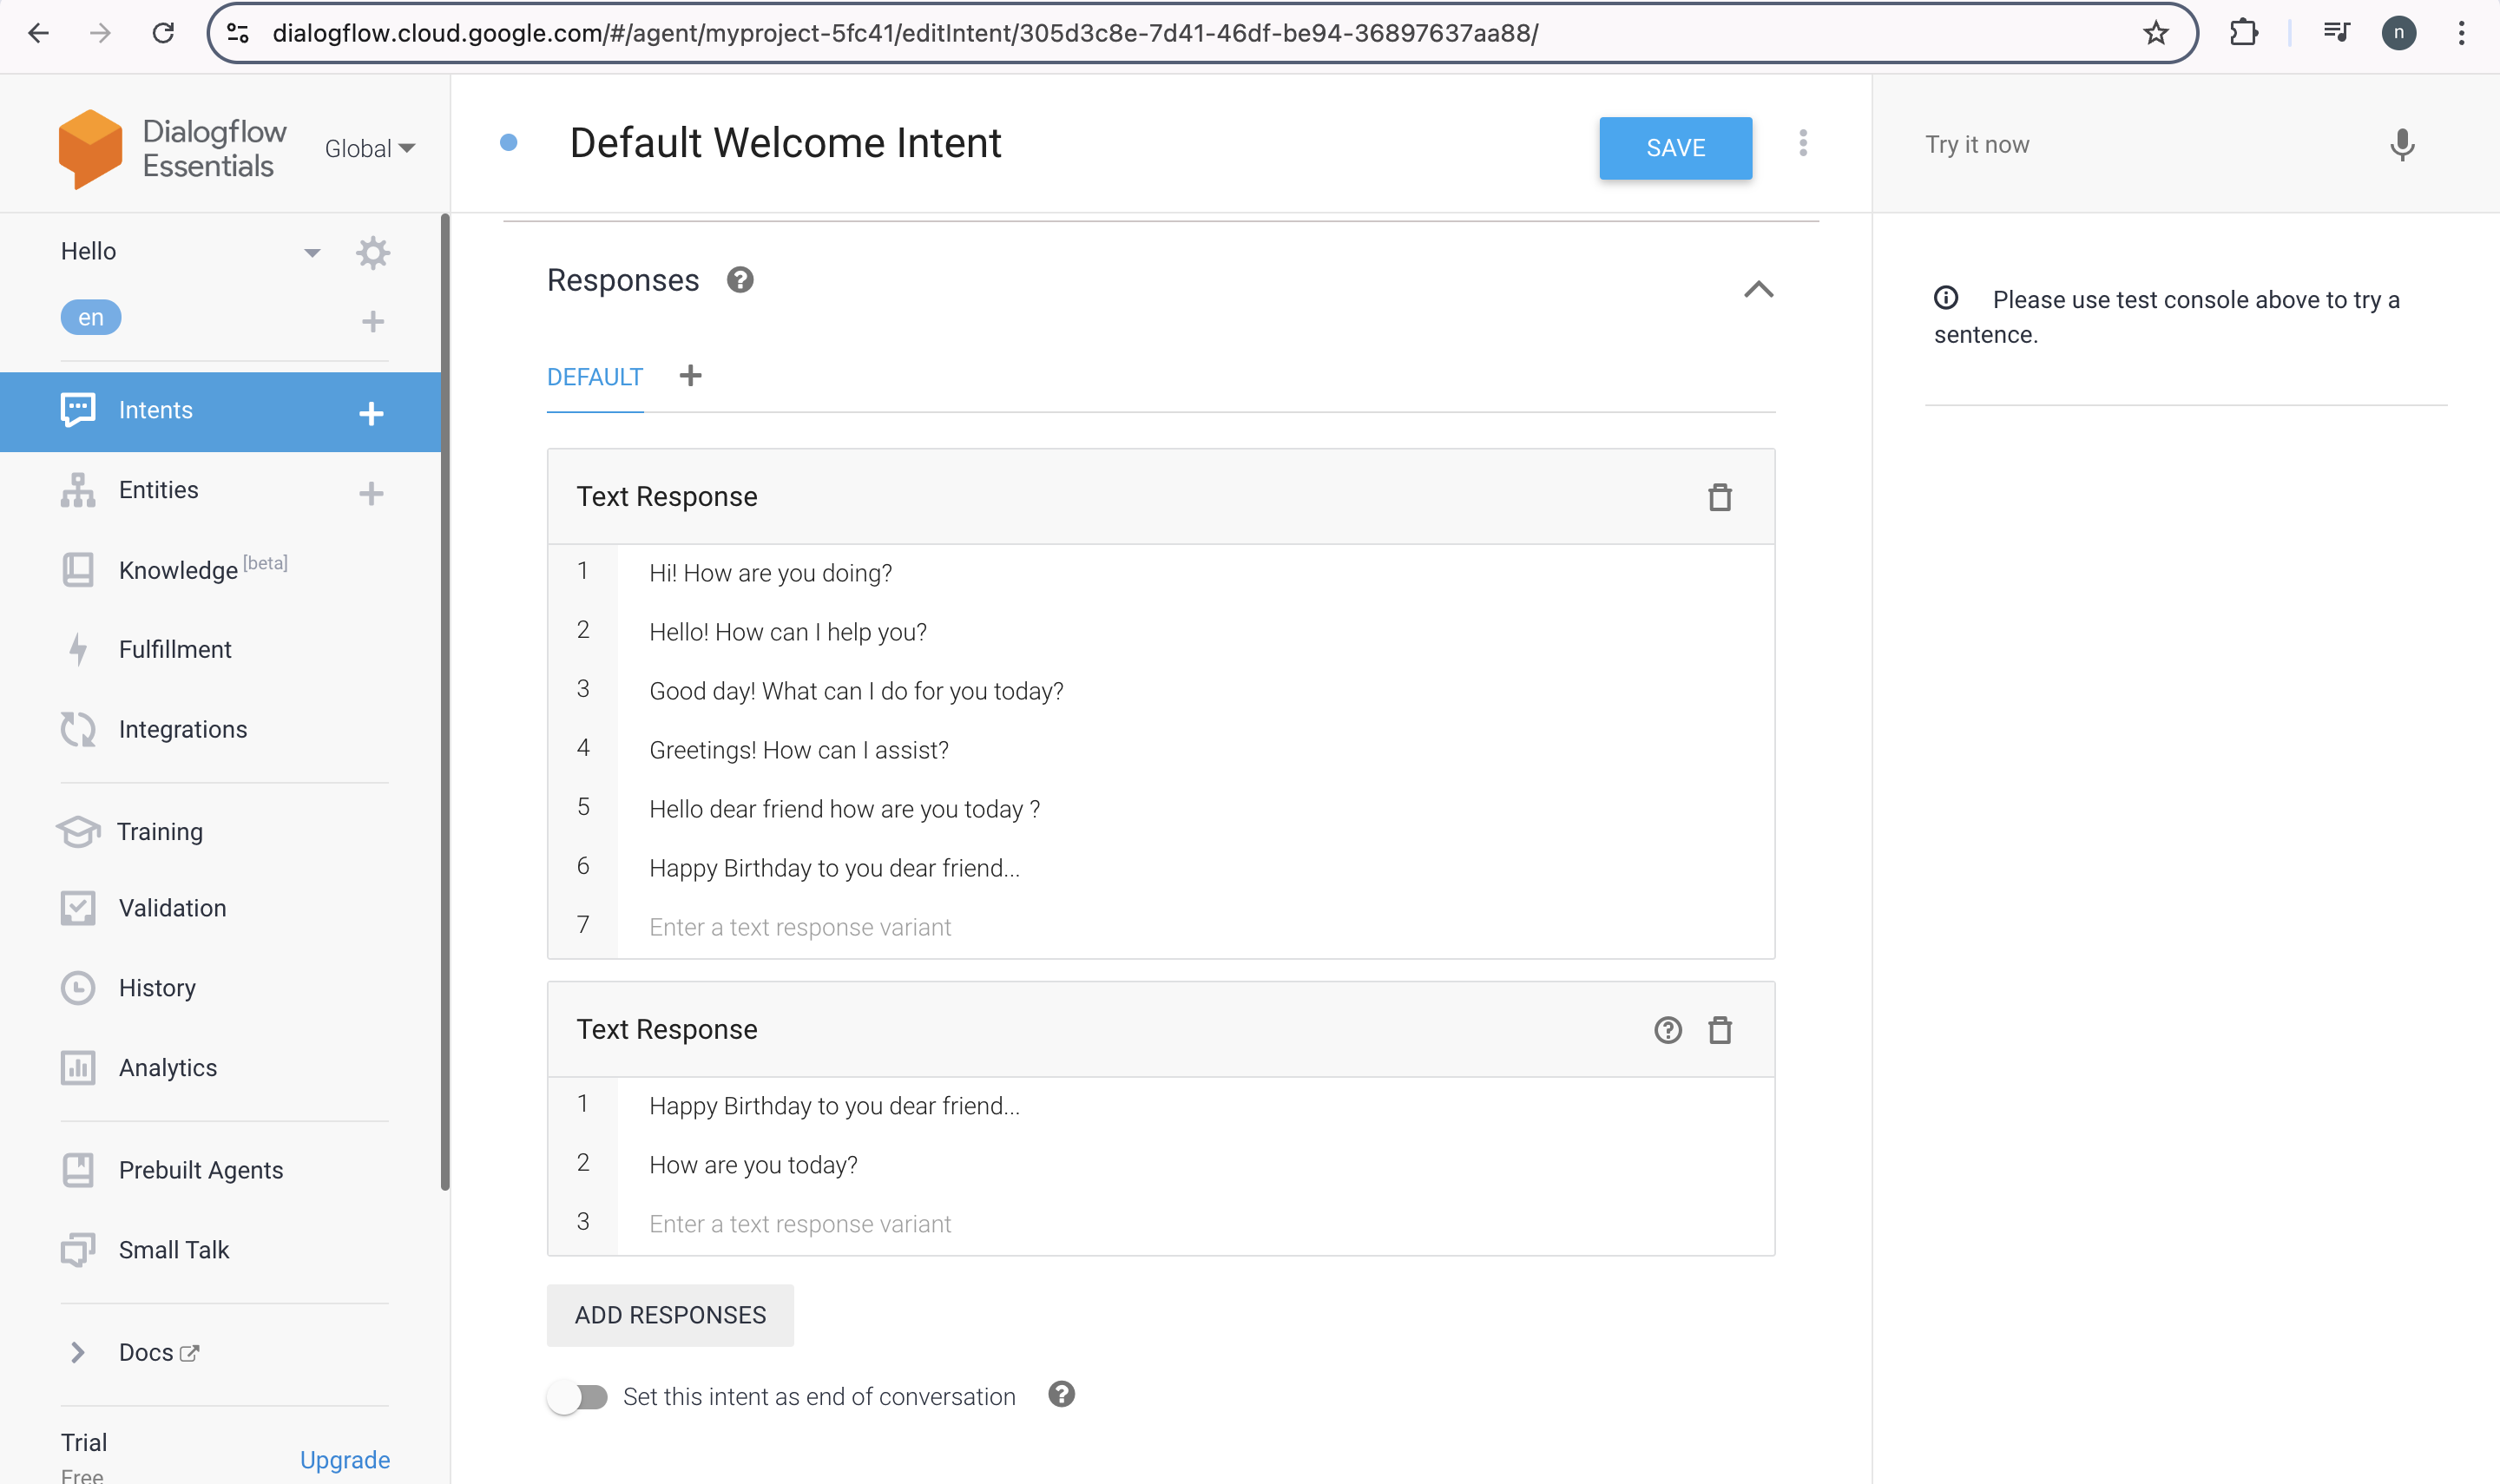
After that build the hello bot. The bot is currently does not know about how to respond to user input. The method continues with teaching it to behave. You must first meet the bot and for a while assume their personality before presenting yourself. And then click on the option called 'Default Welcome Intent'.
Step 4:
Adding "hello" and "hi" to the training phases is the next step. Type these words into the text field and click Enter to do this.
Step 5:
After that we have to select the Responses option and eliminate or delete the ones that are already there.
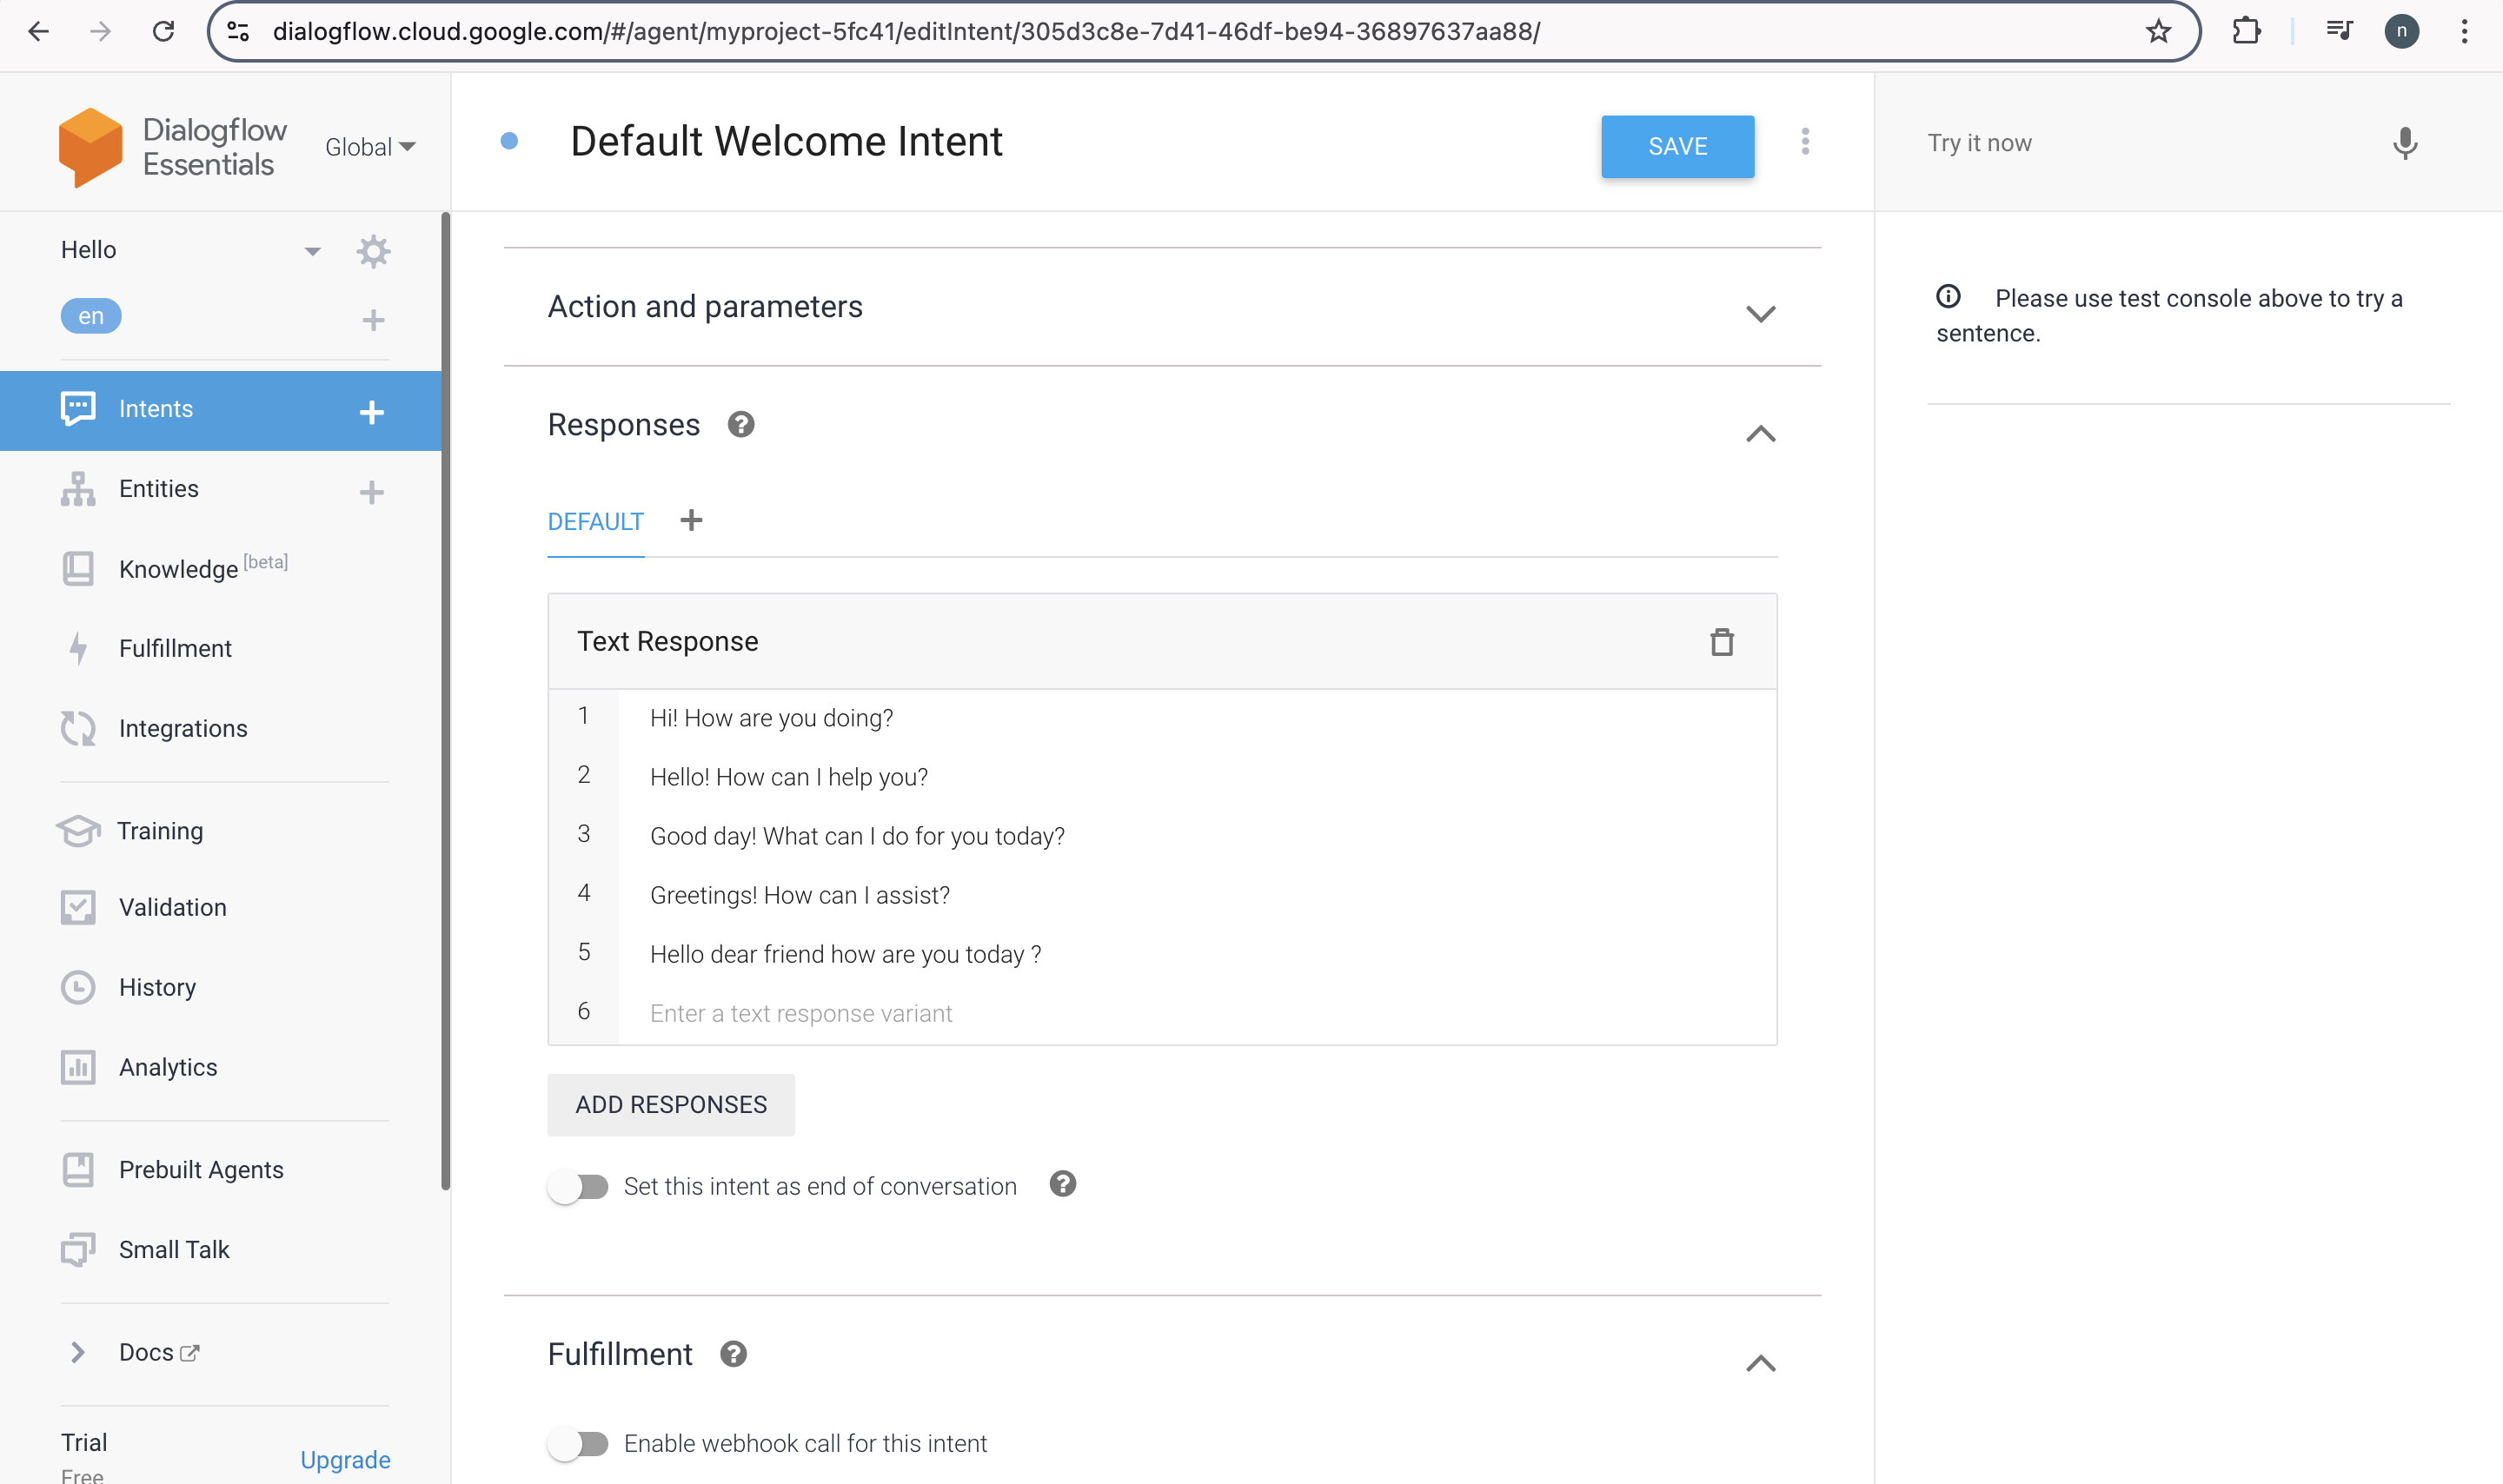
Step 6:
Following that select ADD RESPONSES. Next select Text response. And then type the desired response.
Step 7:
Following the correct texting of the response, you have to click on the Save button to save it.
Importing the Example File to Your Agent
To import the example file into your agent follow these steps −
The new-agent.zip file must be downloaded first.
The Dialogflow Console will then be visible.
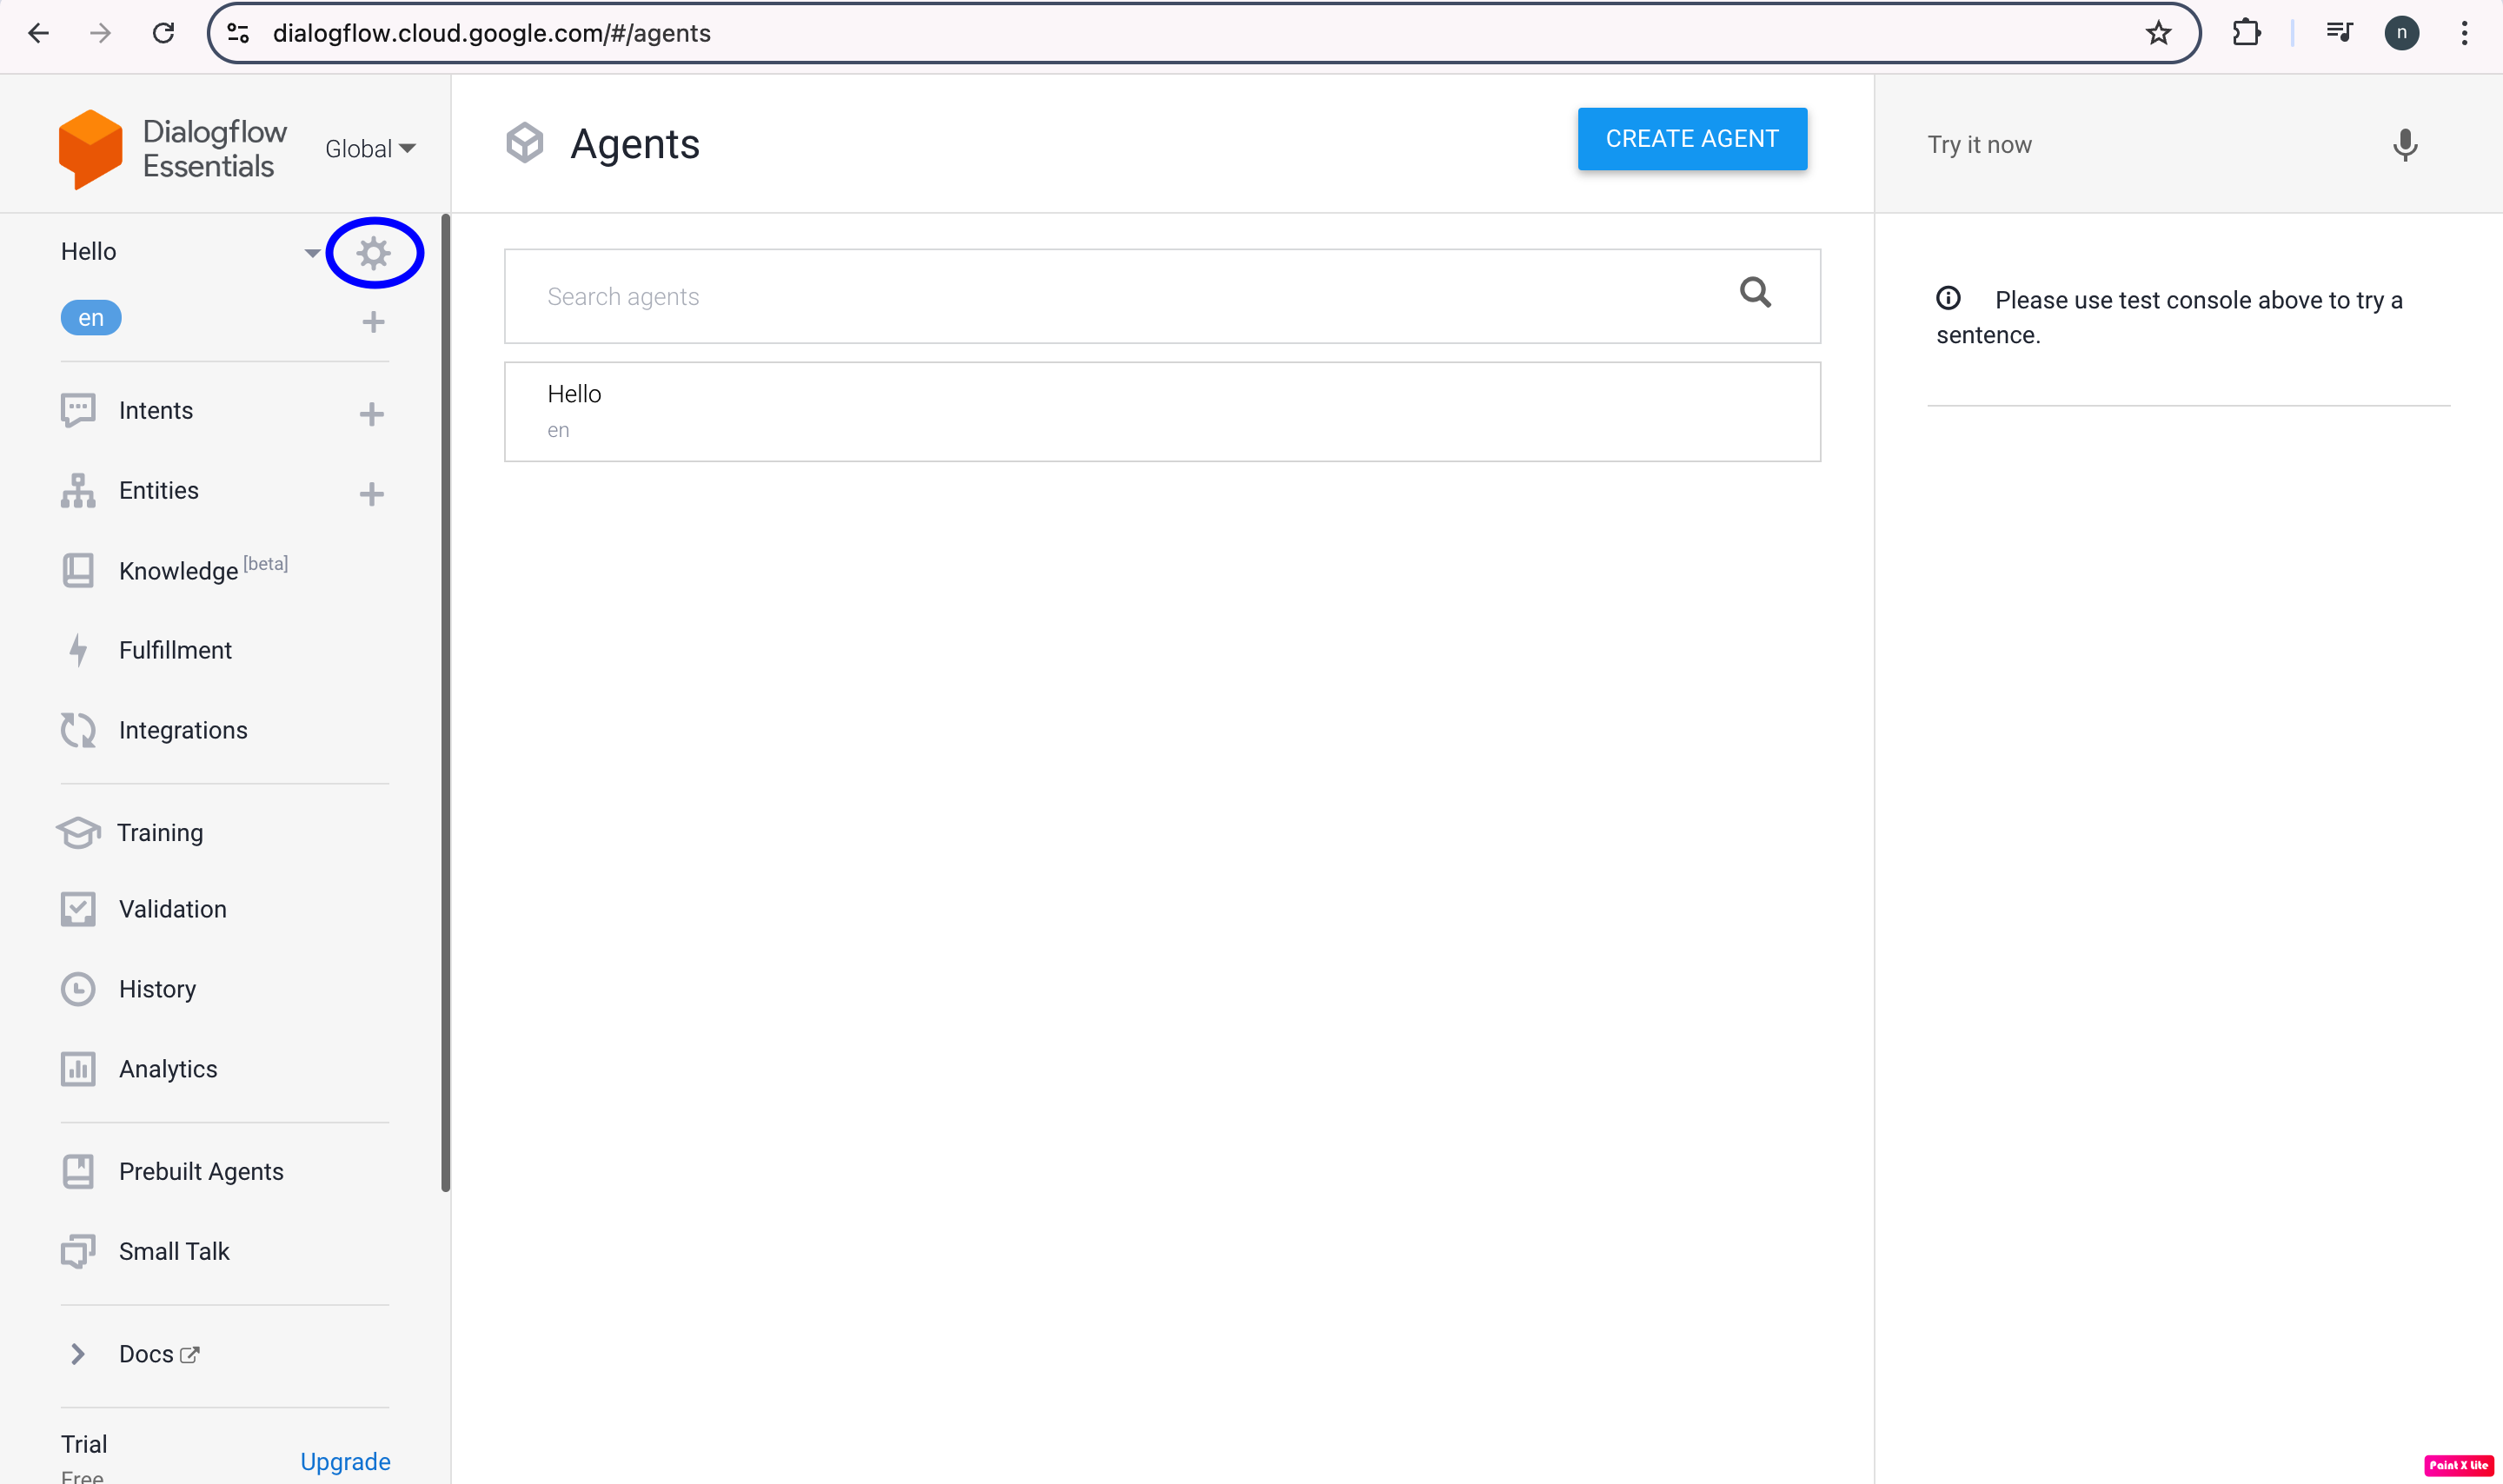
Next select an agent.
After that select the setting icon that appears next to the agent's name.
After that select the Export and Import tab.
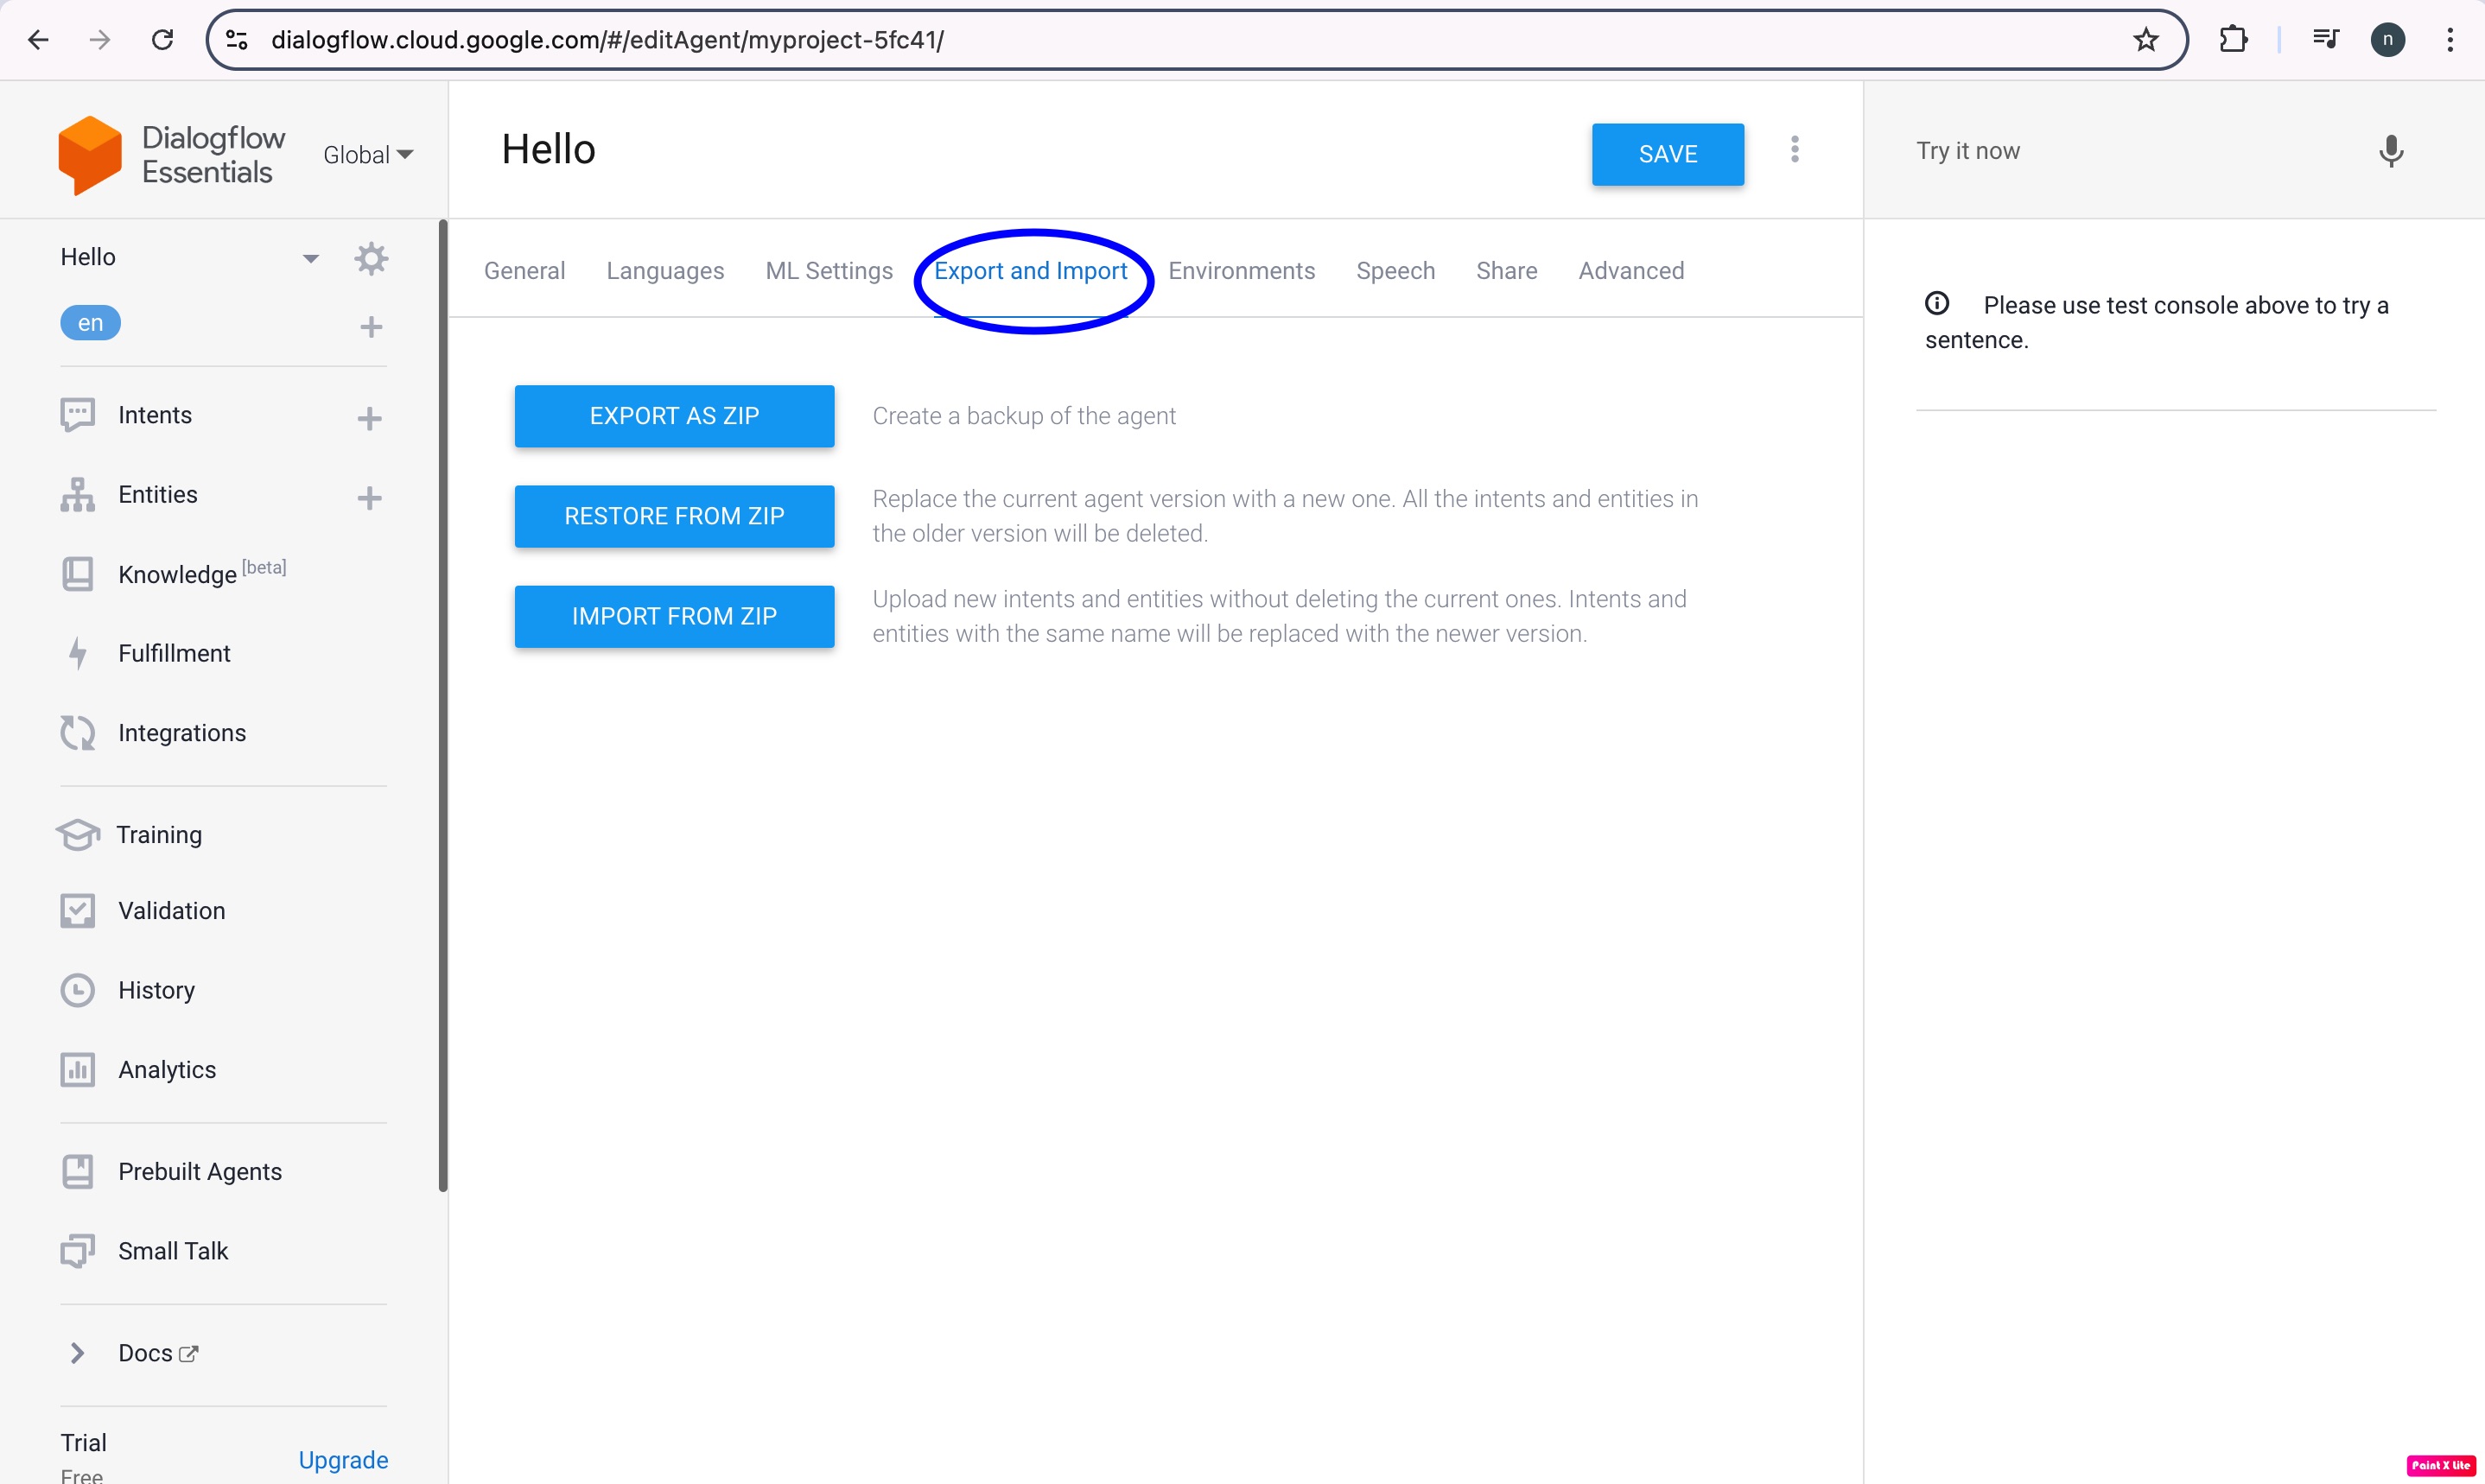
Last but not least choose the Restore from Zip option. After that you have to follow the steps in order to restore the downloaded file.

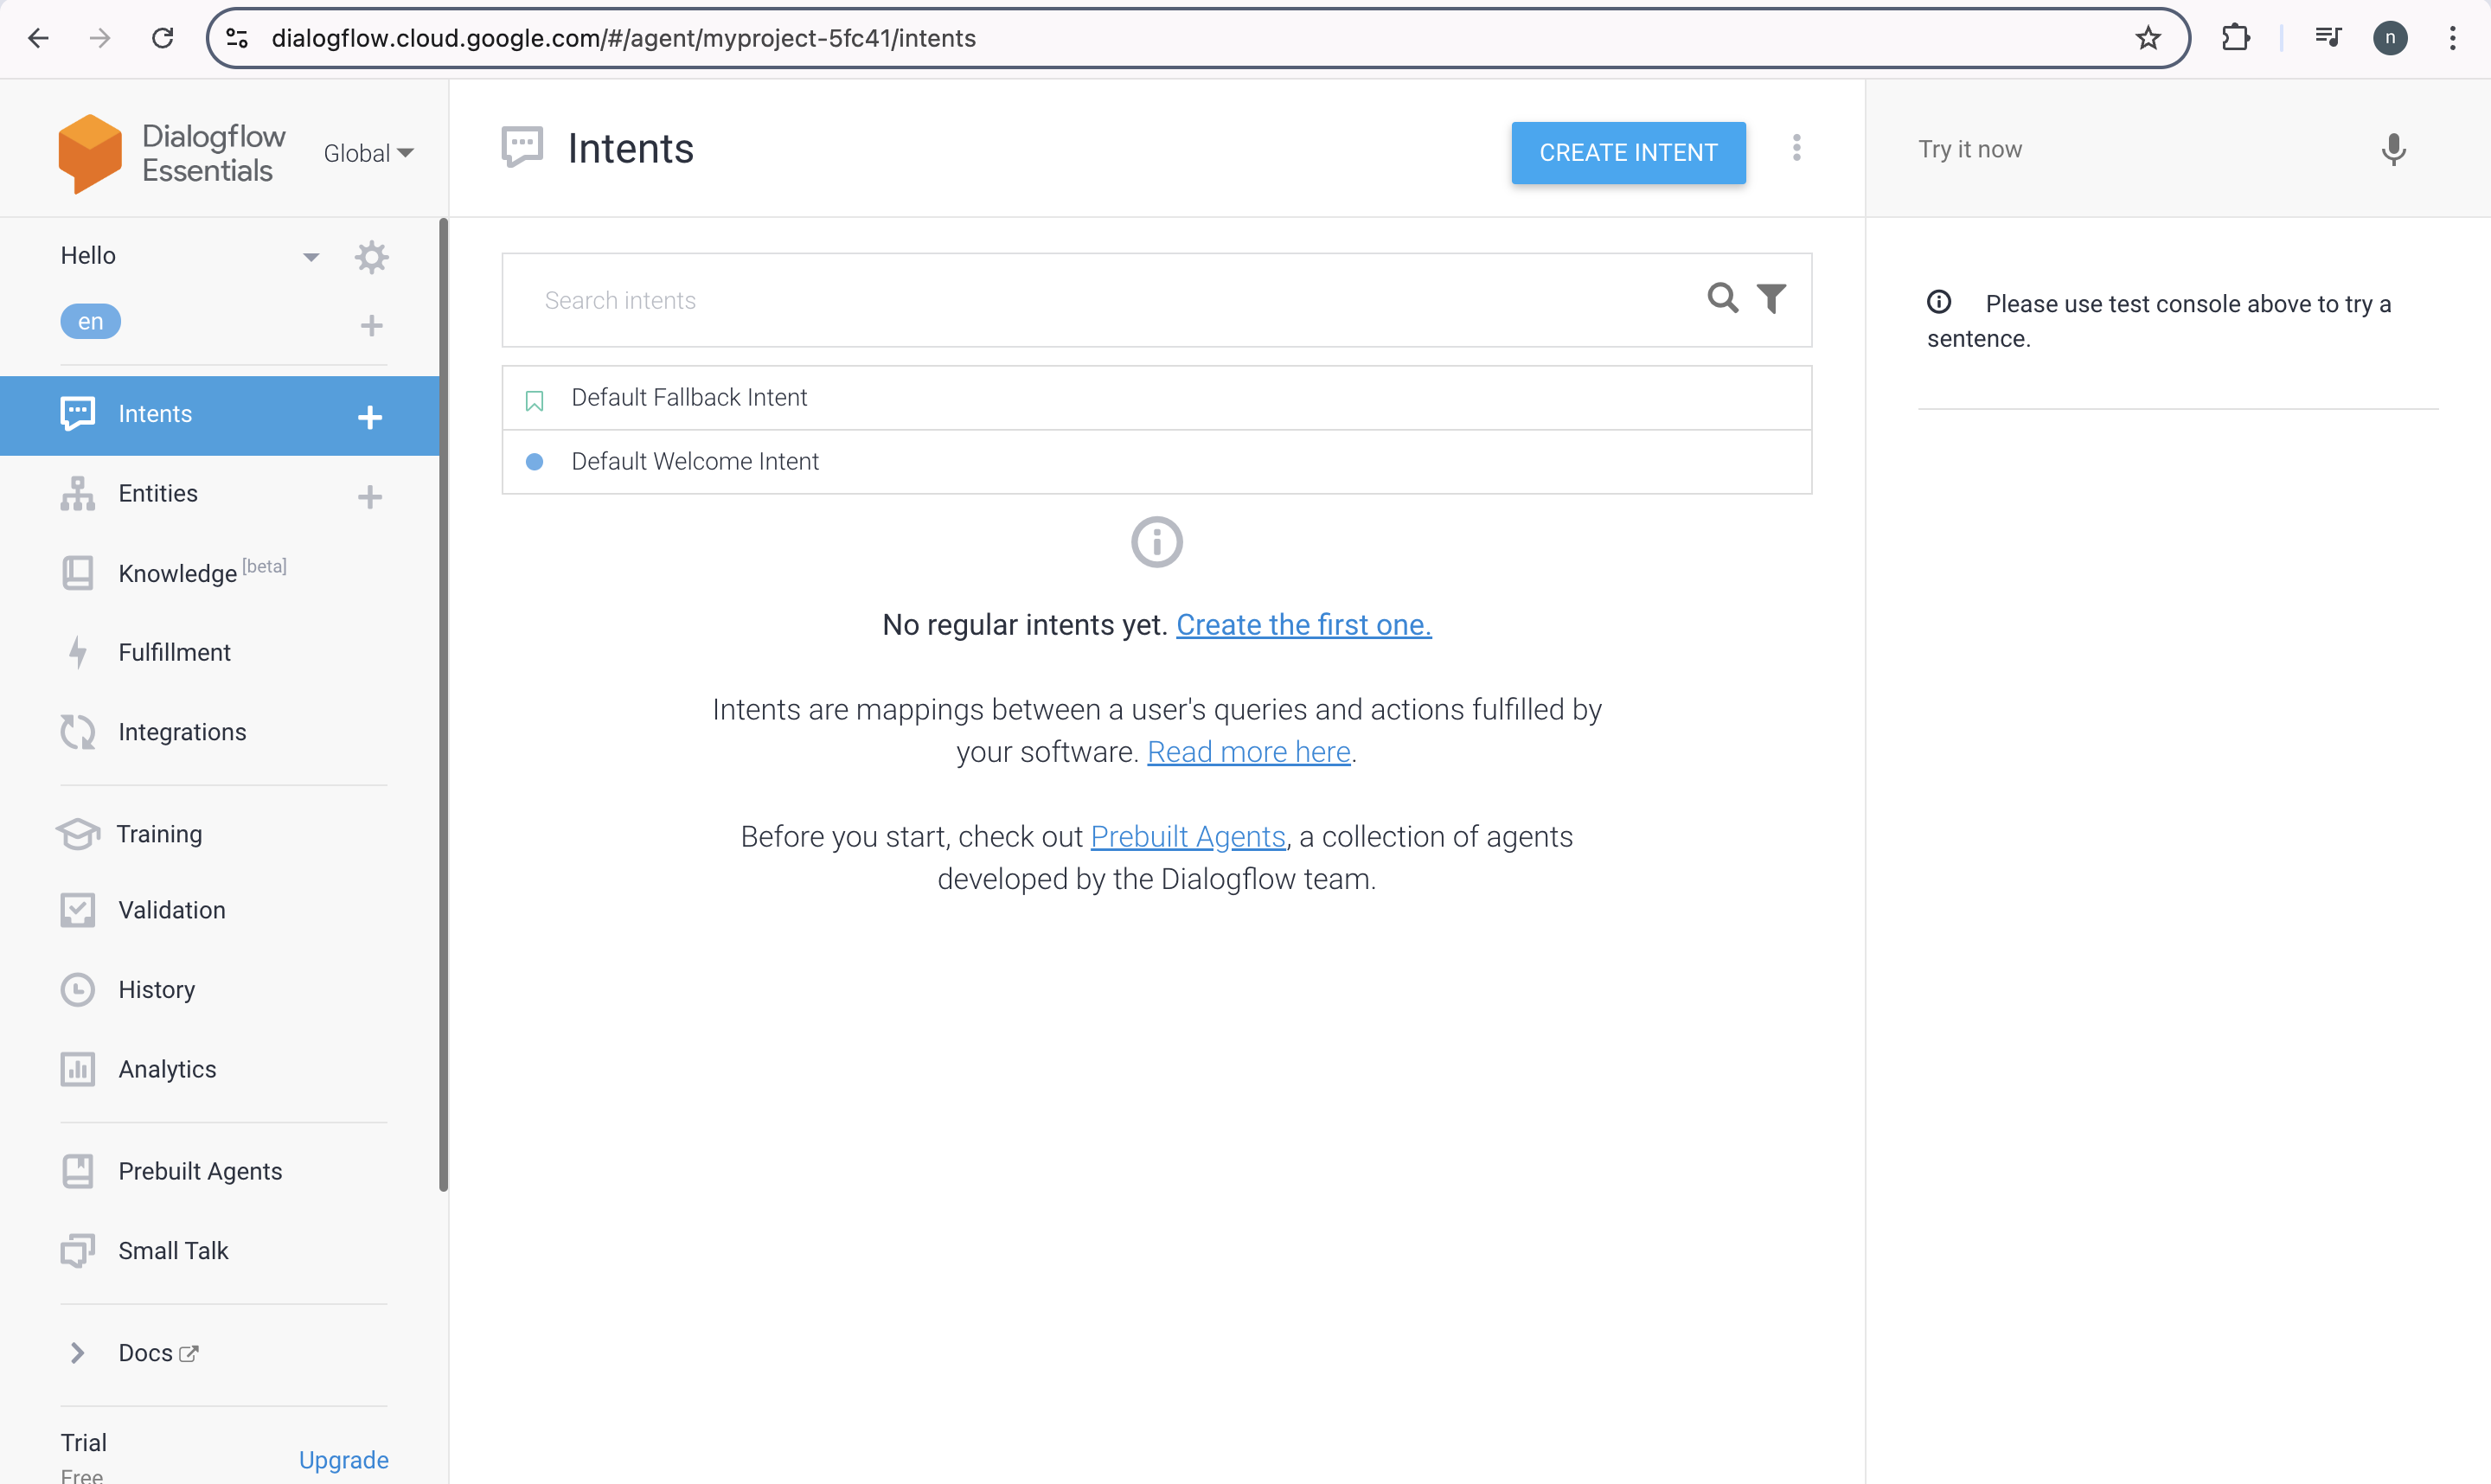
Create a New Intent
We will create an agent in this section that can answer questions like "what is your name" Every intent needs a different set of training phrases. An end-user expression is another name for a training phrase. It acts as an example of the types of questions the end user can create or ask to the agent. As long as we offer Dialogflow and a range of expressions that must be in line with the aim we can give as many training phrases as we want to. Follow these steps to create a new intent −
To start, click the "add intent +" button next to the "intents" option on the left sidebar.
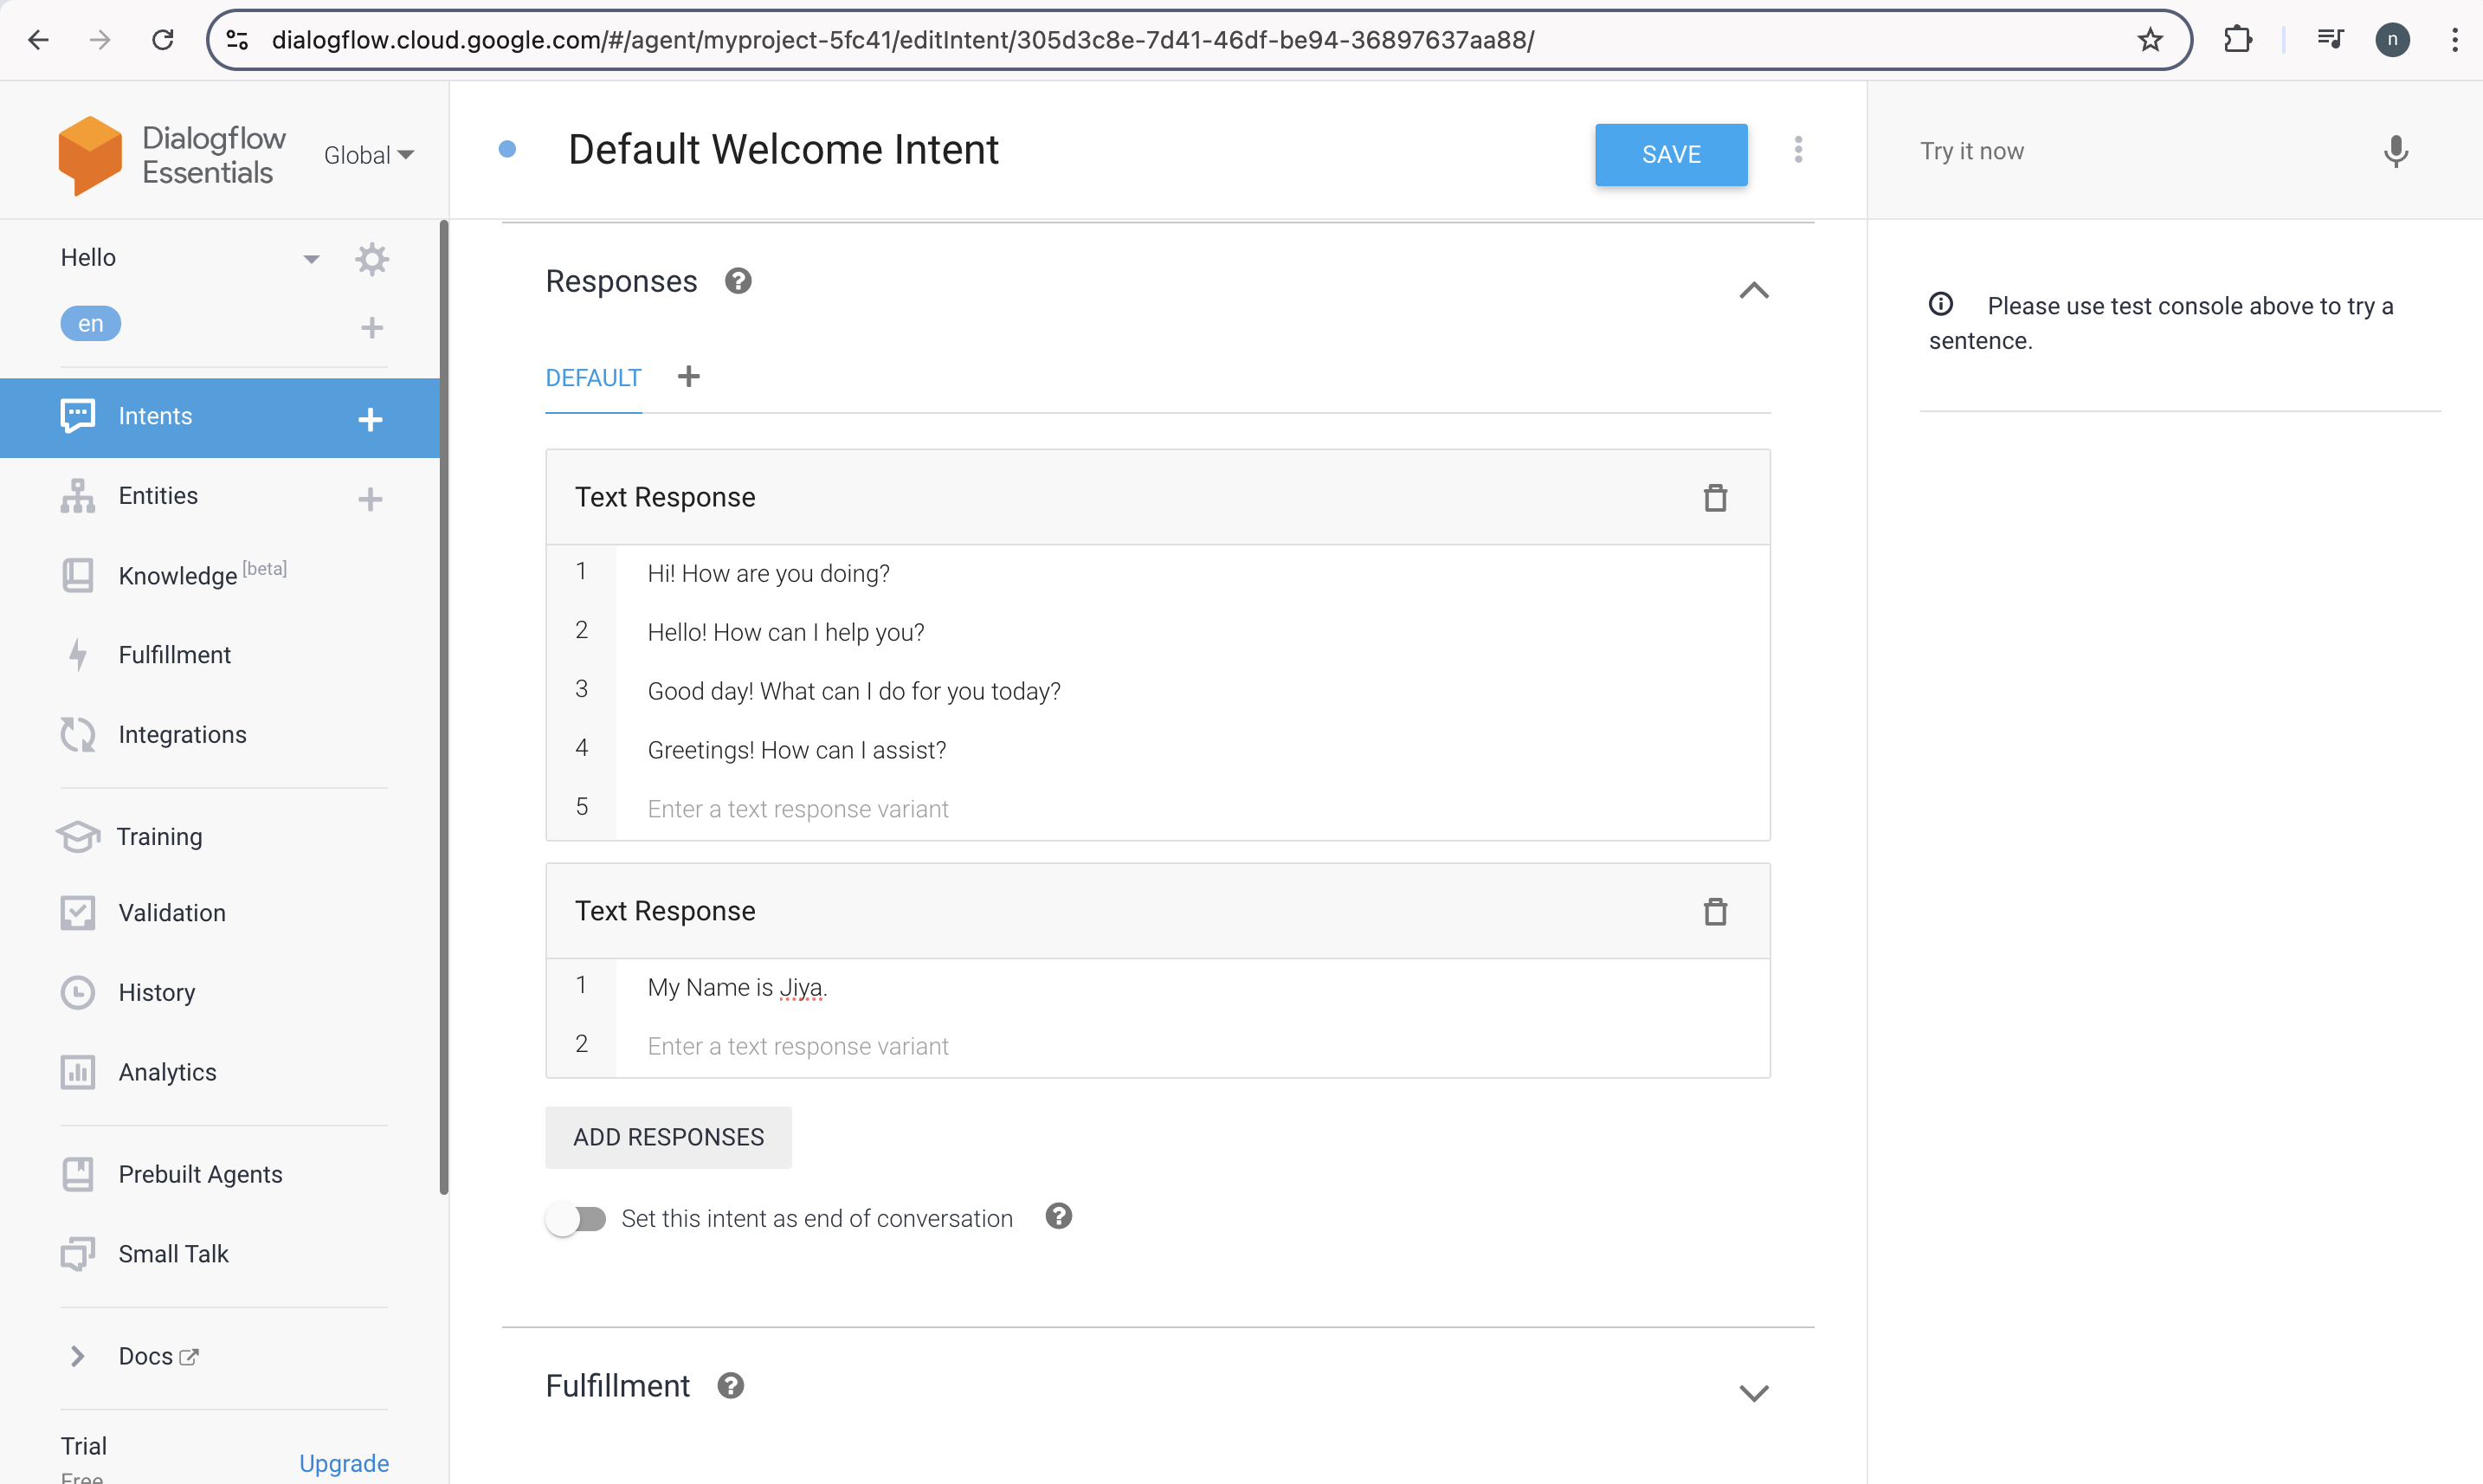
Then select the get-agent-name that appears in the intent name. Next select the "Add training phrases" option listed in the Training phrases.
The training phrases are then entered according to the intent's requirements. After each entry, we have to click Enter. The response needs to be typed in the Response area. For example, "My name is Jiya" should be entered in the Text Response section.
After that we have to wait for the Agent Training dialog to show that the training is finished.
Your agent responds to the term correctly even though it may be somewhat different from the training phrases you given.
Dialogflow uses training phrases like an example for a machine learning model, to match end-user statements to intents. The expressions are compared to each of the agent's intents by the model, which then gives each intent a score before matching the intent with the highest score.
When the highest scoring intent has a very low score, the backup intent is matched.
