- Dialogflow - Home
- Dialogflow - Overview
- Dialogflow - Getting Started
- Dialogflow - Components
- Dialogflow - Creating First Agent
- Dialogflow - Creating Parameters
- Dialogflow - Creating Custom Entities
- Dialogflow - Contexts
- Dialogflow - Creating a Custom Intent
- Dialogflow - Training
- Dialogflow - Intent Matching
- Dialogflow - Integration
- Dialogflow - Building a Chatbot
- Dialogflow - Knowledge Base
- Dialogflow Useful Resources
- Dialogflow - Useful Resources
- Dialogflow - Discussion
Dialogflow - Building a Chatbot
Using the Dialogflow built by Google, you can create many different types of chatbots. Below are some popular types −
Customer Support Chatbots: Handle customer queries, provide support and resolve issues.
E-commerce Chatbots: It will help users with shopping, orders and product recommendations.
Appointment Scheduling Chatbots: Schedule, reschedule or cancel appointments.
Lead Generation Chatbots: Collect user information and generate sales leads
Educational Chatbots: Assist students or learners with educational queries or interactive lessons.
Healthcare Chatbots: Provide medical information, symptoms checking and appointment scheduling.
Virtual Assistant Chatbots: This chatbot will act as a personal assistant to help the users with the daily tasks.
HR and Employee Support Chatbots: This chatbot can help employees with some HR related queries.
Survey and Feedback Chatbots: It can gather feedback or it can be helpful for survey responses from users.
Entertainment or Fun Chatbots: This chatbot can provide entertainment over conversation or games.
Social Media Chatbots: This chatbot can be helpful to engage with users on social media platforms like Facebook Messenger and WhatsApp.
In this chapter we are going to build an Appointment Scheduling chatbot to show you how you can create your chatbot using dialogflow.
Build an Appointment Scheduling Chatbot
So let us build a simple and basic Appointment Scheduling Chatbot with the help of Google Dialogflow. Here is the step-by-step guide −
There are several steps you can follow to build an Appointment Scheduler using the Dialogflow −
Create a Dialogflow agent
Create Intent
Test the Chatbot
Enable Web Integration
Create a Dialogflow agent
To design an appointment scheduler using Dialogflow, we have to create a Dialogflow agent. There are several steps for creating a Dialogflow Agent:
First, click to the Dialogflow console.
Next, if you are using Dialogflow for the first time, sign in with your email address; otherwise, this is not required.
Then accept the terms and conditions, after which we can use the Dialogflow console.
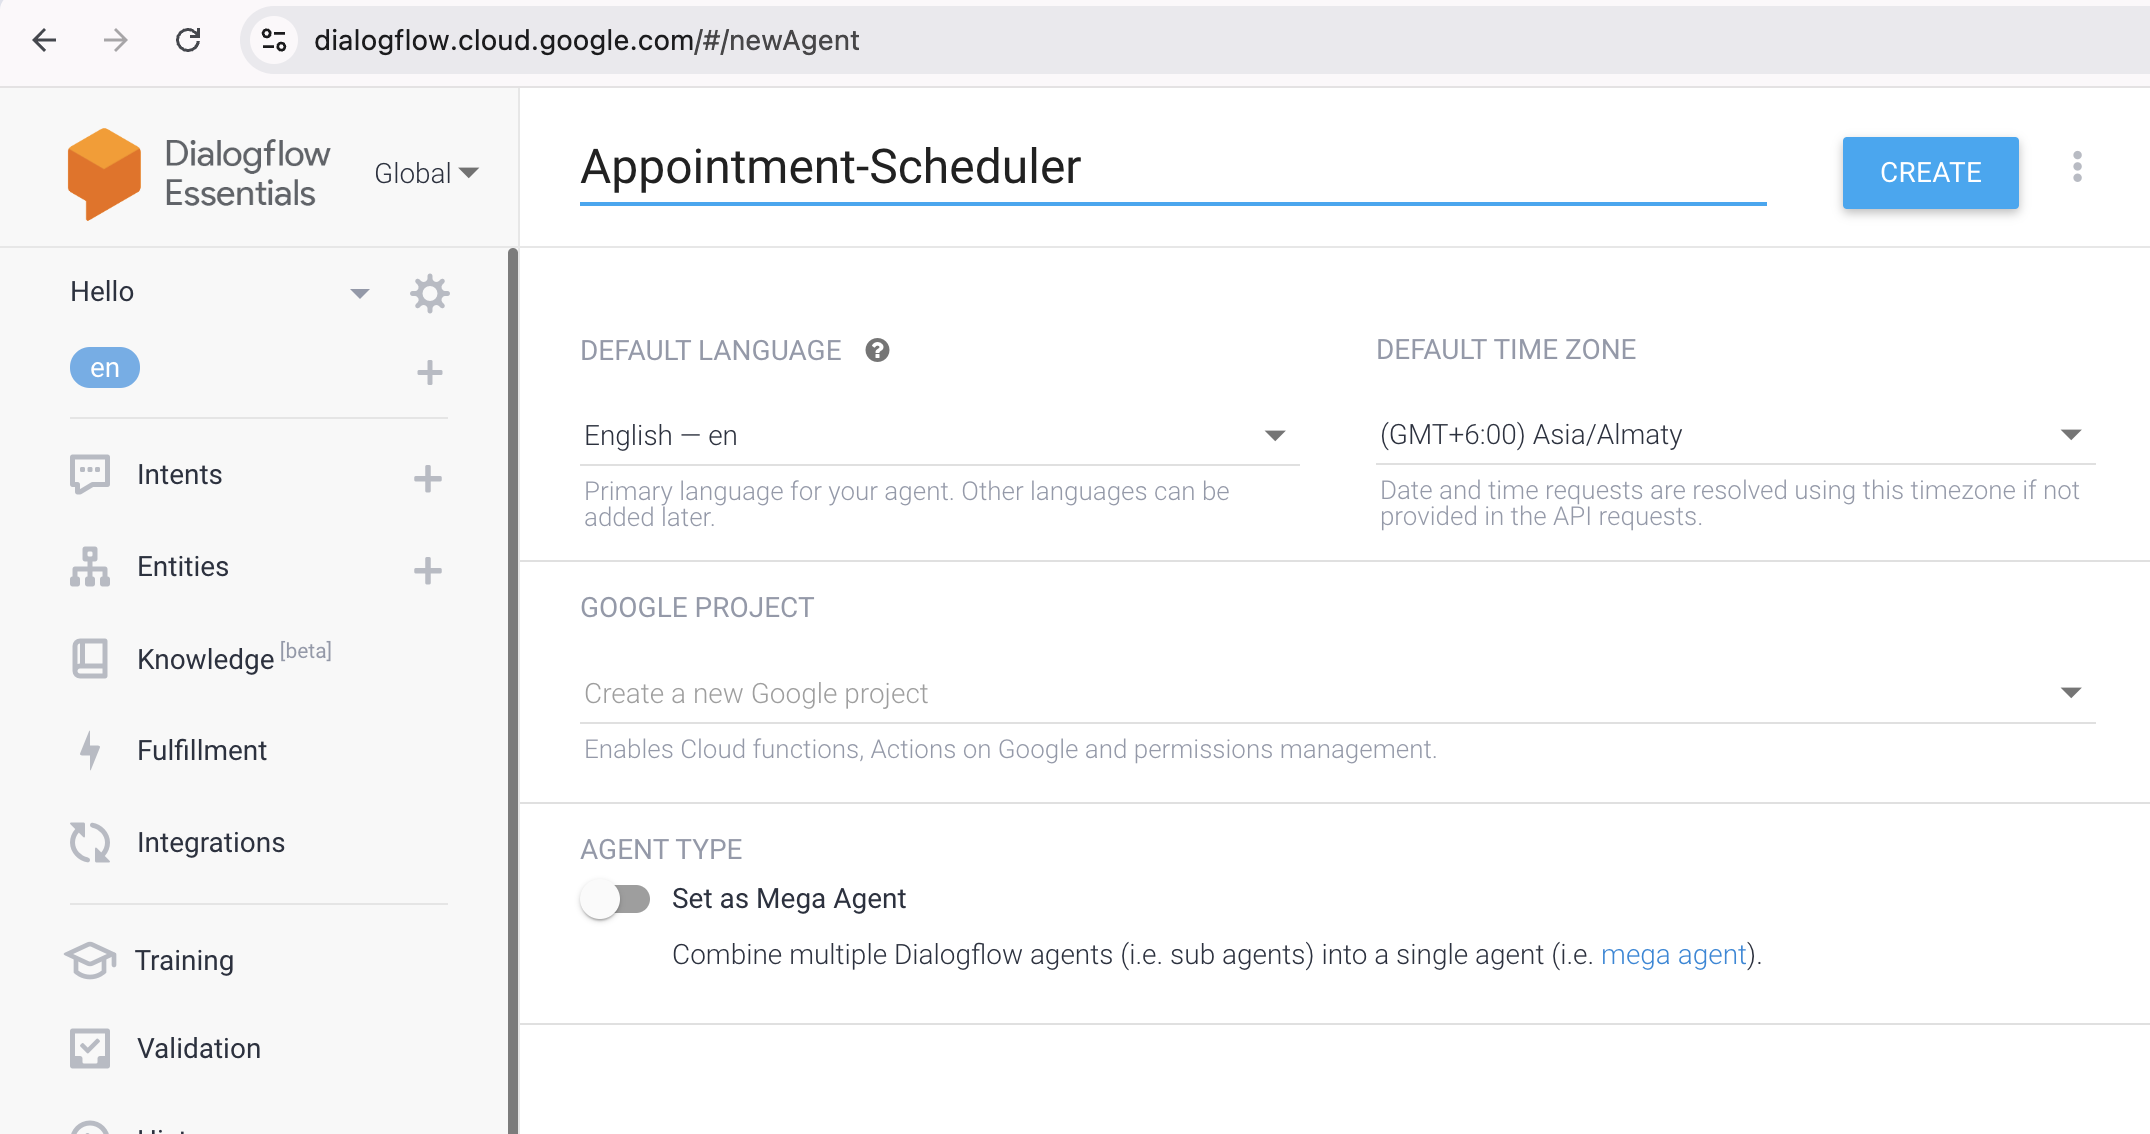
Now, we can create an agent by selecting the Create new agent option from the left sidebar menu.
Then you have to give the name to the agent like 'Appointment-Scheduler' and then click on the 'CREATE' button.
In the Dialogflow as a part of the agent there are two types of default intents −
Default Fallback Intent: This helps to collect inquiries that the bot does not grasp.
Default Welcome Intent: The default welcome intent is used whenever an end user initiates a discussion with your agent.

Test Your Agent
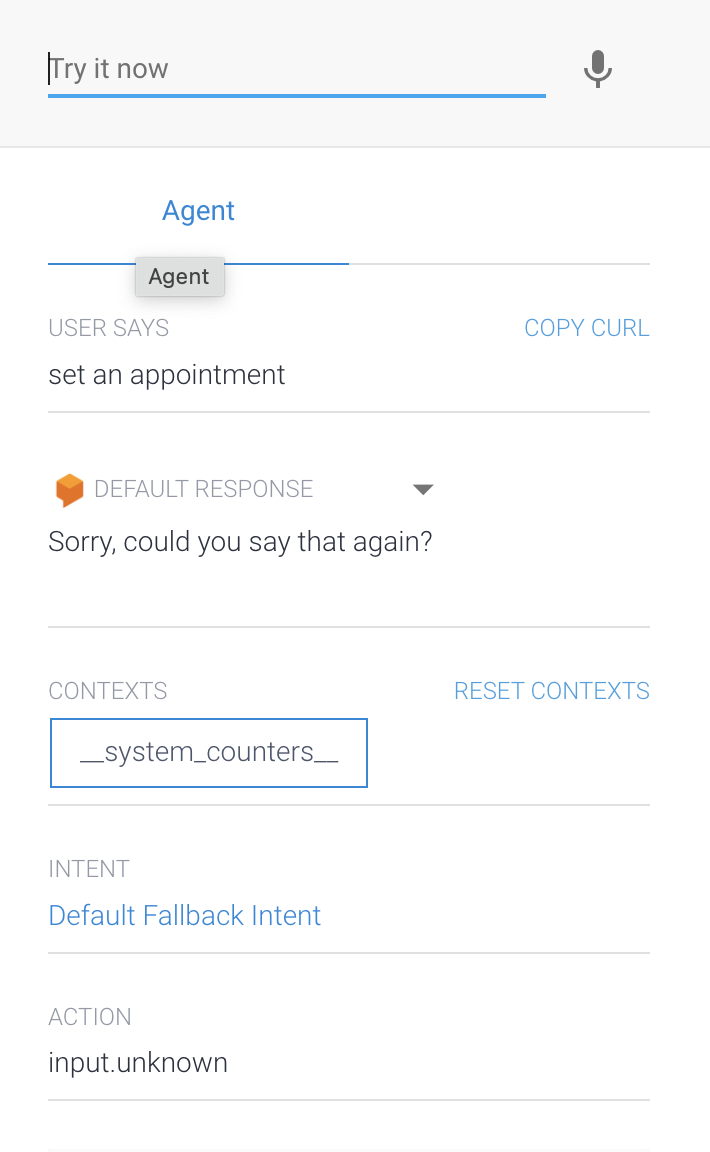
The Dialogflow console has a testing panel that can be used to test the agent. The testing panel is located on the right side of the Dialogflow console window.
To test the agent, simply type "Hi". The agent will then respond with the default greeting, as described in the default welcome intent. It will reply, "Greetings!"Hello! How can I help you?" We can update the response.

If we type "set an appointment," the agent will be unable to respond since it does not know what to do, therefore it will provide the default fallback intent. Because we do not have any intent to capture this particular query.
Create Intent
After creating the agent, we have to create the intent. So creating the intent involves multiple steps −
1. First you need to click the Intent option on the left side of the Dialogflow window then click the "CREATE INTENT".
2. Then you have to click on Training phrases and enter the following phrases:
I need to schedule an appointment on Saturday at 4 p.m.
Schedule an appointment for Monday at 5 p.m.
I'd like to set up an appointment for 2 p.m. on Wednesday.

When we enter all of these sentences, the date and time are quickly recognized as system entities, namely @sys.date and @sys.time.
3. Next, navigate to Responses and put "you are all set; see you then!" in the text response field. We can also say, "You are all set for $date at $time." When we add a dollar($) symbol, the system can quickly retrieve the entity data and click the Add Responses button.
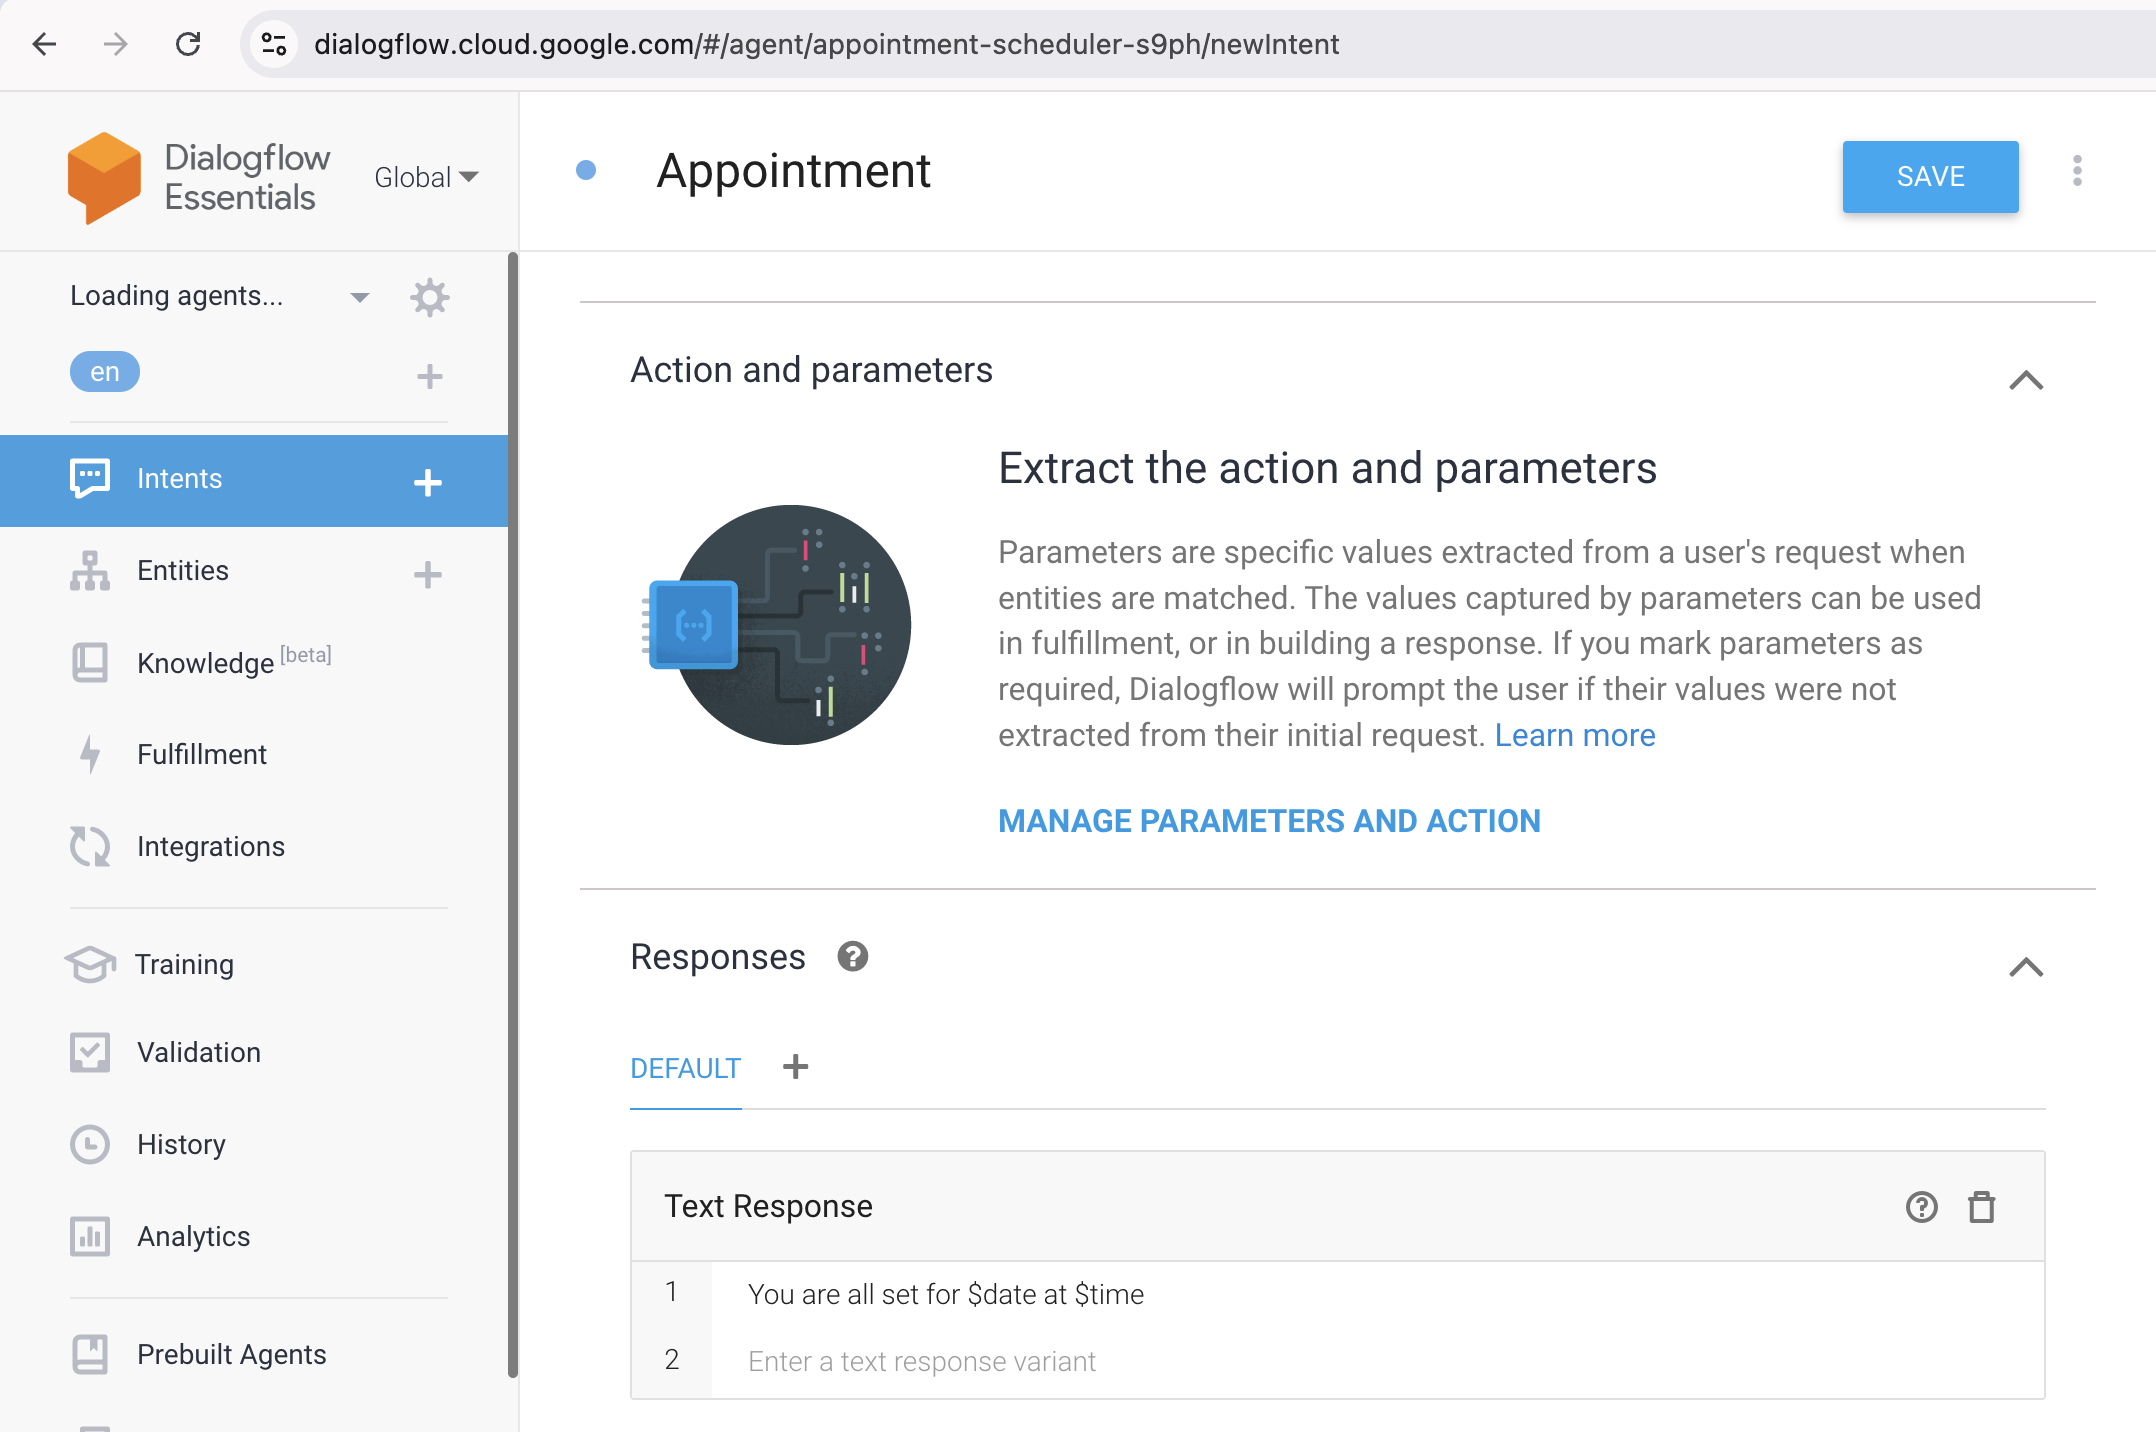
4. Then you have to click on the Save button. Then we will test the agent.

Slot Filling
Now "set an appointment" will be tested. This is unclear and you did not have to deal with the situation. So the default backup intent handles this and we can use slot filling to do so.
Slot filling helps you to design a parameter-value-collection conversation flow with a single goal. Slot filling is useful when we cannot finish an activity without a given set of parameters.
There are some steps for setting up slot filling.
1. First you have to select the 'Action and Parameter' option. Create the required entities and ask for the date and time in Dialogflow before responding.
2. For the date, we enter or type "What date?"
3. For time we will enter or type "what time will you like to come in?

4. Then we need to save it so click on the 'Save' button.
Test your Chatbot
Our appointment scheduling chatbot is now available, and we are testing it. To test the chatbot, insert the various chats into the Dialogflow console's testing panel.
User: "Hi"
ChatBot: "Greetings! How can I assist?
User: "Set an appointment"
Chatbot: "what date?"

User: "25 October"
Chatbot: "What time will you like to come in?"
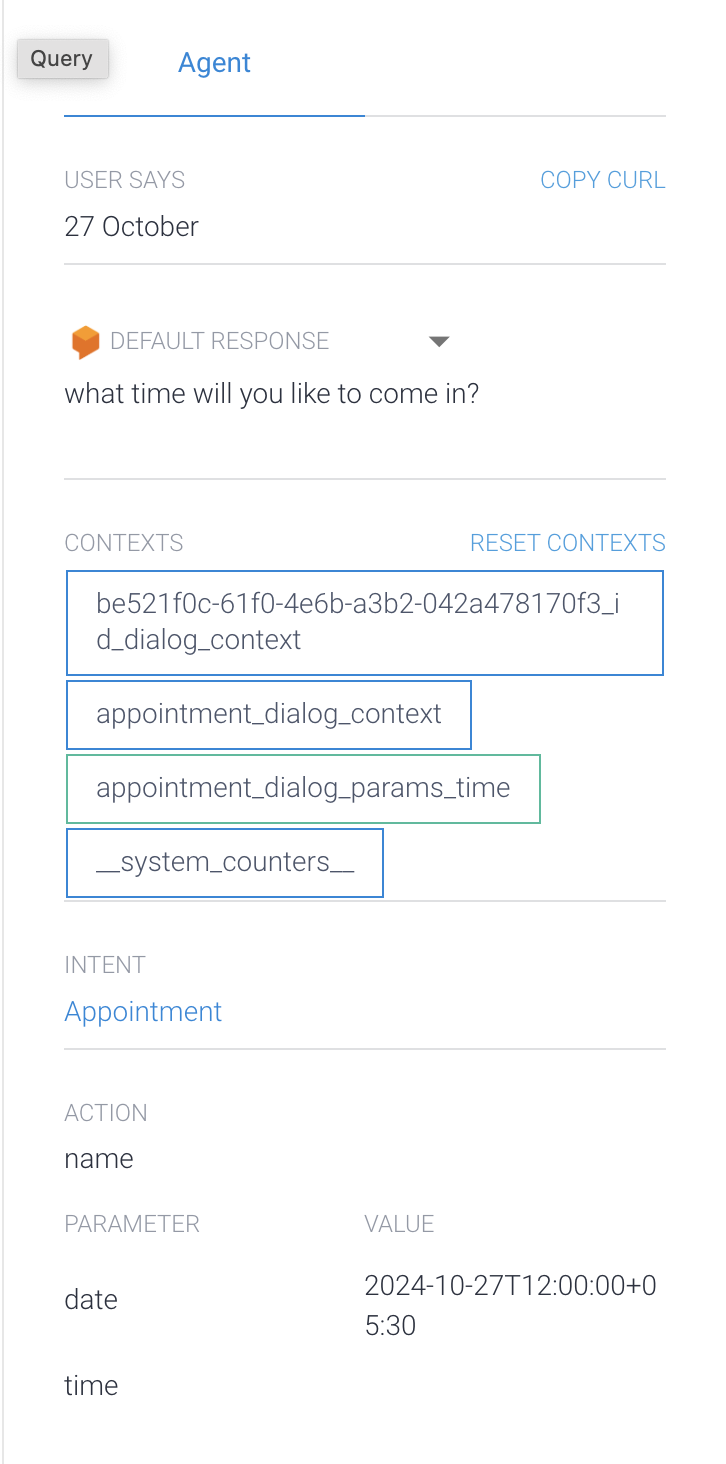
User: "8 AM"
Chatbot: "You are all set for 2024-10-27T12:00:00+05:30 at 08:00:00"

Now you are able to see in the above screenshot that the chatbot we have created is working correctly.
Enable Web Integration
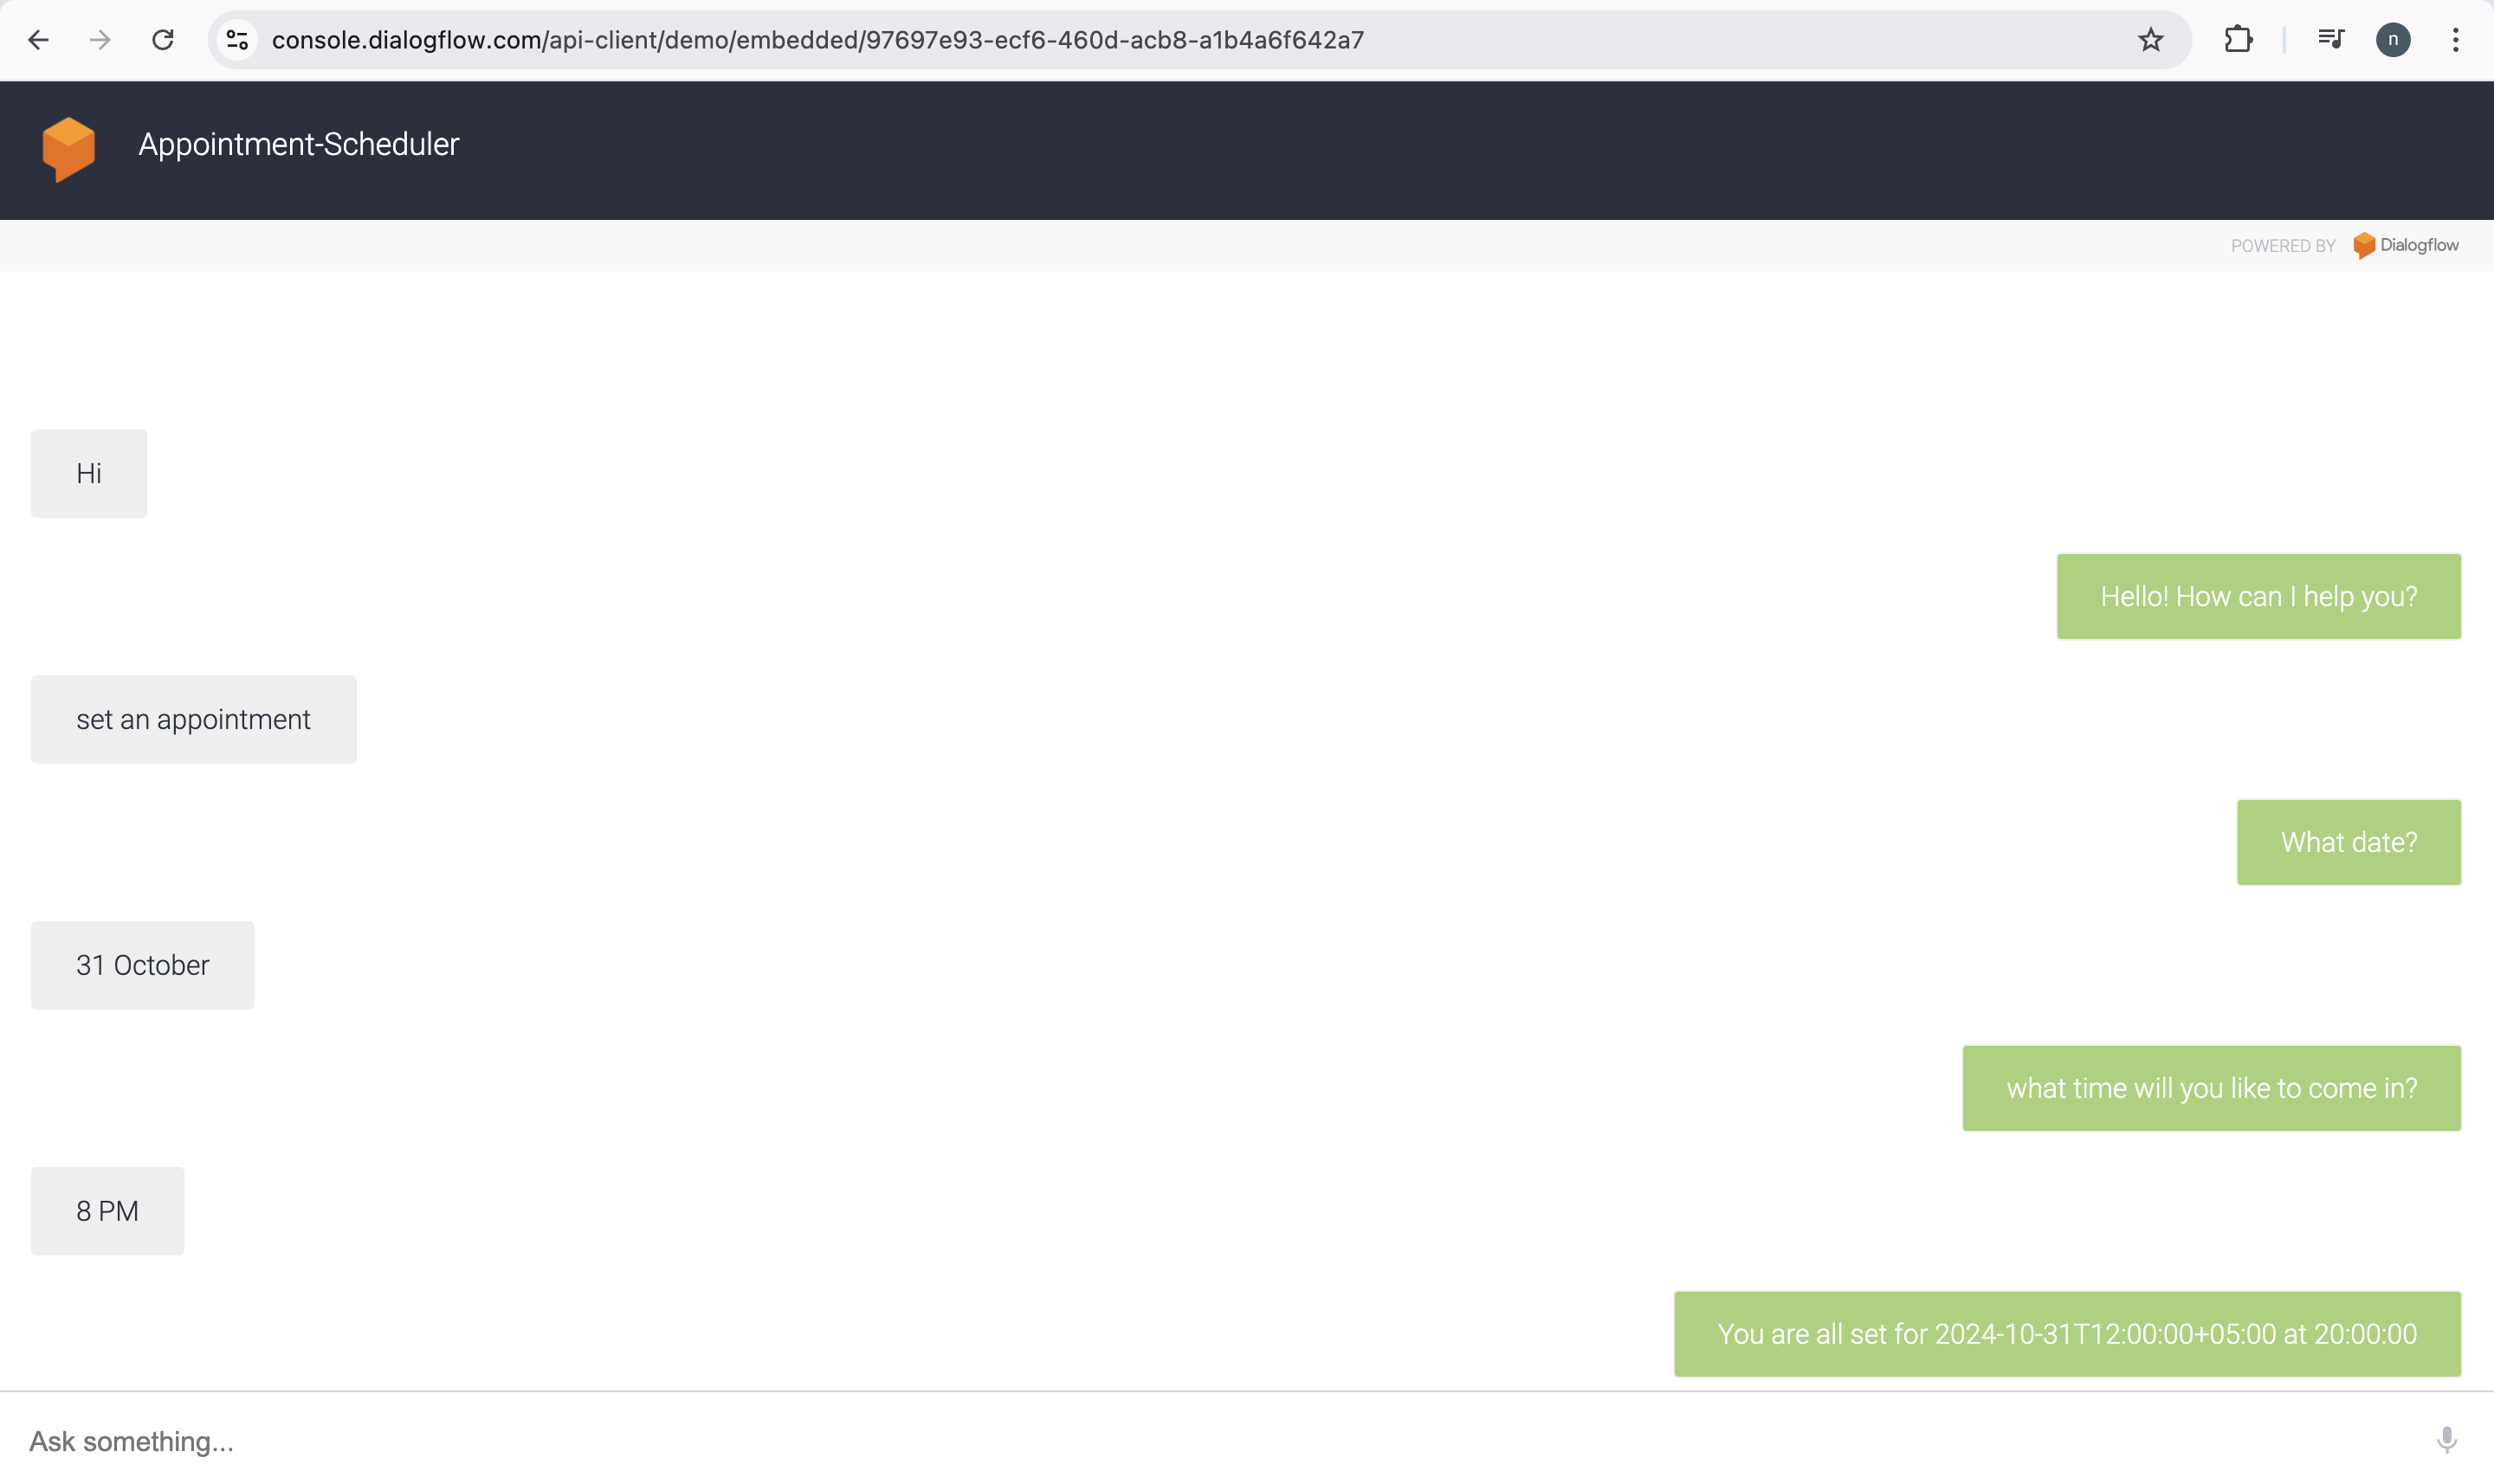
If we want to share the schedule with others then use the option labeled one-click integration. Dialogflow provides a variety of integration options for chatbots. Take a look at this example chatbot web interface.
Using one-click web integration requires multiple steps −
1. In the Dialogflow you have to click on the Integrations option present on the left side menu. Then you have to enable the Web Demo.

2. Next you have to launch the Web Demo so click on the URL. And click on the Enable button to enable your chatbot web integration.

3. After completing the above steps, we can use the chat interface. To use the chat interface, type something where it says 'Ask Something'. We can start using the chat interface with the exchange below.