- Axure RP - Home
- Introduction to Prototyping
- Axure RP - Introduction
- Axure RP - User Interface
- Axure RP - Basic Interactions
- Using Masters & Dynamic Panels
- Axure RP - Condition Logic
- Axure RP - Advanced Interactions
- Axure RP - Widget Library
- Axure RP - Exporting Prototype
Axure RP - Using Masters & Dynamic Panels
Many of the software development approaches, when it comes to user interfaces development, employ a common technique − Creating Masters.
A master is a reusable wireframe, which will be created once and used extensively thereafter on the subsequent pages. With Axure RP, when we create a master page, the changes made to this page will be applied to the pages where it is being used. Hence, it reduces time to a great extent for the components common to all pages.
To get started with Masters, you can focus on the Masters section (marked as 5) as highlighted in the following screenshot.
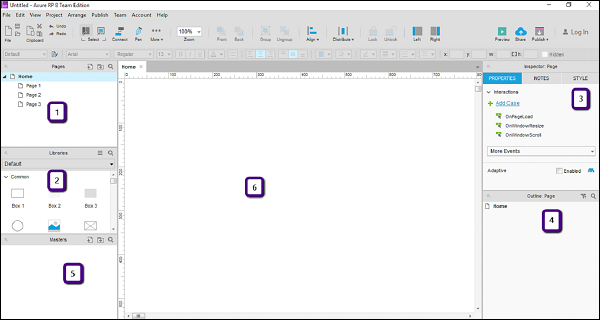
Use this masters section to −
Organize the prototypes masters by adding, deleting, or editing master page/folder.
Select a particular master for editing.
Dynamic Panels
In Axure RP, as we have seen in the previous chapter, there are different states associated with a given widget. For consolidating/organizing the states of a particular widget or set of widgets, we need a container/placeholder. Dynamic panels serve as the container/placeholder for the states of a widget.
Let us understand the dynamic panel better using an example. We will continue from our menu bar example.
The addition in this example will be an image area and a button underneath the menu bar. Use the widget Placeholder for the image area and button under common widgets. Name the placeholder as ImageAreaPlaceholder, button as showImageButton.
Also, let us have the menu bar added into masters. Right-click on the menu bar and click Convert to Master. A dialog box will appear prompting the name for the master. Add the name as menuBarMaster.
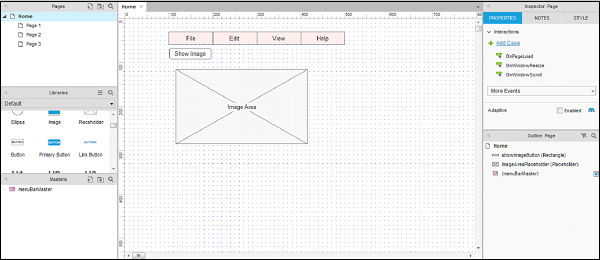
As shown in the above screenshot, the menu bar turns pink and the entry for the masters has been added.
Now, let us create a dynamic panel. The context for dynamic panel is, you want to control the visibility of image area based on Show Image button click. Having a dynamic panel will allow for the flexibility of image area.
Let us see how to create the dynamic panel. Right-click on the Image Area, the context menu will appear, select Convert to Dynamic Panel.
The dynamic panel will be under Outline: Page. Also under Inspector, it shows the dynamic panel. Name the dynamic panel as showImageDynamicPanel. The name for this dynamic panel will get updated under Outline: Page section.
In the design area, right-click on Show Image dynamic panel to see the context menu. Select Set Hidden, the dynamic panel will disappear from the screen.
The dynamic panel can be accessed by double-clicking under Outline: Page.

Now, let us provide a click event to the button. Click the Show Image button, under Inspector → Properties, double-click OnClick interaction.
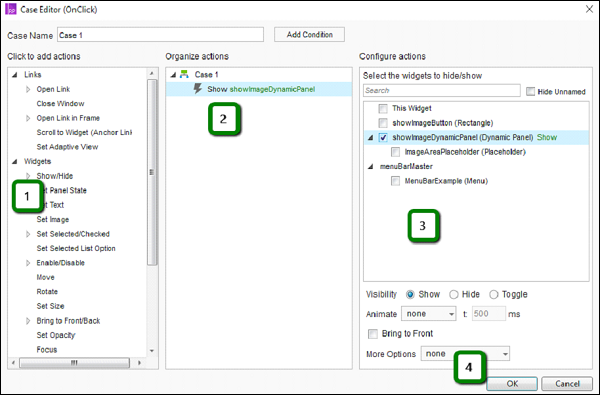
As shown in the above screenshot, click the Show/Hide under Widgets. It will automatically show the available widgets to configure actions. Check select showImageDynamicPanel. Click OK.
Now, click Preview. On the preview screen, click Show Image. Another interaction for a button is finally created.
