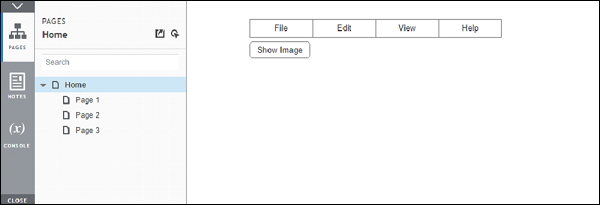
- Axure RP - Home
- Introduction to Prototyping
- Axure RP - Introduction
- Axure RP - User Interface
- Axure RP - Basic Interactions
- Using Masters & Dynamic Panels
- Axure RP - Condition Logic
- Axure RP - Advanced Interactions
- Axure RP - Widget Library
- Axure RP - Exporting Prototype
Axure RP - Condition Logic
In this chapter, we will discuss the conditional logic used in Axure RP.
If - Then - Else in Axure
Just like any other programming tools, Axure also supports conditional logic to create enhanced interactions in prototypes. Once you are familiar with how you can provide interactions, providing conditional logic to the interactions is the next level.
Following is the simple and concise flow for conditional logic −
- If, a particular widget/screen is clicked
- Then, perform a particular action/interaction
- Else, keep/change the state of the widget or the screen
To understand this better, let us resume our flow from the previous example. For this purpose, its required for us to get acquainted with the Condition Builder.
The Condition Builder
Double-click any of the interactions, for instance OnClick. You will be able to see the Case Editor as shown in the following screenshot.
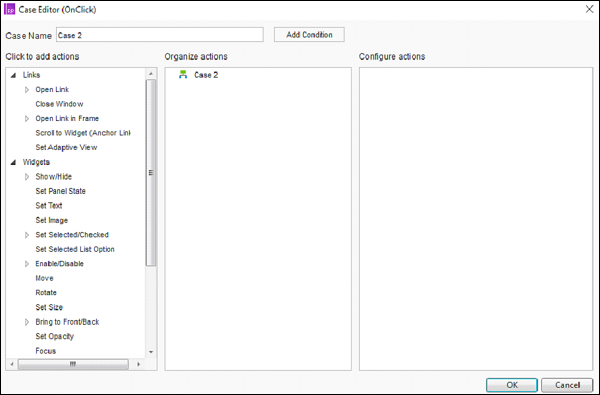
Click the button Add Condition near the Case Name. It will show below in the dialog box.
As shown under the Description, the condition builder will create the If-Then-Else flow as per the conditions chosen in the condition section.
Let us create a condition on this button.
We want to show the hide image button, once the dynamic panel is visible. We made the dynamic panel visible on the Show Image button click in the previous example. Now, let us make another button Hide Image visible.
Close the condition builder, and come back to the design area.
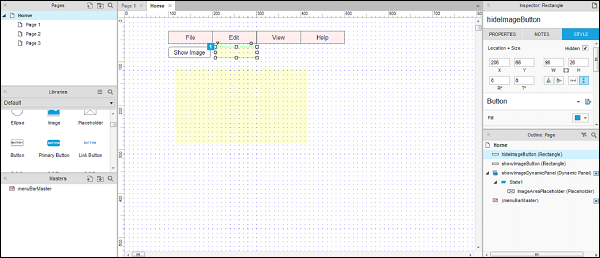
Insert the Hide Image button from the Libraries under common libraries. To reiterate, it is a best practice to name the UI element right after youve inserted it in the design area.
Right-click the Hide Image button and click Set Hidden. The button will be hidden from the design area as shown in the following screenshot.
Now, let us come back to the interactions for Show Image button.
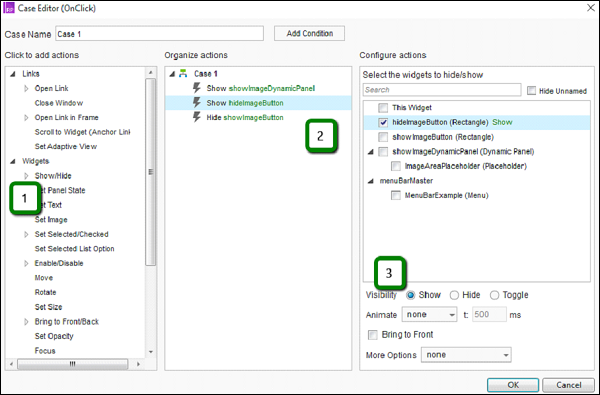
First, under the Show Image button interactions, double-click Case 1, you will be able to see the case editor. Use the Show/Hide action, to select hideImageButton and set its visibility to show.
Similarly, using the Show/Hide action, select showImageButton and set its visibility to hide.
We have managed the visibility of Hide Image button such that, when we click the Show Image button, the button will be shown.
A complete condition will be as shown in the following screenshot.
Let us build the condition.
Under the design area, click the Hide Image button. From the Inspector section, click Add Case.
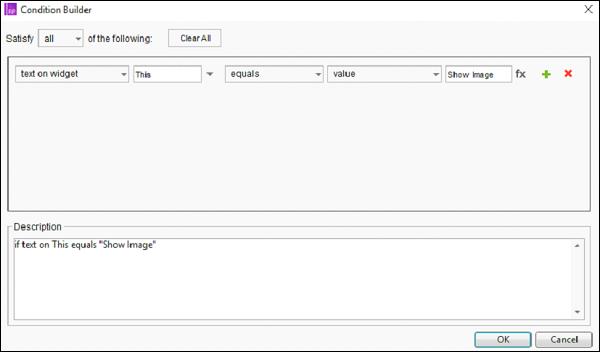
Under Add Case, click Add Condition button. As per the background provided earlier, create the condition set using the dropdown values in the Condition Builder.
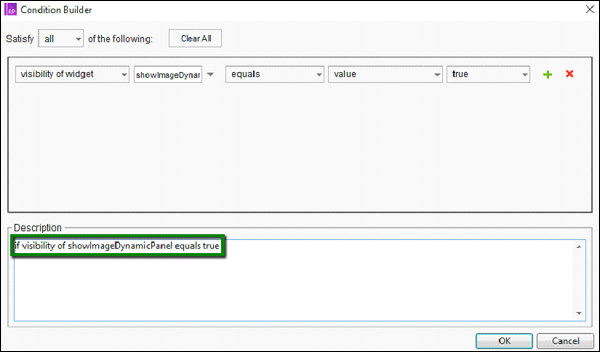
In simple words, with the above condition, we are checking whether the dynamic panel showImageDynamicPanel is visible or not
Now, let us design the interaction for Hide Image button, configure it as follows −
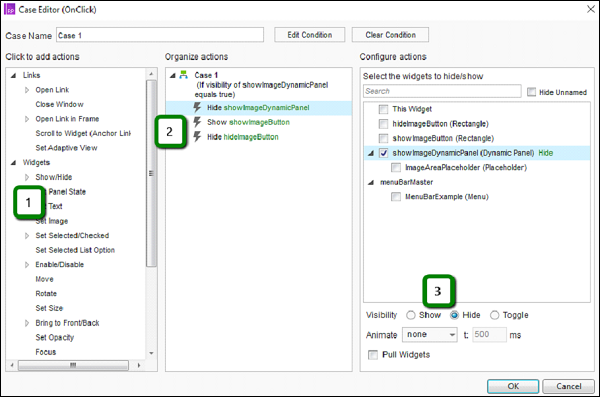
- Select Show/Hide action.
- Select the widget showImageDynamicPanel.
- Set the visibility to Hide.
Similarly, repeat the drill for showing showImageButton and hiding the hideImageButton.
Once done, click OK to close Case Editor.
Then, click Preview to see the changes done.
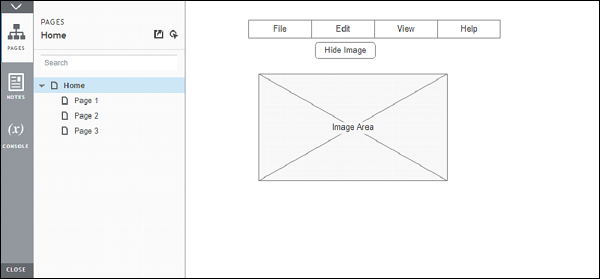
The successful results will be as shown in the following screenshots.
When the Show Image button is clicked −
When the Hide Image button is clicked −