- AWS Lambda - Home
- AWS Lambda - Overview
- AWS Lambda - Environment Setup
- AWS Lambda - Introduction
- Building the Lambda function
- Function in NODEJS
- Function in Java
- Function in Python
- Function in Go
- Function in C#
- Configuring Lambda Function
- Creating & Deploying using AWS Console
- Creating & Deploying using AWS CLI
- Creating & Deploying using Serverless Framework
- AWS Executing & Invoking Lambda Function
- Deleting Lambda Function
- Working with Amazon API Gateway
- Lambda Function with Amazon S3
- Lambda Function with Amazon DynamoDB
- Lambda Function with Scheduled Events
- Lambda Function with Amazon SNS
- Lambda Function with CloudTrail
- Lambda Function with Amazon Kinesis
- Lambda Function with Custom User Applications
- AWS Lambda@Edge with CloudFront
- Monitoring and TroubleShooting using Cloudwatch
- AWS Lambda - Additional Example
Using Lambda Function with Amazon DynamoDB
DynamoDB can trigger AWS Lambda when the data in added to the tables, updated or deleted. In this chapter, we will work on a simple example that will add items to the DynamoDB table and AWS Lambda which will read the data and send mail with the data added.
Requisites
To use Amazon DB and AWS Lambda, we need to follow the steps as shown below −
Create a table in DynamoDB with primary key
Create a role which will have permission to work with DynamoDBand AWS Lambda.
Create function in AWS Lambda
AWS Lambda Trigger to send mail
Add data in DynamoDB
Let us discuss each of this step in detail.
Example
We are going to work out on following example which shows the basic interaction between DynamoDB and AWS Lambda. This example will help you to understand the following operations −
Creating a table called customer in Dynamodb table and how to enter data in that table.
Triggering AWS Lambda function once the data is entered and sending mail using Amazon SES service.
The basic block diagram that explains the flow of the example is as shown below −

Create Table in DynamoDB with Primary Key
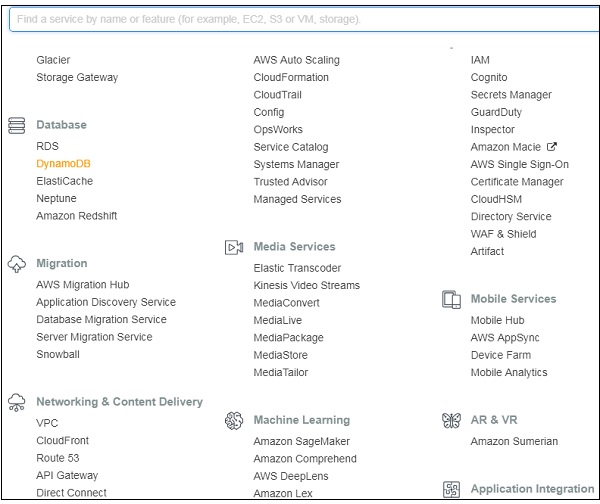
Log in to AWS console. Go to AWS Services and select DynamoDB as shown below. Select DynamoDB.
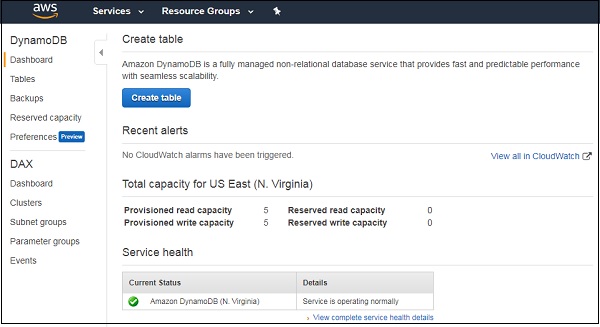
DynamoDB shows the options as shown below −
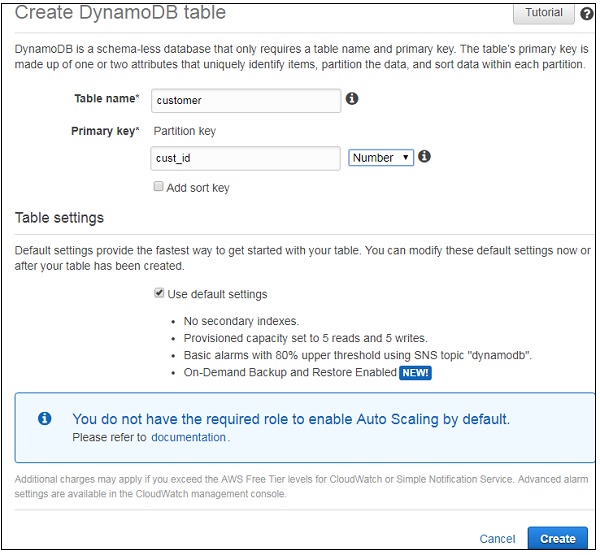
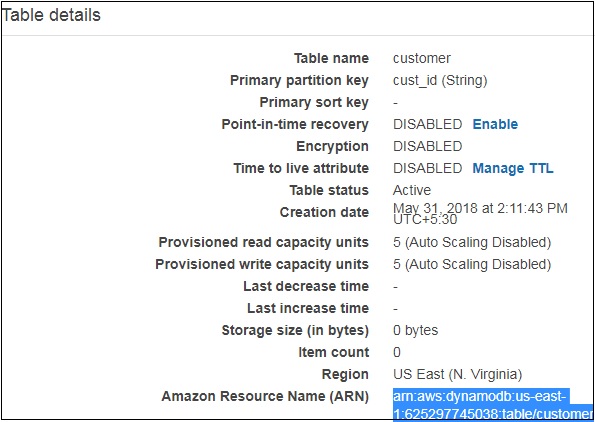
Now, click Create table to create the table as shown. We have named the table as customer with primary key for that table as cust_id. Click on Create button to add the table to dynamodb.
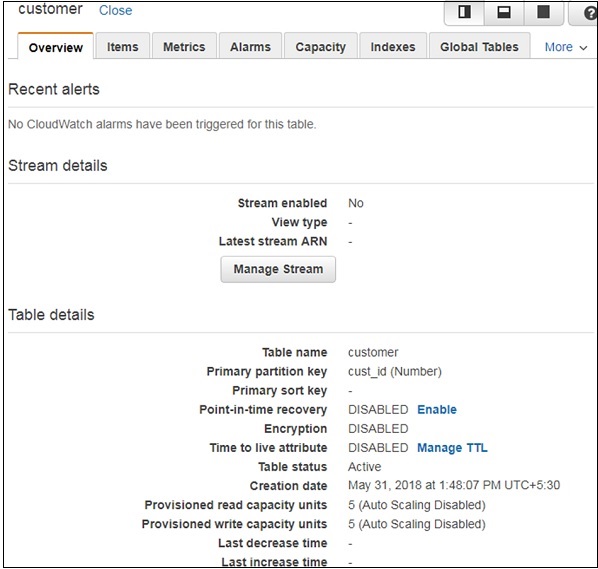
The table created is as shown below −

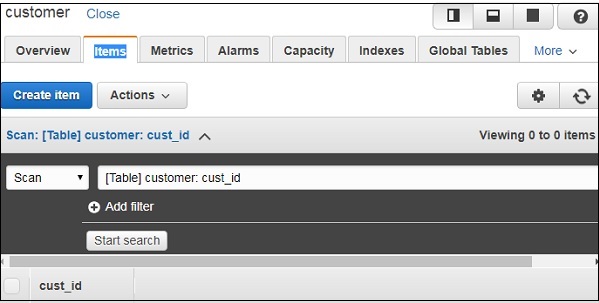
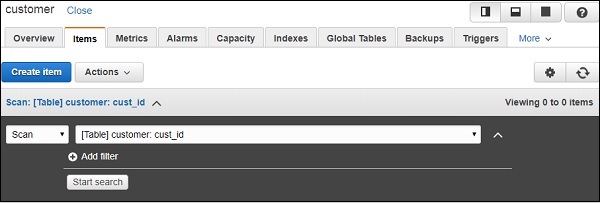
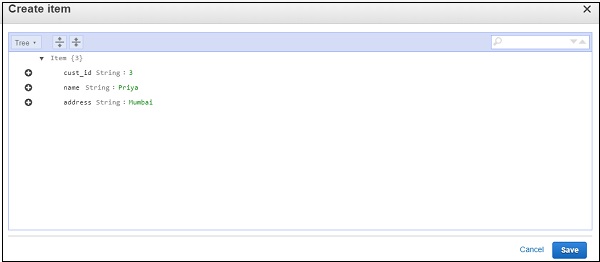
We can add items to the table created as follows −
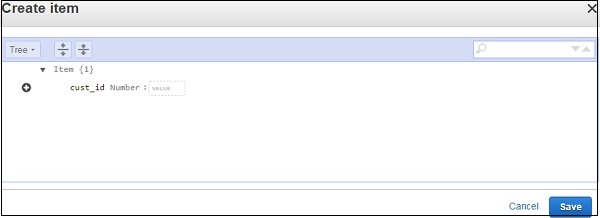
Click Items and click Create item button as shown −
Creating Role with Permissions to Work with DynamoDB and AWS Lambda
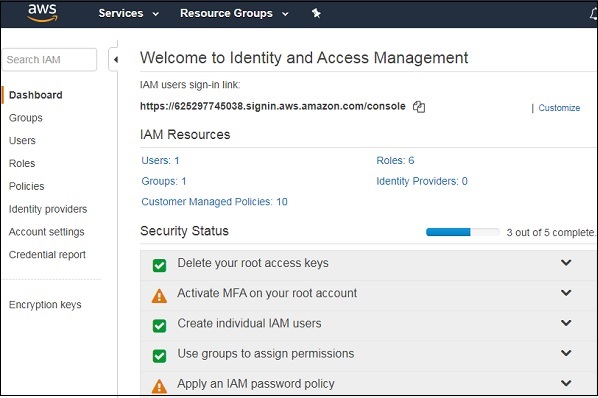
To create role, Go to AWS services and click IAM.
Let us create a policy to be used only for the DynamoDB table created earlier −
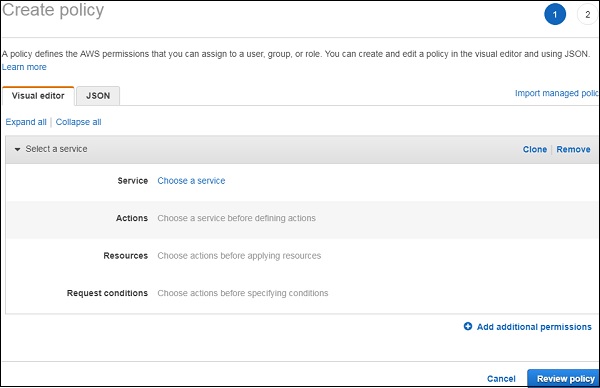
Now, choose a Service. Observe that the service we have selected is DynamoDB. For Actions we have taken all Dynamodb actions ie access to list, read and write. For resources, we will select the table resource type actions. When you click it, you can see a screen as follows −
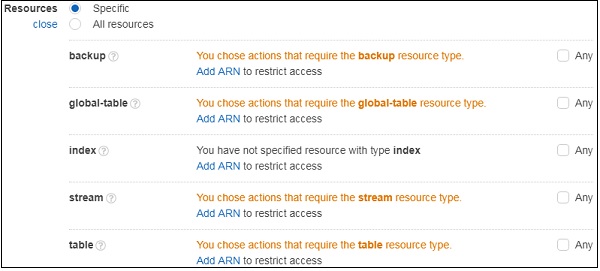
Now, select table and Add ARN to it as shown. We will get ARN details from customer table created as shown below −
Enter arn details here −

Click Add button to save the changes. Once done Click on Review policy. Enter the name of the policy, description etc as shown below −
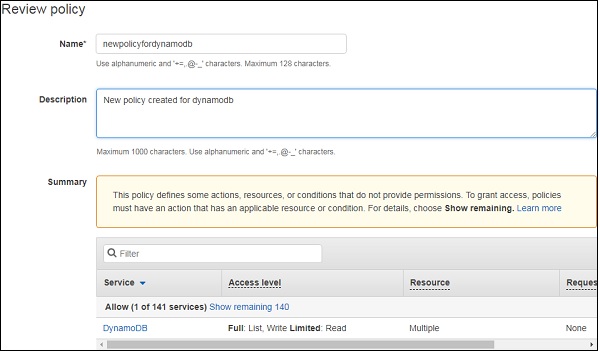
Click on create policy to save it. Add the policy to the role to be created. Select Role from left side and enter the details.
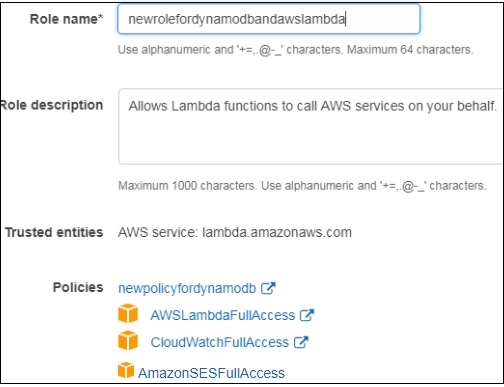
Observe that the policies added are newpolicyfordynamdb, awslambdafullaccess, cloudwatchfullaccess and amazonsesfullaccess. Add the role and will use it while creating AWS Lambda function.
Create Function in AWS Lambda
Thus, we have created Lambda function called newlambdafordynamodb as shown.

Now, let us add DynamodDB trigger to the AWS Lambda created. The runtime we shall use is Node.js.

You can find the following details in Dynamodb trigger that are to be configured for AWS Lambda −
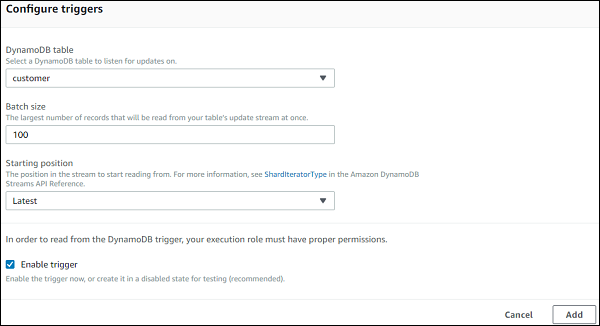
Now, simply click Add to add the trigger to AWS Lambda.
AWS Lambda Trigger to Send Mail
AWS Lambda will get triggered when data is inserted intoAWS Lambda. The event parameter will have the dynamodb data inserted. This will read the data from the event and send email.
Sending an email
To send email, you need to follow the steps given below −
Step 1
Go to AWS service and select SES (simple email service). Validate the email to which we need to send an email as shown −

Step 2
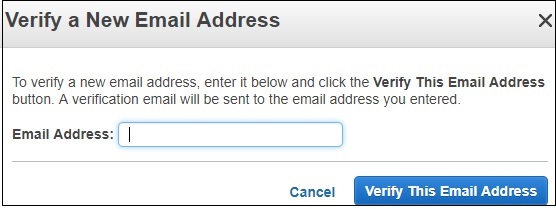
Click the button Verify a New Email Address to add the email address.
Step 3
Enter an email address to verify it. The email address will receive and activation mail from Amazon which needs to be clicked. Once the activation is done, the email id is verified and can be used with AWS services.
Step 4
The AWS Lambda code which reads data from the event and sends email is given below −
var aws = require('aws-sdk');
var ses = new aws.SES({
region: 'us-east-1'
});
exports.handler = function(event, context, callback) {
console.log(event);
let tabledetails = JSON.parse(JSON.stringify(event.Records[0].dynamodb));
console.log(tabledetails.NewImage.address.S);
let customerid = tabledetails.NewImage.cust_id.S;
let name = tabledetails.NewImage.name.S;
let address = tabledetails.NewImage.address.S;
var eParams = {
Destination: {
ToAddresses: ["xxxxx@gmail.com"]
},
Message: {
Body: {
Text: {
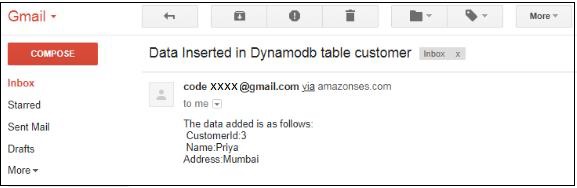
Data: "The data added is as follows:\n CustomerId:"+customerid+"\n Name:"+name+"\nAddress:"+address
}
},
Subject: {
Data: "Data Inserted in Dynamodb table customer"
}
},
Source: "xxxxx@gmail.com"
};
console.log('===SENDING EMAIL===');
var email = ses.sendEmail(eParams, function(err, data) {
if (err) console.log(err);
else {
console.log("===EMAIL SENT===");
console.log("EMAIL CODE END");
console.log('EMAIL: ', email);
context.succeed(event);
callback(null, "email is send");
}
});
}
Now, save the Lambda function and data in DynamoDB table.
Add Data in DynamoDB
Use the following sequence to add data in DynamoDB.
Step 1
Go to the table customer created in Dynamodb.
Step 2
Click Create item.
Step 3
Click Save button and check the email id provided in AWS Lambda to see if the mail has been sent by AWS Lambda.