- AWS Lambda - Home
- AWS Lambda - Overview
- AWS Lambda - Environment Setup
- AWS Lambda - Introduction
- Building the Lambda function
- Function in NODEJS
- Function in Java
- Function in Python
- Function in Go
- Function in C#
- Configuring Lambda Function
- Creating & Deploying using AWS Console
- Creating & Deploying using AWS CLI
- Creating & Deploying using Serverless Framework
- AWS Executing & Invoking Lambda Function
- Deleting Lambda Function
- Working with Amazon API Gateway
- Lambda Function with Amazon S3
- Lambda Function with Amazon DynamoDB
- Lambda Function with Scheduled Events
- Lambda Function with Amazon SNS
- Lambda Function with CloudTrail
- Lambda Function with Amazon Kinesis
- Lambda Function with Custom User Applications
- AWS Lambda@Edge with CloudFront
- Monitoring and TroubleShooting using Cloudwatch
- AWS Lambda - Additional Example
Using AWS Lambda@Edge with CloudFront
Lambda@Edge is an addition to the AWS Lambda compute service which is used to customize the content that cloudfront delivers.
The block diagram which shows the working of AWS Lambda with cloudfront from AWS is shown below −
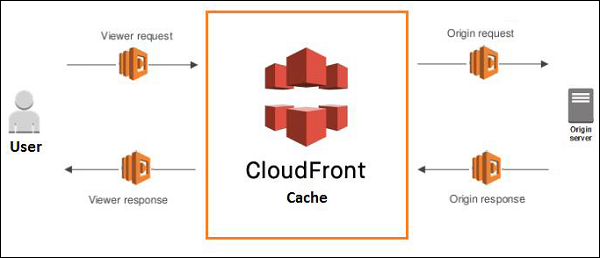
There are four ways in which AWS Lambda can be used −
Viewer Request − End user makes the request called Viewer Request to CloudFront
Origin Request − CloudFront forwards the request to the origin
Origin Response − CloudFront receives the response from the origin
Viewer Response − CloudFront send the response to the viewer
We can use Lambda@Edge for the following purposes −
To change the headers at the request and response time.
Add cookies details to the headers. Carry out AB testing based on the request and response.
Redirect the URL to another site, based on the header details.
We can fetch the user-agent from the headers and find out the details of the browser, OS, etc.
Requisites
To start with working on CloudFront and Lambda@Edge, we need the following −
Create S3 storage bucket with file details
Create role which will allow permission to work with CloudFront and Lambda@Edge
Create CloudFront distribution
Create lambda function
Add lambda function details to cloudfront
Check the cloudfront url in browser
We will work on an example with CloudFront and Lambda@Egde, wherein we will host the page and change the response when detected as desktop and devices.
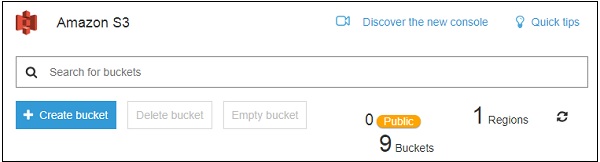
Create S3 Storage Bucket with File Details
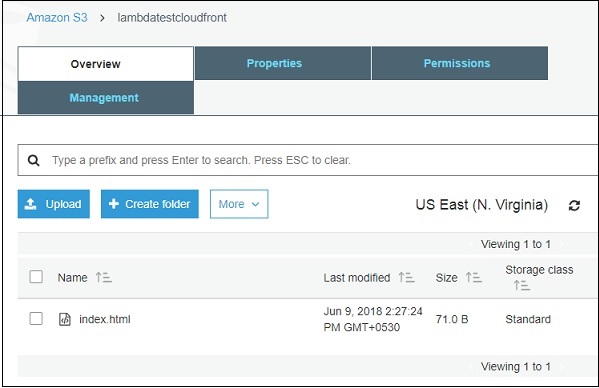
Login to AWS console and create a bucket in S3 and add the . html file which you want to display.
Click on S3 and Create bucket as shown below −
Now, click Create bucket button and add the details of the bucket as shown below −
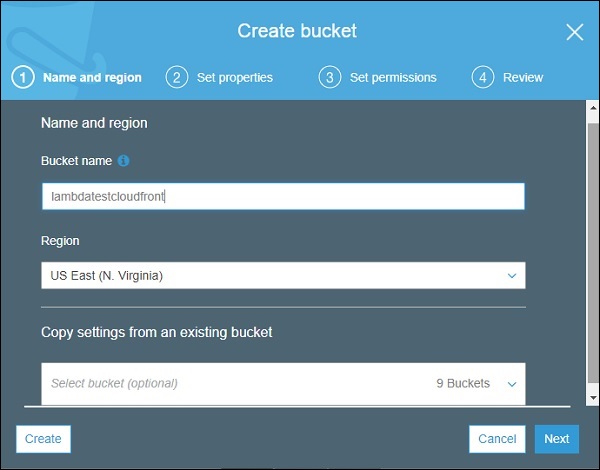
Click on Create button and upload the .html in it.
Create Role
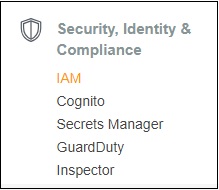
Go to AWS console and click IAM.
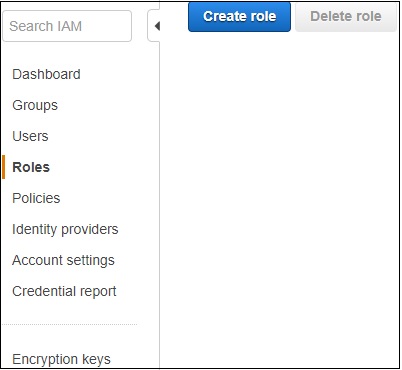
Now, click Roles -> Create role button as shown −
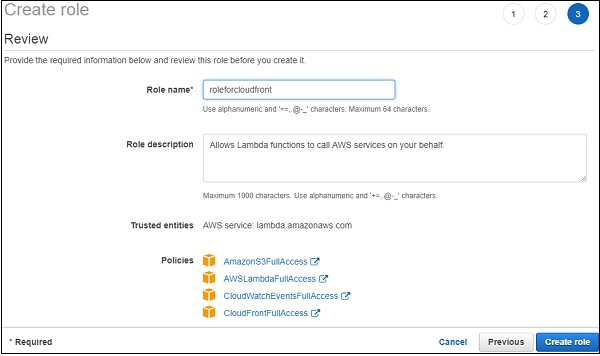
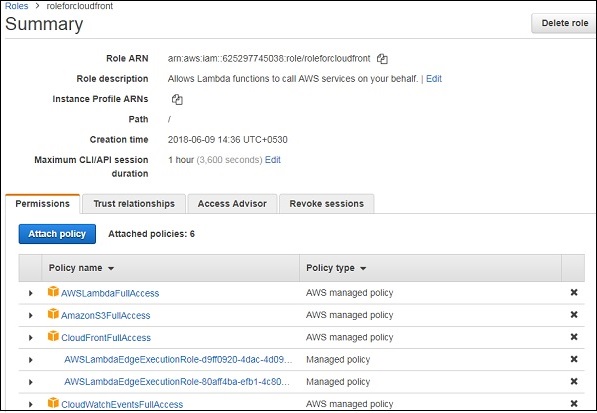
Choose the permission for S3, Lambda and Cloudfront. It is a good practice to create the policy giving permission to only the required function, storage by using the ARN details.
In the example discussed below, we are showing the Full Access permission. Policies for the role name role for cloudfront is added as shown above. Click on Create role.
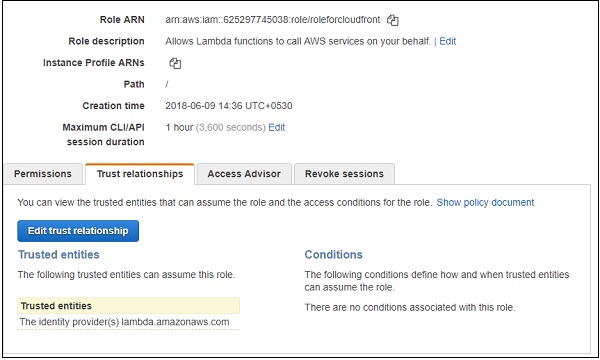
All the policy required for lambda@edge and cloudfront are as shown above. There is a additional step to be done here since incase of cloudfront the url will be available across region and it needs a trust relationship between the services we are using.
Now, for the role created, click on Trust relationships tab as shown −
Click on Edit Trust Relationship as shown below −
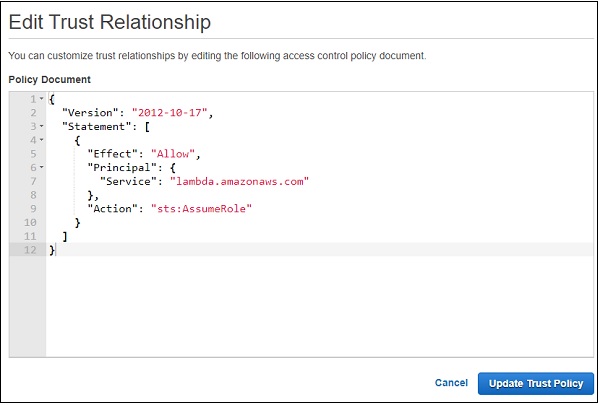
It displays a policy document. We need to add the other services in the Principal -> Service which we are planning to use. The final trust relationship policy document is as shown below −
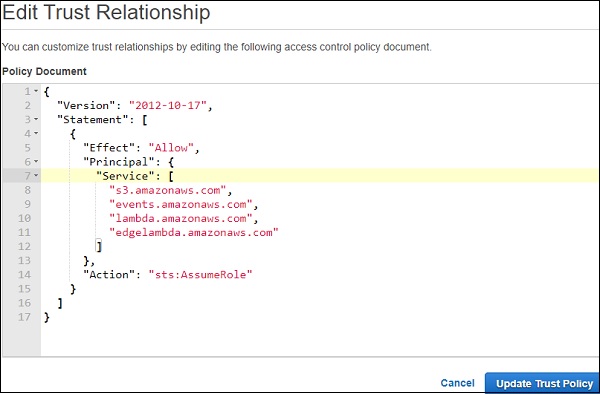
Click Update Trust Policy button to save the changes.
Create CloudFront Distribution
Go to CloudFront service as shown below −
Click on CloudFront service and click on Create Distribution −

Origin Settings, Behaviour Settings and Distribution settings
Let us look into these settings one by one −
Origin Settings
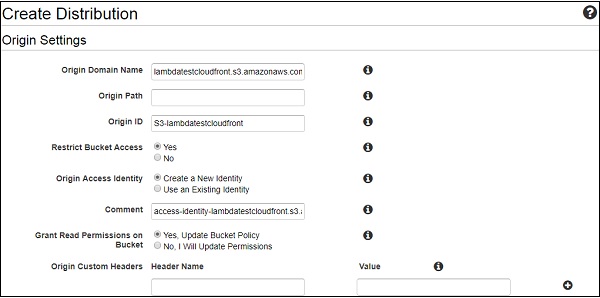
Various parameters of Origin settings are explained as below −
Origin Domain Name − This is the name of the S3 bucket where we have stored the html files. We can also store images, if any, in the S3 bucket by creating folders of our choice.
Origin Path − Here you need to enter the name of the folder where the files are stored. At present, we do not have this folder, so we will keep it blank for now.
Origin ID − It gets populated when the origin domain name is selected. You can change the id as per your choice.
Restrict Bucket Access − In this, we will choose the option yes. Here we need security for the S3 bucket so that no one has the access to the S3 bucket. For this option there are some more options populated like Origin Access Identity, Comment and Grant Read Permission on Bucket.
Origin Access Identity − We have used create a new identity option. You can also choose the existing identity. This creates a new identity which is used by CloudFront to read the details from S3 bucket.
Grand Read Permission on Bucket − For this, choose the option Yes.
Origin Custom Headers − We will keep the headers blank here, as we do not need the details right now.
Next, let us discuss and fill up the Behaviour Settings for Cloudront distribution −
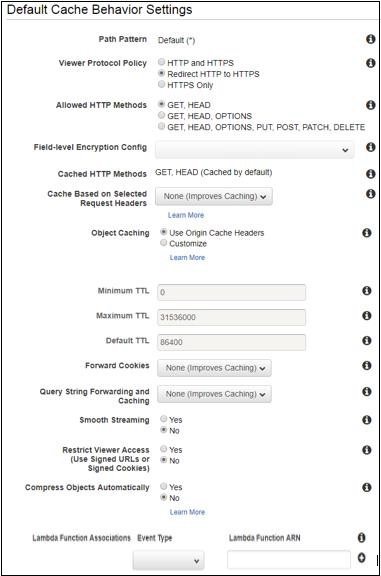
Now, select the protocol https or http, and the caching option. Note that the default caching is 86400 or 24 hrs. You can change this value as per the requirement.
Click Object Caching (customize option) to change the caching. You can use smooth streaming in case if there any videos on your page. Here, we are keeping the default option available. Once the lambda function is created, its details will be added.
The details for distribution settings are shown below −
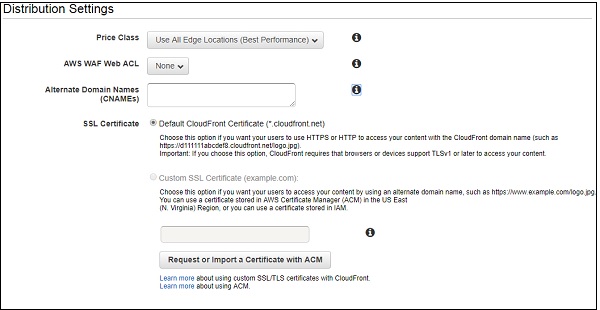
Various parameters of distribution settings are explained below −
Price class − It has details like the origin of users traffic. Note that here we have selected the default one - Use All Edge Locations.
AWS WAF Web ACL − This is for web application firewall selection. Here, it has option as None. First, we need to create the firewall in AWS. It provides security to the site.
Alternate Domain Names − Here you can specify the domain name if you have.
SSL Certificate − This has all the details to be selected for SSL certificate. We will keep the default ones.
Default Root Object − Here we will specify the filename which we have uploaded in S3. For this, we need the content from the .html to be displayed by default.
For the rest, we will keep the default setting.
Click Create Distribution button to add the distribution.

Note that the distribution will take some time to show the status as deployed.
Create AWS Lambda Function
Go to AWS console and create Lambda function.

In AWS Lambda code, we will take the request headers and check the user-agent. If the user-agent is from desktop, we will change the response to display message as DESKTOP : Welcome to AWS Lambda with Cloudfront! and if device the message will beMOBILE DEVICES : Hello from Lambda@Edge!
The corresponding AWS Lambda code is as shown below −
let content = `
<\!DOCTYPE html>
<html lang="en">
   <head>
      <meta charset="utf-8">
      <title>Simple Lambda@Edge Static Content Response</title>
      <meta name="viewport" content="width=device-width, initial-scale=1.0">
   </head>

   <body>
      <h1>MOBILE DEVICES : Hello from Lambda@Edge!</h1>
   </body>
</html>
`;
let content1 = `
<\!DOCTYPE html>
<html lang="en">
   <head>
      <meta charset="utf-8">
      <title>Simple Lambda@Edge Static Content Response</title>
      <meta name="viewport" content="width=device-width, initial-scale=1.0">
   </head>

   <body>
      <h1>DESKTOP : Welcome to AWS Lambda with Cloudfront!</h1>
   </body>
</html>
`;
exports.handler = (event, context, callback) => {
   let request = event.Records[0].cf.request;
   let finalrequest = JSON.stringify(request);
   let headers = request.headers;
   let useragent = JSON.stringify(headers["user-agent"][0].value);
   let str = "";
   if(/Android|webOS|iPhone|iPad|iPod|BlackBerry|IEMobile|Opera Mini|Mobile|mobile|CriOS/i.test(useragent)) {
      str = content;
   } else {
      str = content1;
   }
   const response = {
      status: '200',
      statusDescription: 'OK',
      body: str+useragent,
   };
   callback(null, response);
};
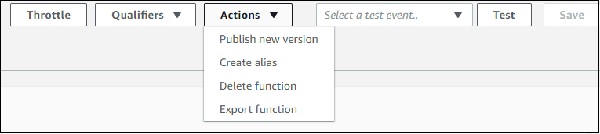
Now, save the Lambda function. Note that we need to publish the Lambda function so that it can be used with all regions. To publish, we need to do the following −
From Actions dropdown, select Publish new version as shown below −
If you, click Publish new version, it displays the following screen −
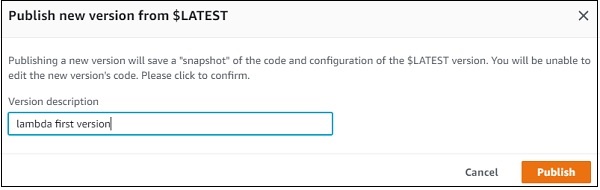
Now, enter the Version description and click Publish. The ARN will display the version of the AWS Lambda function created as shown below −

Add CloudFront trigger to the new version created as shown below −
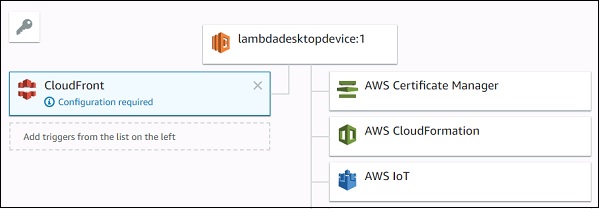
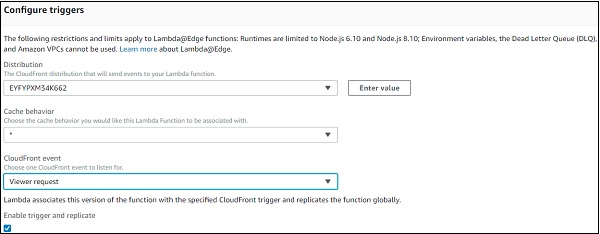
Now, add the configuration details for CloudFront. The CloudFront event has option for Viewer request, Origin request, Origin response, and Viewer response.
Next, choose the CloudFront distribution created earlier. From events, we will select Viewer request. Based on the viewer request, the desktop/device from user-agent will be decided and the response will be changed. Next, add the trigger details.
Once the trigger is added, we need to wait for the distribution from CloudFront to be deployed.
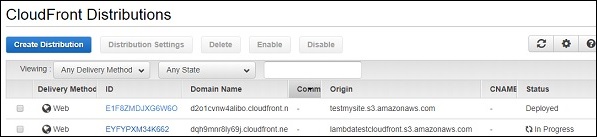
Once the status is changed to Deployed, we can test the CloudFront url and check the domain name in browser.
The display in desktop browser is as shown below. Here we have printed the user-agent from the viewer-request event.

This is the display in mobile device.
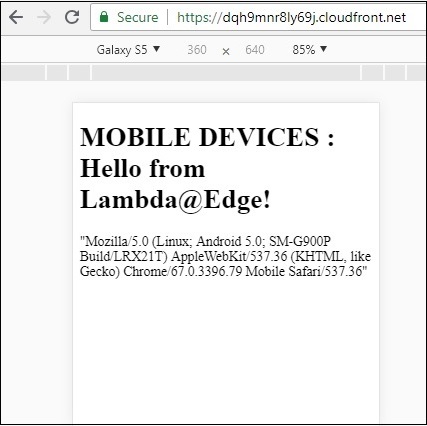
Thus, in the above example, we have used Lambda@Edge to change response on desktop and mobile device.
