- AWS Lambda - Home
- AWS Lambda - Overview
- AWS Lambda - Environment Setup
- AWS Lambda - Introduction
- Building the Lambda function
- Function in NODEJS
- Function in Java
- Function in Python
- Function in Go
- Function in C#
- Configuring Lambda Function
- Creating & Deploying using AWS Console
- Creating & Deploying using AWS CLI
- Creating & Deploying using Serverless Framework
- AWS Executing & Invoking Lambda Function
- Deleting Lambda Function
- Working with Amazon API Gateway
- Lambda Function with Amazon S3
- Lambda Function with Amazon DynamoDB
- Lambda Function with Scheduled Events
- Lambda Function with Amazon SNS
- Lambda Function with CloudTrail
- Lambda Function with Amazon Kinesis
- Lambda Function with Custom User Applications
- AWS Lambda@Edge with CloudFront
- Monitoring and TroubleShooting using Cloudwatch
- AWS Lambda - Additional Example
AWS Lambda Quick Guide
AWS Lambda Overview
AWS Lambda is a service which performs serverless computing, which involves computing without any server. The code is executed based on the response of events in AWS services such as adding/removing files in S3 bucket, updating Amazon dynamo dB tables, HTTP request from Amazon API gateway etc.
To get working with AWS Lambda, we just have to push the code in AWS Lambda service. All other tasks and resources such as infrastructure, operating system, maintenance of server, code monitoring, logs and security is taken care by AWS.
AWS Lambda supports languages such as Java, NodeJS, Python, C#, Go, Ruby, and Powershell. Note thatAWS Lambda will work only with AWS services.
What is AWS Lambda?
Definition of AWS Lambda as given by its official documentation is as follows −
AWS Lambda is a compute service that lets you run code without provisioning or managing servers. AWS Lambda executes your code only when needed and scales automatically, from a few requests per day to thousands per second. You pay only for the compute time you consume - there is no charge when your code is not running.
How AWS Lambda Works?
The block diagram that explains the working of AWS Lambda in five easy steps is shown below −
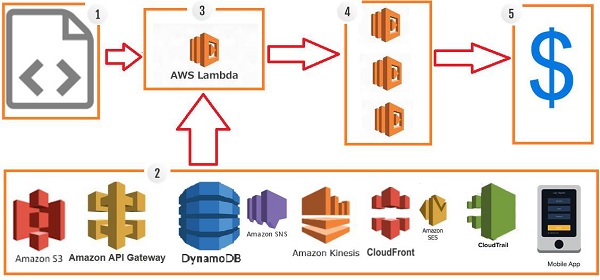
Step 1 − Upload AWS lambda code in any of languages AWS lambda supports, that is NodeJS, Java, Python, C# and Go.
Step 2 − These are few AWS services on which AWS lambda can be triggered.
Step 3 − AWS Lambda which has the upload code and the event details on which the trigger has occurred. For example, event from Amazon S3, Amazon API Gateway, Dynamo dB, Amazon SNS, Amazon Kinesis, CloudFront, Amazon SES, CloudTrail, mobile app etc.
Step 4 − Executes AWS Lambda Code only when triggered by AWS services under the scenarios such as −
- User uploads files in S3 bucket
- http get/post endpoint URL is hit
- data is added/updated/deleted in dynamo dB tables
- push notification
- data streams collection
- hosting of website
- email sending
- mobile app, etc.
Step 5 − Remember that AWS charges only when the AWS lambda code executes, and not otherwise.
Advantages of using AWS Lambda
AWS Lambda offers multiple benefits when you are working on it. This section discusses them in detail −
Ease of working with code
AWS Lambda gives you the infrastructure to upload your code. It takes care of maintaining the code and triggers the code whenever the required event happens. It allows you to choose the memory and the timeout required for the code.
AWS Lambda can also execute parallel requests as per the event triggers.
Log Provision
AWS Lambda gives the details of number of times a code was executed and time taken for execution, the memory consumed etc. AWS CloudWatch collects all the logs, which helps in understanding the execution flow and in the debugging of the code.
Billing based on Usage
AWS Lambda billing is done on memory usage, request made and the execution, which is billed in increments of minimum 100ms. So for a 500ms execution, the billing will be after every 100ms. If you specify your AWS lambda code to be executed in 500ms and the time taken to execute is just 200ms, AWS will bill you only for the time taken, that is 200ms of execution instead of 500ms. AWS always charges for the execution time used. You need not pay if the function is not executed.
Multi Language Support
AWS Lambda supports popular languages such as Node. js, Python, Java, C# and Go. These are widely used languages and any developer will find it easy to write code for AWS Lambda.
Ease of code authoring and deploying
There are many options available for Lambda for authoring and deploying code. For writing your code, you can use AWS online editor, Visual Studio IDE, or Eclipse IDE. It also has support for serverless framework which makes writing and deploying of AWS Lambda code easy. Besides AWS console, we have AWS-cli to create and deploy code.
Other features
You can use AWS Lambda for free by getting a login to AWS free tier. It gives you service for free for 1 year. Take a look at the free services offered by AWS free tier.
Disadvantages of using AWS Lambda
In spite of many advantages, AWS Lambda possesses the following disadvantages −
It is not suitable for small projects.
You need to carefully analyze your code and decide the memory and timeout. Incase if your function needs more time than what is allocated, it will get terminated as per the timeout specified on it and the code will not be fully executed.
Since AWS Lambda relies completely on AWS for the infrastructure, you cannot install anything additional software if your code demands it.
Events that Trigger AWS Lambda
The events can trigger AWS Lambda are as follows −
- Entry into a S3 object
- Insertion, updation and deletion of data in Dynamo DB table
- Push notifications from SNS
- GET/POST calls to API Gateway
- Headers modification at viewer or origin request/response in CloudFront
- Log entries in AWS Kinesis data stream
- Log history in CloudTrail
Use Cases of AWS Lambda
AWS Lambda is a compute service mainly used to run background processes. It can trigger when used with other AWS services. The list of AWS services where we can use AWS Lambda is given below −
S3 Object and AWS Lambda
Amazon S3 passes the event details to AWS Lambda when there is any file upload in S3. The details of the file upload or deletion of file or moving of file is passed to the AWS Lambda. The code in AWS Lambda can take the necessary step for when it receives the event details. For Example creating thumbnail of the image inserted into S3.
DynamoDB and AWS Lambda
DynamoDB can trigger AWS Lambda when there is data added, updated and deleted in the table. AWS Lambda event has all the details of the AWS DynamoDB table about the insert /update or delete.
API Gateway and AWS Lambda
API Gateway can trigger AWS Lambda on GET/POST methods. We can create a form and share details with API Gateway endpoint and use it with AWS Lambda for further processing, for Example, making an entry of the data in DynamoDB table.
SNS and AWS Lambda
SNS is used for push notification, sending SMS etc. We can trigger AWS lambda when there is any push notification happening in SNS. We can also send SMS to the phone number from AWS Lambda when it receives the trigger.
Scheduled Events and AWS Lambda
Scheduled Events can be used for cron jobs. It can trigger AWS Lambda to carry out the task at regular time pattern.
CloudTrail and AWS Lambda
CloudTrail can be helpful in monitoring the logs on the account. We can use AWS Lambda to further process the CloudTrail logs .
Kinesis and AWS Lambda
Kinesis is used to capture/store real time tracking data coming from website clicks, logs, social media feeds and a trigger to AWS Lambda can do additional processing on this logs.
CloudFront and Lambda@Edge
CloudFront is a content delivery network where you can host your website and Lambda@Edge can be used to process the headers coming from viewer request, origin request, origin response and viewer response. The headers modification includes tasks such as modifying cookie data, URL rewrite, used for AB testing to change the response send to the user back, adding extra headers info for security purpose etc.
AWS Lambda Environment Setup
Before you start working with AWS Lambda, you need to have a login with Amazon console. AWS Lambda supports two IDEs:Visual studio and Eclipse. In this chapter, we will discuss about the installation of AWS Lambda stepwise in detail.
Create login in AWS Console
You can create your login in AWS Console for free using Amazon free tier. You can follow these steps given below to create a login with amazon to make use of the Amazon services −
Step 1
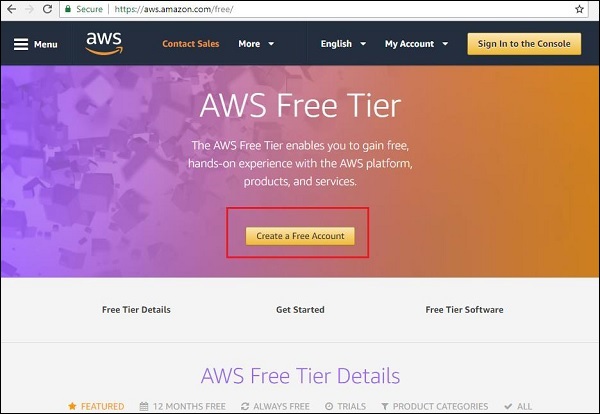
Go to https://aws.amazon.com/free/ and click on create free account. You can see the screenshot as given below −
Step 2
Click on Create a Free Account button and you will be redirected to the screen as shown below −
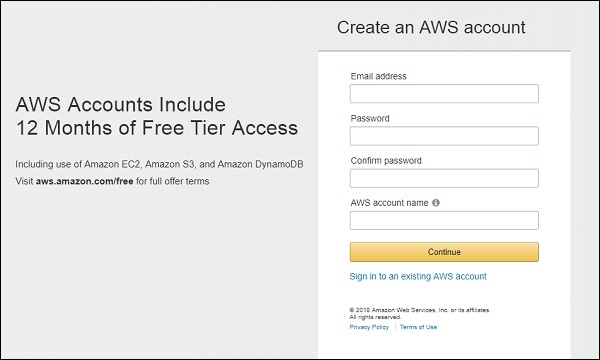
Now, fill in the details of email address, password and AWS account name as per your choice in this form shown above and click Continue.
Step 3
Now, you can find the screen as shown below −
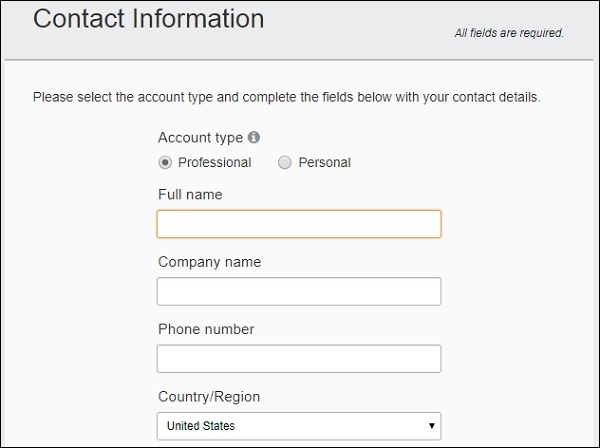
Enter all the required details in this form.
Note that there are minimum charges to be paid based on country selected. The same is refunded once the details entered are validated. You need credit or debit card details to create the free account. For Indian users Rs 2/- is deducted and for US $1 is charged.The same is refunded to the respective card user once the user is validated.
Please note the account is free and there is limit to the usage of the services. If the usage exceeds the limit, the user will be charged for it.
Once the details are entered in the form shown above click Create Account and Continue.
You will be redirected to the next screen as shown below.
Step 4
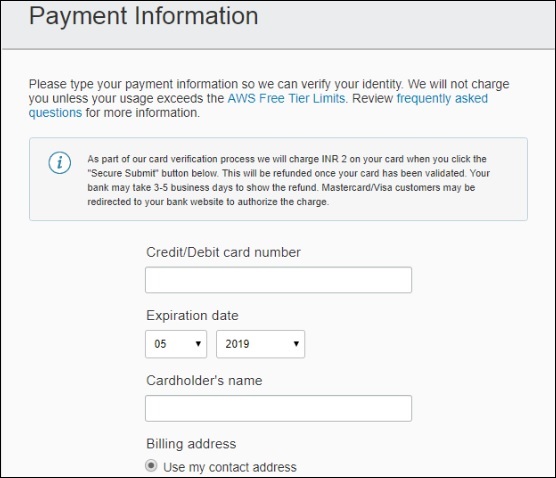
You need to enter the payment details, that is either credit card or debit card, along with its expiry date and the card holder's name as shown below −
Step 5
Once all the details are entered, click Secure Submit and it will validate the card with the bank and will give you the OTP on your mobile which is linked with the card. You can find a window as shown below −
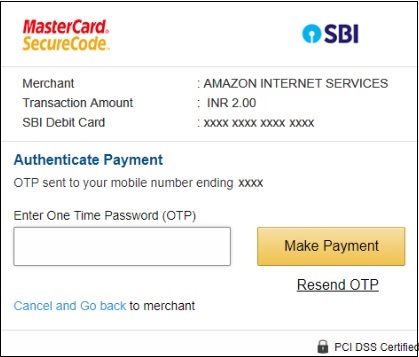
Now, enter the OTP details and click Make Payment. You are charged based on the country selected.
Step 6
Once the payment is done the next step is phone verification. You need to enter your mobile number as shown below −
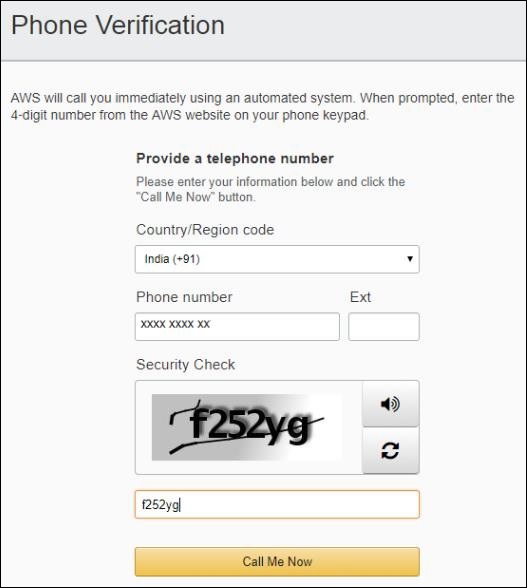
Once details are filled click Call Me Now. AWS will call immediately using automated system. When prompted on call, enter the 4-digit number that will appear on your AWS site to your phone using your phone keypad. This will verify your number and you will get the mail activation in the mail id specified at the start while creating login.
Step 7
Click the mail link and enter the account name or email id and the password and login to you to the AWS services as shown below −
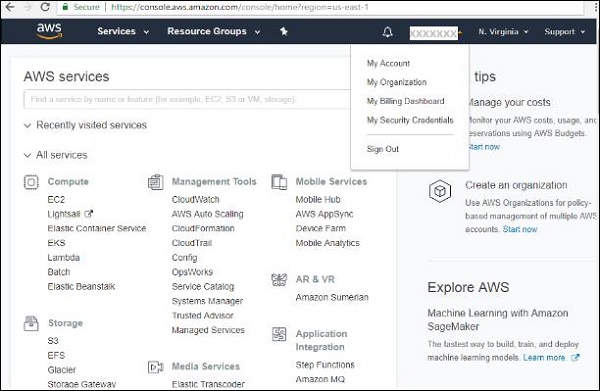
The account name is displayed at top right corner as shown above. You can now start using the AWS Lambda service. For AWS Lambda service the languages supported are NodeJS, Python, Java, C# and Go.
Installation of Visual Studio 2017
There are 2 IDEs compatible with AWS: Visual Studio and Eclipse. In this section, we will discuss installation ofVisual studio 2017 on Windows, Linux Mac. Go to the official site of Visual Studio : https://www.visualstudio.com/downloads/. You can find the welcome screen as shown −
Download the community version ie Visual Studio Community 2017 as its a free now for practice. Once installed, it will run you through the installation steps where you need to select packages to be used later. You can select nodejs, python, c# package for us to work later.

AWS Toolkit Support for Visual Studio 2017
Once you have Visual Studio 2017 installed, you will have to follow the given steps for installing AWS Toolkit support for Visual Studio 2017 −
Step 1
Go to https://aws.amazon.com/visualstudio/ and download the AWS toolkit for Visual Studio.The display is as shown below −
Note that the package downloaded for Visual Studio 2017 is vsix package. If your visual studio version is between 2013-2015, it will install a msi installer. Click the Download button as shown below.
Step 2
Now, double click the vsix package downloaded and it will run you through installation steps as shown below −
Once Visual Studio is successfully installed, you can see a window, as shown below −
Step 3
Now, open Visual Studio 2017 and you should see a welcome page from AWS as shown below −
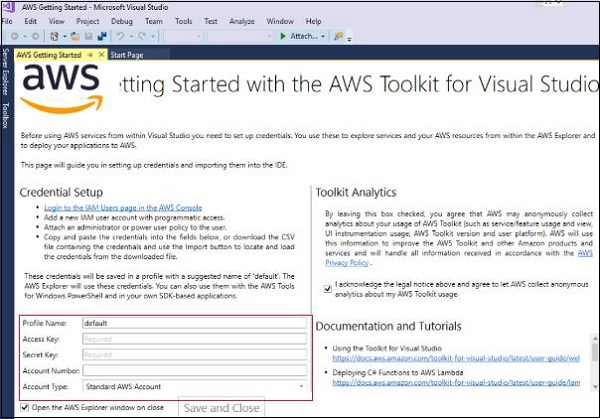
Note that you need to add the access key, secret key, account number to get started and use the AWS services from visual studio.s
AWS Lambda BoilerPlate for NodeJS
You can use it with visual studio code as shown below.
Step 1
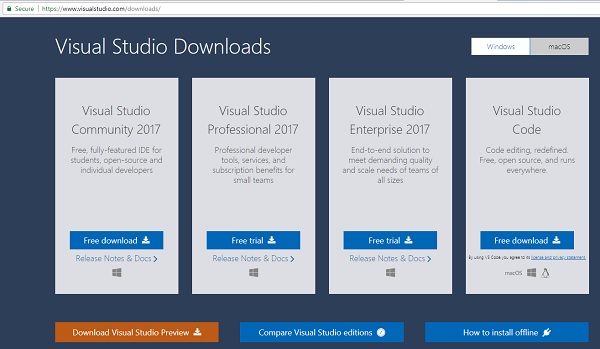
You can download Visual studio code for free from the official website:https://www.visualstudio.com/downloads/. The home page of Visual Studio downloads looks like this −
Step 2
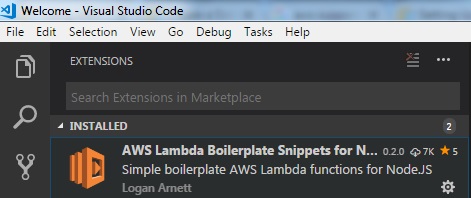
Now, open Visual Studio code as shown below −

Step 3
To install support for AWS, support for nodejs option is available inside extensions. You can search for AWS and it will display the option as follows −
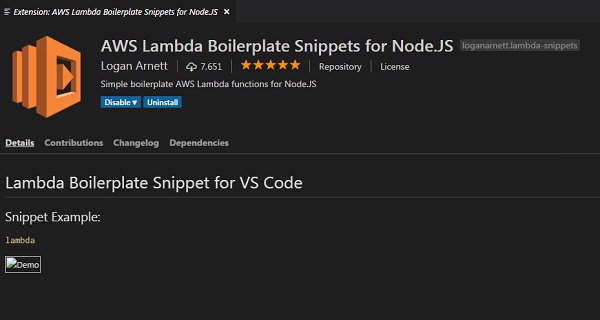
Step 4
Now, install the boilerplate for AWS Lambda in nodejs as shown −
Step 5
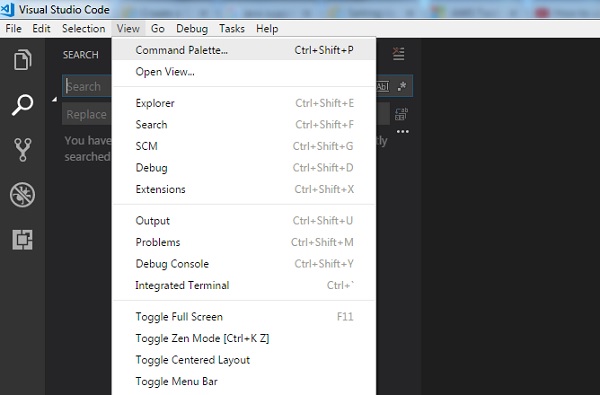
Click the repository and clone it in Visual Studio to start writing the Lambda function in Visual Studio. It redirects you to this repository which we can clone in Visual Studio: https://github.com/loganarnett/vscode-lambda-snippets. Now, open command palette from View option in Visual Studio.
Step 6
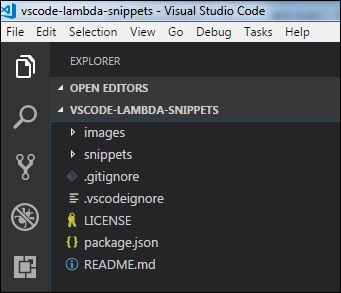
Click on it and choose git clone as shown below −

Step 7
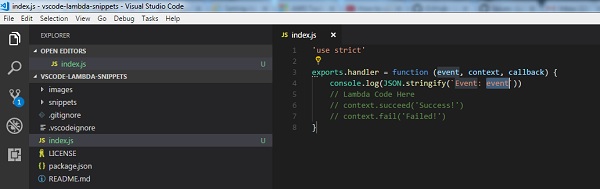
Enter the repository url and save it as per your choice locally. Create index.js file as shown below to work with lambda function −
Installation of Eclipse IDE
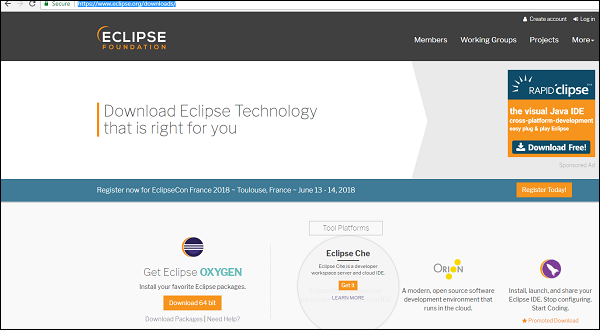
Now, you will have to install latest eclipse Java EE IDE. You can download it from Eclipse official site: https://www.eclipse.org/downloads/
AWS Toolkit Support for Eclipse IDE
Once Eclipse is installed, perform the following steps −
Step 1
Go to help from the menu and click Install New Software.
Step 2
Enter https://aws.amazon.com/eclipse in the text box labelled Work with at the top of the dialog.
Step 3
Now, select the required AWS Core Management Tools and other optional items from the list shown below.
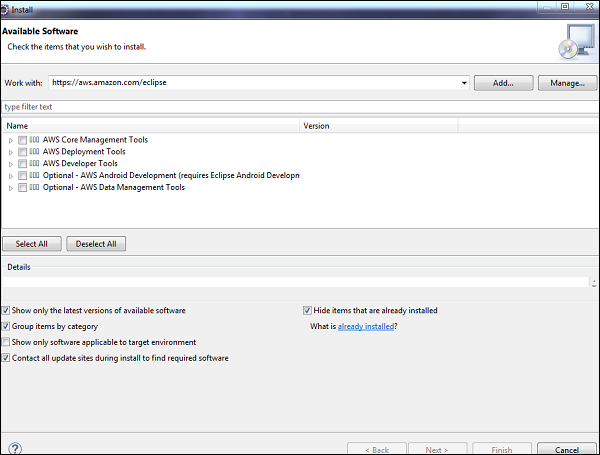
Step 4
Now, click Next. Eclipse will guide you through the remaining installation steps as given in the further steps given below.
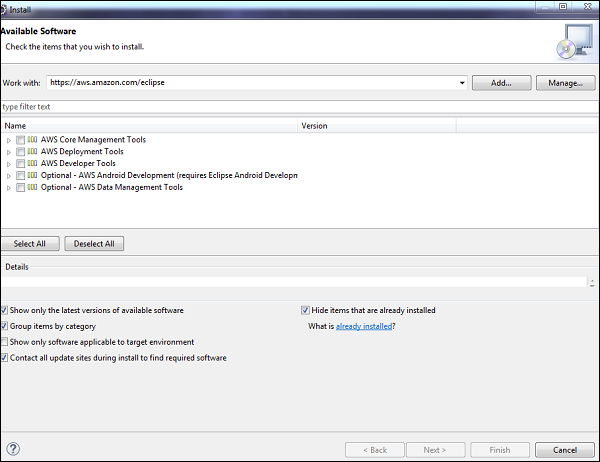
Step 5
The AWS core modules are displayed in the grid below as shown in the screenshot given below −
Step 6
Once installed the AWS tool will be available in Eclipse as shown below −
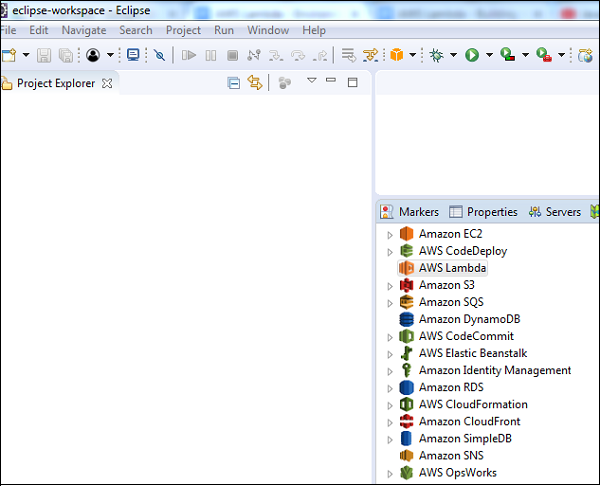
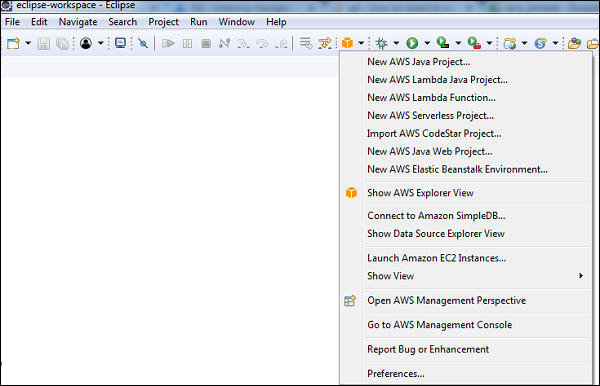
Step 7
You can see the following screen when you click on the Amazon service.
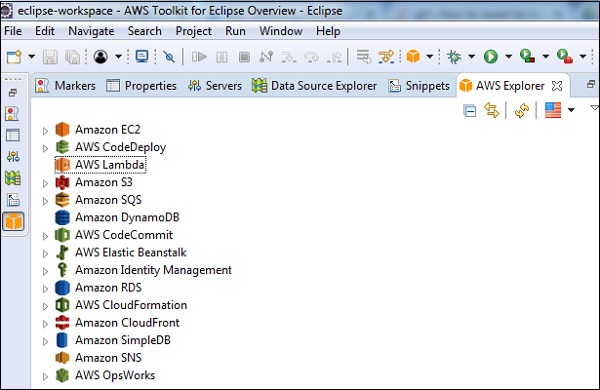
Now, click on AWS Explorer to see the services available. We shall discuss how to work with the installed IDE in upcoming chapters.
AWS Lambda Introduction
AWS Lambda is a service which takes care of computing your code without any server. It is said to be serverless compute. The code is executed based on the response of events in AWS services like adding /removing files in S3 bucket, updating Amazon DynamoDBtables, HTTP request from Amazon Api gateway etc.
AWS Lambda code can be written in NodeJS, Java, C#, Python and Go. This chapter will talk in detail about creating AWS Lambda function in AWS console.
AWS Console
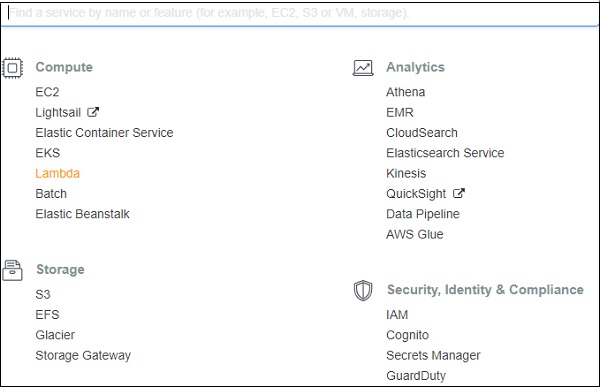
Login to AWS Console at the link https://aws.amazon.com/console. Once you login into it, it will redirect you to the screen where AWS services are displayed.
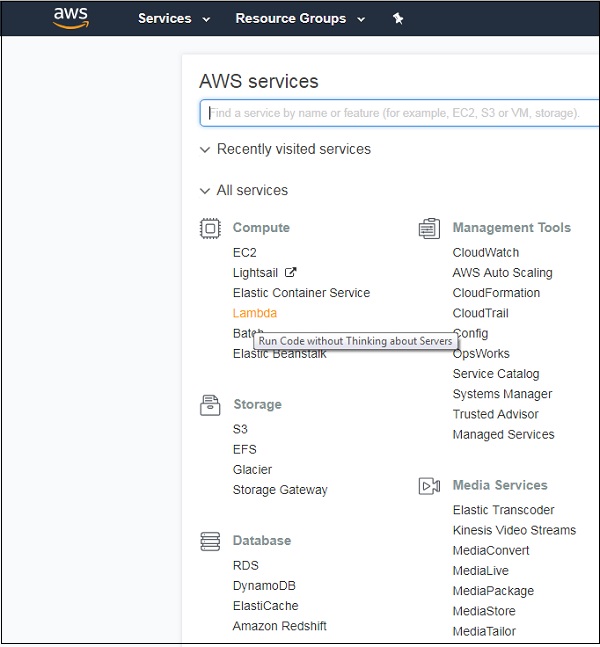
Example: Creating a Function
Let us understand the functionality of AWS Console with the help of an Example. Click on Lambda (marked above), it will redirect to create function as shown below −
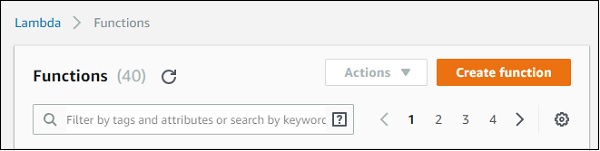
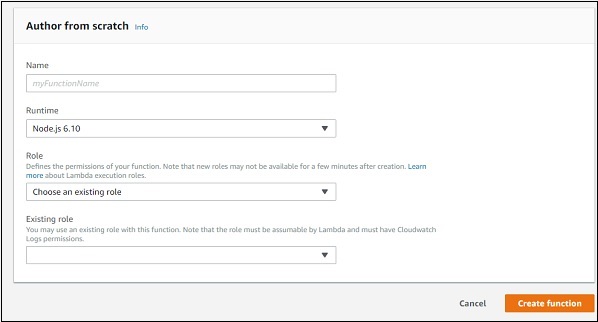
Click Create function button and the screen displays following details −
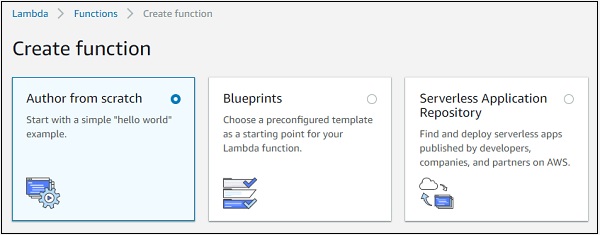
Note that, by default, the option is Author from scratch. This option lets you to write the Lambda code from scratch. It will just have a simple function with hello world message.
The second option Blue prints has following details.
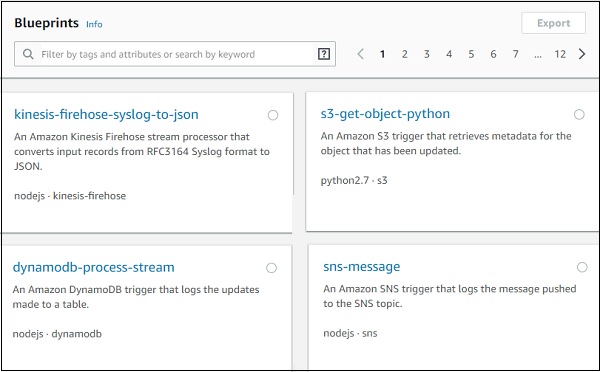
It gives details of code already written for some of the aws services in languages available with AWS Lambda. Incase you need to write AWS Lambda code for any services you can check in blue prints and get started.
The third option Serverless Application Repository has the setup of serverless application which will help to deploy the AWS Lambda code.
In the discussion further, we will work on the first option where we create the AWS lambda function using Author from scratch.
Before we create Lambda function, will need a role i.e, permission for working with AWS services and aws lambda. Later the Role has to be assigned to aws lambda function.
Role creation in AWS Console
For creating a role in AWS Console, go to AWS console services and click on IAM as shown below −
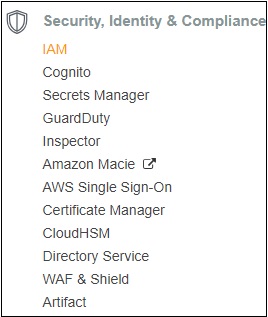
Now, if you click IAM, you will the screen as shown below −
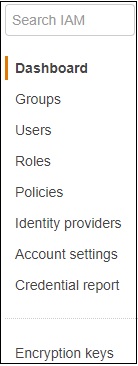
If you select Roles, you can see the following buttons on the screen −

Now, click Create role. It will ask you to choose the service where you need to use the role created.

Since we need to use this role with AWS Lambda, select Lambda and click Next:Permissions button as shown above. The next screen displays the policy name which is available as per AWS services. You can select the policy from here −
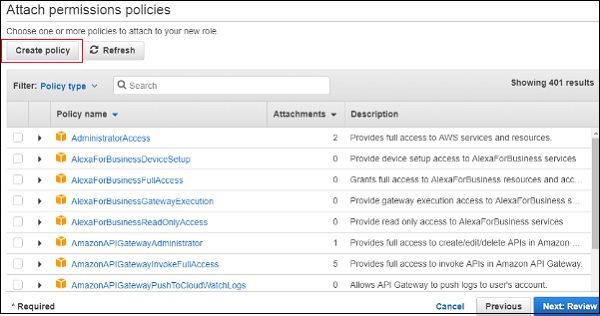
For Example, if you want permission for AWS Lambda to work with S3 and DynamoDB, you need to select the policy. In the search box, enter the AWS service and click on the checkbox. You can select multiple policies and later click on Next:Review.
It is also possible to create policy of your own. For Example, there is dynamodb table and you need to give permission only to that table, under such cases you can create policy.
Click on Create policy button as shown in the screen above. Following are the details displayed on screen.
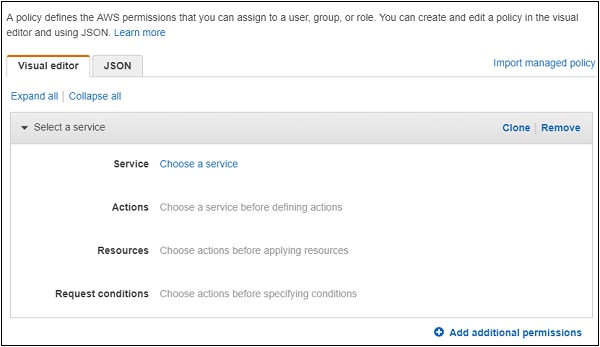
Choose a Service for which you are creating the policy. Later it will display data for Actions, resources and Request conditions.
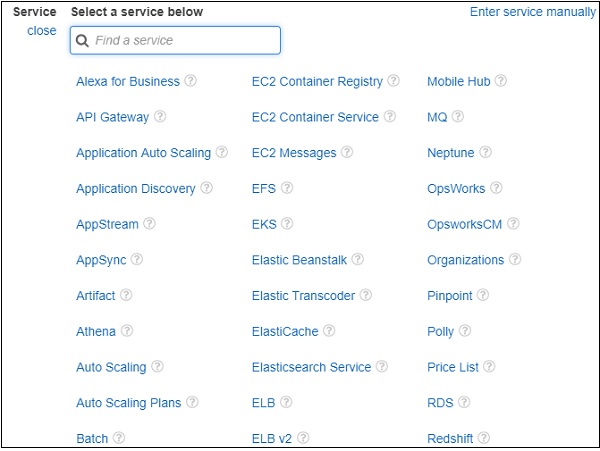
Now, we should choose the service. Let us select AWS Dynamodb from search. Actions has following details −
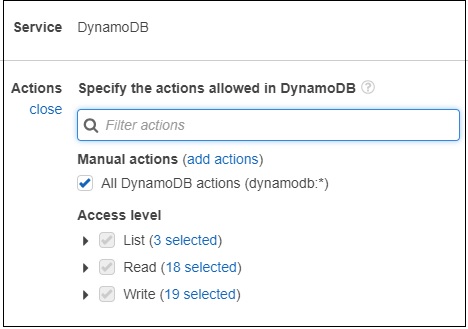
Now, enter the Access level you want to give to DynamoDB. Then, resources will display the following details −

Now, select the table resource type. You can see the following output −
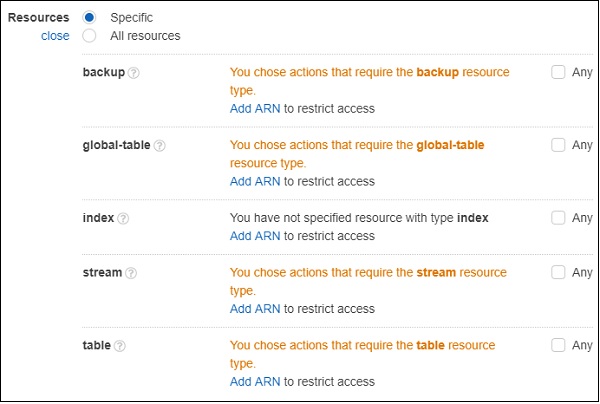
For permission on table, you need to Add ARN. ARN is the details which is unique to the table created in AWS DynamoDB. You will get the details when the table is created in dynamodb.
If you click Add ARN and it will display following details −
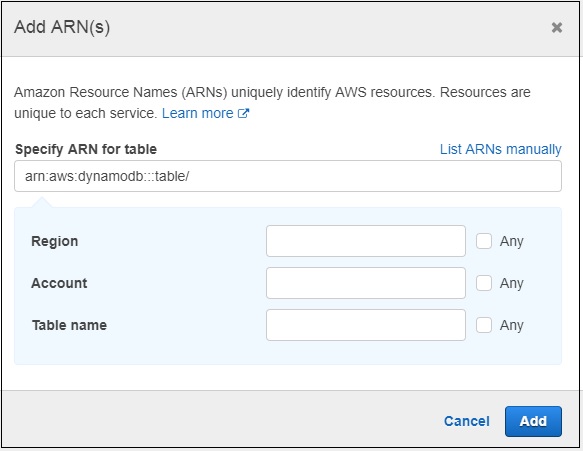
Now, if you enter the ARN and the Region, Account and Table name will get populated. You should click Add button to add the policy. Similarly, you can create policies for other services.
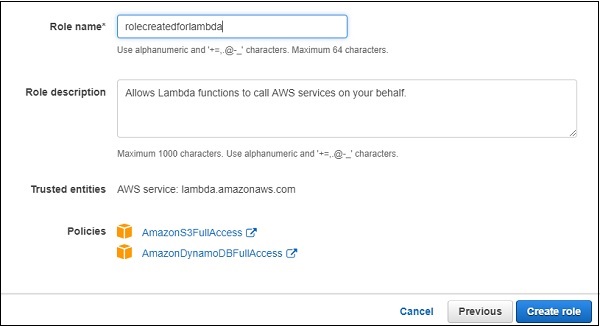
Here, we have selected two policies AmazonS3FullAccess and AmazonDynamoDBFullACcess. We have given full access to S3 and DynamoDB in that role. However, it is suggested that you give permission only to necessary buckets and tables.
You can follow the steps discussed earlier to create the policies using ARN.
Step 1
Click Create role button to create the role. All the roles created are displayed as shown −
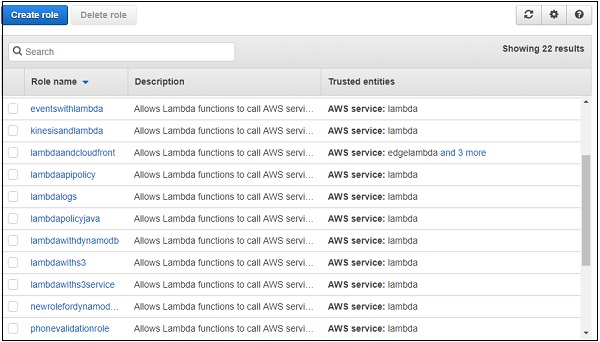
Step 2
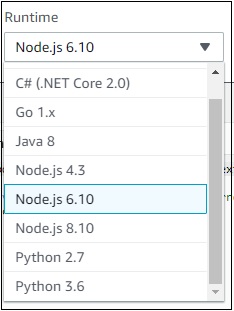
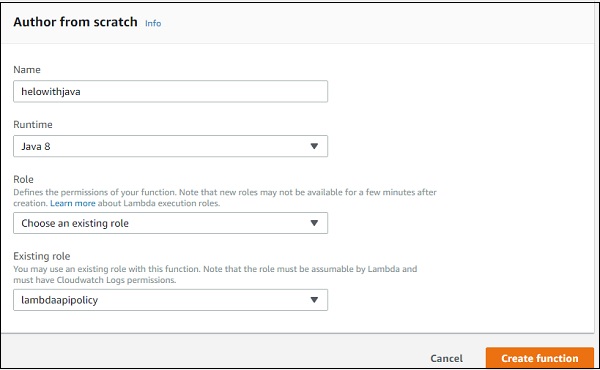
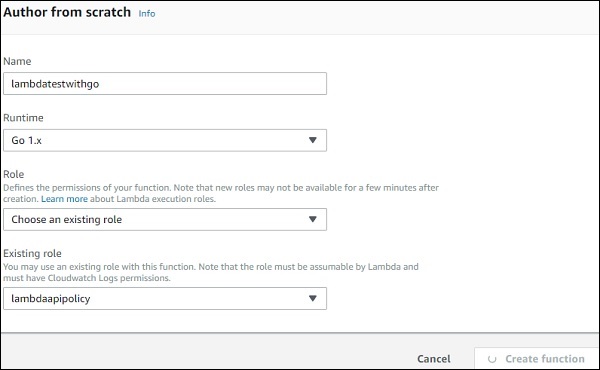
Note that you can select the role you require incase you need any modification for the role created. If we select Author from scratch option, you have to enter Name, Runtime and Role.
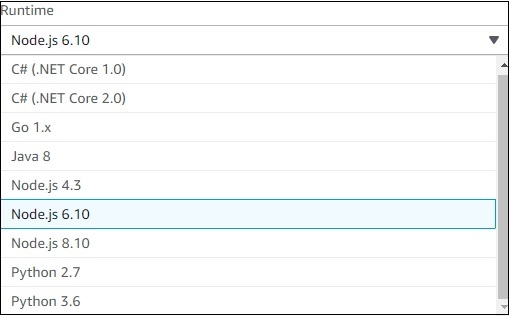
Step 3
You can observe the following details in Runtime dropdown −
Step 4
You can select the runtime of your choice and proceed as shown.
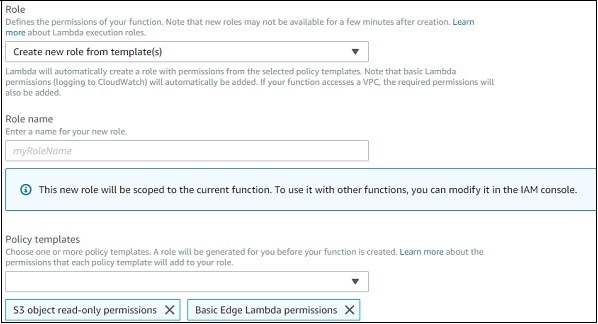
Role dropdown has following options −
Choose an existing role − This will display all the roles created in the IAM roles.
Create new role from template(s) − This will allow you to create role and will display permission to be selected for that role. Observe the screenshot for a better understanding.
Create a custom role − This allows the user to create policies as we discussed earlier.
Step 5
Select the runtime, role and add the function. Click on Create function button to create the lambda function. The next screen displayed is as follows −
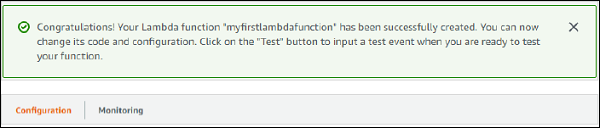
Parts of AWS Lambda Function
There are two parts for AWS Lambda function:Configuration and Monitoring. Let us discuss each in detail.
Configuration
The following functionalities are included in the Configuration.
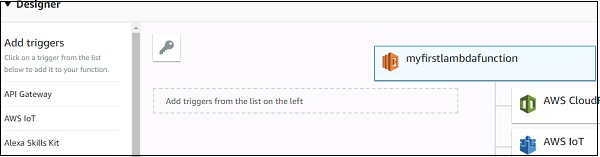
Add Triggers
The triggers that are needed to added to AWS Lambda function are displayed as follows −
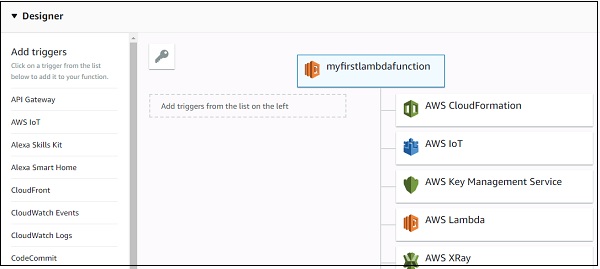
Note that when we select a trigger, we need to add the configuration details for that trigger. For Example for S3 trigger, we need to select the bucket name; for Dynamodb trigger we need to select the table name.
Example
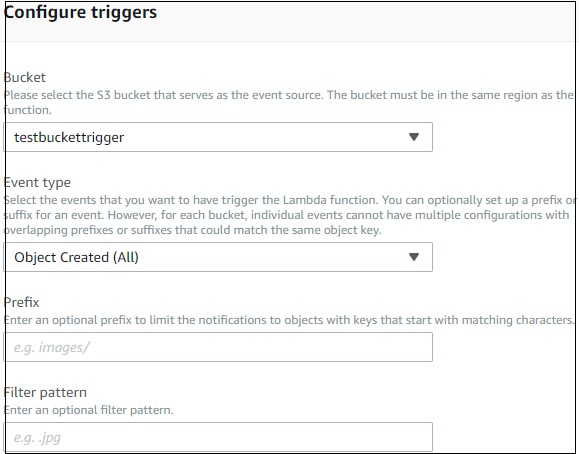
Let us see an example of configuration details for a S3 trigger −
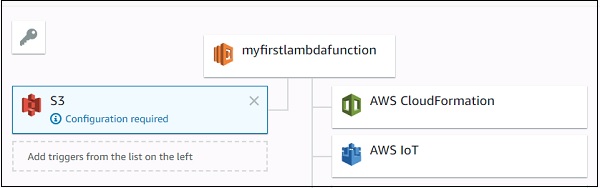
Now, add configuration details for S3 trigger added −

Here you need to select the bucket name, event type on which you want to trigger Lambda, prefix and filter pattern if any and Add the trigger.
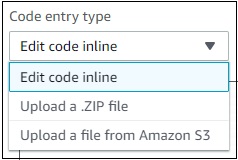
Adding Code in Lambda
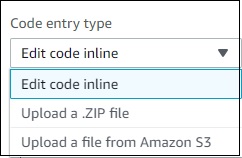
Now, we should focus on the Lambda code to be written. To add code in aws lambda there are three options −
- Using the inline editor
- Using .zip file
- Upload file from Amazon S3
It is shown in the screenshot given below −
Let us discuss each of them in detail.
Using the inline editor
The inline code editor where you can write you code is as follows −
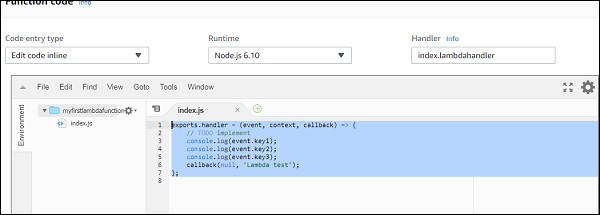
You can write your code by choosing the language of your choice. You are allowed to choose the runtime again here.
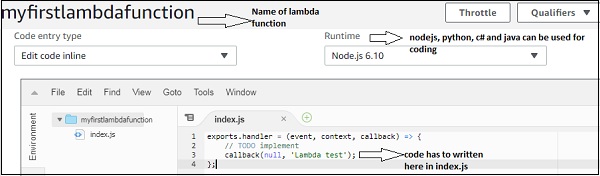
Observe the following screenshot for a better understanding −
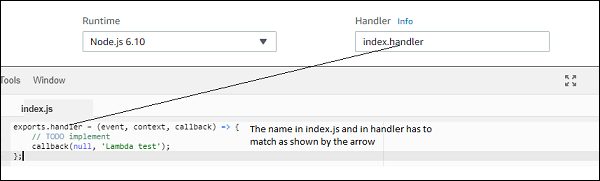
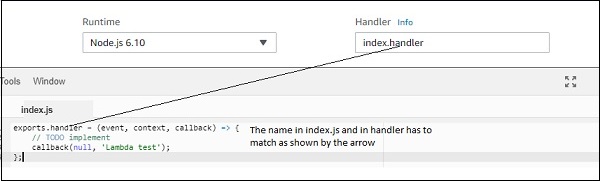
The code has to be written in index.js.Handler. Details will differ based on runtime. For nodejs, it is filename.export function which is right now index.lambda handler.
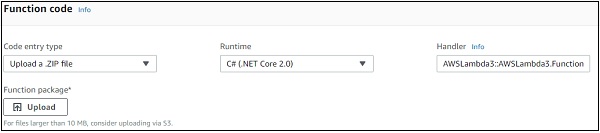
Upload a .ZIP file
You can first write the code, zip it and upload the zip file by selecting Upload a .ZIP file.
Upload a file from Amazon S3
You can upload the file in S3 bucket and choose the option Upload a file from Amazon S3.
Note that for .ZIP and S3 it will not be possible to change the runtime.
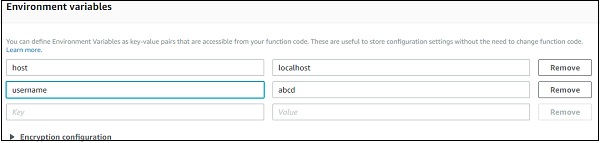
Environment variables
They take in key value pairs and share them with AWS Lambda code. We can use environment variables in AWS Lambda for storing the database connection details, file details as to store the output, log file details etc.

Tags
They are key-value pairs added to AWS Lambda for better organizing the function when used across different regions. For a simple use case, it is not required. When there are lot of Lambda functions created, the tagging helps in filtering and managing the Lambda functions.

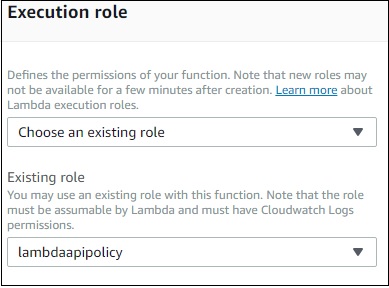
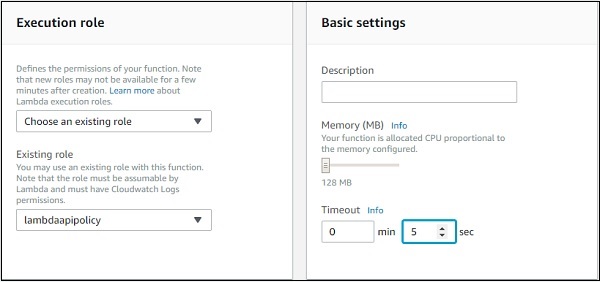
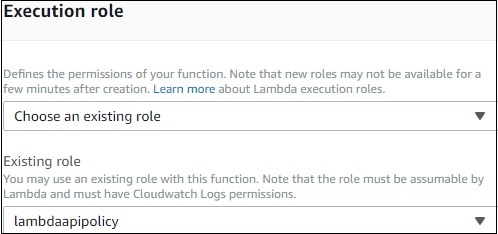
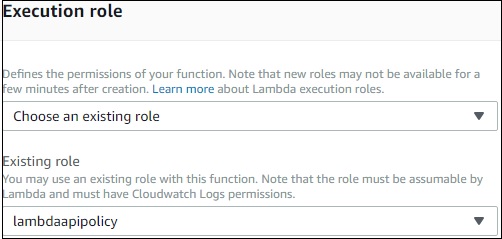
Execution role
You can change the role again here if not done properly at the start of creating Lambda function. You can update or create new role here. It provides same options which were displayed at the start of creating Lambda function.
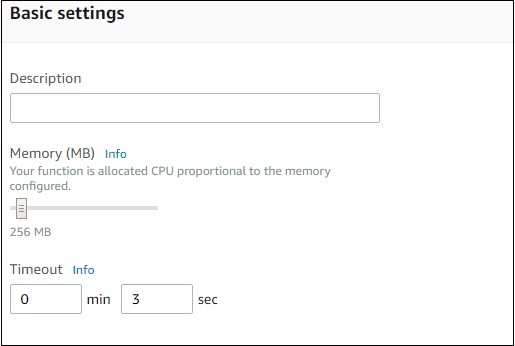
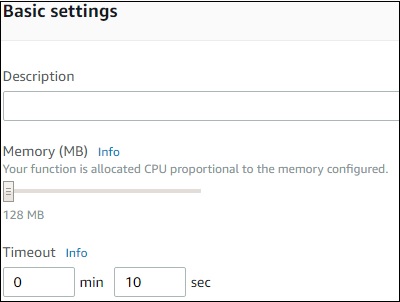
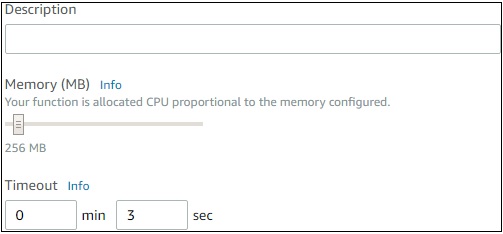
Basic Settings
Here you need to enter the short description of what your Lambda function is doing. Select the memory and timeout which are required for the Lambda function.
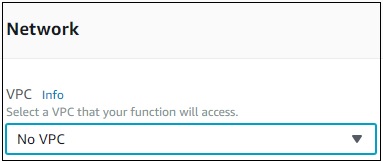
Network
This allows you to select the VPC which will allow you to access the Lambda function from the VPC. By default, no VPC is selected.
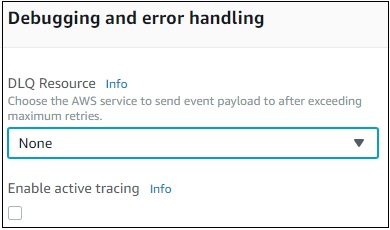
Debugging and Error Handling
For debugging and errors handling, you can select AWS service to send the details. The options available are None, SNS and SQS.
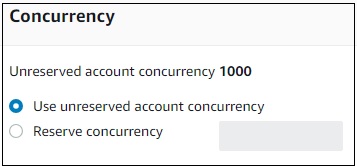
Concurrency
This allows you to allocate a specific limit of concurrent executions allowed for this function.
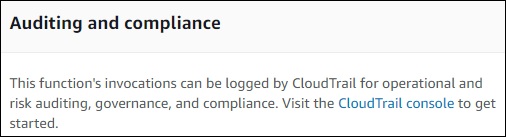
Auditing and Compliance
This contains logs which are managed with the help of AWS CloudTrail.
Once done you need to save the changes using the Save button as shown here −

Now, if you click Test button, it will ask for a test event. You can pass a sample test event as follows −
The test event created is as shown here −
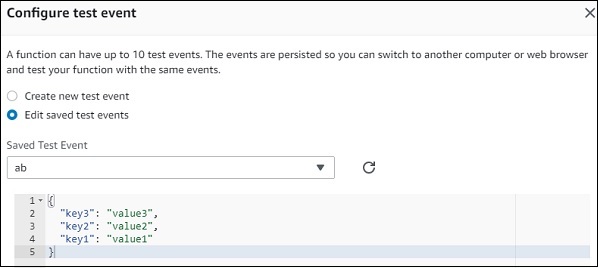
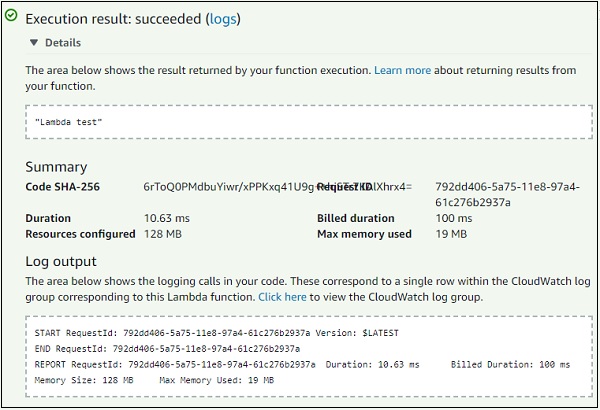
Now, save the test event and click the test button to see the execution of AWS Lambda function −
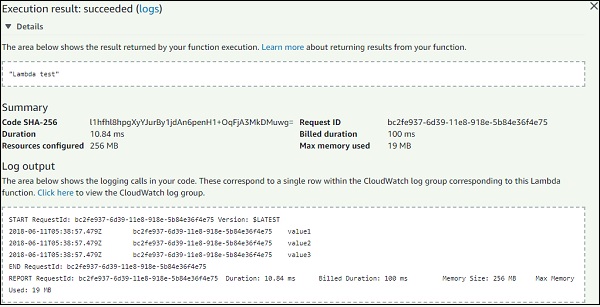
The code for index.js is as follows −
exports.lambdahandler = (event, context, callback) => {
   // TODO implement
   console.log(event.key1);
   console.log(event.key2);
   console.log(event.key3);
   callback(null, 'Lambda test');
};
Note that callback function is called when there is error or success. If success, you can see Lambda test will get displayed.
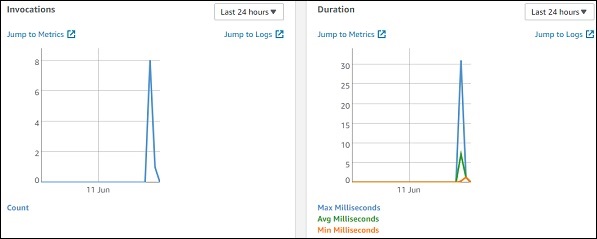
Monitoring
Select the monitoring tab to view the execution details of Lambda function. The graphs show the details of the execution time, errors occured etc.
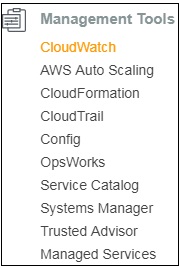
You can also view the logs in Cloudwatch. For this, go to AWS services and select cloudwatch as shown −
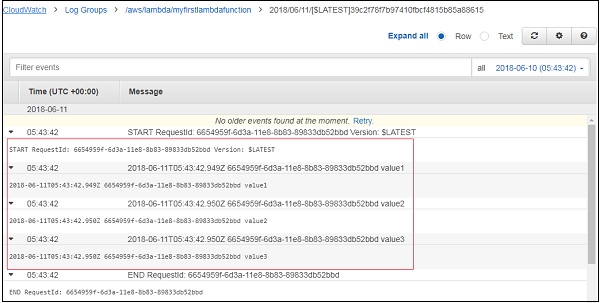
Now, select logs from left side and enter your function name in the filter −
Building the Lambda Function
AWS Lambda function executes a code when it is invoked. This chapter discusses all these steps involved in the life cycle of AWS Lambda function in detail.
Steps for Building a Lambda function
The lifecycle of Lambda function includes four necessary steps −
- Authoring
- Deploying
- Monitoring
- Troubleshooting
Authoring Lambda Code
AWS Lambda function code can be written in following languages −
- NodeJS
- Java,
- Python
- C#
- Go.
We can write code for AWS Lambda using the AWS console, AWS CLI, from Eclipse IDE, from Visual Studio IDE, serverless framework etc.
The following table shows a list of languages and the different tools and IDE that can be used to write the Lambda function −
| Language | IDE for Authoring Lambda Code |
|---|---|
| NodeJS | AWS Lambda Console Visual Studio IDE |
| Java | Eclipse IDE |
| Python | AWS Lambda Console |
| C# | Visual Studio IDE .NET core |
| Go | AWS Lambda Console |
Deploying Lambda Code
Once you decide the language you want to write the Lambda function, there are two ways to deploy the code −
- Directly write the code in AWS console
- Zip or jar the files with all the files and dependencies
However, remember that proper permission has to given to be given to the zip file.
Testing Lambda Code
Lambda Code can be tested for events inside the AWS Lambda console. It is also possible to test the Lambda function from the AWS cli and serverless cli. AWS console has also event data which can be used as sample events while testing AWS Lambda function.
Monitoring Lambda function
Monitoring of Lambda function can be done using the AWS CloudWatch. We can add necessary log messages in languages we choose and see the same in AWS CloudWatch.
To start writing Lambda function, there is pattern to be followed. The following are the main core concepts to be followed for writing a Lambda function −
Handler
Handler is a name of the AWS lambda function from where the execution starts. It appears in AWS console as shown below −
Notice that here we have changed the default handler to another name and updated the same in the Handler −
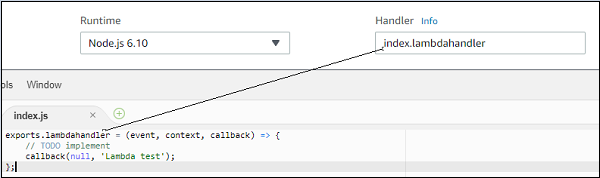
Note that the way a handler is called differs from the languages selected as runtime.
Params passed to handler
If you observe the handler function, the params passed are event, context and call back function as shown below −
Event parameter has all the details for the trigger used.
Context parameter basically takes care of runtime details for the Lambda function to execute. We can interact with the Lambda function using the context param. It has the details like the time left before AWS Lambda terminates a function i.e, timeout specified while creating Lambda function, name of the Lambda function, cloudwatch group name, arn details etc.
Example
Let us understand the details obtained from AWS Lambda context object with the help of an example −
exports.lambdahandler = (event, context, callback) => {
// TODO implement
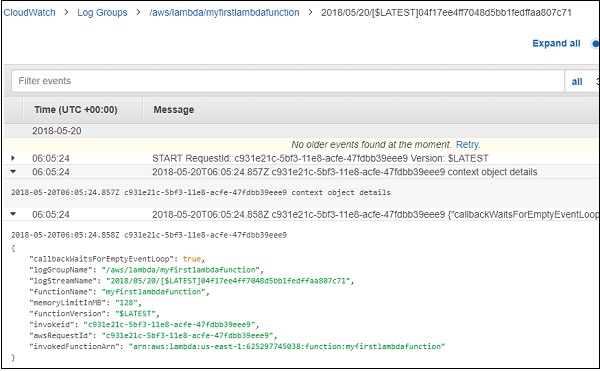
console.log("context object details");
console.log(JSON.stringify(context));
callback(null, 'Lambda test');
};
When you execute the Lambda function shown above, you can see the following output −
Output
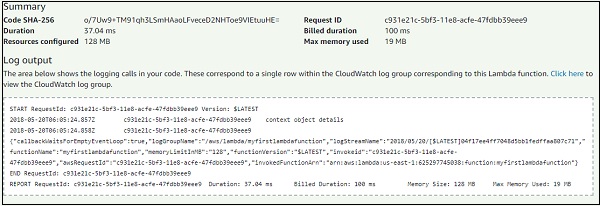
The context details are given as follows −
{
   "callbackWaitsForEmptyEventLoop":true,"logGroupName":"/aws/lambda/myfirstlambdafunction",
   "logStreamName":"2018/05/20/[$LATEST]04f17ee4ff7048d5bb1fedffaa807c71","functionName":
   "myfirstlambdafunction","memoryLimitInMB":"128","functionVersion":"$LATEST","invokeid":
   "c931e21c-5bf3-11e8-acfe-47fdbb39eee9","awsRequestId":"c931e21c-5bf3-11e8-acfe-47fdbb39eee9",
   "invokedFunctionArn":"arn:aws:lambda:us-east-1:625297745038:function:myfirstlambdafunction"
}
Observe that it has details like functionName, memorylimit, requestId etc.
Logging
The logs added inside the Lambda function are displayed in AWS CloudWatch when the AWS function executes. The logs syntax will vary from the language selected. For Example in nodejs, it is console.log.
This is the output you can see in AWSCloudWatch −
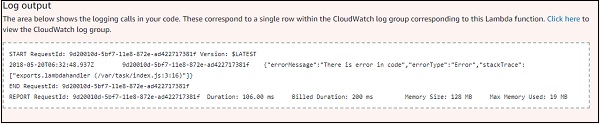
Error Handling
AWS Lambda function provides a callback function which is used to notify to the Lambda function that an error or success has happened. Note that here we have used nodejs as the runtime. The error handling will differ as per the language selected.
Observe the Example given here for a better understanding −
exports.lambdahandler = (event, context, callback) => {
   // TODO implement
   var error = new Error("There is error in code");
   callback(error);
};
Output
When you test the Lambda code, you can find the output as shown below −
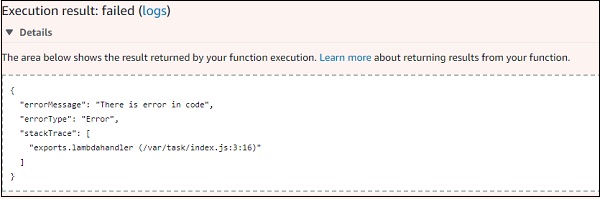
The log details as follows −
AWS Lambda Function in NODEJS
Nodejs is one of the languages that AWS Lambda function supports. The version supported with nodejs are v6.10 and v8.10. In this chapter, we will learn about various functionalities of AWS Lambda function in NODEJS in detail.
Handler in NodeJS
To writeAWS Lambda function in nodejs, we should first declare a handler first. The handler in nodejs is name of the file and the name of the export function. For Example, the name of the file is index.js and the export function name is lambda handler, so its corresponding handler is index.lambdahandler
Observe a sample handler shown here −
exports.lambdahandler = function(event, context, callback) { //code goes here}
Params to Handler
Handler is the main core for building Lambda function. The handler takes three params: event, context and callback.
Event Parameter
It has all the details of the event triggered. For Example, if we are using Lambda function to be triggered on S3, the event will have details of the S3 object.
Context Parameter
It has the details of the context such as the properties and configuration details of the Lambda function.
Callback Function
It helps in giving details back to the caller. The structure of callback looks as follows −
callback(error, result);
The parameters of callback function are explained given below −
Error − This will have details if any error has occurred during the execution of Lambda function. If the Lambda function succeeds,null can be passed as the first param for callback function.
Result − This will give the details of the successful execution of the lambda function. If an error occurs, the result param is ignored.
Note − It is not mandatory to use the callback function in AWS Lambda. Incase if there is no callback function, the handler will return it as null.
The valid callback signatures are given below −
callback();                // It will return success, but no indication to the caller
callback(null);            // It will return success, but no indication to the caller
callback(null, "success"); // It will return the success indication to the caller
callback(error);           //  It will return the error indication to the caller
Whenever AWS Lambda gets executed the callback details such as error or success, are logged in AWS CloudWatch along with console messages, if any.
Working with AWS Lambda in Nodejs8.10
Let us understand how to work with AWS Lambda in nodejs8.10 and invoke the function in sync and async way.
Invoking Lambda Function in Sync Way
The following example gives you an idea about invoking Lambda function in sync way −
exports.handler = function(event, context, callback) {
   let arrItems = [4,5,6,8,9,10,35,70,80,31];
   function countevennumbers (items) {
      return new Promise(resolve => {
         setTimeout(() => {
            let a = 0;
            for (var i in items) {
               if (items[i] % 2 == 0) {
                  a++;
               }
            }
            resolve(a);
         },2000);
      });
   }
   let evennumber = countevennumbers(arrItems);
   callback(null,'even numbers equals ='+evennumber);
};
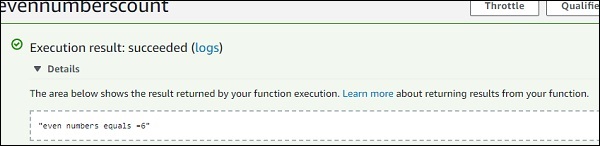
You can observe the following output after testing this code in AWS console −
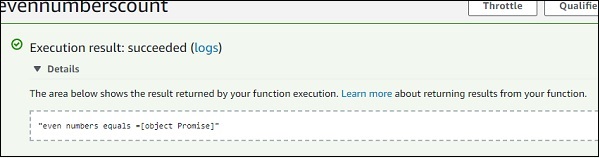
Note that the output from the above code is a promise object. It does not give the count, as the count is incremented inside a setTimeout and the function call does not wait for the execution inside setTimeout and returns the promise object.
If we had async/await on the handler function will get exact output of from the lambda function.
Invoking the Handler in an Async Way
The following example gives you an idea about invoking Lambda function in an async way −
exports.handler = async function(event, context, callback) {
   let arrItems = [4,5,6,8,9,10,35,70,80,31];
   function countevennumbers (items) {
      return new Promise(resolve => {
         setTimeout(() => {
            let a = 0;
            for (var i in items) {
               if (items[i] % 2 == 0) {
                  a++;
               }
            }
            resolve(a);
         }, 2000);
      });
   }
   let evennumber = await countevennumbers(arrItems);
   callback(null,'even numbers equals ='+evennumber);
};
We have added async and await in above code. When we use await beside the function call, the execution pauses till the promise inside the function gets resolved. Note that await is valid only for async functions.
You can observe the following output after testing this code in AWS console −
ContextDetails in NodeJS
Context object gives details such as the name of the Lambda function, time remaining in milliseconds, request id, cloudwatch group name, timeout details etc.
The following tables shows the list of methods and attributes available with context object −
Method available for context object
| Sr.No | Method Name & Description |
|---|---|
| 1 | getRemainingTimeInMillis() This method gives the remaining time in milliseconds until the Lambda function terminates the function |
Attributes available for context object
| Sr.No | Attribute name & Description |
|---|---|
| 1 | functionName This gives AWS Lambda function name |
| 2 | functionVersion This gives the version of AWS Lambda function executing |
| 3 | nvokedFunctionArn This will gives ARN details. |
| 4 | memoryLimitInMB This shows the memory limit added while creating Lambda function |
| 5 | awsRequestId This gives the AWS request id. |
| 6 | logGroupName This will give the name of the cloudwatch group name |
| 7 | logStreamName This will give the name of the cloudwatch log stream name where the logs are written. |
| 8 | identity This will give details about amazon cognito identity provider when used with aws mobile sdk. Details given are as follows −
|
| 9 | clientContext This will details of the client application when used with aws mobile sdk. The details given are as follows −
|
Look at the following example to get a better idea about context object −
exports.handler = (event, context, callback) => {
   // TODO implement
   console.log('Remaining time =>', context.getRemainingTimeInMillis());
   console.log('functionName =>', context.functionName);
   console.log('AWSrequestID =>', context.awsRequestId);
   console.log('logGroupName =>', context.log_group_name);
   console.log('logStreamName =>', context.log_stream_name);
   console.log('clientContext =>', context.clientContext);
   callback(null, 'Name of aws Lambda is=>'+context.functionName);
};
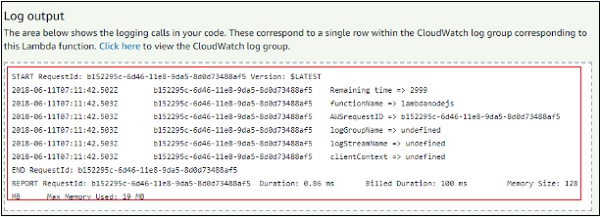
You can observe the following output after testing this code in AWS console −

You can observe the following log output after testing this code in AWS console −
Logging in NodeJS
We can use console.log for logging in NodeJS.The log details can be fetched from CloudWatch service against the Lambda function.
Observe the following example for a better understanding −
exports.handler = (event, context, callback) => {
   // TODO implement
   console.log('Logging for AWS Lamnda in NodeJS');
   callback(null, 'Name of aws Lambda is=>'+context.functionName);
};
You can observe the following output after testing this code in AWS console −
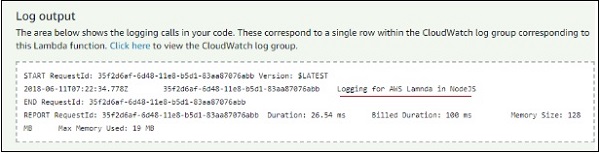
You can observe the following screenshot from CloudWatch −

Error Handling in NodeJS
Let us understand how error notification is done in NodeJS. Observe the following code −
exports.handler = function(event, context, callback) {
   // This Source code only throws error.
   var error = new Error("something is wrong");
   callback(error);
};
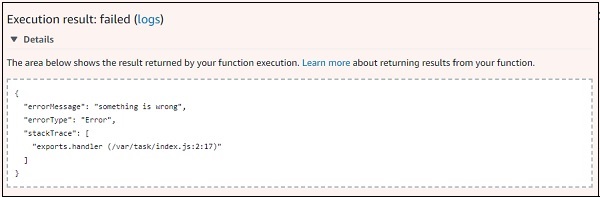
You can observe the following in the log output −
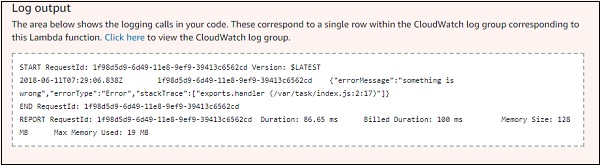
The error details are given in the callback as follows −
{
   "errorMessage": "something is wrong",
   "errorType": "Error",
   "stackTrace": [    "exports.handler (/var/task/index.js:2:17)"  ]
}
AWS Lambda Function in Java
In this chapter, let us understand in detail how to create a simple AWS Lambda function in Java in detail.
Creating JAR file in Eclipse
Before proceeding to work on creating a lambda function in AWS, we need AWS toolkit support for Eclipse. For any guidance on installation of the same, you can refer to the Environment Setup chapter in this tutorial.
Once you are done with installation, follow the steps given here −
Step 1
Open Eclipse IDE and create a new project with AWS Lambda Java Project. Observe the screenshot given below for better understanding −

Step 2
Once you select Next, it will redirect you the screen shown below −
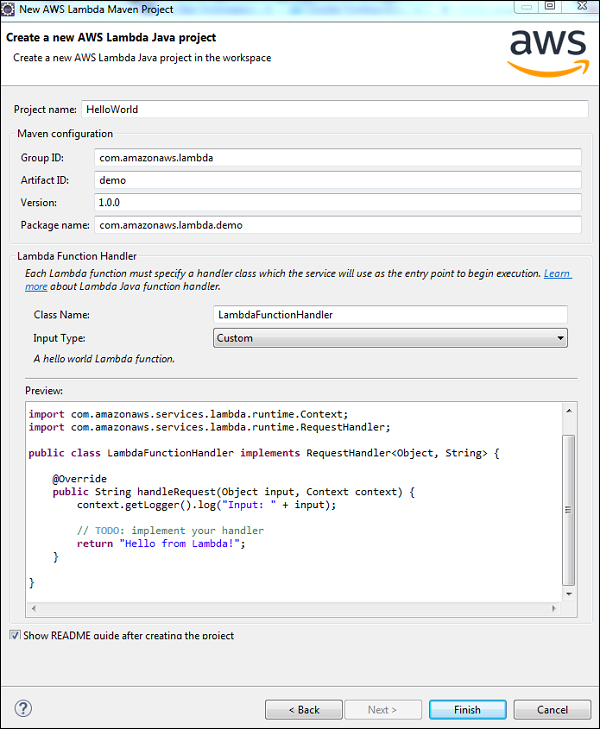
Step 3
Now, a default code is created for Input Type Custom. Once you click Finish button the project gets created as shown below −
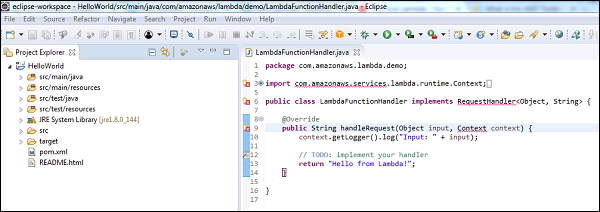
Step 4
Now, right click your project and export it. Select Java / JAR file from the Export wizard and click Next.
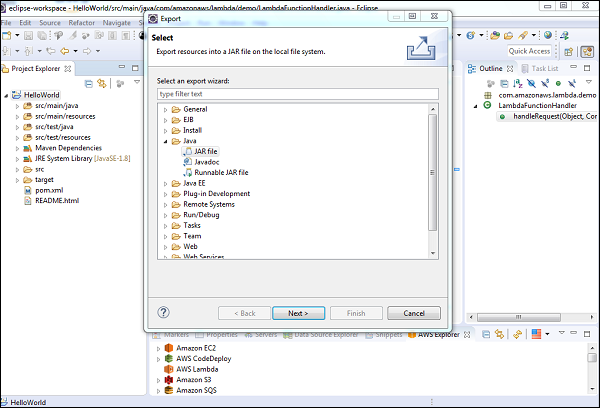
Step 5
Now, if you click Next, you will be prompted save the file in the destination folder which will be asked when you click on next.
Once the file is saved, go back to AWS Console and create the AWS Lambda function for Java.
Step 6
Now, upload the .jar file that we created using the Upload button as shown in the screenshot given below −
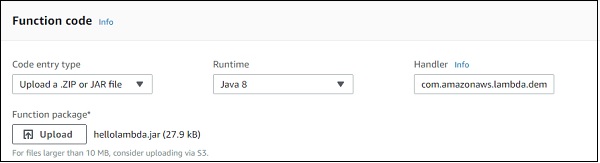
Handler Details for Java
Handler is package name and class name. Look at the following example to understand handler in detail −
Example
package com.amazonaws.lambda.demo; import com.amazonaws.services.lambda.runtime.Context; import com.amazonaws.services.lambda.runtime.RequestHandler; public class LambdaFunctionHandler implements RequestHandler
Observe that from the above code, the handler will be com.amazonaws.lambda.demo.LambdaFunctionHandler
Now, let us test the changes and see the output −
Context Object in Java
Interaction with AWS Lambda execution is done using the context. It provides following methods to be used inside Java −
| Sr.No | Context Methods & Description |
|---|---|
| 1 | getMemoryLimitInMB() this will give the memory limit you specified while creating lambda function. |
| 2 | getFunctionName() this will give the name of the lambda function. |
| 3 | getFunctionVersion() this will give the version of the lambda function running. |
| 4 | getInvokedFunctionArn() this will give the ARN used to invoke the function. |
| 5 | getAwsRequestId() this will give the aws request id. This id gets created for the lambda function and it is unique. The id can be used with aws support incase if you face any issues. |
| 6 | getLogGroupName() this will give the aws cloudwatch group name linked with aws lambda function created. It will be null if the iam user is not having permission for cloudwatch logging. |
| 7 | getClientContext() this will give details about the app and device when used with aws mobile sdk. It will give details like version name and code, client id, title, app package name. It can be null. |
| 8 | getIdentity() this will give details about the amazon cognito identity when used with aws mobile sdk. It can be null. |
| 9 | getRemainingTimeInMillis() this will give the remaining time execution in milliseconds when the function is terminated after the specified timeout. |
| 10 | getLogger() this will give the lambda logger linked with the context object. |
Now, let us update the code given above and observe the output for some of the methods listed above. Observe the Example code given below for a better understanding −
package com.amazonaws.lambda.demo;
import com.amazonaws.services.lambda.runtime.Context;
import com.amazonaws.services.lambda.runtime.RequestHandler;
public class LambdaFunctionHandler implements RequestHandler<Object, String> {
@Override
public String handleRequest(Object input, Context context) {
context.getLogger().log("Input: " + input);
System.out.println("AWS Lambda function name: " + context.getFunctionName());
System.out.println("Memory Allocated: " + context.getMemoryLimitInMB());
System.out.println("Time remaining in milliseconds: " + context.getRemainingTimeInMillis());
System.out.println("Cloudwatch group name " + context.getLogGroupName());
System.out.println("AWS Lambda Request Id " + context.getAwsRequestId());
// TODO: implement your handler
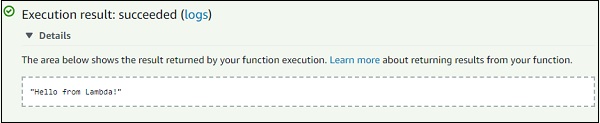
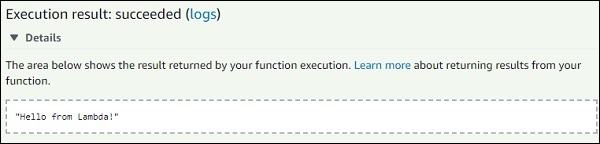
return "Hello from Lambda!";
}
}
Once you run the code given above, you can find the output as given below −
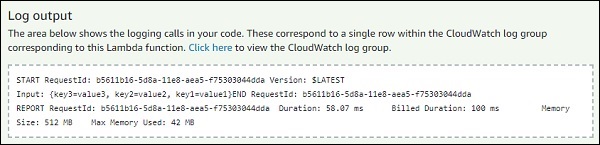
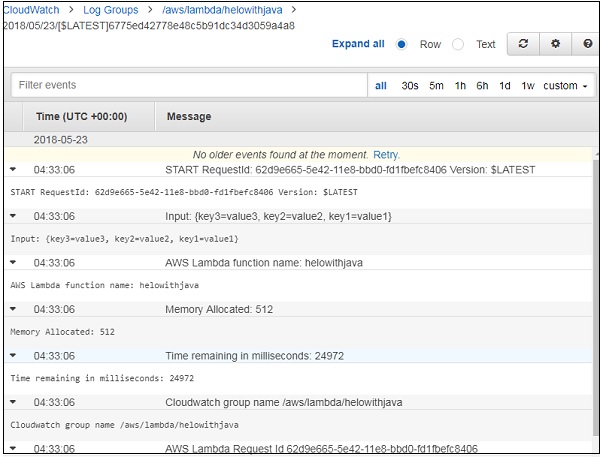
Logs for context
You can observe the following output when you are viewing your log output −
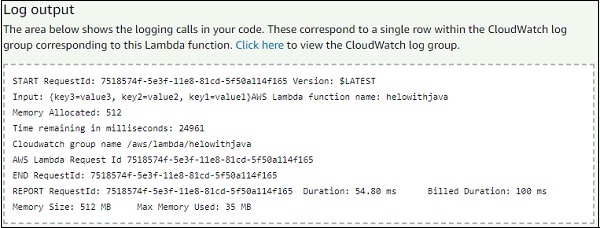
The memory allocated for the Lambda function is 512MB. The time allocated is 25 seconds. The time remaining as displayed above is 24961, which is in milliseconds. So 25000 - 24961 which equals to 39 milliseconds is used for the execution of the Lambda function. Note that Cloudwatch group name and request id are also displayed as shown above.
Note that we have used the following command to print logs in Java −
System.out.println (log message)
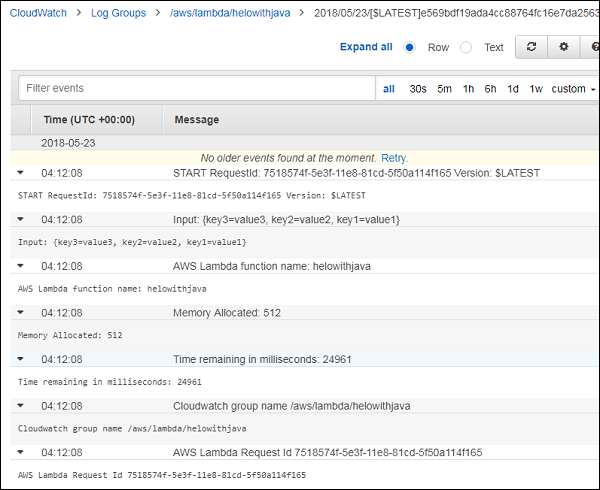
The same is available in CloudWatch. For this, go to AWS services, select CloudWatchservices and click Logs.
Now, if you select the Lambda function, it will display the logs date wise as shown below −
Logging in Java
You can also use Lambdalogger in Java to log the data. Observe the following example that shows the same −
Example
package com.amazonaws.lambda.demo;
import com.amazonaws.services.lambda.runtime.Context;
import com.amazonaws.services.lambda.runtime.RequestHandler;
import com.amazonaws.services.lambda.runtime.LambdaLogger;
public class LambdaFunctionHandler implements RequestHandler<Object, String> {
   @Override
   public String handleRequest(Object input, Context context) {
      LambdaLogger logger = context.getLogger();
      logger.log("Input: " + input);
      logger.log("AWS Lambda function name: " + context.getFunctionName()+"\n");
      logger.log("Memory Allocated: " + context.getMemoryLimitInMB()+"\n");
      logger.log("Time remaining in milliseconds: " + context.getRemainingTimeInMillis()+"\n");
      logger.log("Cloudwatch group name " + context.getLogGroupName()+"\n");
      logger.log("AWS Lambda Request Id " + context.getAwsRequestId()+"\n");

      // TODO: implement your handler
      return "Hello from Lambda!";
   }
}
The code shown above will give you the following output −
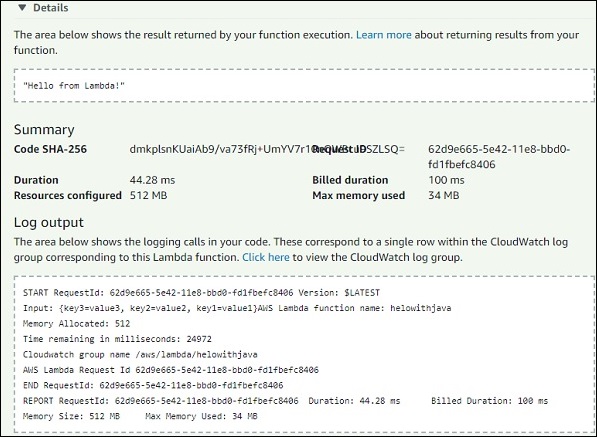
The output in CloudWatch will be as shown below −
Error handling in Java for Lambda Function
This section will explain how to handle errors in Java for Lambda function. Observe the following code that shows the same −
package com.amazonaws.lambda.errorhandling;
import com.amazonaws.services.lambda.runtime.Context;
import com.amazonaws.services.lambda.runtime.RequestHandler;
public class LambdaFunctionHandler implements RequestHandler<Object, String> {
   @Override
   public String handleRequest(Object input, Context context) {
      throw new RuntimeException("Error from aws lambda");
   }
}
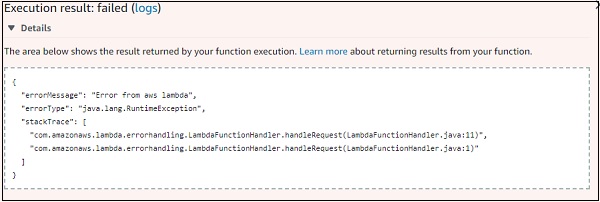
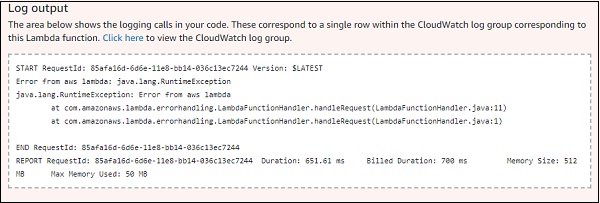
Note that the error details are displayed in json format with errorMessage Error from AWS Lambda. Also, the ErrorType and stackTrace gives more details about the error.
The output and the corresponding log output of the code given above will be as shown in the following screenshots given below −
AWS Lambda Function in Python
In this chapter, we will create a simple AWS Lambda function in Python and understand its working concepts following detail.
Before proceeding to work on creating a Lambda function in AWS, we need AWS toolkit support for Python. For this purpose, follow the steps given below and observe the corresponding screenshots attached −
Step 1
Login to AWS console and create Lambda function and select the language as Python.
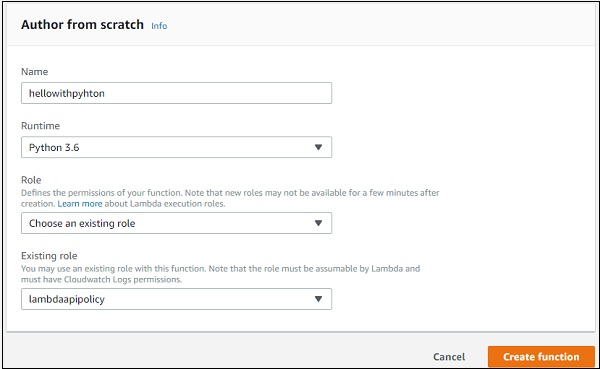
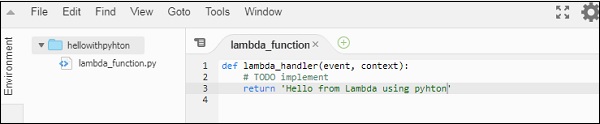
Step 2
Now, click Create function button and enter the details for creating a simple AWS Lambda in Python. This code returns the message Hello from Lambda using Python and looks as shown here −
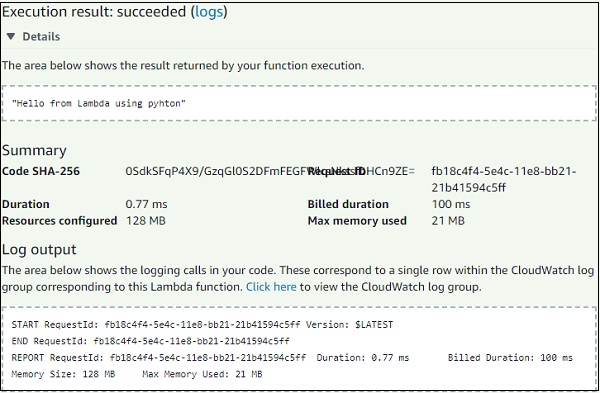
Step 3
Now, save the changes and the test the code to see the output. You should see the following output and logs when you test it in AWS console using the test button from the UI.
Step 4
Now, you can write code inside any editor or an IDE for Python. Here, we are using visual studio code for writing the code. You should later zip the file and upload in AWS console.

Here, we have zipped the code and using it AWS console.
Step 5
Now, select Upload a .ZIP file option as shown below −
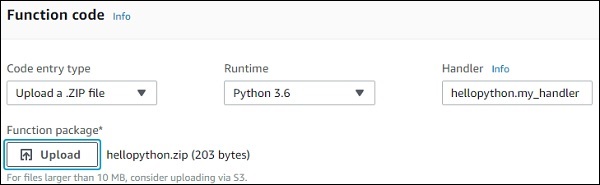
Handler Details for Python
Note that the handler has to be name of the file followed by name of the function. In the above case, our file name is hellopython.py and name of the function is my_handler; so the handler will be hellopython.my_handler.
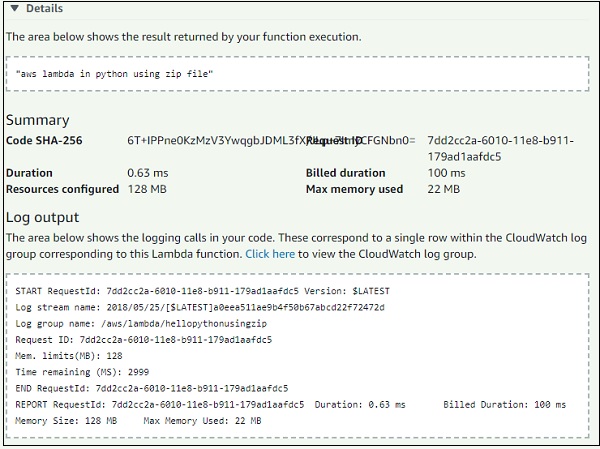
Once the upload is done and changes are saved, it actually shows the details of the zip file in the online editor in AWS Lambda console. Now, let us test the code to see the output and logs.

Now, let us understand the details of the Lambda function using the following sample code −
def my_handler(event, context):
   return "aws lambda in python using zip file"
In the above code, the function name my_handler is having 2 params, event and context.
Context Object in Python
Context object gives details like the name of the Lambda function, time remaining in milliseconds, request id, cloud watch group name, timeout details etc.
The methods and attributes available on context object are shown in the tables given below −
| Sr.No | Method Name & Description |
|---|---|
| 1 | get_remaining_time_in_millis() This method gives the remaining time in milliseconds until the lambda function terminates the function |
| Sr.No | Attribute & Description |
|---|---|
| 1 | function_name This gives aws lambda function name |
| 2 | function_version This gives the version of aws lambda function executing |
| 3 | invoked_function_arn This will gives ARN details. |
| 4 | memory_limit_in_mb This shows the memory limit added while creating lambda function |
| 5 | aws_request_id This gives the aws request id. |
| 6 | og_group_name This will give the name of the cloudwatch group name |
| 7 | log_stream_name This will give the name of the cloudwatch log stream name where the logs are written. |
| 8 | identity This will give details about amazon cognito identity provider when used with aws mobile sdk. Details given are as follows −
|
| 9 | client_context This will details of the client application when used with aws mobile sdk. The details given are as follows −
|
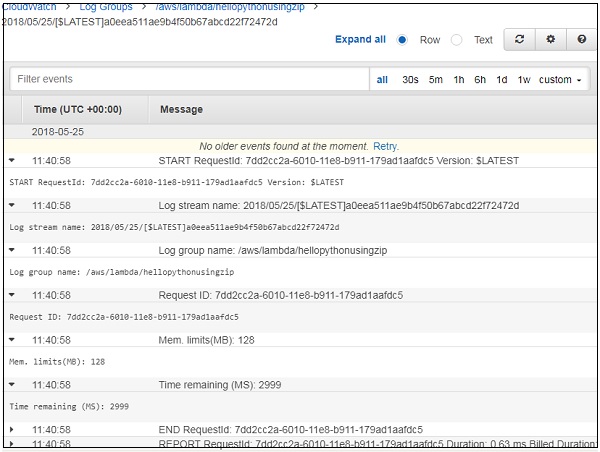
Let us see a working example in Python which outputs the context details. Observe the code given below −
def my_handler(event, context):
   print("Log stream name:", context.log_stream_name)
   print("Log group name:",  context.log_group_name)
   print("Request ID:",context.aws_request_id)
   print("Mem. limits(MB):", context.memory_limit_in_mb)
   print("Time remaining (MS):", context.get_remaining_time_in_millis())
   return "aws lambda in python using zip file"
The corresponding output of the code shown above is given below −
Logging using Python
To log info using Python, we can use print or logger function available. Let us use the above example of context and check inCloudWatch to see if the logs are printed. Observe the following code −
def my_handler(event, context):
   print("Log stream name:", context.log_stream_name)
   print("Log group name:",  context.log_group_name)
   print("Request ID:",context.aws_request_id)
   print("Mem. limits(MB):", context.memory_limit_in_mb)
   print("Time remaining (MS):", context.get_remaining_time_in_millis())
   return "aws lambda in python using zip file"
The output of this code in CloudWatch is as shown below −
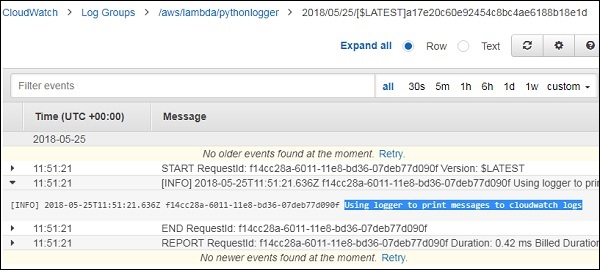
Observe the following example to understand about using logger to print logs to CloudWatch −
import logging
logger = logging.getLogger()
logger.setLevel(logging.INFO)
def my_handler(event, context):
   logger.info('Using logger to print messages to cloudwatch logs')
   return "aws lambda in python using zip file"
The output for this will be as shown in the screenshot given below −
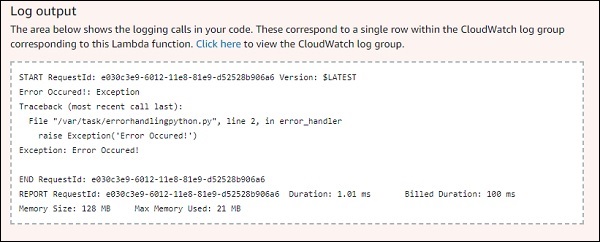
Error Handling in Python for Lambda function
In this section, let us see a working example which shows how to handler errors in Python. Observe the piece of code given here −
def error_handler(event, context):
   raise Exception('Error Occured!')
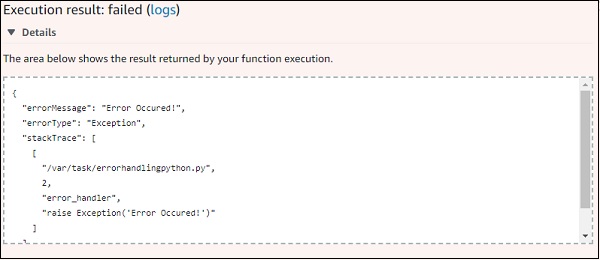
The log display is as shown in the image here −
AWS Lambda Function in Go
Go Language support is a recent addition to AWS. To work with Go, you need to select the language from AWS console while creating the AWS Lambda function. In this chapter, let us learn in detail about AWS Lambda function in Go language.
Installing Go
To get started we need Go Language support. In this section, we will go through following details to start working with AWS Lambda in Go. This is the official site for Go download: https://go.dev/dl/
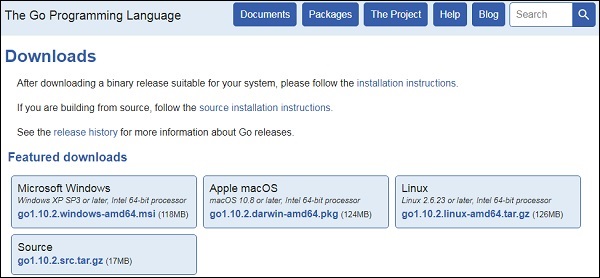
Now, download the package as per the operating system. Follow the procedure given here to install Go on the respective operating system.
Installation on Windows
Observe that for Windows, there is 32-bit and 64-bit download available. Download the zip file and extract the contents and store it in a directory of your choice.
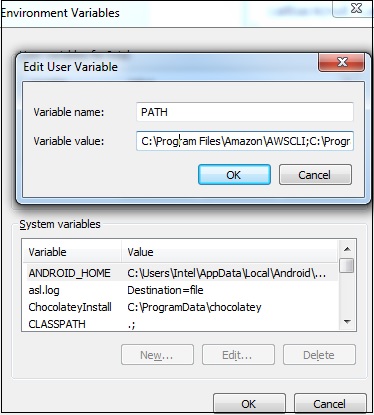
Add the environment variables available at ControlPanel ---> System ---> Advanced system settings.
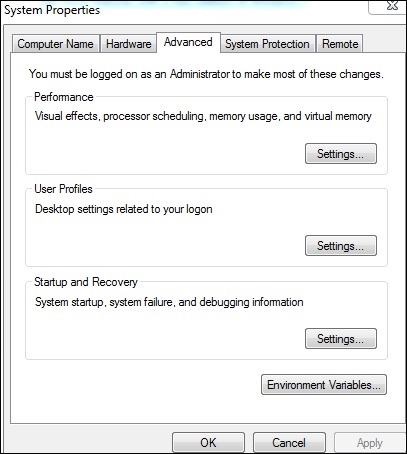
Now, click Environment Variables button and add the directory path as shown here −
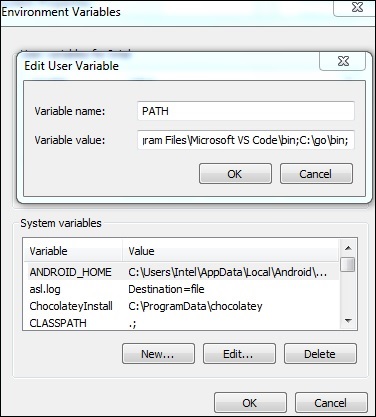
You can also edit the system variable as shown here −
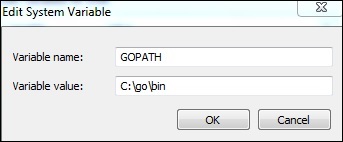
Once these steps are done, you should be able to start working with Go. Open command prompt and check the Go command for version. Observe the following screenshot for the same.

Installation for Linux and Mac OS
For installing packages on Linux and Mac OS, follow the instruction as shown below −
Unpack the packages and store it at the location /usr/local/go. Now, add /usr/local/go/bin to the PATH environment variable. It can be done using /etc/profile or $HOME/.profile.
For this purpose, you can use the following command
export PATH=$PATH:/usr/local/go/bin
To add AWS support to for Windows, Linux and mac, use the following in your git command line −
go.exe get -u github.com/aws/aws-lambda-go/lambda
go.exe get -u github.com/aws/aws-lambda-go/lambdacontext
go.exe get -u github.com/aws/aws-lambda-go/cmd/build-lambda-zip
To compile the code Windows/Linux/Mac, use the following commands −
GOOS=linux GOARCH=amd64 go build -o main main.go
%GOPATH%\bin\build-lambda-zip.exe -o main.zip main
AWS Lambda Function using GO
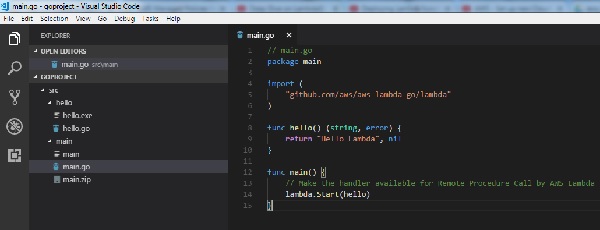
A program returned in Go when build gives an executable file. The following is a simple program in Go with AWS Lambda support. We need to import the github.com/aws/aws-lambda-go/lambda, as this has the Lambda programming functionality.Another important need for AWS Lambda is the handler.
Main.go
// main.go
package main

import (
   "github.com/aws/aws-lambda-go/lambda"
)
func hello() (string, error) {
   return "Hello Lambda", nil
}
func main() {
   // Make the handler available for Remote Procedure Call by AWS Lambda
   lambda.Start(hello)
}
Note that the execution of the Go program starts from main where lambda. start is called with the handler function. Observe the code shown below −
func main() {
   // Make the handler available for Remote Procedure Call by AWS Lambda
   lambda.Start(hello)
}
Now, let us execute the above file using Go command and then zip the executable file.
The structure of the file we have been using is as shown here −
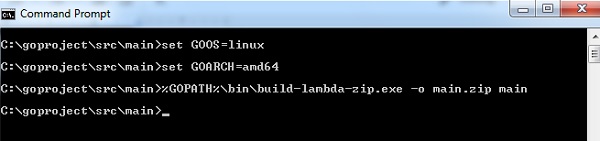
With go build, it creates an executable file called main.exe. To zip the file and upload it in AWS Lambda, you can use the following procedure −
To compile the code Windows/Linux/Mac, use the following commands −
GOOS=linux GOARCH=amd64 go build -o main main.go
%GOPATH%\bin\build-lambda-zip.exe -o main.zip main
Then, login into AWS console and create Lambda function using Go as runtime −
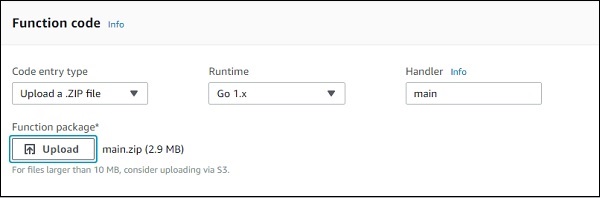
Once the function is created, upload the executable zip file created above.
Lambda function handler with Go
Handler is where the execution of the Go program starts. From main call to lambda.start, execution is called with the handler function. Note that the handler to be added will be main.
Observe the code here for an understanding −
func main() {
   // Make the handler available for Remote Procedure Call by AWS Lambda
   lambda.Start(hello)
}
Follow as per the screenshots given below −
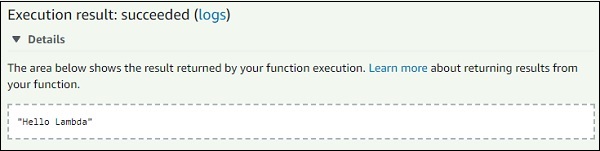
Now, save the function and test it. You can see the execution result as shown here.
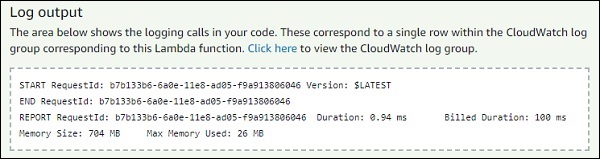
The corresponding log output will be as shown here −
Context object with Go
AWS Lambda in Go gives following global variables and properties for context.
MemoryLimitInMB − Memory limit, in MB that is configured in aws lambda.
FunctionName − name of aws lambda function.
FunctionVersion − the version of aws lambda function executing.
LogStreamName − cloudwatch log stream name.
LogGroupName − cloudwatch group name.
The properties available on context are given as under −
AwsRequestID
This is AWS request id which you get when AWS Lambda function is invoked.
ClientContext
This contains details about the client application and device when invoked through the AWS Mobile SDK. It can be null. Client context provides details like client ID, application title, version name, version code, and the application package name.
InvokedFunctionArn
The ARN of the function invoked. An unqualified ARN executes the $LATEST version and aliases execute the function version it is pointing to.
Identity
It gives details about the Amazon Cognito identity provider when used with AWS mobile SDK.
The changes added to main.go to print context details −
// main.go
package main

import (
   "context"
   "log"
   "github.com/aws/aws-lambda-go/lambda"
   "github.com/aws/aws-lambda-go/lambdacontext"
)

func hello(ctx context.Context) (string, error) {
   lc, _ := lambdacontext.FromContext(ctx);
   log.Print(lc);
   log.Print(lc.AwsRequestID);
   log.Print(lc.InvokedFunctionArn);
   return "Hello Lambda", nil
}

func main() {
   // Make the handler available for Remote Procedure Call by AWS Lambda
   lambda.Start(hello)
}
We need to import the log and lambda context to use it with Go. The context details are as follows −
func hello(ctx context.Context) (string, error) {
   lc, _ := lambdacontext.FromContext(ctx);
   log.Print(lc);
   log.Print(lc.AwsRequestID);
   log.Print(lc.InvokedFunctionArn);
   return "Hello Lambda", nil
}
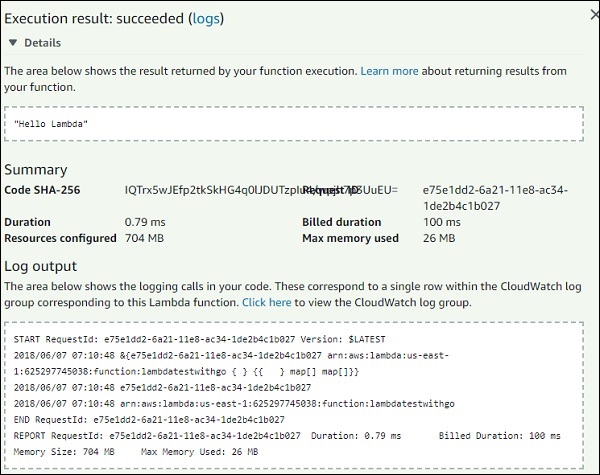
You can observe the following output on testing the above code −
Logging data
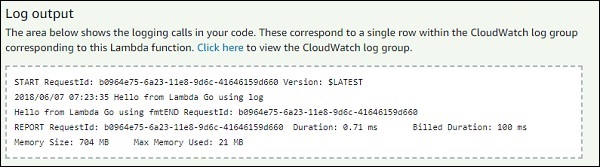
With Go you can log data using the log or fmt module as shown below −
// main.go
package main

import (
   "log"
   "fmt"
   "github.com/aws/aws-lambda-go/lambda"
)

func hello() (string, error) {
   log.Print("Hello from Lambda Go using log");
   fmt.Print("Hello from Lambda Go using fmt");
   return "Hello Lambda", nil
}

func main() {
   // Make the handler available for Remote Procedure Call by AWS Lambda
   lambda.Start(hello)
}
The output for same is as shown below −
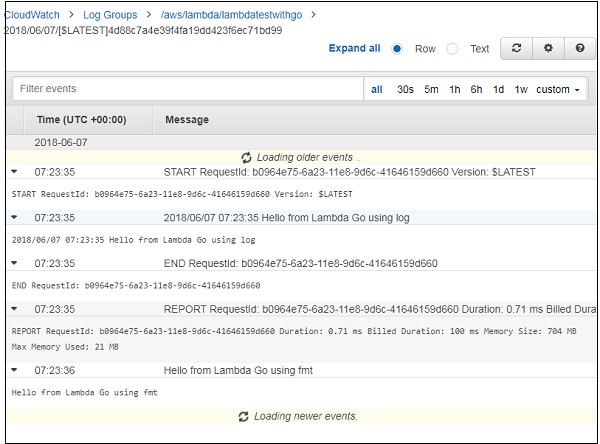
Checking Logs in CloudWatch
You can see the logs in CloudWatch also. For this, go to AWS service and select cloudwatch and click Logs on left side. Now, search for Lambda function in the list to see the logs −
Function Errors
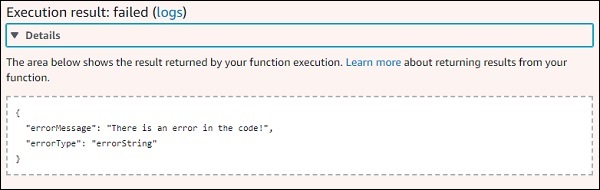
You can create custom error handling in AWS Lambda using the errors module as shown in the code below −
// main.go
package main
import (
   "errors"
   "github.com/aws/aws-lambda-go/lambda"
)

func hello() error  {
   return errors.New("There is an error in the code!")
}

func main() {
   // Make the handler available for Remote Procedure Call by AWS Lambda
   lambda.Start(hello)
}
The output for the code shown above is as given below −
AWS Lambda Function in C#
This chapter will explain you how to work with AWS Lambda function in C# in detail. Here, we are going to use visual studio to write and deploy the code to AWS Lambda. For any information and help regarding installation of Visual studio and adding AWS toolkit to Visual Studio, please refer to the Introduction chapter in this tutorial. Once you are done with installation of Visual Studio, please follow the steps given below. Refer to the respective screenshots for a better understanding −
Step 1
Open your Visual Studio and follow the steps to create new project. Click on File -> New -> Project.

Step 2
Now, the following screen is displayed wherein you select AWS Lambda for Visual C#. Select AWS Lambda Project (.NET Core).
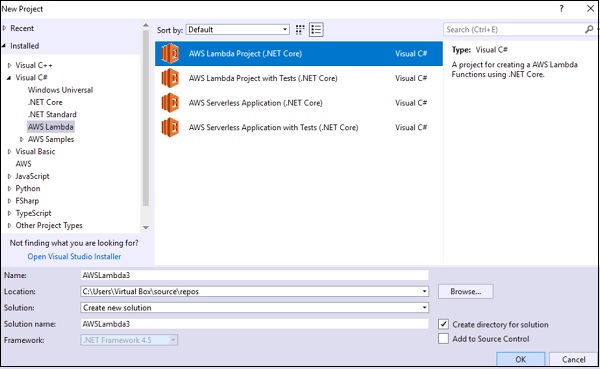
You can change the name if required, will keep here the default name. Click OK to continue.
The next step will ask you to select a Blueprint.

Select Empty function for this example and click Finish. It will create a new project structure as shown below −
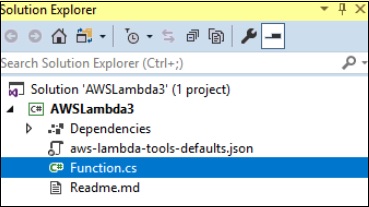
Now, select Function.cs which is the main file where the handler with event and context is created for AWS Lambda.
The display of the file Functions.cs is as follows −
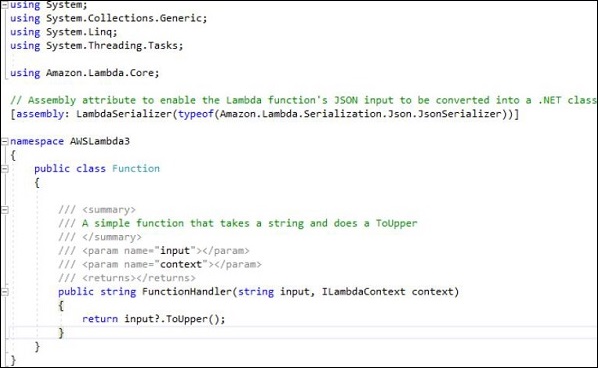
You can use the command given below to serialize the input and output parameters to AWS Lambda function.
[assembly:
LambdaSerializer(typeof(Amazon.Lambda.Serialization.Json.JsonSerializer))]
Handler Details for C#
The handler is displayed as follows −
public string FunctionHandler(string input, ILambdaContext context) {
   return input?.ToUpper();
}
Various components of the above code are explained below −
FunctionHandler −This is the starting point of the C# AWS Lambda function.
String input − The parameters to the handler string input has all the event data such as S3 object, API gateway details etc.
ILambdaContext context − ILamdaContext is an interface which has context details. It has details like lambda function name, memory details, timeout details etc.
The Lambda handler can be invoked in sync and async way. If invoked in a sync way as shown above you can have the return type. If async than the return type has to be void.
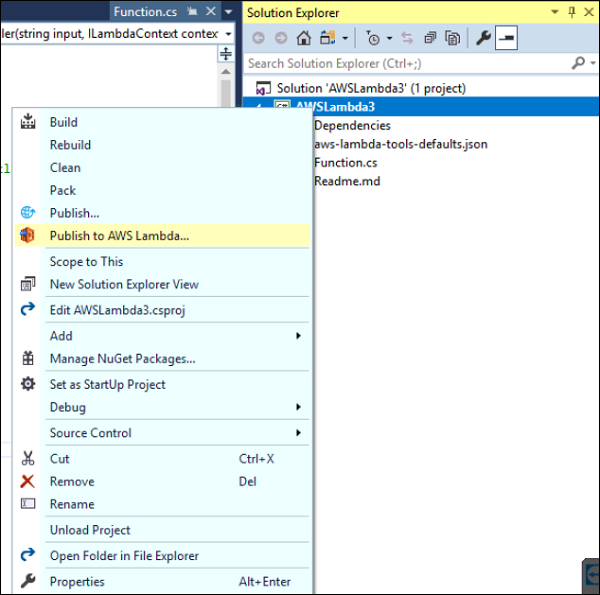
Now, let us deploy the AWS Lambda C# and test the same. Right click the project and click Publish to AWS Lambda as shown below −
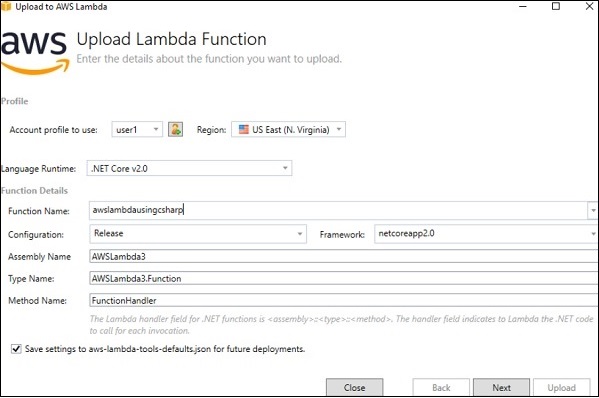
Fill up the Function Name and click on Next. The next screen displayed is the Advanced Function Details as shown −
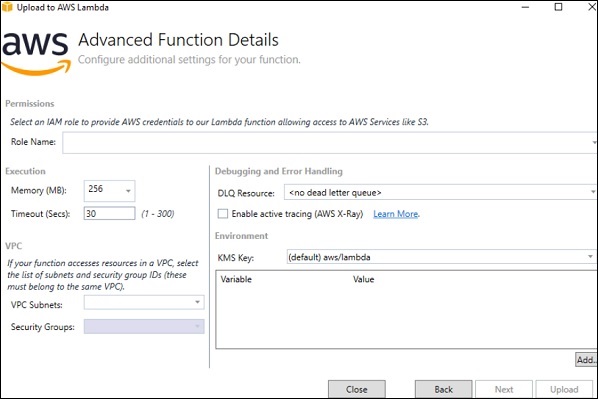
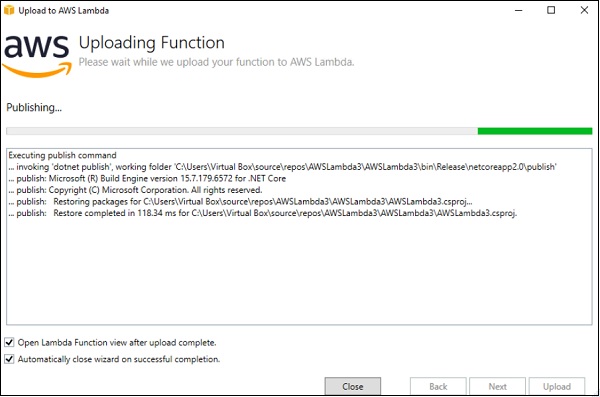
Enter the Role Name, Memory and Timeout. detailsNote that here we have selected the existing role created and used memory as 128MB and timeout as 10seconds. Once done click Upload to publish to AWS Lambda console.
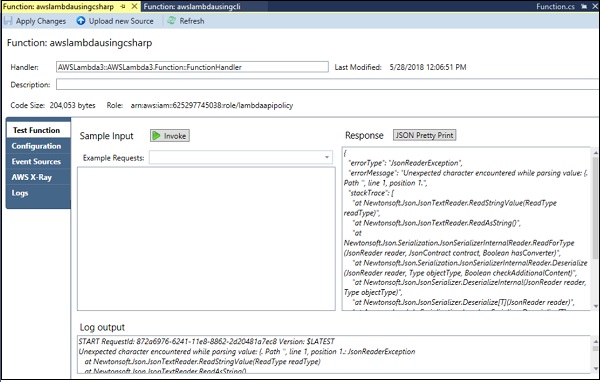
You can see the following screen once AWS Lambda function is uploaded. Click Invoke to execute the AWS Lambda function created. At present, it shows error as it needs some input as per the code written.
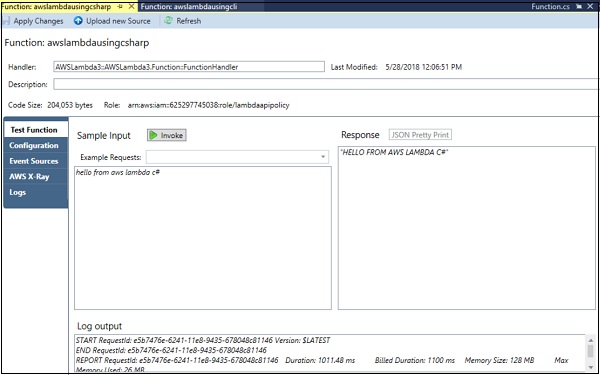
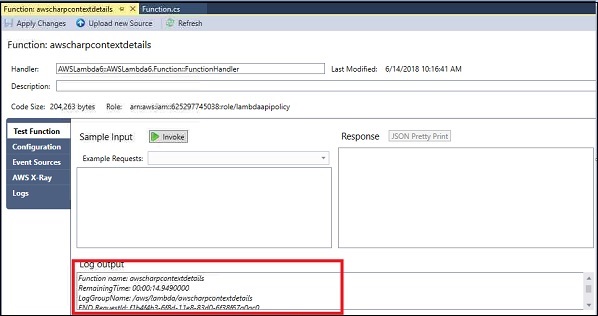
Now, let us enter some sample input and Invoke it again. Note that here we have entered some text in the input box and the same on clicking invoke is displayed in uppercase in the response section. The log output is displayed below −
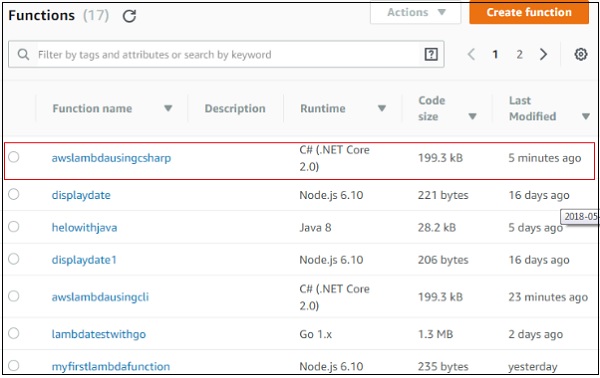
Now, let us also check AWS console to see if the function is created as we have deployed the function from Visual Studio.
The Lambda function created above is aws lambda using csharp and the same is displayed in AWS console as shown in the screenshots given below −
Handler Signature
Handler is start point for AWS to execute. The name of the handler should be defined as −
ASSEMBLY::TYPE::METHOD
The details of the signature are explained as below −
ASSEMBLY − This is the name of the .NET assembly for the application created. It is basically the name of the folder from where the project is created.
TYPE − This is the name of the handler. It is basically the namespace.classname.
METHOD − This is the name of the function handler.
The code for handler signature is as shown below −
using System;
using System.Collections.Generic;
using System.Linq;
using System.Threading.Tasks;
using Amazon.Lambda.Core;

// Assembly attribute to enable the Lambda function's JSON input to be converted into a .NET class.
[assembly: LambdaSerializer(typeof(Amazon.Lambda.Serialization.Json.JsonSerializer))]

namespace AWSLambda3 {
   public class Function {

      /// <summary>
      /// A simple function that takes a string and does a ToUpper
      /// </summary>
      /// <param name="input"></param>
      /// <param name="context"></param>
      /// <returns></returns>
      public string FunctionHandler(string input, ILambdaContext context) {
         return input?.ToUpper();
      }
   }
}
Note that here the assembly is AWSLamda3, Type is namespace.classname which is AWSLambda3.Function and Method is FunctionHandler. Thus, the handler signature is AWSLamda3::AWSLambda3.Function::FunctionHandler
Context object in C#
Context Object gives useful information about the runtime in AWS environment. The properties available in the context object are as shown in the following table −
| Sr.No | Properties & Description |
|---|---|
| 1 | MemoryLimitInMB This will give details of the memory configured for AWS Lambda function |
| 2 | FunctionName Name of AWS Lambda function |
| 3 | FunctionVersion Version of AWS Lambda function |
| 4 | InvokedFunctionArn ARN used to invoke this function. |
| 5 | AwsRequestId AWS request id for the AWS function created |
| 6 | LogStreamName Cloudwatch log stream name |
| 7 | LogGroupName Cloudwatch group name |
| 8 | ClientContext Information about the client application and device when used with AWS mobile SDK |
| 9 | Identity Information about the amazon cogbnito identity when used with AWS mobile SDK |
| 10 | RemainingTime Remaining execution time till the function will be terminated |
| 11 | Logger The logger associated with the context |
Example
In this section, let us test some of the above properties in AWS Lambda in C#. Observe the sample code given below −
using System;
using System.Collections.Generic;
using System.Linq;
using System.Threading.Tasks;
using Amazon.Lambda.Core;
// Assembly attribute to enable the Lambda function's JSON input to be converted into a .NET class.
[assembly: LambdaSerializer(typeof(Amazon.Lambda.Serialization.Json.JsonSerializer))]

namespace AWSLambda6 {
   public class Function {

      /// <summary>
      /// </summary>
      /// <param name="input"></param>
      /// <param name="context"></param>
      /// <returns></returns>
      public void FunctionHandler(ILambdaContext context) {
         LambdaLogger.Log("Function name: " + context.FunctionName+"\n");
         context.Logger.Log("RemainingTime: " + context.RemainingTime+"\n");
         LambdaLogger.Log("LogGroupName: " + context.LogGroupName+"\n");
      }
   }
}
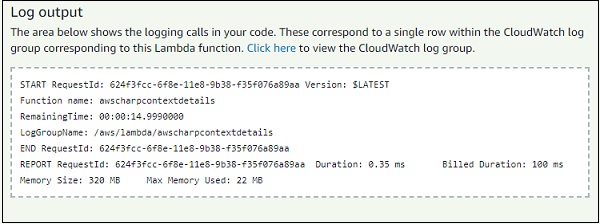
The related output that you can observe when you invoke the above code in C# is as shown below −
The related output that you can observe when you invoke the above code in AWS Console is as shown below −
Logging using C#
For logging, you can use two functions −
context.Logger.Log
LambdaLogger.Log
Observe the following example shown here −
public void FunctionHandler(ILambdaContext context) {
   LambdaLogger.Log("Function name: " + context.FunctionName+"\n");
   context.Logger.Log("RemainingTime: " + context.RemainingTime+"\n");
   LambdaLogger.Log("LogGroupName: " + context.LogGroupName+"\n");
}
The corresponding output fo the code given above is shown here −

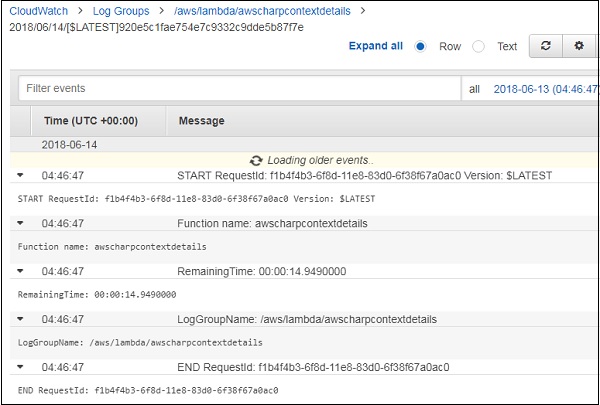
You can get the logs from CloudWatch as shown below −
Error Handling in C# for Lambda Function
This section discusses about error handling in C#. For error handling,Exception class has to be extended as shown in the example shown below −
example
namespace example {
   public class AccountAlreadyExistsException : Exception {
      public AccountAlreadyExistsException(String message) :
         base(message) {
      }
   }
}
namespace example {
   public class Handler {
     public static void CreateAccount() {
       throw new AccountAlreadyExistsException("Error in AWS Lambda!");
     }
   }
}
The corresponding output for the code given above is as given below −
{
   "errorType": "LambdaException",
   "errorMessage": "Error in AWS Lambda!"
}
AWS Lambda Configuring Lambda Function
In the previous chapters, we have learnt how to create AWS Lambda function in AWS console. However, there are other parameters for creating a Lambda function. These include memory allocation, timeout etc.
In this chapter, let us understand in detail about the following configuration properties for AWS Lambda.
Memory Allocation
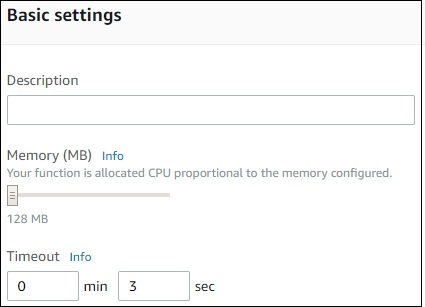
Login to AWS console and create or select the existing lambda function. Click the Configuration tab to get the details of the memory allocated. Look at the screenshot shown below −
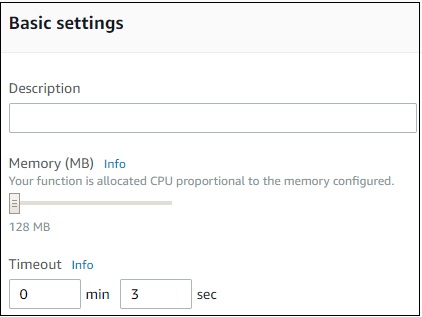
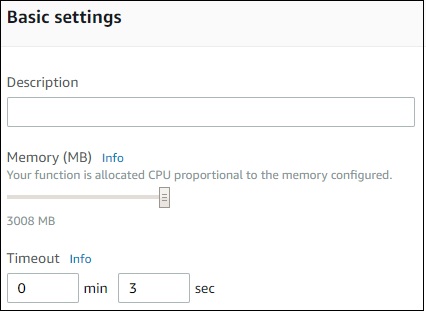
Note that by default the memory allocated is 128MB. If you want to increase the memory you can click the slider.
The memory will get incremented to 64MB as you move the slider. Observe that the maximum memory available is 3008MB. Look at the screenshot shown below −
You can also use aws cli from command prompt to increase the memory limit. You will have to give the memory in increments of 64MB.
Now, let us increase the memory limit of AWS Lambda with name :myfirstlambdafunction.
The memory details of the function are shown in the screenshot given below −
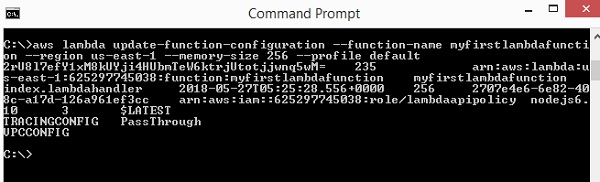
The command used to change the memory using aws cli is as follows −
aws lambda update-function-configuration --function-name your function name --
region region where your function resides --memory-size memory amount --
profile admin user
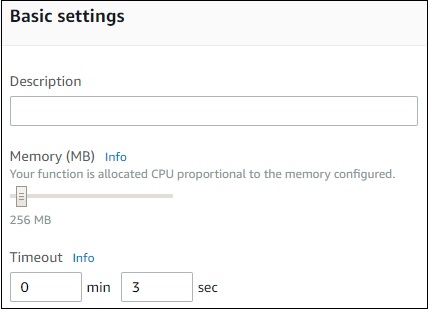
The corresponding output of AWS Lambda function myfirstlambdafunction in AWS console is shown here. Observe that the memory is changed from 128MB to 256MB.
Maximum Execution Time
Timeout is the time allotted to AWS Lambda function to terminate if the timeout happens. AWS Lambda function will either run within the allocated time or terminate if it exceeds the timeout given. You need to evaluate the time required for the function to execute and accordingly select the time in Configuration tab in AWS console as shown below −
IAM Role
When creating AWS Lambda function, the role or the permission needs to be assigned. Incase you need AWS Lambda for S3 or dynamoDB, permission with regard to the services of lambda needs to be assigned. Based on the role assigned, AWS Lambda will decide the steps to be taken. For Example if you give full access of dynamodb, you can add, update and delete the rows from the dynamodb table.
Handler Name
This is the start of execution of the AWS Lambda function. Handler function has the details of the event triggered, context object and the callback which has to send back on success or error of AWS Lambda.
The format of the handler function in nodejs is shown here −
exports.handler = (event, context, callback) => {
   callback(null, "hello from lambda");
};
Lambda Function using Environment Variables
In this section, we will create a simple Lambda function using environment variables added in the configuration section. For this purpose, follow the steps given below and refer the respective screenshots −
Step 1
Go to AWS console and create a function in Lambda as shown.

Step 2
Now, add the environment variables as shown −
Step 3
Now, let us fetch the same in Lambda code as follows −
exports.handler = (event, context, callback) => {
   var hostName = process.env.host;
   var userName = process.env.username;
   callback(null, "Environment Variables =>"+hostName+" and "+userName);
};
Step 4
To get the details from environment variables we need to use process.env as shown. Note that this syntax is for NodeJS runtime.
var hostName = process.env.host;
var userName = process.env.username;
Step 5
The output for the Lambda function on execution will be as shown −

Creating and Deploying using AWS Console
We can create Lambda function and test the same in AWS console. This chapter discusses this in detail. For this purpose, you will have to follow the steps given here and observe the respective screenshots given −
Step 1
Login to AWS Console https://aws.amazon.com/console/. Now, you will be redirected to the screen where the AWS services are displayed.
Step 2
Now, click on Lambda service as highlighted above. This will redirect to create function as shown below −

Step 3
Now, click Create function and enter the details of the function. Then you can see a screen as shown below −
Step 4
You can write your code by choosing the language of your choice. The code has to be written in editor if the option selected is edit code inline. The other options available are as follows −
Step 5
Once done you need to save the changes for which the button is given at the top right corner as shown below −

Step 6
Now, click Test button. This gives all details of the execution of the Lambda function as shown below −
Step 7
The code for index.js is as follows −
exports.handler = (event, context, callback) => {
   // TODO implement
   callback(null, 'Lambda test');
};
This will call the Callback function and the result can be error or success. On success you will see a Lambda test message; if error it will pass null.
Step 8
The Role details for Lambda function is a part of the configuration and is displayed as shown below −
Step 9
Now, you can update the role if required and save the Lambda function. Then, the memory and timeout details for lambda function are displayed as shown below −
Step 10
Now, we need to add trigger to the Lambda function so that it executes when the event occurs. The trigger details are displayed at the start of the AWS Lambda function screen as shown below −
From this, you can select the trigger you want your Lambda function to get triggered. When you select the trigger, the config details for the trigger has to be added.
For Example, for trigger on S3 the config details to be added are as follows −
Step 11
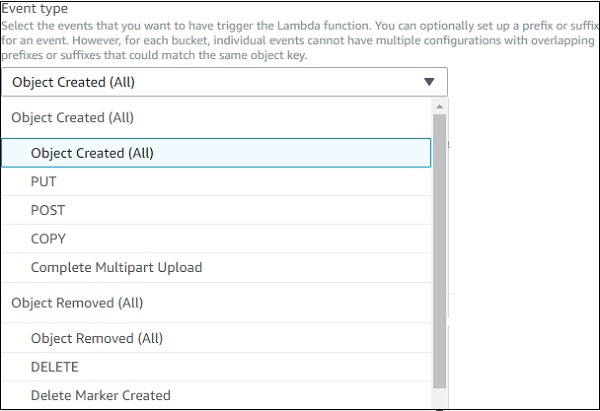
Now, select the bucket you want the trigger on. The event type has the following details −
Step 12
For the trigger, you can also mention the prefix type files or file pattern, the Lambda has to be trigger. The details are as shown −
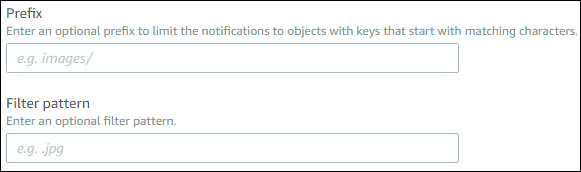
Step 13
Now, fill up the required details for the trigger and click Add button .Save the Lambda function for the trigger to get added.Saving the function deploys the details, and from now onwards anytime files are added to the S3 bucket, the Lambda will get triggered.
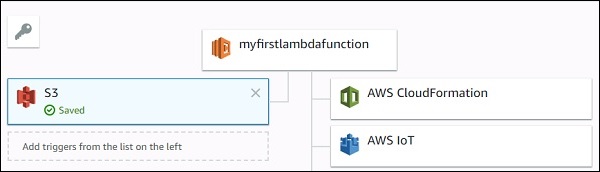
Observe the following screenshot which shows S3 trigger added to AWS Lambda −
Step 14
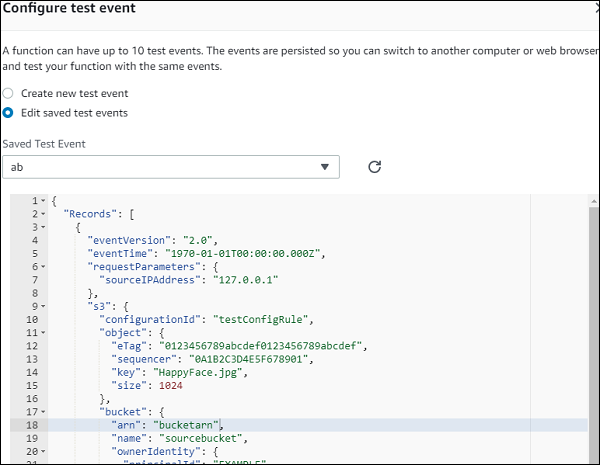
Now, let us use S3 sample event to test the Lambda function. The code for the same is shown here −
Amazon S3 Put Sample Event
{
   "Records": [{
      "eventVersion": "2.0",
      "eventTime": "1970-01-01T00:00:00.000Z",
      "requestParameters": {
         "ExampleIPAddress": "127.0.0.1"
      },
      "s3": {
         "configurationId": "testConfigRule",
         "object": {
            "eTag": "0123456789abcdef0123456789abcdef",
            "sequencer": "0A1B2C3D4E5F678901",
            "key": "HappyFace.jpg",
            "size": 1024
         },
         "bucket": {
            "arn": bucketarn,
            "name": "Examplebucket",
            "ownerIdentity": {
               "principalId": "Example"
            }
         },
         "s3SchemaVersion": "1.0"
      },
      "responseElements": {
         "x-amz-id-2": "Example123/5678abcdefghijklambdaisawesome/mnopqrstuvwxyzABCDEFGH",
         "x-amz-request-id": "Example123456789"
      },
      "awsRegion": "us-east-1",
      "eventName": "ObjectCreated:Put",
      "userIdentity": {
         "principalId": "Example"
      },
      "eventSource": "aws:s3"
   }]
}
You will have to use the following command to get the details of file uploaded from the S3 put event −
event.Records[0].s3.object.key //will display the name of the file
You will have to use the following command to get the bucket name −
event.Records[0].s3.bucket.name //will give the name of the bucket.
You will have to use the following command to get the EventName −
event.Records[0].eventName // will display the event name
Step 15
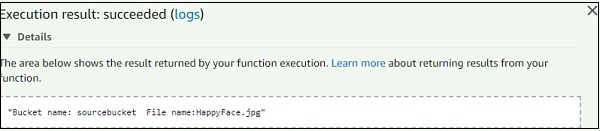
Now, let us update AWS Lambda code to print the S3 details as shown below −
exports.lambdahandler = (event, context, callback) => {
   callback(null, "Bucket name: "+event.Records[0].s3.bucket.name+"
   File name:"+event.Records[0].s3.object.key );
};
Step 16
Save the changes. Click Test and enter the S3 sample event −
Step 17
Now click Test and you can see the output as shown −
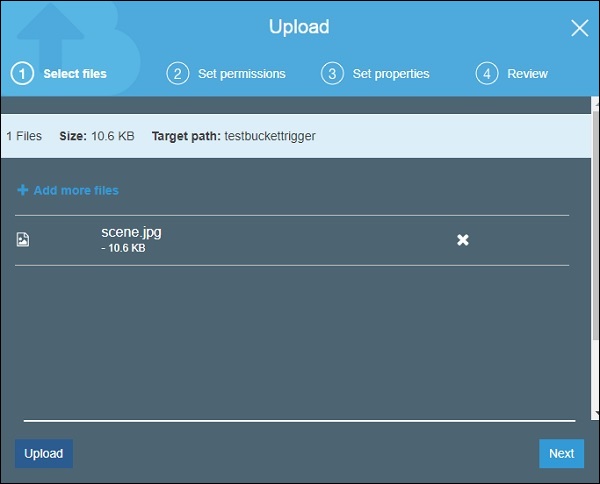
Step 18
To test the trigger on S3 using S3 AWS service, upload a file in S3 bucket: test bucket trigger. Update the role used with Lambda to take S3 and SES policy(to send mail) for permissions. This will update AWS Lambda code to send mail to see the trigger working −
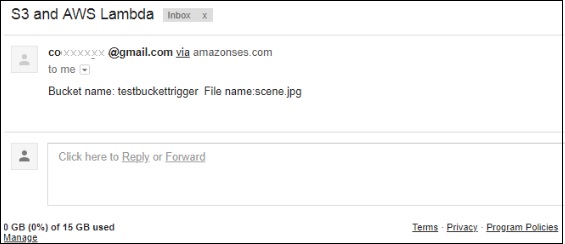
The updated AWS Lambda code is as shown −
var aws = require('aws-sdk');
var ses = new aws.SES({
   region: 'us-east-1'
});
exports.lambdahandler = function(event, context, callback) {
   var eParams = {
      Destination: {
         ToAddresses: ["coxxxxxxx@gmail.com"]
      },
      Message: {
         Body: {
            Text: {
               Data: "Bucket name: "+event.Records[0].s3.bucket.name+"  File name:"+event.Records[0].s3.object.key
            }
         },
         Subject: {
            Data: "S3 and AWS Lambda"
         }
      },
      Example: "coxxxxxx@gmail.com"
   };
   console.log('===SENDING EMAIL===');
   var email = ses.sendEmail(eParams, function(err, data) {
      if (err) console.log(err);
         else {
            console.log("===EMAIL SENT===");
            console.log("EMAIL CODE END");
            console.log('EMAIL: ', email);
            context.succeed(event);
            callback(null, "email is send");
         }
   });
};
The corresponding screenshot is as shown here −
Step 19
Now, upload the file and check the mail id provided in AWS Lambda code −
Creating and Deploying using AWS CLI
AWS CLI is a command line tool which helps to work with AWS services. We can use it to create, update, delete, invoke aws lambda function. In this chapter, you will discuss about installation and usage of AWS CLI in detail.
Installation of AWS CLI
This section will guide you through the installation of AWS CLI on various operating systems. Follow the steps given and observe corresponding screenshots wherever attached.
For Windows
Check your Windows configuration and choose one of the following links for installing AWS CLI MSI −
For Windows 64 bit − AWS CLI MSI install for windows (64bit)
For Windows 32 bit − AWS CLI MSI install for windows (32)
Once you choose corresponding link and click it, you can find a Window as shown here −
Next, set the Environment path in windows as shown in the screenshots below −
Once done, you can use the following command on the command prompt, to see if aws cli is installed −
aws --version
It displays the details of aws-cli version as shown in the following screenshot −

For Linux / Mac
For installing on Linux and Mac, you need Python 2.6.3 or higher verison of it. Then, use following commands for further installation processes −
$ curl "https://s3.amazonaws.com/aws-cli/awscli-bundle.zip" -o "awscli-bundle.zip"
$ unzip awscli-bundle.zip
$ sudo ./awscli-bundle/install -i /usr/local/aws -b /usr/local/bin/aws
Now, we need to configure AWS settings. You can use the following command for this purpose −
aws configure
For this purpose, it requires details such as −
- AWS Access Key ID
- AWS Secret Access Key
- Default region name
- Default output from format
You can obtain these details from your aws console. Go to you Account name at top right corner as shown −
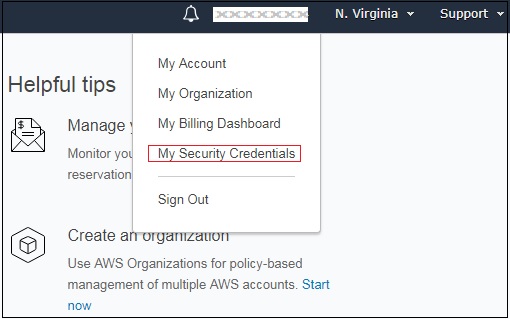
Now, click My Security Credentials and select users from left side. Add user with details as asked.
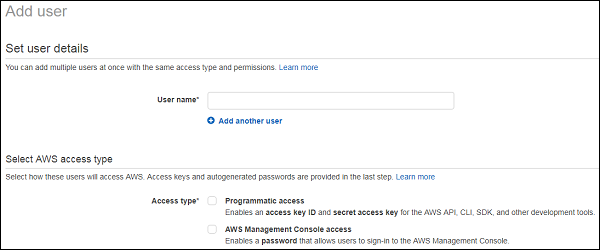
Add the user and to get the access key and secret key. To see the new access key, choose Show. Your credentials will look like as shown below −
Access key ID − AOSAIOSFOCDD7Example
Secret access key − aJuirCVtnROUN/K7MDENG/bPxRfiCYExampleKEY
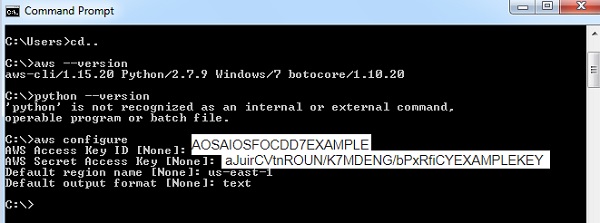
Reference Commands for AWS CLIS
The following table will give command references available to work with aws cli.
| Name of aws cli command | Command reference |
|---|---|
| create-function | create-function --function-name <value> --runtime <value> --role <value> --handler <value> [--code <value>] [--description <value>] [--timeout <value>] [--memory-size <value>] [--environment <value>] [--kms-key-arn <value>] [--tags <value>] [--zip-file <value>] [--cli-input-json <value>] |
| list-functions | list-functions [--master-region <value>] [--function-version <value>] [--max-items <value>] [--cli-input-json <value>] [--starting-token <value>] [--page-size <value>] [--generate-cli-skeleton <value>] |
| get-function | get-function --function-name <value> [--qualifier <value>] [--cli-input-json <value>] [--generate-cli-skeleton <value>] |
| get-function-configuration | get-function-configuration --function-name <value> [--qualifier <value>] [--cli-input-json <value>] [--generate-cli-skeleton <value>] |
| get-account-settings | get-account-settings [--cli-input-json <value>] [--generate-cli-skeleton <value>] |
| update-function-configuration | update-function-configuration --function-name <value> [--role <value>] [--handler <value>] [--description <value>] [--timeout <value>] [--memory-size <value>] [--vpc-config <value>] [--environment <value>] [--runtime <value>] [--dead-letter-config <value>] [--kms-key-arn <value>] [--tracing-config <value>] [--revision-id <value>] [--cli-input-json <value>] [--generate-cli-skeleton <value>] |
| update-function-code | update-function-code --function-name <value> [--zip-file <value>] [--s3-bucket<value>] [--s3-key <value>] [--s3-object-version <value>] [--publish | --no-publish] [--dry-run | --no-dry-run] [--revision-id <value>][--cli-input-json <value>][--generate-cli-skeleton <value>] |
| delete-function | delete-function --function-name <value> [--qualifier <value>] [--cli-input-json <value>] [--generate-cli-skeleton <value>] |
Now, let us discuss these commands one by one in detail.
create-function
This api will create a new lambda function. The code needs to be given in zip format. If the function to be created already exists, the api will fail. Note that the function name is case-sensitive.
Commands Included
The list of commands that you can use with create-function is given here −
create-function
--function-name <value>
--runtime <value>
--role <value>
--handler <value>
[--code <value>]
[--description <value>]
[--timeout <value>]
[--memory-size <value>]
[--environment <value>]
[--kms-key-arn <value>]
[--tags <value>]
[--zip-file <value>]
[--cli-input-json <value>]
Options Included
Various options that you can use with the functions above are as follows −
--function-name (string) − This takes the name of the function. The name can be 64-bit characters.
--runtime(string) − Here you need to specify the runtime environment ie the language selection. The details of the runtime are as given below −
| Options available | runtime |
|---|---|
| Python v3.6 | python3.6 |
| Python v2.7 | python2.7 |
| NodeJS v6.10 | nodejs6.10 |
| NodeJS v8.10 | nodejs8.10 |
| Java | java8 |
| C# 1 | dotnetcore1.0 |
| C# 2 | dotnetcore2.0 |
| Go | go1.x |
--role(string) − This will be the name of the lambda policy ie the role to be given to the lambda function for accessing other services. It will have the permission as per the role specified.
--handler (string) − This is the name of the handler where the lambda code execution will start.
- For nodejs, handler name is the module name that we export.
- For java, it is package.classname :: handler or package.classname
- For python, handler is nameofthefile.
--code (structure) −AWS Lambda code
--description (string) − description for the AWS Lambda function
--timeout (integer) − timeout will have the time at which the lambda function has to terminate execution. The default is 3s.
--memory-size (integer) − This is the memory given to the aws lambda function. AWS will allocate the amount of CPU and memory allocation based on the memory given.
--environment (structure) − its a object with environment details required in the aws lambda function.
e.g : Variables = {Name1 = string, Name2 = string}
--kms-key-arn (string) − this is amazon resource name (ARN) used to encrypt the environment variables. If not provided it will take the default settings to encrypt.
--zip-file (blob) − path of the zip file which has the details of the code.
--cli-input-json (string) : Performs service operation based on the JSON string provided. The JSON string follows the format provided by --generate-cli-skeleton. If other arguments are provided on the command line, the CLI values will override the JSON-provided values.
Now, let us create a simple AWS Lambda function using runtime as nodejsand add some console.logs to be printed.
Consider a sample code for understanding the same −
exports.handler = async (event) => {
   console.log("Using aws cli");
   return 'Hello from Lambda from aws cli!'
};
Now, zip the file and store it as awscli.zip.
Getting ARN
For the role, let us use the arn from the existing role we have created. To get the ARN, you will have to follow the steps as shown here. Observe the respective screenshots wherever attached −
Step 1
Go to IAM and select the role you want from Roles. The ARN details for the role are displayed as shown below. Use Role ARN with create-function in aws cli.
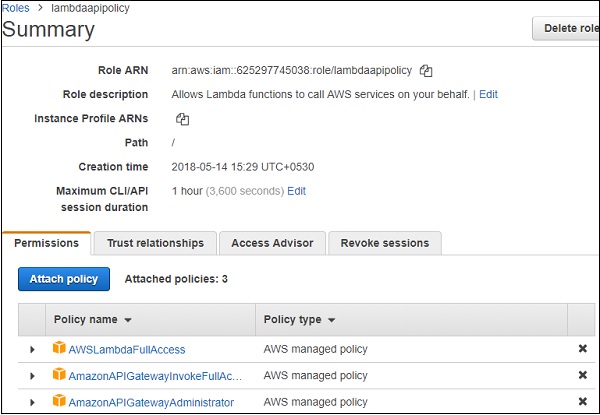
Observe here that the role arn is : arn:aws:iam::625297745038:role/lambdaapipolicy
The command with values for create-function is as follows −
aws lambda create-function
--function-name "awslambdausingcli"
--runtime "nodejs8.10"
--role "arn:aws:iam::625297745038:role/lambdaapipolicy"
--handler "awscli.handler"
--timeout 5
--memory-size 256
--zip-file "fileb://awscli.zip"
Now, if you run the command in aws cli, you can find an output as shown below −

In AWS console, the Lambda function is displayed as shown below −
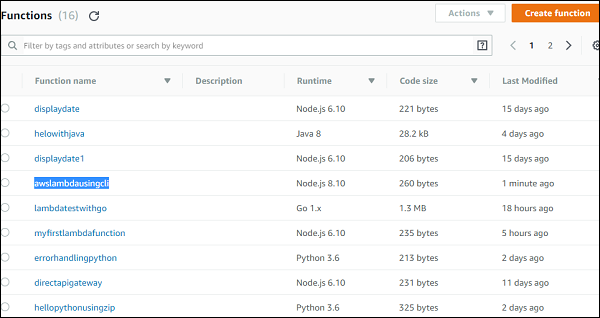
The details of the functions are as shown here −
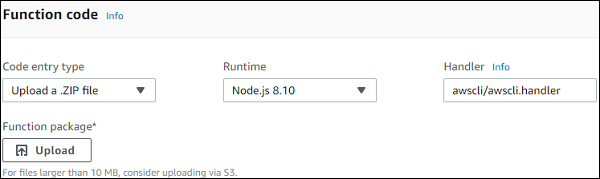
The details of the configuration are as given below −
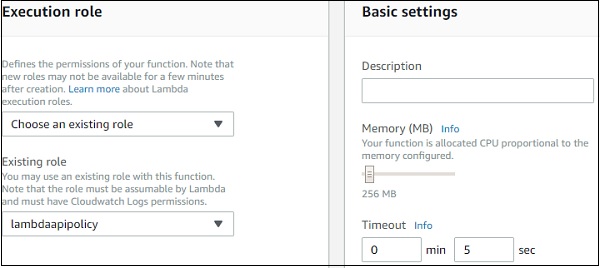
You can test the function and check the output as shown −
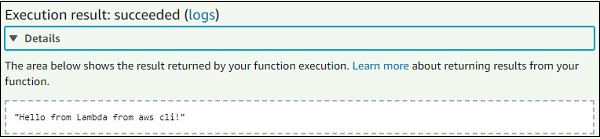
The corresponding Log output is shown here −
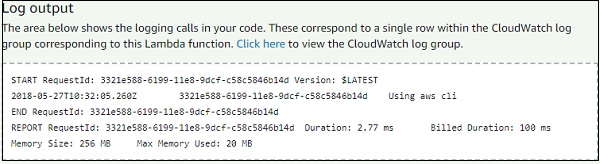
list-functions
This api gives the list of functions created so far in AWS Lambda.
Commands Included
The following are the commands asscociated with this API −
list-functions
[--master-region <value>]
[--function-version <value>]
[--max-items <value>]
[--cli-input-json <value>]
Options under list-functions
The following are various options you can use under this list-functions api −
--master-region(string) − optional. The region from which the functions needs to be displayed.
--function-version(string) − optional. This will give the function version.
--max-items(integer) − optional. This will give the items as the per the value specified.
--cli-input-json(string) − optional. Will perform operation based on the json file provided.
The command with values list-functions is as follows −
aws lambda list-functions --max-items 3
The command displays details as follows −
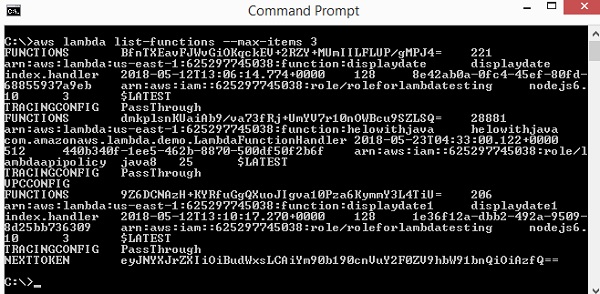
get-function
This api will give details of the functions and also a url link which has zip file uploaded using create-function. The url with zip details will be valid only for 10 mins.
Commands Included
The following are the commands associated with this api −
get-function
--function-name <value>
[--qualifier <value>]
[--cli-input-json <value>]
[--generate-cli-skeleton <value>]
Options Included
--function-name − Name of the AWS Lambda function. You can also specify Amazon Resource Name of the function.
--qualifier(string) − Optional. Function version can be used to get the details of the function.
The command with values to get-function are −
aws lambda get-function --function-name awslambdausingcli
The command display details are as follows −
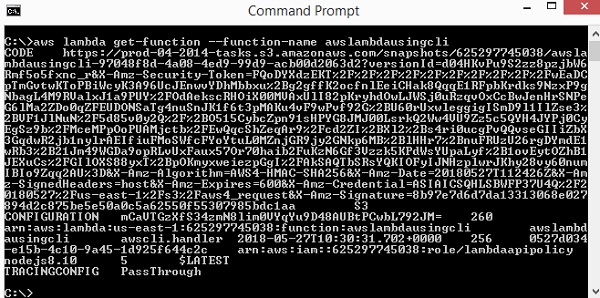
It gives the url which has the zip code uploaded. In the above case the url is −
https://prod-04-2014-
tasks.s3.amazonaws.com/snapshots/625297745038/awslambdausingcli-97048f8d-4a08
-4ed9-99d9-acb00d2063d2?versionId=d04HKvPu9S2zz8pzjbW6Rmf5o5fxnc_r&X-Amz-Security
-Token=FQoDYXdzEKT%2F%2F%2F%2F%2F%2F%2F%2F%2F%2FwEaDCpTmGvtwKToPBiWcyK3A96UcJEnwvYDhMbbxu
%2Bg2gffK2ocfnlEeiCHak8QqqE1RFpbKrdks9NzxP9gNbagL4M9RValxJ1a9PUY%2FOdAekscRHOiX00MVAxUlI8
2pKryhdOwLJWSj0uRzqvOxCcBwJenHrSNPeG6lMa2ZDo0qZFEUDONSaTg4nuSnJK1f6t3pMAKu4vF9wPvf92G%2BU
60rUxwleggigISmD9l1IlZse3%2BVF1JlNuN%2F5d85v0y2Q%2F%2BO515CybcZpn91sHPYG8JMJ00LsrkQ2Ww4VU
9Zz5c5QYH4JYPj0CyEgSz9b%2FMceMPpOoPUAMjctb%2FEwQqcShZeqAr9%2Fcd2ZI%2BXl2%2Bs4ri0ucgPvQQvs
eGIIiZbX3GqdwR2jb1nylrAEIfiuFMoSWfcFYoYtuL0MZnjGR9jy2GNkp6MB%2BlHHr7%2BnuFRUzU26rgDYmdE1w
Rb3%2B21Jm49WGDa9opRLvUxFaux57Or70haib2FuKzN6Gf3Vzzk5KPdWsYUpaLyf%2B1ovEytOZhB1JEXuCs%2FG
IlOXS88yxT%2BpOKmyxweiezpGgI%2FAkSAQTbSRsYQKIOFyIJNHzplwrJKhy28vy60numIBIo9Zqq2AU%3D
&X-Amz-Algorithm=AWS4-HMAC-SHA256&X-Amz-Date=20180527T112426Z&X-Amz-
SignedHeaders=host&X-Amz-Expires=600&X-Amz-
Credential=ASIAICSQHLSBWFP37U4Q%2F20180527%2Fus-
east-1%2Fs3%2Faws4_request&X-Amz-Signature=
8b97e7d6d7da13313068e027894d2c875be5e50a0c5a62550f55307985bdc1aa
get-function-configuration
This will give the configuration details of the AWS Lambda function.
The following are the commands used along with this api −
get-function-configuration
--function-name <value>
[--qualifier <value>]
The following are the options used with
--function-name (string) − name of the aws lambda function. You can also specify Amazon Resource Name of the function.
--qualifier(string) − Optional.Function version can be used to get the details of the function.
The command with values to get-function are −
aws lambda get-function-configuration --function-name awslambdausingcli
The command displays details as follows −
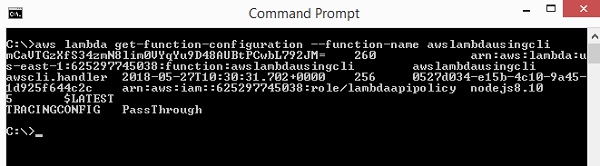
get-account-settings
This api gives the accounts settings.
Commands Involved
The command that you can use with this api are −
get-account-settings
[--cli-input-json <value>]
[--generate-cli-skeleton <value>]
Options Involved
You can use the following options with this api −
--cli-input-json(string) − Performs the service based on the json string provided.
--generate-cli-skeleton(string) − It prints json output without sending the API request.
You can use the following command for get-account-settings −
aws lambda get-account-settings
You can see the following output when you execute the command given above −

update-function-configuration
This api helps to update the configuration details for AWS Lambda function created. You can change the memory, timeout, handler, role, runtime, description etc.
Commands Involved
The following are the commands involved in the update-function-configuration api −
update-function-configuration
--function-name <value>
[--role <value>]
[--handler <value>]
[--description <value>]
[--timeout <value>]
[--memory-size <value>]
[--environment <value>]
[--runtime <value>]
[--cli-input-json <value>]
[--generate-cli-skeleton <value>]
Options Involved
The following are the options involved in update-function-configuration api −
--function-name − name of the aws lambda function
--role (string) − optional. The ARN of role is needed to be updated.
--handler (string) − optional. The handler details of aws lambda function.
--description(string) − optional. Description for the function.
--timeout(integer) − optional. Time required so that aws lambda function can terminate.
--memory-size(integer) − optional. This is the memory given to the aws lambda function. AWS will allocate the amount of CPU and memory allocation based on the memory given.
--environment (structure) − optional. It is an object with environment details required in the aws lambda function.
e.g: Variables = {Name1 = string, Name2 = string}
--runtime(string) − Here you need to specify the runtime environment ie the language selection.
The details of the runtime are shown in the table given below −
| Options available | runtime |
|---|---|
| Python v3.6 | python3.6 |
| Python v2.7 | python2.7 |
| NodeJS v6.10 | nodejs6.10 |
| NodeJS v8.10 | nodejs8.10 |
| Java | java8 |
| C# 1 | dotnetcore1.0 |
| C# 2 | dotnetcore2.0 |
| Go | go1.x |
--cli-input-json (string) − optional. This will perform the operation on the api as specified in the json string provided.
--generate-cli-skeleton (string) − optional. This will output the JSON skeleton of all details without executing the api. The output can be used as a input to --cli-input-json.
Now, let us chage the memory and timeout of AWS Lambda function that we have created earlier. Follow the Steps given below and observe the corresponding screenshots attached for this purpose −
Step 1
The memory and timeout before the change occurred is as follows −
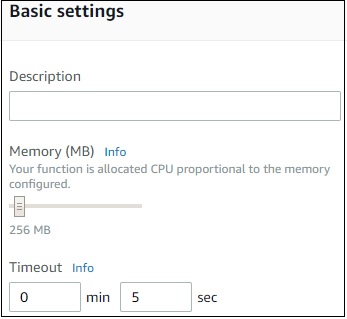
Step 2
Now, with update-function-configuration, let us change the memory and timeout to 320MB and timeout to 10s. For this purpose, use the following command with values −
aws lambda update-function-configuration --function-name awslambdusingcli
--timeout 10 --memory-size 320
Step 3
Then you can see the following output as the display −
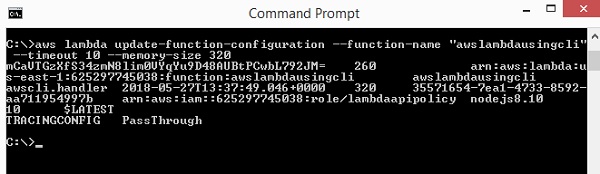
Step 4
The display in AWS console after using update-function-configuration is as follows −
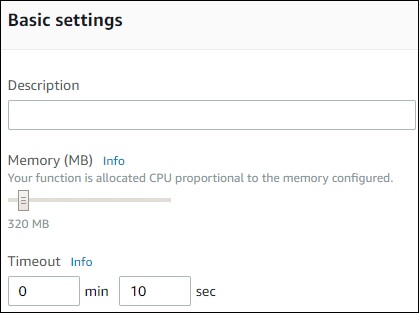
Update-function-code
This api will update the code for an existing AWS Lambda function.
Commands Involved
update-function-code
--function-name <value>
[--zip-file <value>]
[--s3-bucket <value>]
[--s3-key <value>]
[--s3-object-version <value>]
[--cli-input-json <value>]
[--generate-cli-skeleton <value>]
Options Involved
The following are the options involved with the update-function-code api −
--function-name(string) − name of aws lambda function
--zip-file (blob) − optional. Path of the zip file which has the code to be updated.
--s3-bucket(string) − optional. S3 bucket name which has the zip file with code uploaded.
--s3-key(string) − optional. AWS s3 object key name which has to be uploaded.
--s3-object-version (string) − optional. AWS s3 object version.
--cli-input-json (string) − optional. This will perform the operation on the api as specified in the json string provided.
--generate-cli-skeleton (string) − optional. This will output the JSON skeleton of all details without executing the api. The output can be used as a input to --cli-input-json.
The updated code is as shown below −
exports.handler = async (event, context) => {
   console.log("Using aws cli");
   console.log()
   return 'Hello from Lambda from aws cli!'
};
You can use the following command with values for this purpose −
aws lambda update-function-code --function-name "awslambdausingcli"
--zip-file "fileb://awscli.zip"
The corresponding output is as shown here −
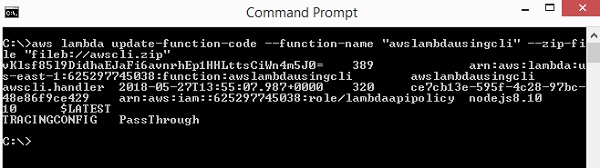
The display from AWS console is as shown here −

The corresponding log output is as shown below −
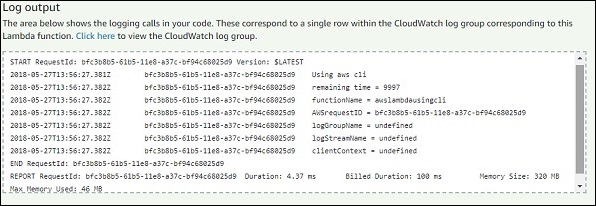
delete-function
The delete aws cli api will delete the function given.
Commands Included
The command details for the same are given here −
delete-function
--function-name <value>
[--qualifier <value>]
[--cli-input-json <value>]
[--generate-cli-skeleton <value>]
Options Included
The options included in this api are as given below −
--function-name(string) − this will take the lambda function name or the arn of the aws lambda function.
--qualifier (string) − This is optional. Here you can specify the version of aws lambda that needs to be deleted.
-- cli-input-json(string) − Performs service operation based on the JSON string provided. The JSON string follows the format provided by --generate-cli-skeleton. If other arguments are provided on the command line, the CLI values will override the JSON-provided values.
--generate-cli-skeleton(string) − it prints json skeleton to standard output without sending the API request.
You can use the following command with values for this purpose −aws lambda delete-function --function-name "lambdatestcli"

Now, observe that the function will not be seen in AWS Lambda function list −
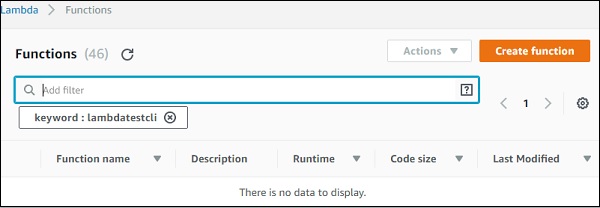
Creating and Deploying using Serverless Framework
AWS Lambda can be created and deployed using serverless framework. It allows you to create AWS Lambda triggers and also deploy the same by creating the required roles. Serverless framework allows to handle big projects in an easier way. The events and resources required are written in one place and just a few commands helps in deploying the full functionality on AWS console.
In this chapter, you will learn in detail how to get started with AWS serverless framework.
Install Serverless Framework using npm install
To begin with, you need to first install nodejs. You can check for nodejs as follows −

You will have to use the following command to install serverless using npm package −
npm install -g serverless

Once npm is done, execute serverless command which shows the list of command to be used to create and deploy AWS Lambda function. Observe the screenshots given below −
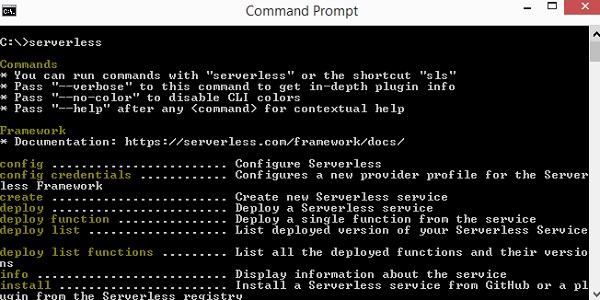
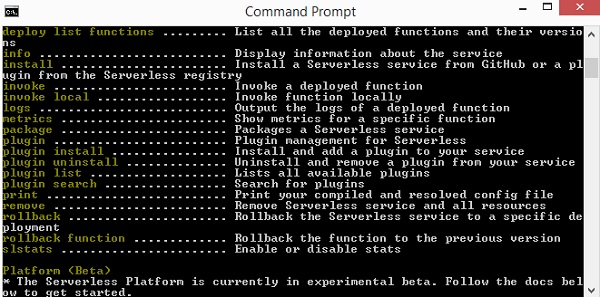
You can also use sls instead of serverless. sls is the shorthand command for serverless.
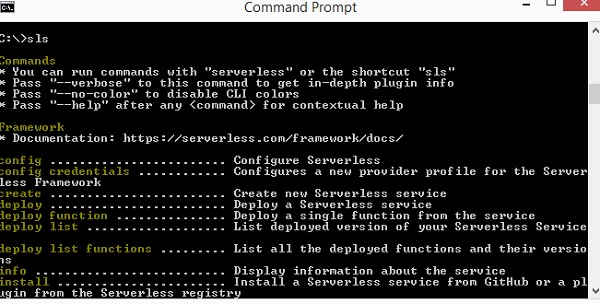
In case you need help on the command sls, you can use the following command −
sls create --help
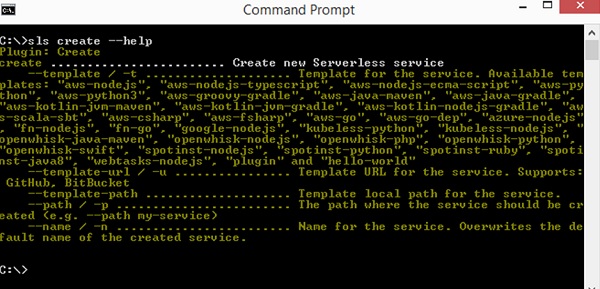
For creating a serverless framework, you have to follow the steps given below −
Step 1
To start using serverless framework, we need to add the credentials. By this, you can the user first in AWS console as follows −
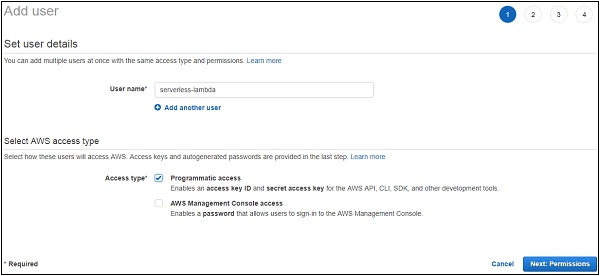
Step 2
Click on Next:Permissions button to add permissions. You will have to attach the existing policies or Administrator Access to this user.
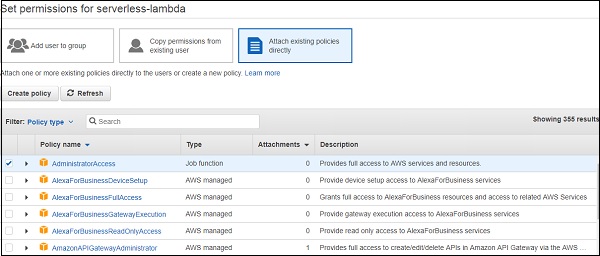
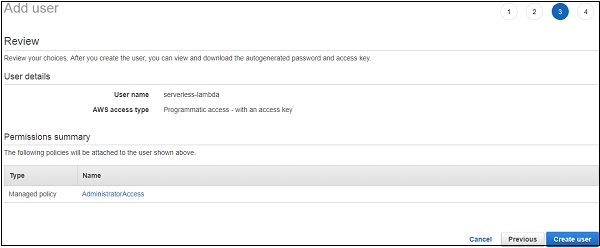
Step 3
Click Create User to add the user. It will display the access key and secret key which we need to configure the serverless framework −

Configure AWS Serverless Framework
Let us see how to configure AWS serverless framework. You can use the following command for this purpose −
sls config credentials --provider aws --key accesskey --secret secretkey
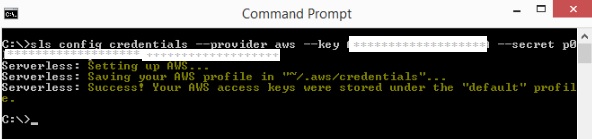
Note that the details of credentials entered, that is the access key and secret key are stored in the file /aws/credentials.
First, create a folder where you want your project files to be stored.
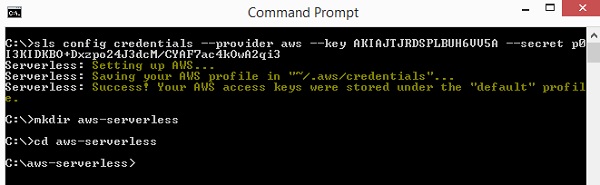
Next, we will start the work in aws-serverless folder.
Create AWS Lambda using Serverless Framework
Now, let us create a Lambda function with the serverless framework using the Steps given below −
Step 1
Following are the details for serverless create command −
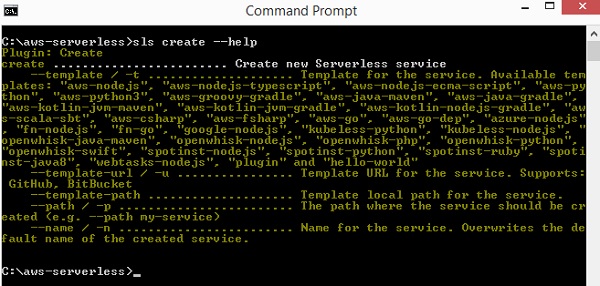
Step 2
Now, we need to assign the template which are as follows −
AWS-nodejs, aws-nodejs-typescript, aws-nodejs-ecma-script, aws-python, aws-python3, aws-groovy-gradle etc.
Step 3
We shall make use of aws-nodejs template to create our first project using serverless framework. The command for the same purpose is as shown here −
sls create --template aws-nodejs
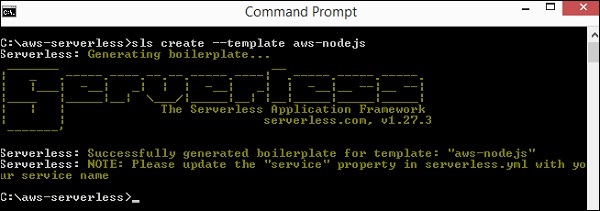
Note that this command creates a boilerplate for template aws-nodejs.
Step 4
Now, open the folder created in an IDE. Here we are using Visual Studio code and the folder structure is as follows −
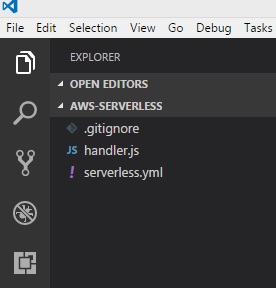
Step 5
There are 2 files created: handler.js and Serverless.yml
The AWS Lambda basic function details are shown in handler.js as follows −
'use strict';

module.exports.hello = (event, context, callback) => {
   const response = {
      statusCode: 200,
      body: JSON.stringify({
         message: 'Go Serverless v1.0! Your function executed successfully!',
         input: event,
      }),
   };
   callback(null, response);

   // Use this code if you don't use the http event with the LAMBDA-PROXY integration
   // callback(null, { message: 'Go Serverless v1.0! Your function executed successfully!', event });
};
This file Serverless.yml has the configuration details of the serverless framework as shown below −
# Welcome to Serverless!
#
# This file is the main config file for your service.
# It's very minimal at this point and uses default values.
# You can always add more config options for more control.
# We've included some commented out config Examples here.
# Just uncomment any of them to get that config option.
#
# For full config options, check the docs:
#    docs.serverless.com
#
# Happy Coding!
service: aws-nodejs # NOTE: update this with your service name

# You can pin your service to only deploy with a specific Serverless version
# Check out our docs for more details
# frameworkVersion: "=X.X.X"

provider:
 name: aws
 runtime: nodejs6.10

# you can overwrite defaults here
#  stage: dev
#  region: us-east-1

# you can add statements to the Lambda function's IAM Role here
#  iamRoleStatements:
#    - Effect: "Allow"
#      Action:
#        - "s3:ListBucket"
#      Resource: { "Fn::Join" : ["", ["arn:aws:s3:::", { "Ref" : "ServerlessDeploymentBucket" } ] ]  }
#    - Effect: "Allow"
#      Action:
#        - "s3:PutObject"
#      Resource:
#        Fn::Join:
#          - ""
#          - - "arn:aws:s3:::"
#            - "Ref" : "ServerlessDeploymentBucket"
#            - "/*"

# you can define service wide environment variables here
#  environment:
#    variable1: value1

# you can add packaging information here
#package:
#  include:
#    - include-me.js
#    - include-me-dir/**
#  exclude:
#    - exclude-me.js
#    - exclude-me-dir/**

functions:
 hello:
   handler: handler.hello

#    The following are a few example events you can configure
#    NOTE: Please make sure to change your handler code to work with those events
#    Check the event documentation for details
#    events:
#      - http:
#          path: users/create
#          method: get
#      - s3: ${env:BUCKET}
#      - schedule: rate(10 minutes)
#      - sns: greeter-topic
#      - stream: arn:aws:dynamodb:region:XXXXXX:table/foo/stream/1970-01-01T00:00:00.000
#      - alexaSkill: amzn1.ask.skill.xx-xx-xx-xx
#      - alexaSmartHome: amzn1.ask.skill.xx-xx-xx-xx
#      - iot:
#          sql: "SELECT * FROM 'some_topic'"
#      - cloudwatchEvent:
#          event:
#            Example:
#              - "aws.ec2"
#            detail-type:
#              - "EC2 Instance State-change Notification"
#            detail:
#              state:
#                - pending
#      - cloudwatchLog: '/aws/lambda/hello'
#      - cognitoUserPool:
#          pool: MyUserPool
#          trigger: PreSignUp

#    Define function environment variables here
#    environment:
#      variable2: value2

# you can add CloudFormation resource templates here
#resources:
#  resources:
#    NewResource:
#      Type: AWS::S3::Bucket
#      Properties:
#        BucketName: my-new-bucket
#  Outputs:
#     NewOutput:
#       Description: "Description for the output"
#       Value: "Some output value"
Now, we need to add changes in serverless.yml file as per our requirements. You can use the commands as given below −
You can use the following command for Service −
service: aws-nodejs # NOTE: update this with your service name
Now, change the service here and add the name given to our folder as shown −
service: aws-serverless # NOTE: update this with your service name
The provider details are as shown −
provider:
   name: aws
   runtime: nodejs6.10
The provider is aws and runtime is nodejs6.10. We need to add the region in which we will be working and the stage, that is dev or prod environment for the project. So here are the updated details of provider:provider −
name: aws
runtime: nodejs6.10
# you can overwrite defaults here
stage: prod
region: us-east-1
IAM Role
The iam role, that is, the code for permission to work with Lambda is shown here in the .yml file −
#  iamRoleStatements:
#    - Effect: "Allow"
#      Action:
#        - "s3:ListBucket"
#      Resource: { "Fn::Join" : ["", ["arn:aws:s3:::", { "Ref" : "ServerlessDeploymentBucket" } ] ]  }
#    - Effect: "Allow"
#      Action:
#        - "s3:PutObject"
#      Resource:
#        Fn::Join:
#          - ""
#          - - "arn:aws:s3:::"
#            - "Ref" : "ServerlessDeploymentBucket"
#            - "/*"
Note that we need to give the details of the role, that is the permission required with other AWS services, in the above section.
AWS Lambda Handler Details
The name of the export function in handler.js is hello. So the handler is name of the file followed by export name.
functions:
   hello:
      handler: handler.hello
The resource details about the s3 service added as shown below here −
# you can add CloudFormation resource templates here
#resources:
#  resources:
#    NewResource:
#      Type: AWS::S3::Bucket
#      Properties:
#        BucketName: my-new-bucket
#  Outputs:
#     NewOutput:
#       Description: "Description for the output"
#       Value: "Some output value"
Deploy AWS Lambda using Serverless Framework
Let us deploy the above lambda function to AWS console. You can use the following Steps for this purpose −
Step 1
First, you will have to use the following command −
sls deploy
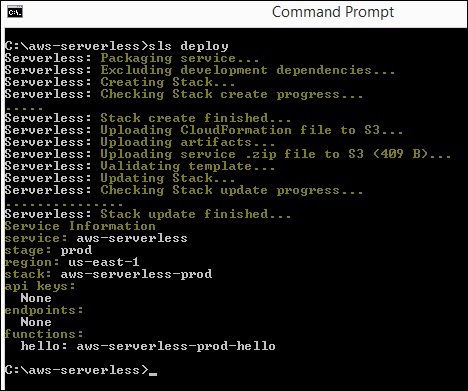
Step 2
Now, you should see the function in AWS console now as shown. The details of serverless AWS are logged in AWS cloud formation. For this purpose, go to AWS service and select CloudFormation. The details of the AWS Lambda are displayed as follows −
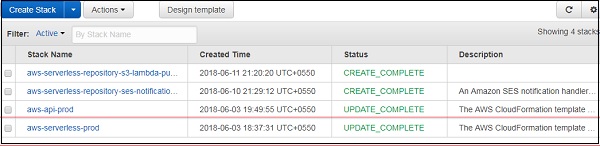
Observe that the name given is project name followed by the stage used.
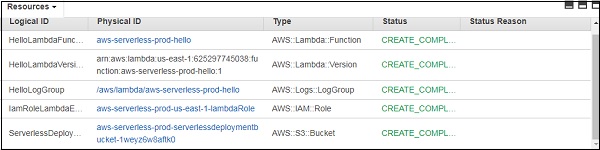
Step 3
It creates the iam role for AWS Lambda and log group for AWS cloudwatch. S3 bucket is created which has the code details stored and the configuration details.
This is created by the command sls deploy. You need not specify the iam role, instead it is created by default during the deploy stage.
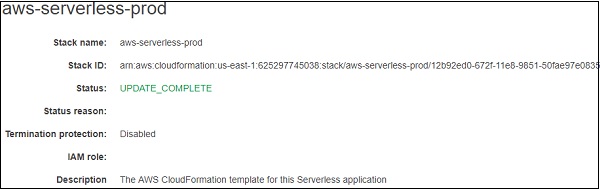
Step 4
The detailed flow of events is displayed below in the cloud formation service.
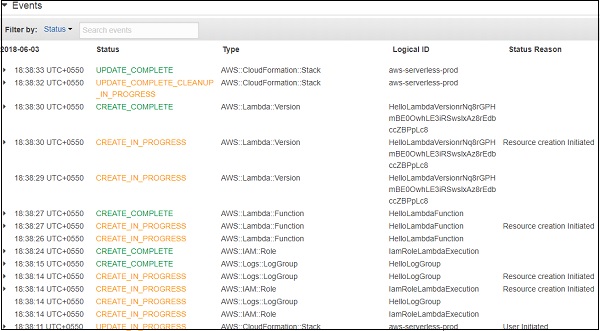

AWS Lambda Code
The AWS Lambda code and its execution settings are shown in the screenshot given below −
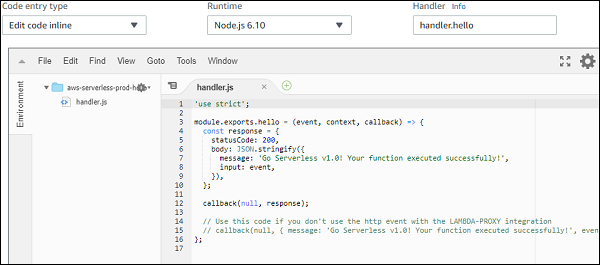
When you test the Lambda function, you can find the following output −
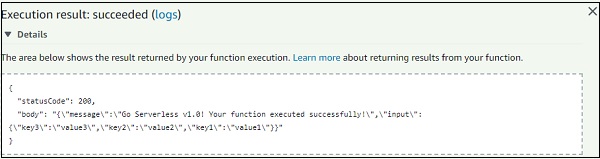
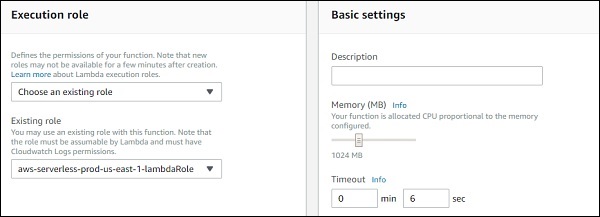
The Log output for the above function is shown here −
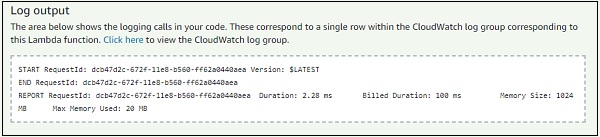
We can also test the AWS Lambda function using the serverless command as shown below −
sls invoke --function hello
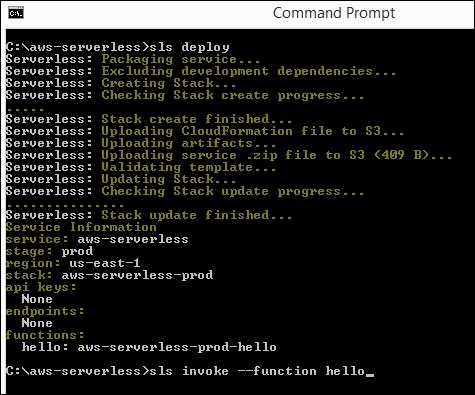
The syntax of the invoke command is shown here −
sls invoke --function hello
This invoke command triggers the AWS Lambda function and displays the output in the command prompt as shown below −
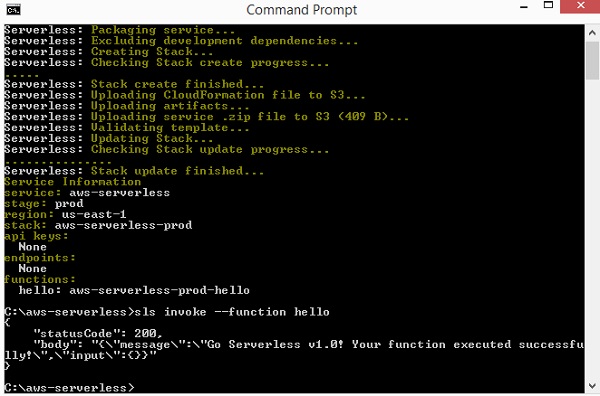
You can also test the Lambda function before deploying and the command for same using the following command −
sls invoke local --function hello
Please note that it is not always possible to test locally as the resources like S3 andDynanoDB cannot be simulated on the local environment. Only the basic function calls can be tested locally.

Using API Gateway and AWS Lambda with Serverless Framework
Let us see how to create new project to work with Lambda and api gateway. You can use the following command for this purpose −
sls create --template aws-nodejs
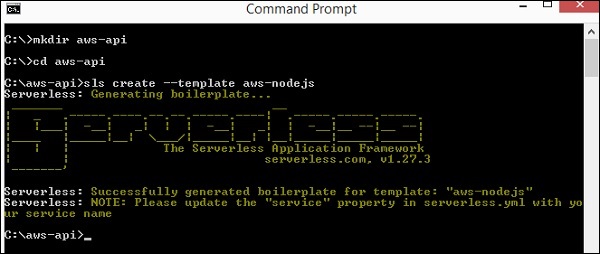
Now, open aws-api project in visual code. You can see that the handler.js and serverless.yml files created. Let us do the changes in that for addition of api gateway.
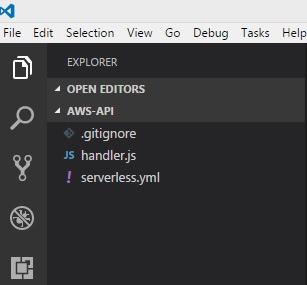
You will have to do the following changes in serverless.yml −
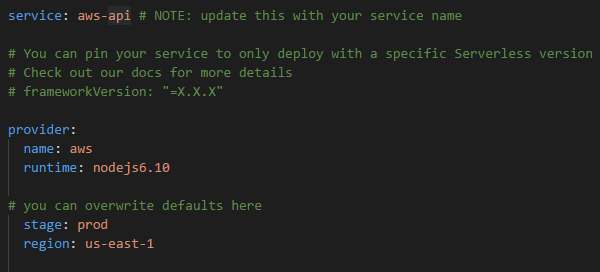
Now, the events details added for api gateway activation with AWS Lambda −
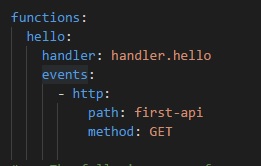
There is a new thing added here called events. We have specified the event as http, along with its path and method.
The path is the end-point which we will use when the api gateway path is created and method used is GET.
Observe that the handler is handler.hello, and hello is the export name from handler.js.

Note that you donot have to deploy the api gateway here, as the serverless framework will perform it.
Now, we will run the sls deploy command to create AWS Lambda function with trigger as api gateway.
sls deploy
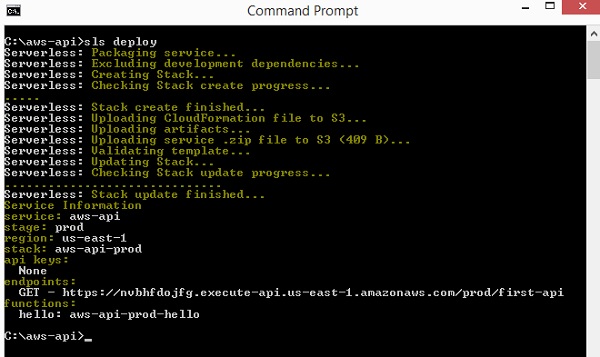
Observe that the deploy details are listed above. It gives the Get url with the end-point as the path details. The stage is prod so same is used in the url. The name of the function is aws-api-prod-hello.
Let us hit the url and see the output. You can see the followings the response we get from the api-gateway get url −

{"message":"Go Serverless v1.0! Your function executed
successfully!","input":{"resource":"/first-api","path":"/first-api","httpMethod":
"GET","headers":{"Accept":"text/html,application/xhtml+xml,application/xml;q=0.9,
image/webp,image/apng,*/*;q=0.8","Accept-Encoding":"gzip, deflate, br","Accept-Language":"en-US,en;q=0.9","CloudFront-Forwarded-Proto":
"https","CloudFront-Is-Desktop-Viewer":"true","CloudFront-Is-Mobile-Viewer":
"false","CloudFront-Is-SmartTV-Viewer":"false","CloudFront-Is-Tablet-Viewer":
"false","CloudFront-Viewer-Country":"IN","Host":"nvbhfdojfg.execute-api.us-east-1.
amazonaws.com","upgrade-insecure-requests":"1","User-Agent":"Mozilla/5.0
(Windows NT 6.3; Win64; x64) AppleWebKit/537.36 (KHTML, like Gecko)
 Chrome/66.0.3359.181 Safari/537.36","Via":"2.0 707912794802dbb4825c79b7d8626a5d.cloudfront.net (CloudFront)","X-Amz-Cf-Id":"j70MMqkWFp6kmvuauzp_nvTbI-WwKIQmm2Jl5hzSoN6gkdvX11hh-g==",
 "X-Amzn-Trace-Id":"Root=1-5b13f9ef-5b012e36b7f40b5013a326fc","X-Forwarded-For":"157.33.133.217, 54.182.242.73","X-Forwarded-Port":"443","X-Forwarded-Proto":"https"},
 "queryStringParameters":null,"pathParameters":null,"stageVariables":null,
 "requestContext":{"resourceId":"pes5sy","resourcePath":"/first-api","httpMethod":
 "GET","extendedRequestId":"H6P9fE-MoAMFdIg=","requestTime":"03/Jun/2018:14:23:
 43 +0000","path":"/prod/first-api","accountId":"625297745038","protocol":"HTTP/1.1",
 "stage":"prod","requestTimeEpoch":1528035823928,"requestId":"b865dbd6-6739-11e8-b135
 -a30269a8ec58","identity":{"cognitoIdentityPoolId":null,"accountId":null,
 "cognitoIdentityId":null,"caller":null,"SourceIp":"157.33.133.217","accessKey":null,
 "cognitoAuthenticationType":null,"cognitoAuthenticationProvider":null,"userArn":null,
 "userAgent":"Mozilla/5.0 (Windows NT 6.3; Win64; x64) AppleWebKit/537.36 (KHTML, like
 Gecko) Chrome/66.0.3359.181 Safari/537.36","user":null},"apiId":"nvbhfdojfg"},"body":null,
 "isBase64Encoded":false}}
The event details are also available in the output when you hit the url. The httpMethod is GET and the queryStringParameters are null as there is nothing passed in the query string. The event details are given to input which we have specified in the AWS Lambda handler −

The output we get from api gateway are only the body details such as message and input. The response is totally controlled by the api gateway and how to display it as output.
Now, let us pass inputs to the GET url in query string and see the display −
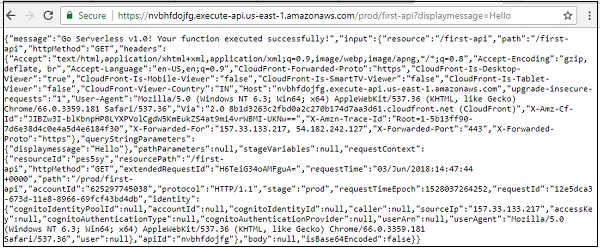
Then you can see the output of querystring as shown below −
{"message":"Go Serverless v1.0! Your function executed
successfully!","input":{"resource":"/first-api","path":"/first-api","httpMethod":
"GET","headers":{"Accept":"text/html,application/xhtml+xml,application/xml;q=0.9,
image/webp,image/apng,*/*;q=0.8","Accept-Encoding":"gzip, deflate,
br","Accept-Language":"en-US,en;q=0.9","CloudFront-Forwarded-Proto":"https",
"CloudFront-Is-Desktop-Viewer":"true","CloudFront-Is-Mobile-Viewer":"false",
"CloudFront-Is-SmartTV-Viewer":"false","CloudFront-Is-Tablet-Viewer":"false",
"CloudFront-Viewer-Country":"IN","Host":"nvbhfdojfg.execute-api.us-east-1.amazonaws.com",
"upgrade-insecure-requests":"1","User-Agent":"Mozilla/5.0 (Windows NT 6.3; Win64; x64)
 AppleWebKit/537.36 (KHTML, like Gecko) Chrome/66.0.3359.181 Safari/537.36","Via":"2.0
 8b1d3263c2fbd0a2c270b174d7aa3d61.cloudfront.net (CloudFront)","X-Amz-Cf-Id":"JIBZw3I-blKbnpHP8LYXPVolCgdW5KmEukZS4at9mi4vrWBMI-UKNw==",
 "X-Amzn-Trace-Id":"Root=1-5b13ff90-7d6e38d4c0e4a5d4e6184f30","X-Forwarded-For":
 "157.33.133.217, 54.182.242.127","X-Forwarded-Port":"443","X-Forwarded-Proto":"https"},"queryString
 Parameters":{"displaymessage":"Hello"},"pathParameters":null,"stageVariables":null,
 "requestContext":{"resourceId":"pes5sy","resourcePath":"/first-api","httpMethod":
 "GET","extendedRequestId":"H6TeiG34oAMFguA=","requestTime":"03/Jun/2018:14:47:44 +0000","path":"/prod/first-api","accountId":"625297745038","protocol":"HTTP/1.1",
"stage":"prod","requestTimeEpoch":1528037264252,"requestId":"12e5dca3-
673d-11e8-8966-69fcf43bd4db","identity":{"cognitoIdentityPoolId":null,"accountId":null,
"cognitoIdentityId":null,"caller":null,"exmpleIp":"157.33.133.217","accessKey":null,
"cognitoAuthenticationType":null,"cognitoAuthenticationProvider":null,"userArn":null,
"userAgent":"Mozilla/5.0 (Windows NT 6.3; Win64; x64) AppleWebKit/537.36 (KHTML, like
 Gecko) Chrome/66.0.3359.181 Safari/537.36","user":null},"apiId":"nvbhfdojfg"},"body":
 null,"isBase64Encoded":false}}
Let us change the AWS Lambda function to just display the querystring details as shown below −
'use strict';
module.exports.hello = (event, context, callback) => {
   const response = {
      statusCode: 200,
      body: JSON.stringify({
         message:(event.queryStringParameters &&     event.queryStringParameters.displaymessage!="") ? event.queryStringParameters.displaymessage : 'Go Serverless v1.0! Your function executed successfully!'
      }),
   };
   callback(null, response);
   // Use this code if you don't use the http event with the LAMBDA-PROXY integration
   // callback(null, { message: 'Go Serverless v1.0! Your function executed successfully!', event });
};
Observe that we have changed the message based on the querystring display message. This will deploy the the function again and check the output. It displays the details present in query string variable display message as shown below.

Let us now add post method to the events created as shown below −
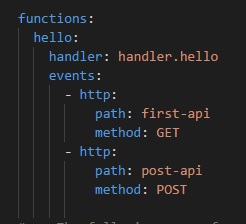
Now, deploy the changes made and you can see the following output from the deploy command −
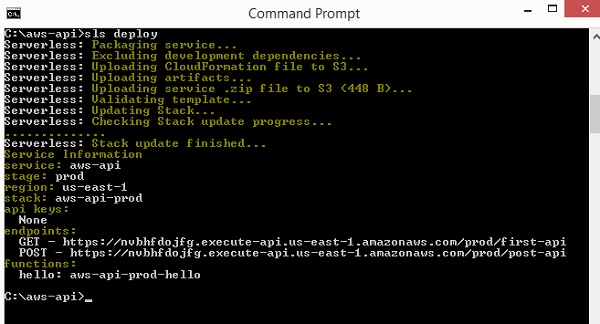
Note that testing post url in browser directly will not give the details. You should test the post url in postman.
To get postman go to https://www.getpostman.com/apps. Download the app as per your OS. Once installed, you should be able to test your post url as shown below −
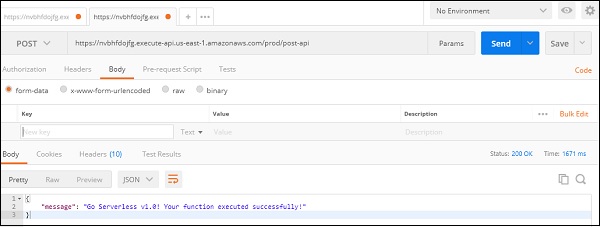
This displays the message we have added in the Lambda function.
Executing and Invoking Lambda Function
This chapter will explain in detail about process of executing and invoking Lambda function and the steps involved in it.
AWS Lambda Execution Model
AWS execution depends on the configuration details added for AWS Lambda Function. When the function is created, there is a memory and time allotted, which is used for the execution of AWS Lambda function.
With the help of the configuration details, AWS Lambda creates an execution context. Execution context is a temporary runtime environment which is made ready with any external dependencies such as database connection, http endpoints, third party libraries etc., if any.
When AWS Lambda function is invoked for the very first time or if the lambda function is updated, there is little latency added because of the execution context setup. However, the subsequent calls are faster in comparison to the first one. AWS Lambda tries to reuse the execution context again if the Lambda function is invoked taking lesser time.
The reuse of execution context has the following implications −
If there is any database connection done for the execution of Lambda, the connection is maintained for reuse. So the Lambda code has to be such that the connection has to be checked first- if exists and reused; otherwise we shall have to make fresh new connection.
Execution context maintains a disk space of 500MB in /tmp directory. The data required is cached in this directory. You can have additional check in the code to see if the data exists.
If the callbacks or some background processes if the are not complete when the Lambda function was invoked, the execution will start when the lambda function is invoked again. Incase you do not need such thing to happen make sure your processes are all ended properly, when the function execution is complete.
You should use of the execution context and the data stored in tmp directory. You will have to add necessary checks in the code to see if the required data exists before creating fresh new ones. This will save the time during execution and make it more faster.
Invoking AWS Lambda function
We can invoke AWS manually using aws cli. We have already seen how to create and deploy AWS Lambda using cli. Here, we will first create a function using aws cli and invoke the same.
Creating AWS Lambda Function using AWS CLI
You can use the following commands for creating AWS Lambda function using aws cli −
Commands
create-function
--function-name <value>
--runtime <value>
--role <value>
--handler <value>
[--code <value>]
[--description <value>]
[--timeout <value>]
[--memory-size <value>]
[--environment <value>]
[--kms-key-arn <value>]
[--tags <value>]
[--zip-file <value>]
[--cli-input-json <value>]
Command with values
aws lambda create-function
--function-name "lambdainvoke"
--runtime "nodejs8.10"
--role "arn:aws:iam::625297745038:role/lambdaapipolicy"
--handler "index.handler"
--timeout 5
--memory-size 256
--zip-file "fileb://C:\nodeproject\index.zip"
The output is as shown below −
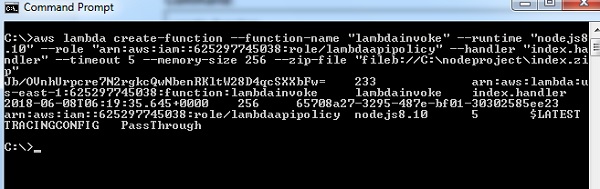
The function created in AWS console is as shown below −


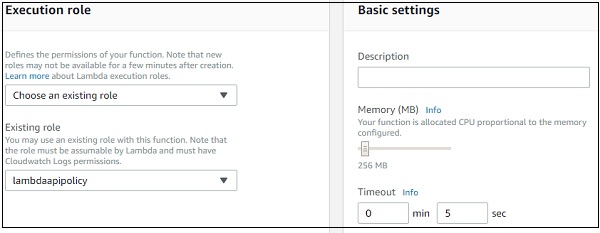
Now, you can invoke the function using the command:invoke
--function-name <value>
[--invocation-type <value>]
[--log-type <value>]
[--client-context <value>]
[--payload <value>]
[--qualifier <value>]
outfile <value>
Options
--function-name − Specify the name of the function you want to invoke.
--invocation-type(string) − by default the invokation-type is requestresponse. The values available to be used with invokation-type is RequestResponse, Event and DryRun.
Event invocation-type is to be used for async response.
DryRun is to be used when you want to verify the Lambda function without need of executing it.
--log-type − It will be Tail if the invocation type is RequestResponse. It gives the last 4KB base64-encoded log data. Possible values are Tail and None.
--client-context − You can pass client specific details to the Lambda function. The clientcontext has to be in json format and base64-encoded. Maximum file size is 3583 bytes.
--payload − json format input to you lambda function.
--qualifier − You can specify Lambda function version or alias name. If you pass the function version than the api will use qualified function arn to invoke the Lambda function. If you specify alias name, the api uses alias ARN to invoke Lambda function.
outfile − This is the filename where the content will be saved.
Command with values
aws lambda invoke --function-name "lambdainvoke" --log-type
Tail C:\nodeproject\outputfile.txt
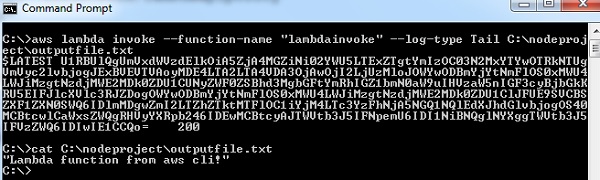
You can use payload option to send dummy event to the lambda function in json format as shown below.
The related AWS Lambda code is as follows −
exports.handler = async (event, callback) => {
   console.log("Hello => "+ event.name);
   console.log("Address =>"+ event.addr);
   callback(null, 'Hello '+event.name +" and address is "+ event.addr);
};
Observe that in the code, we have console event.name and event.addr. Now, let us use payload option in aws cli to send the event with name and address as follows −
aws lambda invoke --function-name "lambdainvoke" --log-type
Tail --payload file://C:\clioutput\input.txt C:\clioutput\outputfile.txt
Thenpayload takes input as a filepath which has json input as shown −
{"name":"Roy Singh", "addr":"Mumbai"}
The corresponding output is as shown below −
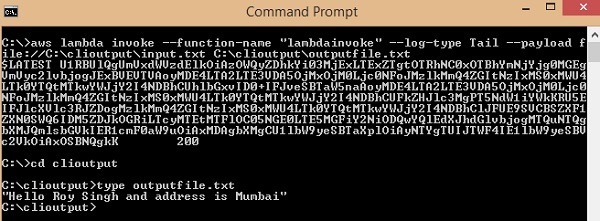
The output is stored in the file C:\clioutput\outputfile.txt as follows −
"Hello Roy Singh and address is Mumbai"
Sample Events
You can test AWS Lambda function by passing a sample event. This section gives some sample events for AWS Services. You can use the invoke command to test the output when triggered with any of the services. Observe the codes given for corresponding sample events below −
Amazon S3 Put Sample Event
{
  "Records": [{
      "eventVersion": "2.0",
      "eventTime": "1970-01-01T00:00:00.000Z",
      "requestParameters": {
         "SourceIPAddress": "127.0.0.1"
      },
      "s3": {
         "configurationId": "testConfigRule",
         "object": {
            "eTag": "0123456789abcdef0123456789abcdef",
            "sequencer": "0A1B2C3D4E5F678901",
            "key": "HappyFace.jpg",
            "size": 1024
         },
         "bucket": {
            "arn": bucketarn,
            "name": "Sourcebucket",
            "ownerIdentity": {
               "principalId": "EXAMPLE"
            }
         },
         "s3SchemaVersion": "1.0"
      },
      "responseElements": {
         "x-amz-id-2": "EXAMPLE123/5678abcdefghijklambdaisawesome/mnopqrstuvwxyzABCDEFGH",
         "x-amz-request-id": "EXAMPLE123456789"
      },
      "awsRegion": "us-east-1",
      "eventName": "ObjectCreated:Put",
      "userIdentity": {
         "principalId": "EXAMPLE"
      },
      "eventSource": "aws:s3"
   }]
}
To get the details of the file from the s3 put event, you can use the following command −
event.Records[0].s3.object.key //will display the name of the file
To get the bucket name, you can use the following command −
event.Records[0].s3.bucket.name //will give the name of the bucket.
To see the EventName, you can use the following command −
event.Records[0].eventName // will display the eventname
Amazon S3 Delete Sample Event
{
   "Records": [{
      "eventVersion": "2.0",
      "eventTime": "1970-01-01T00:00:00.000Z",
      "requestParameters": {
         "SourceIPAddress": "127.0.0.1"
      },
      "s3": {
         "configurationId": "testConfigRule",
         "object": {
            "sequencer": "0A1B2C3D4E5F678901",
            "key": "HappyFace.jpg"
         },
         "bucket": {
            "arn": bucketarn,
            "name": "Sourcebucket",
            "ownerIdentity": {
               "principalId": "EXAMPLE"
            }
         },
        "s3SchemaVersion": "1.0"
      },
      "responseElements": {
         "x-amz-id-2": "EXAMPLE123/5678abcdefghijklambdaisawesome/mnopqrstuvwxyzABCDEFGH",
         "x-amz-request-id": "EXAMPLE123456789"
      },
      "awsRegion": "us-east-1",
      "eventName": "ObjectRemoved:Delete",
      "userIdentity": {
         "principalId": "EXAMPLE"
      },
      "eventSource": "aws:s3"
   }]
}
Amazon DynamoDB
Amazon DynamoDB can be an event on AWS Lambda when changes are made on DynamoDB table. We can perform operation like add entry, update and delete records from the DynamodDB table.
A sample event for DynamoDB add, insert and delete event is shown here −
{
  "Records": [{
      "eventID": "1",
      "eventVersion": "1.0",
      "dynamodb": {
         "Keys": {
            "Id": {
               "N": "101"
            }
         },
         "NewImage": {
            "Message": {
               "S": "New item!"
            },
            "Id": {
               "N": "101"
            }
         },
         "StreamViewType": "NEW_AND_OLD_IMAGES",
         "SequenceNumber": "111",
         "SizeBytes": 26
      },
      "awsRegion": "us-west-2",
      "eventName": "INSERT",
      "eventSourceARN": eventSourcearn,
      "eventSource": "aws:dynamodb"
   },
   {
      "eventID": "2",
      "eventVersion": "1.0",
      "dynamodb": {
         "OldImage": {
            "Message": {
               "S": "New item!"
            },
            "Id": {
               "N": "101"
            }
         },
        "SequenceNumber": "222",
        "Keys": {
            "Id": {
               "N": "101"
            }
         },
        "SizeBytes": 59,
        "NewImage": {
            "Message": {
               "S": "This item has changed"
            },
            "Id": {
				   "N": "101"
            }
         },
         "StreamViewType": "NEW_AND_OLD_IMAGES"
      },
      "awsRegion": "us-west-2",
      "eventName": "MODIFY",
      "eventSourceARN": Sourcearn,
      "eventSource": "aws:dynamodb"
   },
   {
   "eventID": "3",
      "eventVersion": "1.0",
      "dynamodb": {
         "Keys": {
            "Id": {
               "N": "101"
            }
         },
         "SizeBytes": 38,
         "SequenceNumber": "333",
         "OldImage": {
            "Message": {
               "S": "This item has changed"
            },
            "Id": {
               "N": "101"
            }
         },
         "StreamViewType": "NEW_AND_OLD_IMAGES"
      },      "awsRegion": "us-west-2",
      "eventName": "REMOVE",
      "eventSourceARN": Sourcearn,
      "eventSource": "aws:dynamodb"
   }]
}
Amazon Simple Notification Service
AWS Lambda can be helpful to process the notification created in Simple Notification Service (SNS). Whenever there is message published in SNS, the Lambda function can be triggered with a SNS event, which has details of the messages. This messages can be processed inside Lambda function and can be sent further to other services as per the requirement.
Once the message is entered, SNS will trigger the Lambda function. If any error tries to invoke the Lambda function, SNS will retry to call the lambda function upto three times.
Amazon SNS Sample Event
A sample event that has all the details available in AWS Lambda function to carry out the further process is shown below −
{
  "Records": [{
      "EventVersion": "1.0",
      "EventSubscriptionArn": eventsubscriptionarn,
      "EventSource": "aws:sns",
      "Sns": {
         "SignatureVersion": "1",
         "Timestamp": "1970-01-01T00:00:00.000Z",
         "Signature": "EXAMPLE",
         "SigningCertUrl": "EXAMPLE",
         "MessageId": "95df01b4-ee98-5cb9-9903-4c221d41eb5e",
         "Message": "Hello from SNS!",
         "MessageAttributes": {
            "Test": {
               "Type": "String",
               "Value": "TestString"
            },
            "TestBinary": {
               "Type": "Binary",
               "Value": "TestBinary"
            }
         },
         "Type": "Notification",
         "UnsubscribeUrl": "EXAMPLE",
         "TopicArn": topicarn,
         "Subject": "TestInvoke"
      }
   }]
}
Amazon Simple Mail Service
Amazon Simple Mail Service can be used to send messages and also to receive messages. The AWS Lambda function can be called on Simple Mail Service when the message is received.
Amazon SES Email Receiving Sample Event
The details of SES event when used inside AWS Lambda is shown below −
{
  "Records": [{
      "eventVersion": "1.0",
      "ses": {
         "mail": {
            "commonHeaders": {
               "from": [
                  "Jane Doe <janedoe@example.com>"
               ],
            "to": [
               "johndoe@Source.com"
            ],
            "returnPath": "janedoe@example.com",
            "messageId": "<0123456789Source.com>",
            "date": "Wed, 7 Oct 2015 12:34:56 -0700",
            "subject": "Test Subject"
         },
         "example": "janedoe@example.com",
         "timestamp": "1970-01-01T00:00:00.000Z",
         "destination": [
            "johndoe@example.com"
         ],
         "headers": [{
            "name": "Return-Path",
            "value": "<janedoe@example.com>"
         },
         {
            "name": "Received",
            "value": "from mailer.example.com (mailer.example.com [203.0.113.1]) by inbound-smtp.us-west-2.amazonaws.com with SMTP id o3vrnil0e2ic for johndoe@example.com; Wed, 07 Oct 2015 12:34:56 +0000 (UTC)"
         },
         {
            "name": "DKIM-Signature",
            "value": "v=1; a=rsa-sha256; c=relaxed/relaxed; d=example.com; s=example; h=mime-version:from:date:message-id:subject:to:content-type; bh=jX3F0bCAI7sIbkHyy3mLYO28ieDQz2R0P8HwQkklFj4=; b=sQwJ+LMe9RjkesGu+vqU56asvMhrLRRYrWCbV"
         },
         {
            "name": "MIME-Version",
            "value": "1.0"
         },
         {
            "name": "From",
            "value": "Jane Doe <janedoe@example.com>"
         },
         {
            "name": "Date",
            "value": "Wed, 7 Oct 2015 12:34:56 -0700"
         },
         {
            "name": "Message-ID",
            "value": "<0123456789example.com>"
         },
         {
            "name": "Subject",
            "value": "Test Subject"
         },
         {
            "name": "To",
            "value": "johndoe@example.com"
         },
         {
            "name": "Content-Type",
            "value": "text/plain; charset=UTF-8"
         }],
         "headersTruncated": false,
         "messageId": "o3vrnil0e2ic28tr"
      },
      "receipt": {
         "recipients": [
            "johndoe@example.com"
         ],
         "timestamp": "1970-01-01T00:00:00.000Z",
         "spamVerdict": {
            "status": "PASS"
         },
         "dkimVerdict": {
            "status": "PASS"
         },
         "processingTimeMillis": 574,
         "action": {
            "type": "Lambda",
            "invocationType": "Event",
            "functionArn": "arn:aws:lambda:us-west-2:012345678912:function:example"
         },
         "spfVerdict": {
            "status": "PASS"
         },
         "virusVerdict": {
            "status": "PASS"
         }
      }
   },
   "eventexample": "aws:ses"
   }]
}
Amazon Cloudwatch Logs
AWS Lambda can be triggered from Amazon CloudWatch Logs using the CloudWatch Logs Subscriptions. CloudWatch Logs subscriptions has data real-time data about the logs which can be processed and analyzed inside AWS Lambda or could be used to load to other systems.
Amazon CloudWatch Logs Sample Event
{
   "awslogs": {
      "data": "H4sIAAAAAAAAAHWPwQqCQBCGX0Xm7EFtK+smZBEUgXoLCdMhFtKV3akI8d0bLYmibvPPN3wz00CJxmQnTO41whwW
      QRIctmEcB6sQbFC3CjW3XW8kxpOpP+OC22d1Wml1qZkQGtoMsScxaczKN3plG8zlaHIta5KqWsozoTYw3/djzwhpL
      wivWFGHGpAFe7DL68JlBUk+l7KSN7tCOEJ4M3/qOI49vMHj+zCKdlFqLaU2ZHV2a4Ct/an0/ivdX8oYc1UVX860fQ
      DQiMdxRQEAAA=="
   }
}
Amazon API Gateway
AWS Lambda function can be invoked on https url. IT can be done on GET, POST, PUT. When the https url is invoked, the AWS Lambda function is also triggered and the data passed to https using get/post can be made available inside AWS Lambda to be used to insert in DynamoDB or to send mail etc.
API Gateway Proxy Request Event
{
   "path": "/test/hello",
   "headers": {
      "Accept":  "text/html,application/xhtml+xml,application/xml;q=0.9,image/webp,*/*;q=0.8",
      "Accept-Encoding": "gzip, deflate, lzma, sdch, br",
      "Accept-Language": "en-US,en;q=0.8",
      "CloudFront-Forwarded-Proto": "https",
      "CloudFront-Is-Desktop-Viewer": "true",
      "CloudFront-Is-Mobile-Viewer": "false",
      "CloudFront-Is-SmartTV-Viewer": "false",
      "CloudFront-Is-Tablet-Viewer": "false",
      "CloudFront-Viewer-Country": "US",
      "Host": "wt6mne2s9k.execute-api.us-west-2.amazonaws.com",
      "Upgrade-Insecure-Requests": "1",
      "User-Agent": "Mozilla/5.0 (Macintosh; Intel Mac OS X 10_11_6) AppleWebKit/537.36 (KHTML, like Gecko) Chrome/52.0.2743.82 Safari/537.36 OPR/39.0.2256.48",
      "Via": "1.1 fb7cca60f0ecd82ce07790c9c5eef16c.cloudfront.net (CloudFront)",
      "X-Amz-Cf-Id": "nBsWBOrSHMgnaROZJK1wGCZ9PcRcSpq_oSXZNQwQ10OTZL4cimZo3g==",
      "X-Forwarded-For": "192.168.100.1, 192.168.1.1",
      "X-Forwarded-Port": "443",
      "X-Forwarded-Proto": "https"
   },
   "pathParameters": {
      "proxy": "hello"
   },
   "requestContext": {
      "accountId": "123456789012",
      "reexampleId": "us4z18",
      "stage": "test",
      "requestId": "41b45ea3-70b5-11e6-b7bd-69b5aaebc7d9",
	   "identity": {
         "cognitoIdentityPoolId": "",
         "accountId": "",
         "cognitoIdentityId": "",
         "caller": "",
         "apiKey": "",
         "exampleIp": "192.168.100.1",
         "cognitoAuthenticationType": "",
         "cognitoAuthenticationProvider": "",
         "userArn": "",
         "userAgent": "Mozilla/5.0 (Macintosh; Intel Mac OS X 10_11_6) AppleWebKit/537.36 (KHTML, like Gecko) Chrome/52.0.2743.82 Safari/537.36 OPR/39.0.2256.48",
         "user": ""
      },
      "reexamplePath": "/{proxy+}",
      "httpMethod": "GET",
      "apiId": "wt6mne2s9k"
   },
   "reexample": "/{proxy+}",
   "httpMethod": "GET",
   "queryStringParameters": {
      "name": "me"
   },
   "stageVariables": {
      "stageVarName": "stageVarValue"
   }
}
API Gateway Proxy Response Event
{
   "statusCode": 200,
   "headers": {
      "Accept": "text/html,application/xhtml+xml,application/xml;q=0.9,image/webp,*/*;q=0.8",
      "Accept-Encoding": "gzip, deflate, lzma, sdch, br",
      "Accept-Language": "en-US,en;q=0.8",
      "CloudFront-Forwarded-Proto": "https",
      "CloudFront-Is-Desktop-Viewer": "true",
      "CloudFront-Is-Mobile-Viewer": "false",
      "CloudFront-Is-SmartTV-Viewer": "false",
      "CloudFront-Is-Tablet-Viewer": "false",
      "CloudFront-Viewer-Country": "US",
      "Host": "wt6mne2s9k.execute-api.us-west-2.amazonaws.com",
      "Upgrade-Insecure-Requests": "1",
      "User-Agent": "Mozilla/5.0 (Macintosh; Intel Mac OS X 10_11_6) AppleWebKit/537.36 (KHTML, like Gecko) Chrome/52.0.2743.82 Safari/537.36 OPR/39.0.2256.48",
      "Via": "1.1 fb7cca60f0ecd82ce07790c9c5eef16c.cloudfront.net (CloudFront)",
      "X-Amz-Cf-Id": "nBsWBOrSHMgnaROZJK1wGCZ9PcRcSpq_oSXZNQwQ10OTZL4cimZo3g==",
      "X-Forwarded-For": "192.168.100.1, 192.168.1.1",
      "X-Forwarded-Port": "443",
      "X-Forwarded-Proto": "https"
   },
   "body": "Hello World"
}
Deleting Lambda Function
Deleting AWS Lambda function will remove the AWS Lambda from the AWS console. There are 2 ways to delete AWS Lambda function.
- Using AWS console.
- Using AWS CLI command
This chapter discusses these two ways in detail.
Using AWS Console
For deleting a Lambda function using AWS console, follow the steps given below −
Step 1
Login to AWS console and go to AWS Lambda service. You can find that AWS lambda functions created so far are listed in AWS console as shown below −
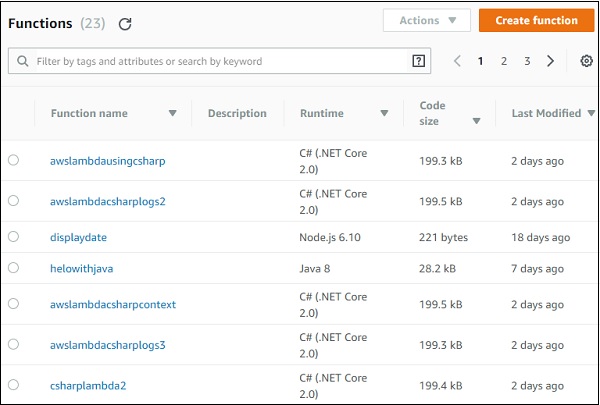
The list shows that there are 23 AWS Lambda functions created so far. You can view them using the pagination provided on the top or search the AWS Lambda by using the search box.
Step 2
Observe that there is a radio button across each of the AWS Lambda function. Select the function you want to delete. Observe the screenshot shown below −
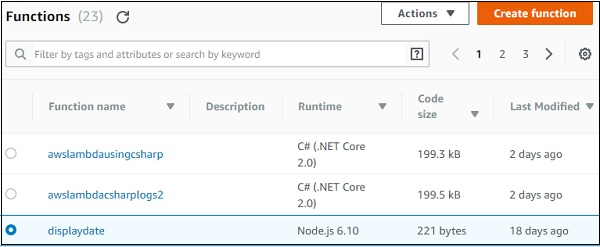
Step 3
Once you select the AWS Lambda function, the Action dropdown which was earlier grayed out is highlighted now. Now, open the combo box and it will display options as shown −
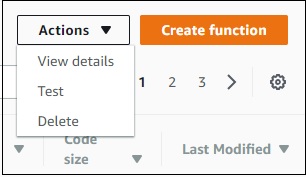
Step 4
Select the Delete button to delete the AWS Lambda function. Once you click Delete, it displays the message as follows −
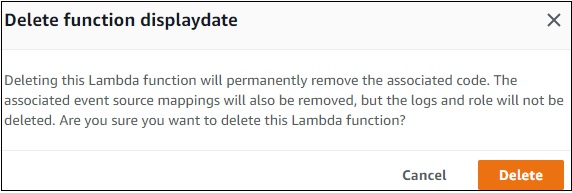
Step 5
Read the message carefully and later click Delete button to remove the AWS lambda function permanently.
Note − Deleting aws lambda will not delete the role linked. To remove the role, you need to go to IAM and remove the role.
Step 6
The list of roles created so far is shown below. Observe that there is a Create role button and Delete role button.
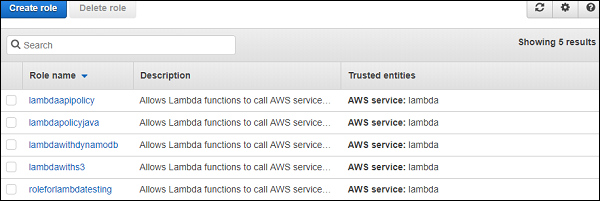
Click the checkbox across the role you want to delete. You can also select multiple roles to delete at a time.
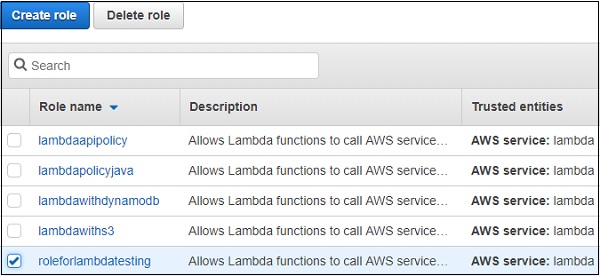
Step 7
You will see a confirmation message as shown below once you click Delete button −
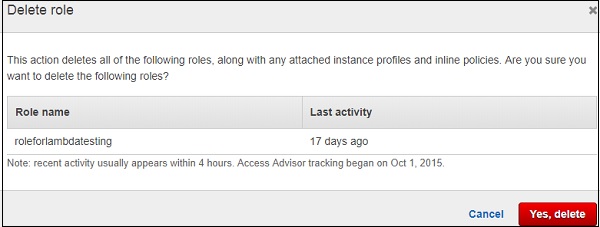
Now, read the details mentioned carefully and later click Yes, delete button.
Using AWS CLI command
Let us first create a Lambda function using aws cli and delete the same using the same command. Follow the Steps given below for this purpose −
Step 1
The command with values for create-function is as follows −aws lambda create-function --function-name "lambdatestcli" --runtime "nodejs8.10" --role "arn:aws:iam::625297745038:role/lambdaapipolicy" --handler "index.handler" --timeout 5 --memory-size 256 --zip-file "fileb://C:\demotest\index.zip"
The corresponding output is shown here −
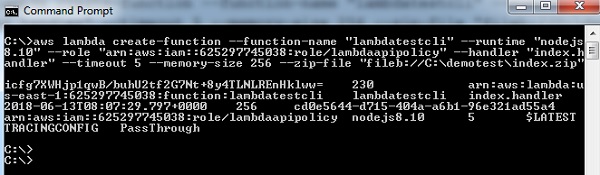
Step 2
The AWS Lambda function created is lambdatestcli. We have used existing role arn to create the lambda function.
Then you can find this function displayed in AWS console as shown below −
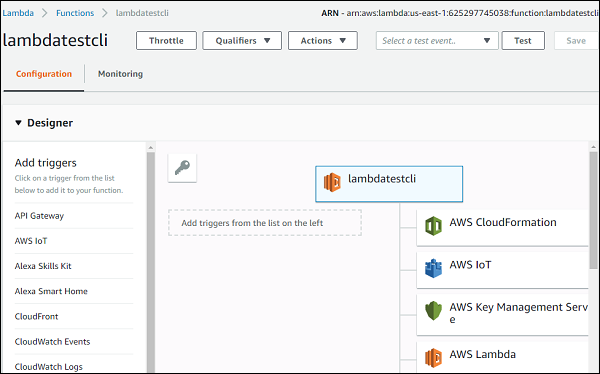
Step 3
Now, let us invoke the function to test the output using the command shown −aws lambda invoke --function-name "lambdatestcli" --log-type Tail C:\demotest\outputfile.txt
This command will give you the output as shown −
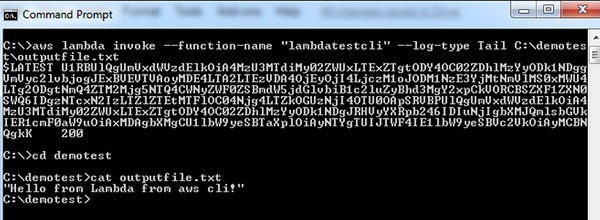
Step 4
You can observe logs from cloudwatch for lambda function lambdatestcli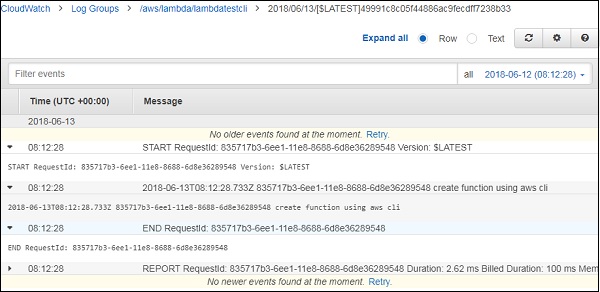
Step 5
Now, let us come to the actual part of deleting the AWS function. Delete aws cli api will delete the function given. The details of command used for this purpose is given below −Command
delete-function
--function-name <value>
[--qualifier <value>]
[--cli-input-json <value>]
[--generate-cli-skeleton <value>]
Options
--function-name(string) − This will take the Lambda function name or the arn of the AWS Lambda function.
--qualifier (string) − This is optional. Here you can specify the version of AWS Lambda that needs to be deleted.
-- cli-input-json(string) − Performs service operation based on the JSON string provided. The JSON string follows the format provided by --generate-cli-skeleton. If other arguments are provided on the command line, the CLI values will override the JSON-provided values.
--generate-cli-skeleton(string) − it prints json skeleton to standard output without sending the API request.
Command with values
aws lambda delete-function --function-name "lambdatestcli"
The corresponding output is shown below −

Step 6
If you check now, you can observe that the function will not be seen in AWS Lambda function list as shown in the screenshot given below −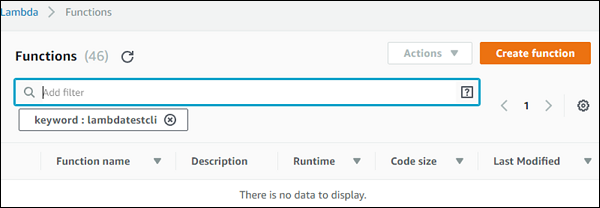
Working with Amazon API Gateway
AWS Lambda function can be invoked on HTTPS url. It can be done on GET, POST, PUT. When the HTTPS url is invoked, the AWS Lambda function can also triggered and the data passed to HTTPS using get/post can be made available inside AWS Lambda to be used to insert in DynamoDB or to send mail etc.
This chapter discusses in detail about various processes involved in work in with AWS lambda and API Gateway.
Processes involved
The following are the processes involved in working with AWS lambda and API Gateway −
- Create IAM role for permission
- Create AWS lambda function
- Create API Gateway
- Link lambda function to api gateway
- Passing data to api gateway
A basic diagram that explains the working of API gateway and AWS Lambda is given here −
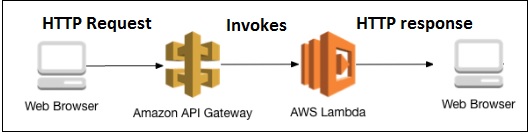
These processes are explained in detail further in this chapter with relevant screenshots.
Create IAM role for permission
From Amazon services as shown below, select IAM for creating roles to be used by Lambda function.
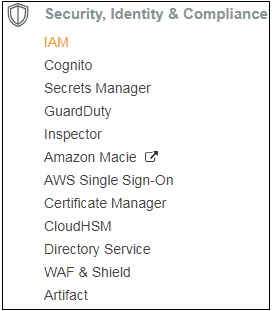
Go to IAM and select Roles from left side section as shown below −
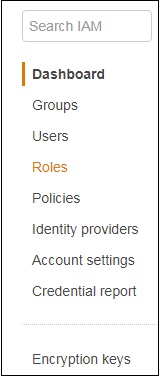
Click Create role for Lambda function.
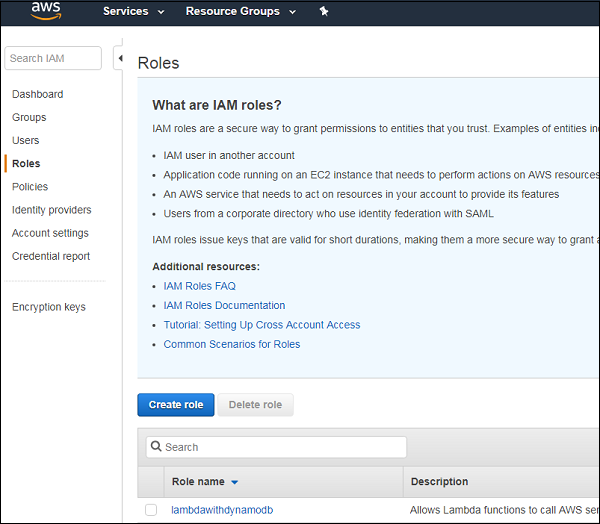
Select Lambda and click Permissions at the bottom. Select the permission required for the API Gateway and Lambda.
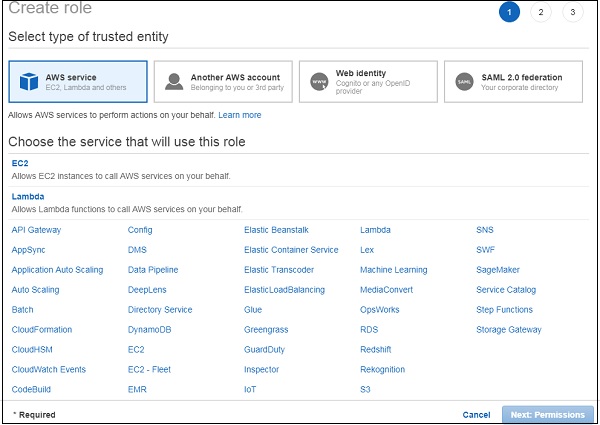
Search for API gateway in the search and it will list you all the related permissions. Here we have chosen full access to API gateway as shown below −

Now, search for API gateway and it will list you all the related permissions. Here we have chosen full access to API gateway as shown below −
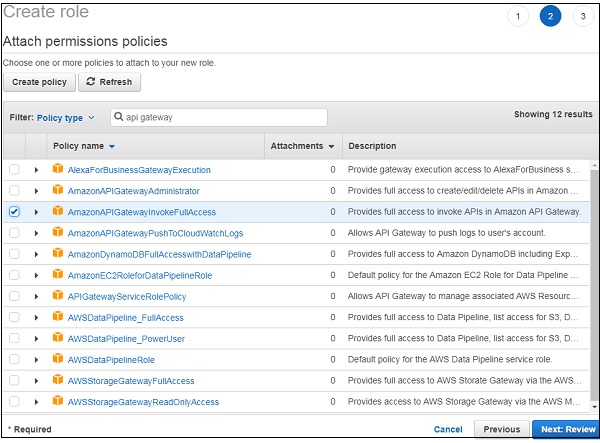
You have to repeat the same process for Policies also.
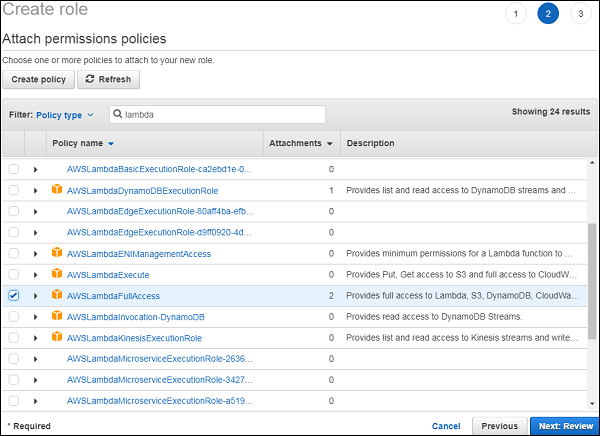
Once you are done choosing the necessary policies, click Review for the next step. Enter the name of the role as per your choice as shown below −
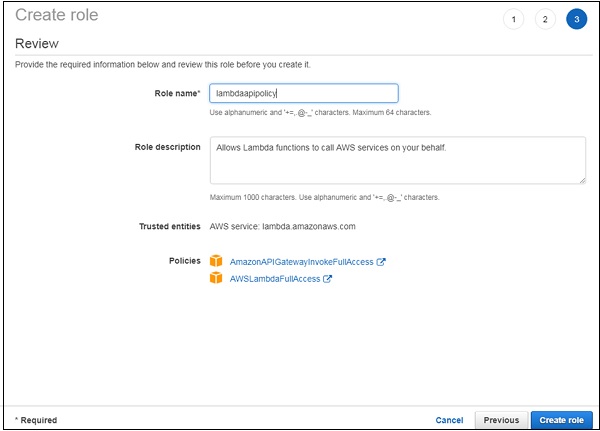
It displays the policies attached to the role. Click Create role and we are done with the role creation and can proceed with the lambda function.
Create AWS Lambda Function
Go to AWS services and click on lambda service to create a function for connecting it with api gateway.
The UI screen for Lambda function is shown below. Click Create function button to proceed with creation of Lambda function.

Enter the name of the function and choose the existing role which we have created above.
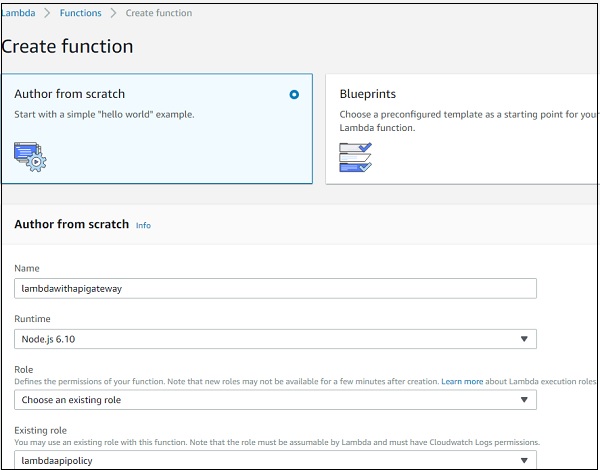
It flashes a message that the function with the name lambdawithapigateway is created successfully.
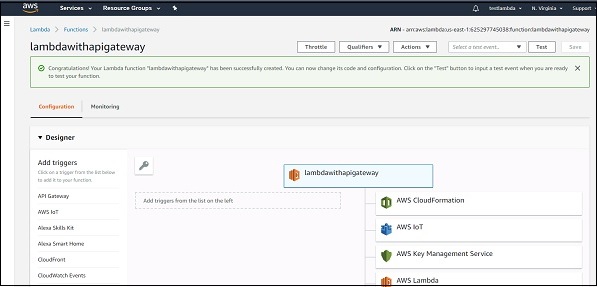
Note that here we will use nodejs runtime to write the code. The AWS code with helloworld message is as shown below −
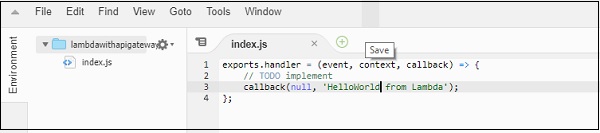
AWS Lambda code is present in index.js file. The function called handler has the params namely events, context and callback.
Callback function basically has the error and the success message. Note that here we do not have any error related code, so null is passed and the success message is HelloWorld from lambda.
Lastly, save the changes added and let us proceed to add the Lambda function to the API gateway.
Create API Gateway
Login to your AWS account and open API Gateway as shown below −
Click API Gateway and it will lead you to the screen where new API gateway can be created.
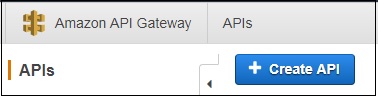
Click Create API and add details as shown below −
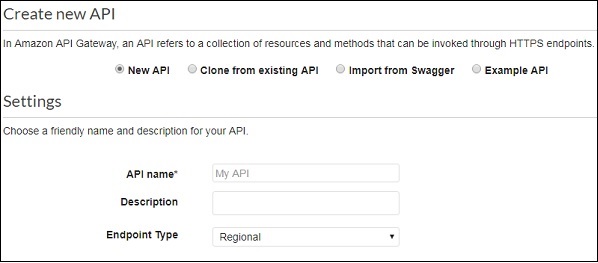
Click the Create API button on right side of the screen. This will display the newly created API on to left side of the screen.
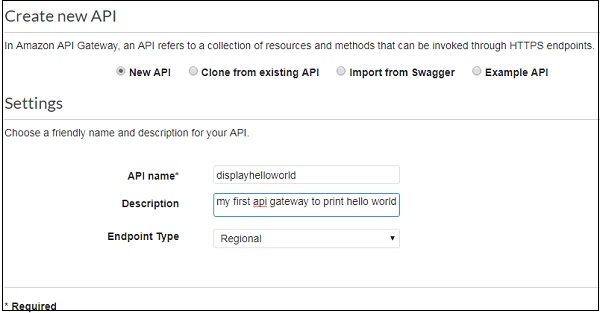
Click the Actions dropdown to create a new resource for the API.
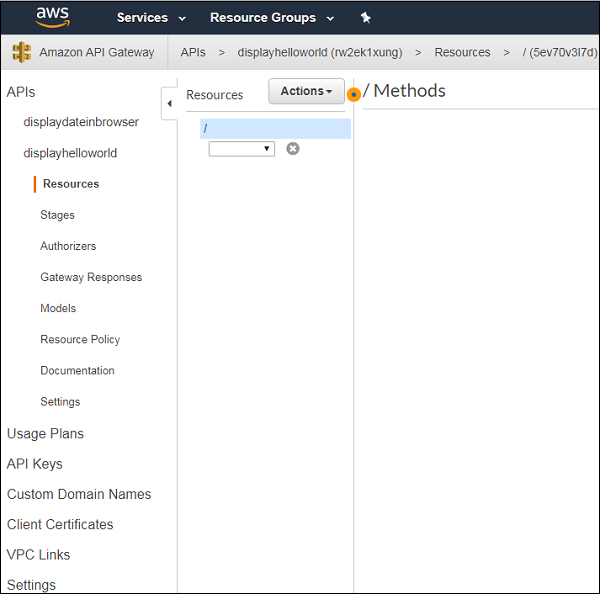
Now, create a new resource as shown below −

Enter the Resource Name as shown below. You will see the name of the resource entered in the url created at the end. Click Create Resource and you will see it on the screen as follows −
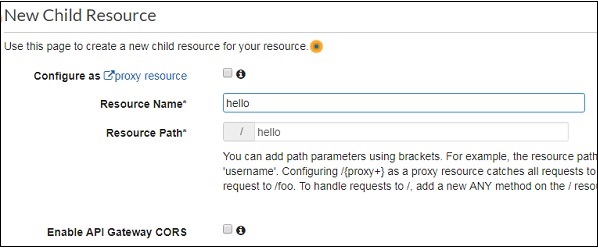

Add GET/POST methods to the resource created as shown below. Select the method from Actions dropdown.
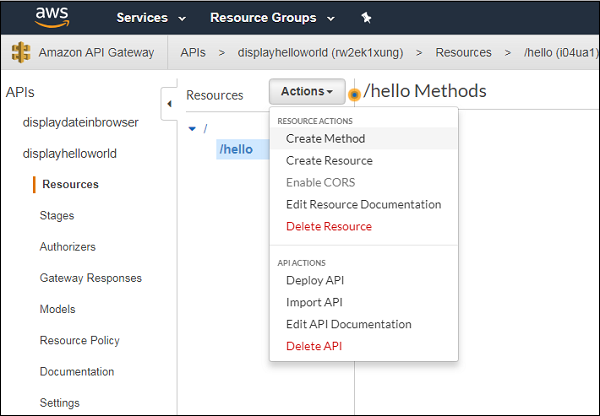
Click the GET method to add the method to the API.
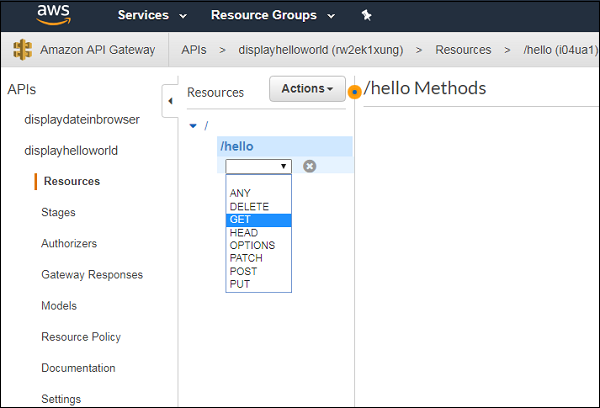
Next step is the integration which will integrate it with Lambda function. Now add the Lambda function to it as shown below −
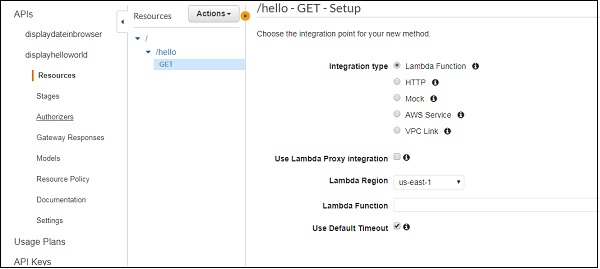
Link Lambda Function to API Gateway
Select the lambda function created earlier.
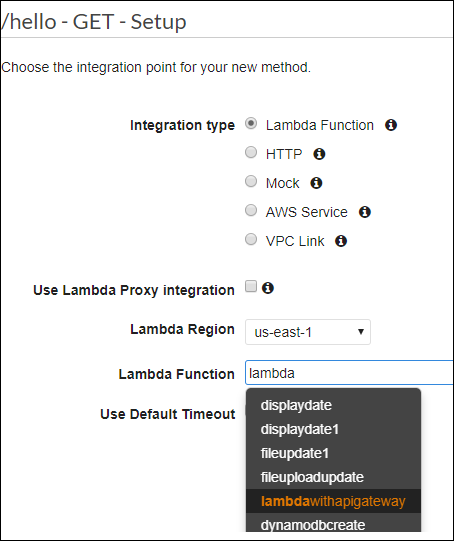
Save the changes and you can see a dialog box asking for permission as shown below −
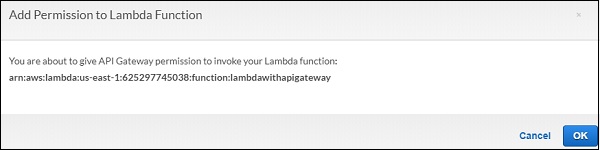
Click OK for the permission. This is the execution details between the API gateway HTTP request and the Lambda function −
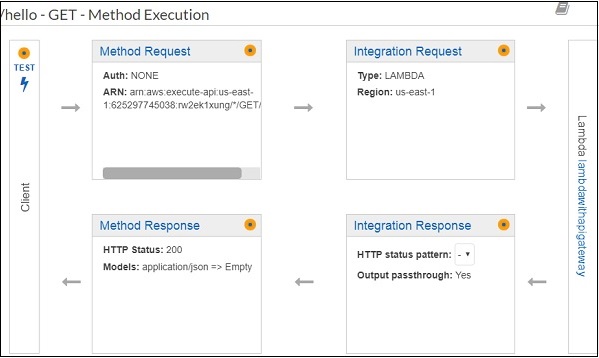
Now, let us deploy the API gateway changes. For this purpose, we need to select the Deploy API from Actions dropdown as shown below −
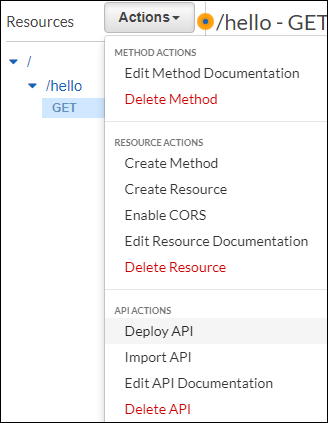
Select Deploy API. It will ask for the deployment state. Select New Stage from Deployment stage dropdown and add the stage name as Production.
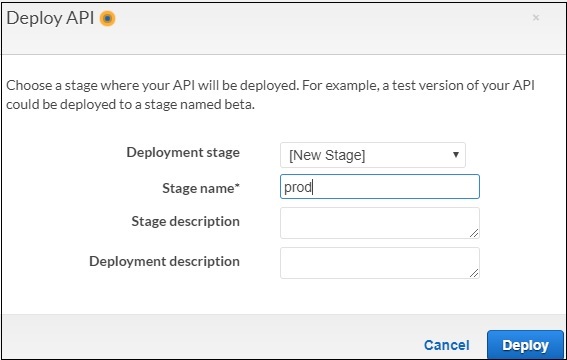
Click Deploy button and it will redirect you to the url as shown below −

Select the GET method from left side to get the url. Open the url in a new tab to see the message from Lambda function.

This is a basic example of working with AWS Lambda and AWS API Gateway. In the above example, we have hardcoded the message in Lambda function.
Now, let us take the message details from the API Gateway. Incase if the HTTPS call has to be called from a different domain, for example AJAX call to the API, we need to enable CORS for the API gateway created.
Select the reSource created for the API and click Actions dropdown −
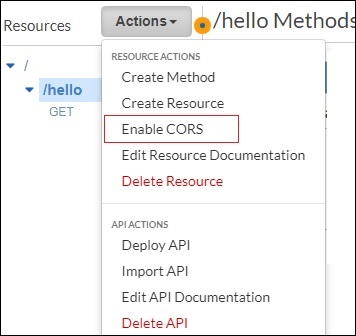
Now, Enable CORS will open up the following screen −
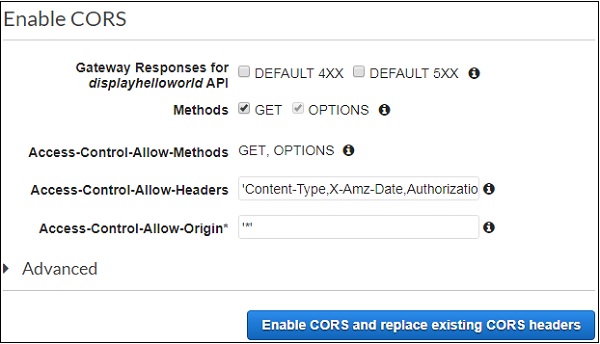
You can use few methods to ENABLE CORS. Access-Control-Allow-Origin is marked as * which means it will allow to get contents from API gateway from any domain.
You can also specify the domain name you want to work with the API. Click Enable CORS and replace existing CORS headers button and it will display confirmation message as shown below −

Click Yes, replace existing values button to enable it. The Enable CORS screen looks as shown below −
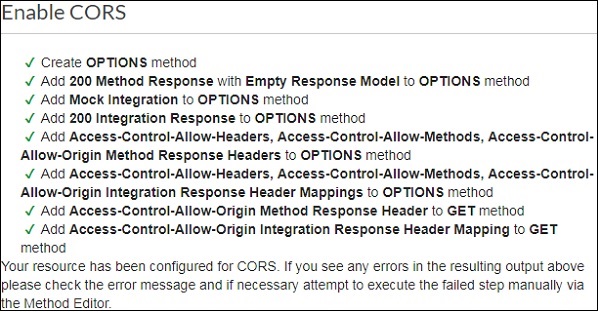
Passing Data to API Gateway
Open the API created in API Gateway displayhelloworld as shown below −
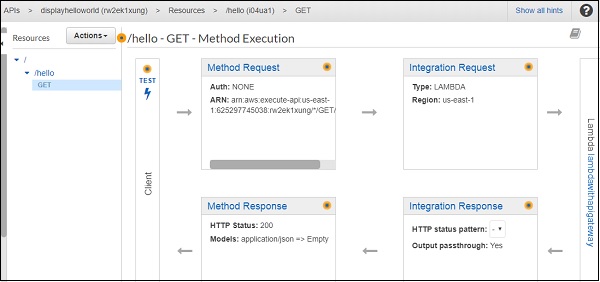
Click Integration Request to send data as shown below −
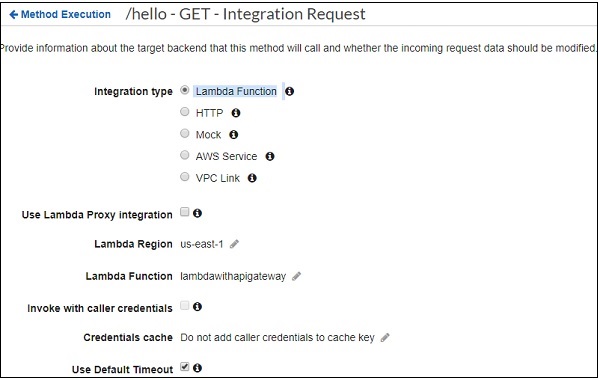
Choose Body Mapping Templates and add the Content-Type for this example as application/json. Click on the content type added add the details as follows −
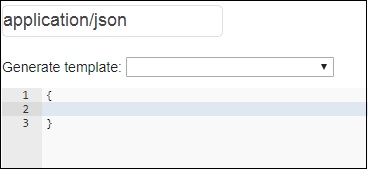
Now, add the template in JSON format as shown below −
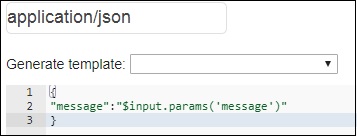
Observe that we have taken the message as the parameter to get data from API Gateway and share it with AWS Lambda. The syntax to get the details is as shown above.
Now, deploy the API to make the changes available on the API Gateway URL. For this, we need to change Lambda function to display the data based on the API Gateway URL. The code for Lambda function is givn below. Note that we are taking the message from the event and passing to callback.
exports.handler = (event, context, callback) => {
   let message = event.message;
   callback(null, message);
};
Now, save the changes in Lambda and hit the URL to see the changes. Observe the screenshot given below −
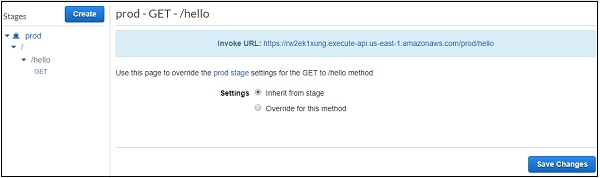
Click the URL as shown below −
https://rw2ek1xung.execute-api.us-east-
1.amazonaws.com/prod/hello?message=hello%20from%20api%20gateway
Observe that here we are passing message as query string to the GET url. Then you can observe the output as shown below −

It reads the details sent to message from the URL and displays the same in the browser.
Using Lambda Function with Amazon S3
Amazon S3 service is used for file storage, where you can upload or remove files. We can trigger AWS Lambda on S3 when there are any file uploads in S3 buckets. AWS Lambda has a handler function which acts as a start point for AWS Lambda function. The handler has the details of the events. In this chapter, let us see how to use AWS S3 to trigger AWS Lambda function when we upload files in S3 bucket.
Steps for Using AWS Lambda Function with Amazon S3
To start using AWS Lambda with Amazon S3, we need the following −
- Create S3 Bucket
- Create role which has permission to work with s3 and lambda
- Create lambda function and add s3 as the trigger.
Example
Let us see these steps with the help of an example which shows the basic interaction between Amazon S3 and AWS Lambda.
User will upload a file in Amazon S3 bucket
Once the file is uploaded, it will trigger AWS Lambda function in the background which will display an output in the form of a console message that the file is uploaded.
The user will be able to see the message in Cloudwatch logs once the file is uploaded.
The block diagram that explains the flow of the example is shown here −
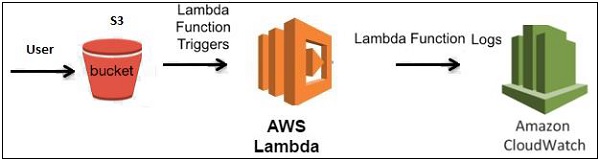
Creating S3 Bucket
Let us start first by creating a s3 bucket in AWS console using the steps given below −
Step 1
Go to Amazon services and click S3 in storage section as highlighted in the image given below −
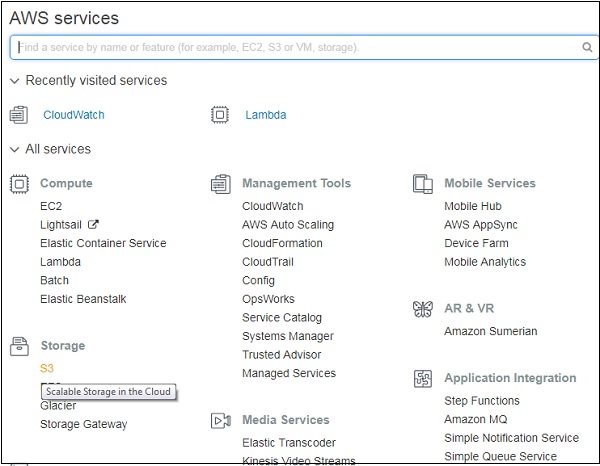
Step 2
Click S3 storage and Create bucket which will store the files uploaded.
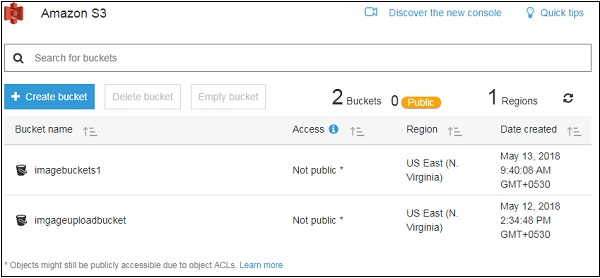
Step 3
Once you click Create bucket button, you can see a screen as follows −
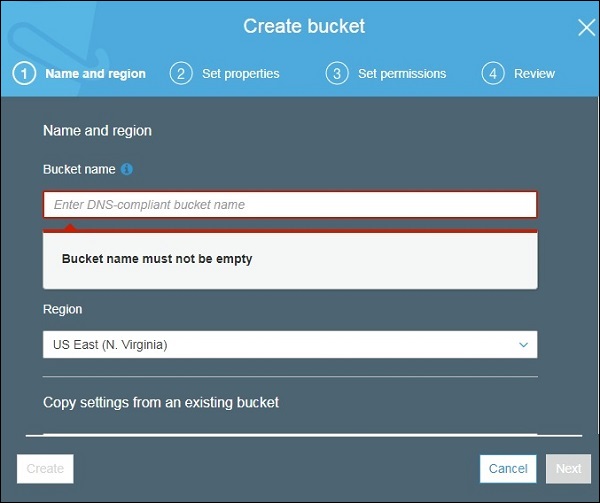
Step 4
Enter the details Bucket name, Select the Region and click Create button at the bottom left side. Thus, we have created bucket with name : workingwithlambdaands3.

Step 5
Now, click the bucket name and it will ask you to upload files as shown below −
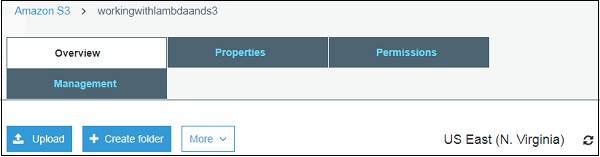
Thus, we are done with bucket creation in S3.
Create Role that Works with S3 and Lambda
To create role that works with S3 and Lambda, please follow the Steps given below −
Step 1
Go to AWS services and select IAM as shown below −
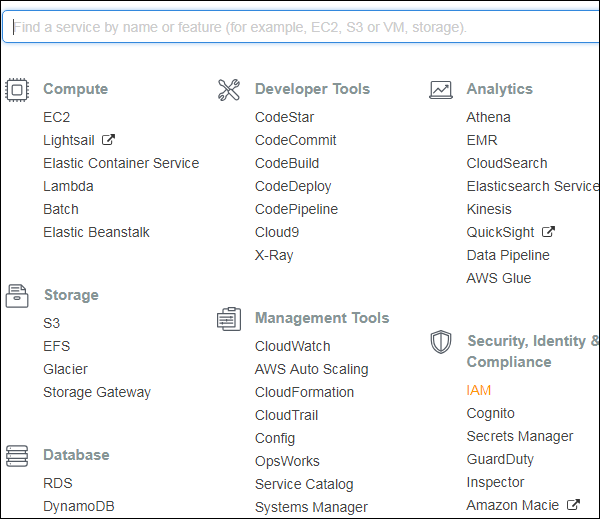
Step 2
Now, click IAM -> Roles as shown below −
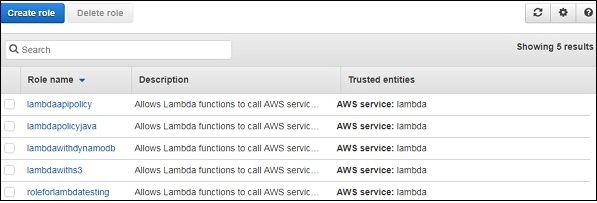
Step 3
Now, click Create role and choose the services that will use this role. Select Lambda and click Permission button.
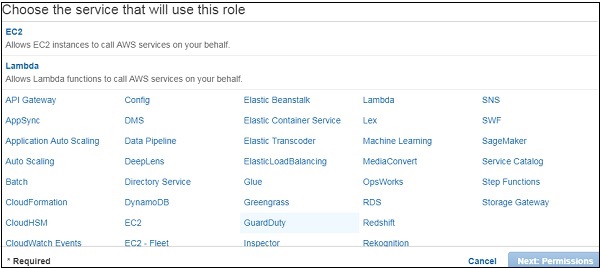
Step 4
Add the permission from below and click Review.
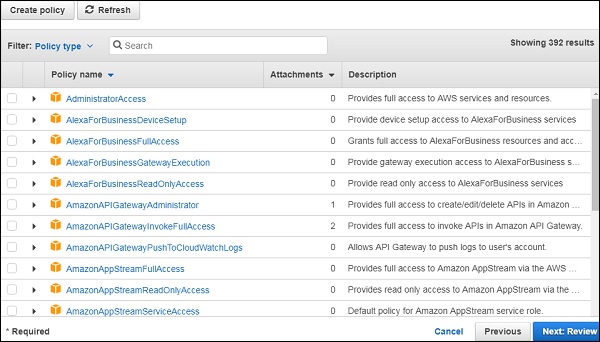
Step 5
Observe that we have chosen the following permissions −
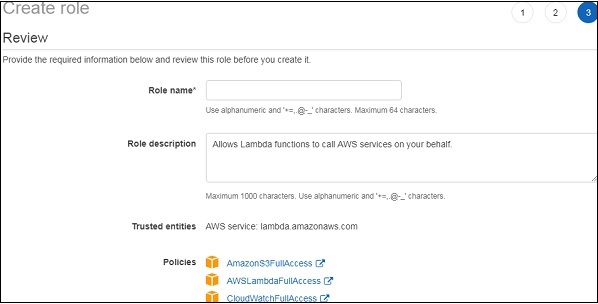
Observe that the Policies that we have selected are AmazonS3FullAccess, AWSLambdaFullAccess and CloudWatchFullAccess.
Step 6
Now, enter the Role name, Role description and click Create Role button at the bottom.
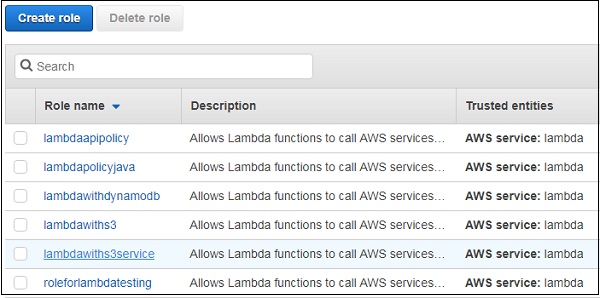
Thus, our role named lambdawiths3service is created.
Create Lambda function and Add S3 Trigger
In this section, let us see how to create a Lambda function and add a S3 trigger to it. For this purpose, you will have to follow th Steps given below −
Step 1
Go to AWS Services and select Lambda as shown below −
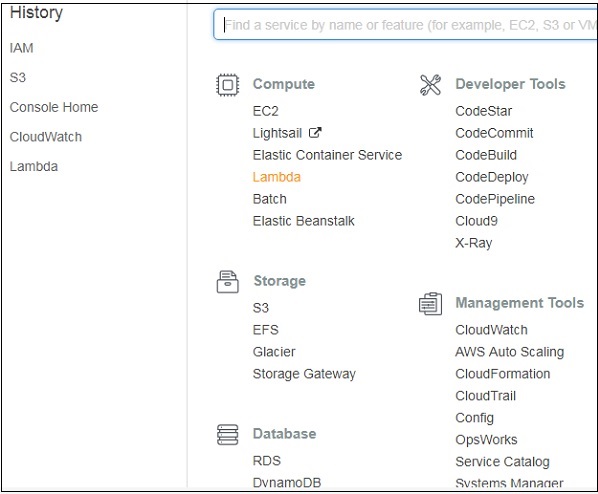
Step 2
Click Lambda and follow the process for adding Name. Choose the Runtime, Role etc. and create the function. The Lambda function that we have created is shown in the screenshot below −

Step 3
Now let us add the S3 trigger.
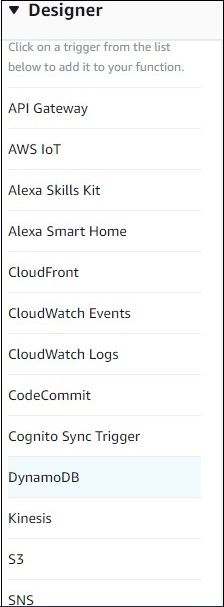
Step 4
Choose the trigger from above and add the details as shown below −
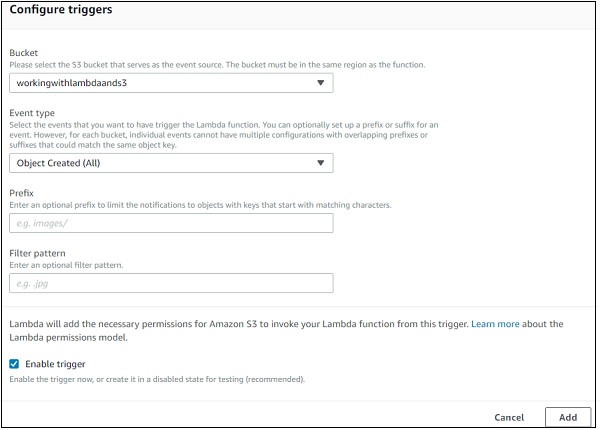
Step 5
Select the bucket created from bucket dropdown. The event type has following details −
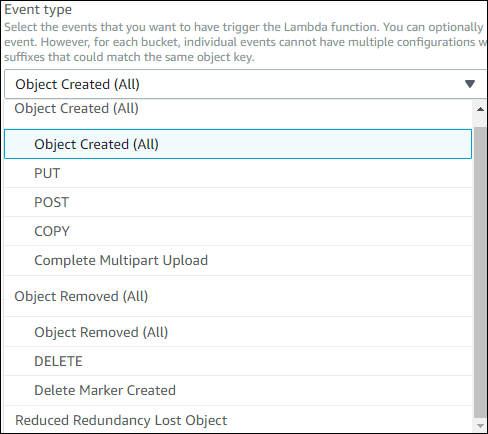
Select Object Created (All), as we need AWS Lambda trigger when file is uploaded, removed etc.
Step 6
You can add Prefix and File pattern which are used to filter the files added. For Example, to trigger lambda only for .jpg images. Let us keep it blank for now as we need to trigger Lambda for all files uploaded. Click Add button to add the trigger.
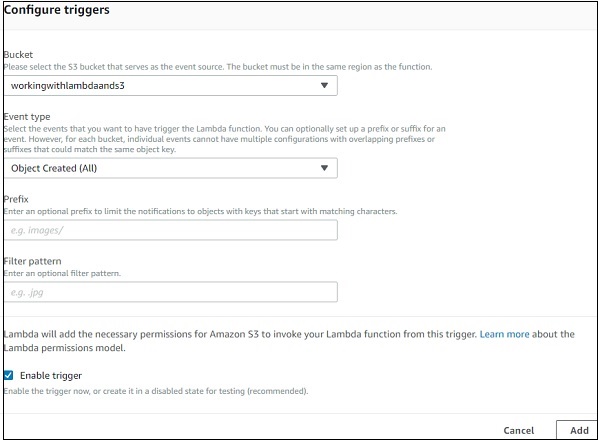
Step 7
You can find the the trigger display for the Lambda function as shown below −
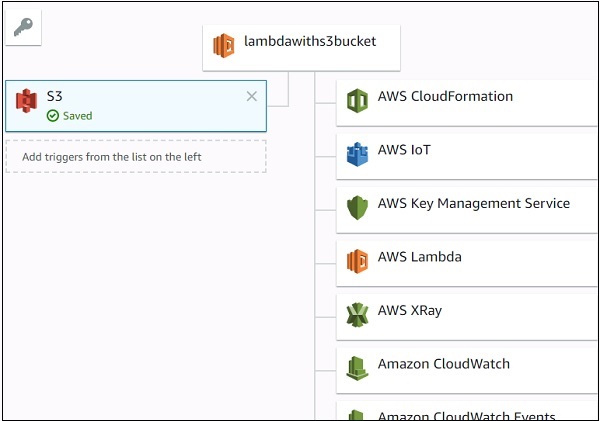
Lets add the details for the aws lambda function. Here, we will use the online editor to add our code and use nodejs as the runtime environment.
Step 8
To trigger S3 with AWS Lambda, we will have to use S3 event in the code as shown below −
exports.handler = function(event, context, callback) {
   console.log("Incoming Event: ", event);
   const bucket = event.Records[0].s3.bucket.name;
   const filename = decodeURIComponent(event.Records[0].s3.object.key.replace(/\+/g, ' '));
   const message = `File is uploaded in - ${bucket} -> ${filename}`;
   console.log(message);
   callback(null, message);
};
Note that the event param has the details of the S3event. We have consoled the bucket name and the file name which will get logged when you upload image in S3bucket.
Step 9
Now, let us save the changes and test the lambda function with S3upload. The following are the code details added in AWS Lambda −
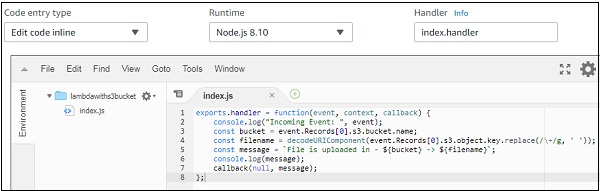
Step 10
Now, let us add the role, memory and timeout.
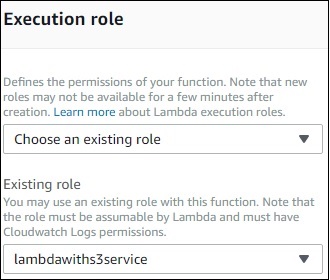
Step 11
Now, save the Lambda function. Open S3 from Amazon services and open the bucket we created earlier namely workingwithlambdaands3.
Upload the image in it as shown below −
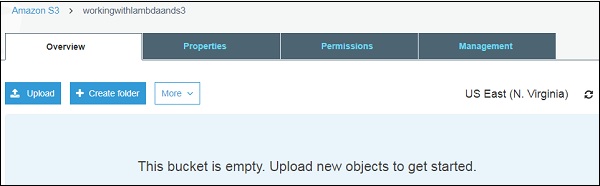
Step 12
Click Upload button to add files as shown −
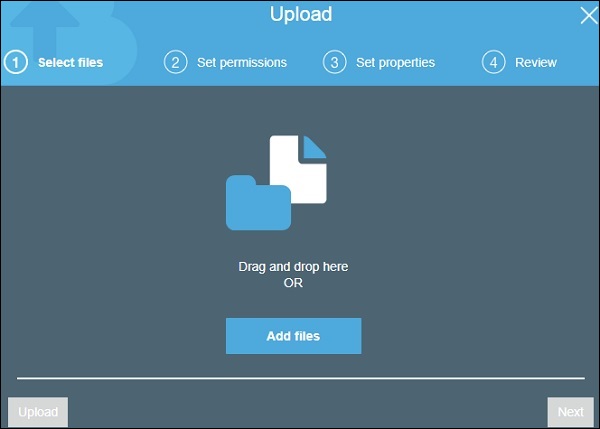
Step 13
Click Add files to add files. You can also drag and drop the files. Now, click Upload button.
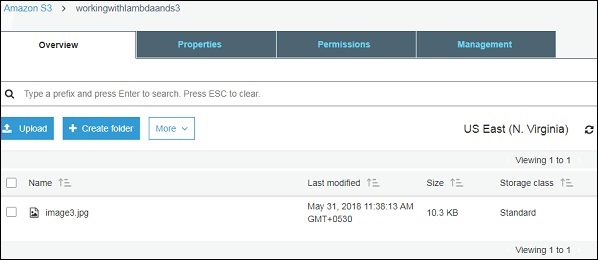
Thus, we have uploaded one image in our S3 bucket.
Step 14
To see the trigger details, go to AWS service and select CloudWatch. Open the logs for the Lambda function and use the following code −
exports.handler = function(event, context, callback) {
   console.log("Incoming Event: ", event);
   const bucket = event.Records[0].s3.bucket.name;
   const filename = decodeURIComponent(event.Records[0].s3.object.key.replace(/\+/g, ' '));
   const message = `File is uploaded in - ${bucket} -> ${filename}`;
   console.log(message);
   callback(null, message);
};
The output you can observe in Cloudwatch is as shown −
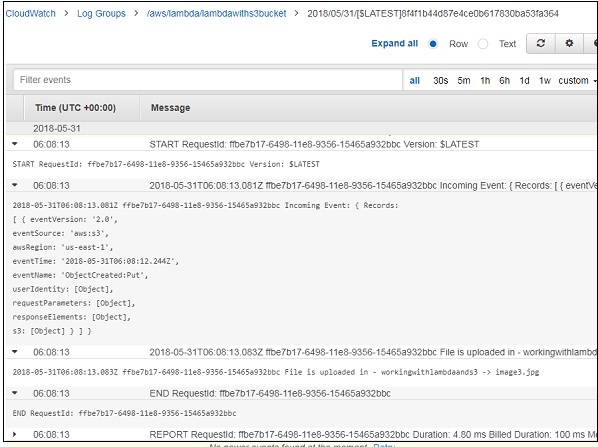
AWS Lambda function gets triggered when file is uploaded in S3 bucket and the details are logged in Cloudwatch as shown below −
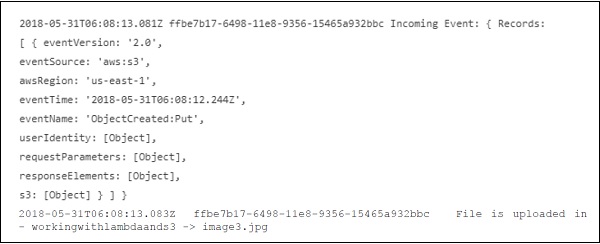
Using Lambda Function with Amazon DynamoDB
DynamoDB can trigger AWS Lambda when the data in added to the tables, updated or deleted. In this chapter, we will work on a simple example that will add items to the DynamoDB table and AWS Lambda which will read the data and send mail with the data added.
Requisites
To use Amazon DB and AWS Lambda, we need to follow the steps as shown below −
Create a table in DynamoDB with primary key
Create a role which will have permission to work with DynamoDBand AWS Lambda.
Create function in AWS Lambda
AWS Lambda Trigger to send mail
Add data in DynamoDB
Let us discuss each of this step in detail.
Example
We are going to work out on following example which shows the basic interaction between DynamoDB and AWS Lambda. This example will help you to understand the following operations −
Creating a table called customer in Dynamodb table and how to enter data in that table.
Triggering AWS Lambda function once the data is entered and sending mail using Amazon SES service.
The basic block diagram that explains the flow of the example is as shown below −

Create Table in DynamoDB with Primary Key
Log in to AWS console. Go to AWS Services and select DynamoDB as shown below. Select DynamoDB.
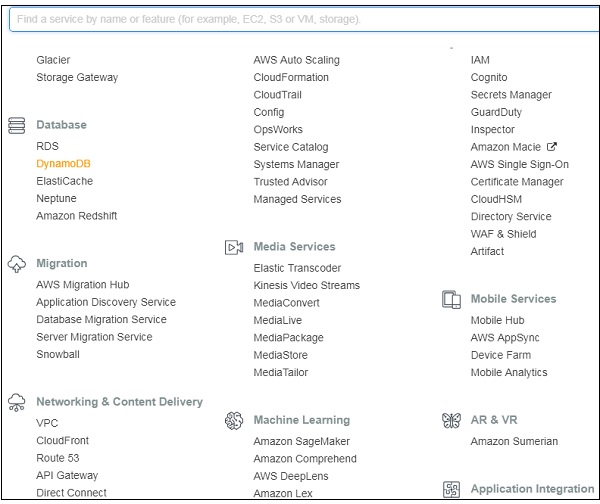
DynamoDB shows the options as shown below −
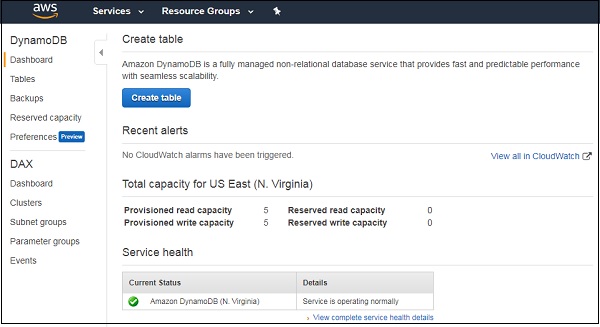
Now, click Create table to create the table as shown. We have named the table as customer with primary key for that table as cust_id. Click on Create button to add the table to dynamodb.
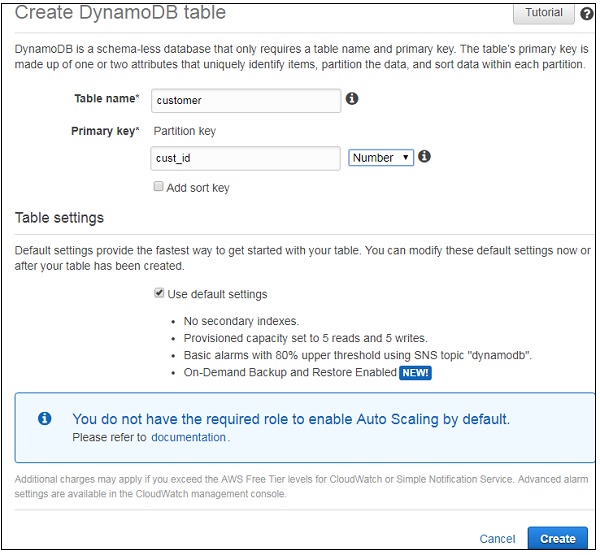
The table created is as shown below −

We can add items to the table created as follows −
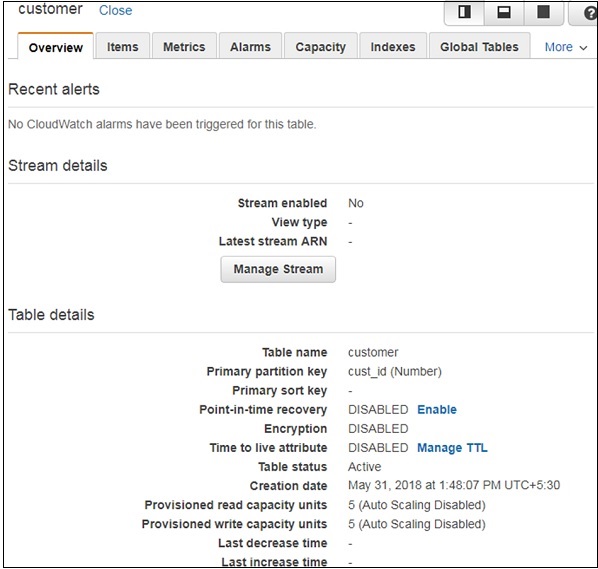
Click Items and click Create item button as shown −
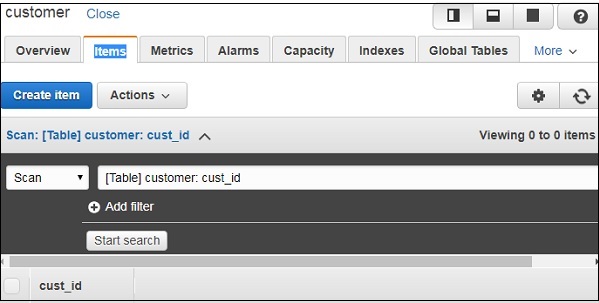
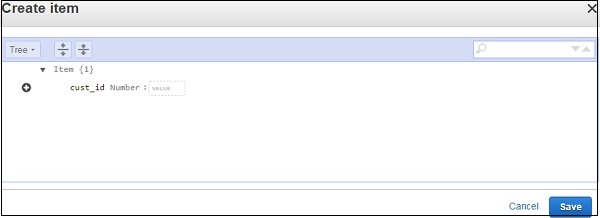
Creating Role with Permissions to Work with DynamoDB and AWS Lambda
To create role, Go to AWS services and click IAM.
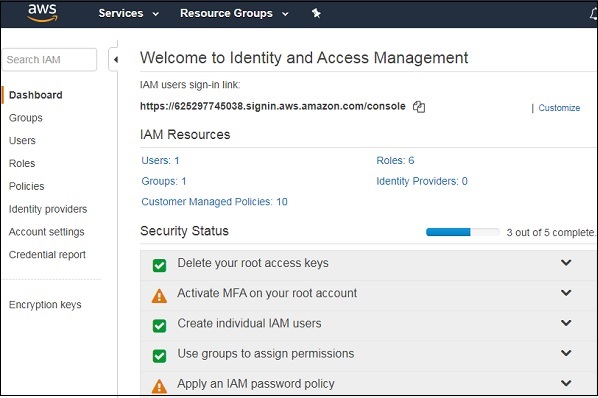
Let us create a policy to be used only for the DynamoDB table created earlier −
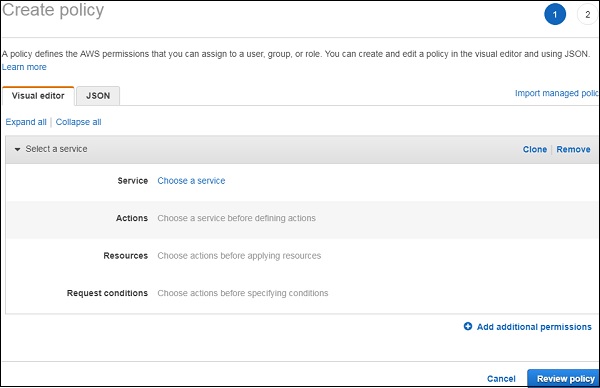
Now, choose a Service. Observe that the service we have selected is DynamoDB. For Actions we have taken all Dynamodb actions ie access to list, read and write. For resources, we will select the table resource type actions. When you click it, you can see a screen as follows −
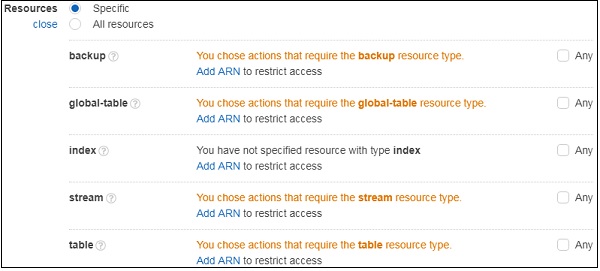
Now, select table and Add ARN to it as shown. We will get ARN details from customer table created as shown below −
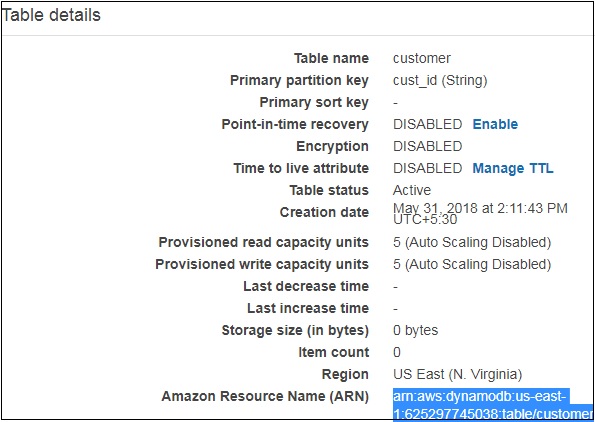
Enter arn details here −

Click Add button to save the changes. Once done Click on Review policy. Enter the name of the policy, description etc as shown below −
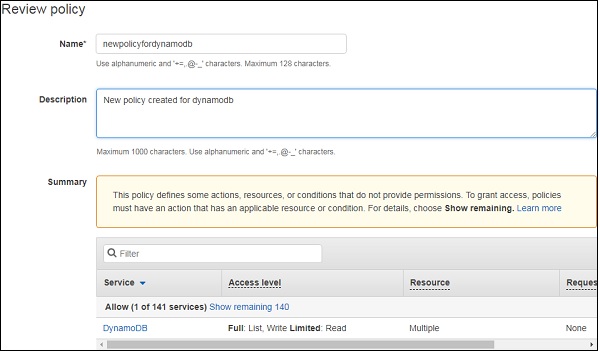
Click on create policy to save it. Add the policy to the role to be created. Select Role from left side and enter the details.
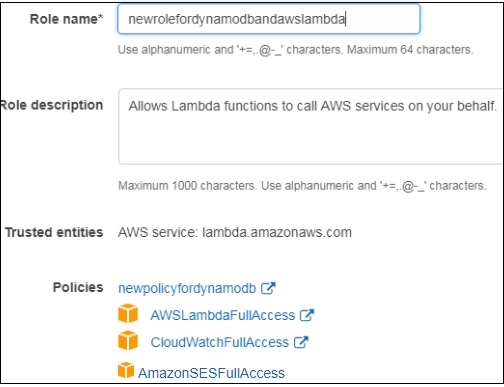
Observe that the policies added are newpolicyfordynamdb, awslambdafullaccess, cloudwatchfullaccess and amazonsesfullaccess. Add the role and will use it while creating AWS Lambda function.
Create Function in AWS Lambda
Thus, we have created Lambda function called newlambdafordynamodb as shown.

Now, let us add DynamodDB trigger to the AWS Lambda created. The runtime we shall use is Node.js.

You can find the following details in Dynamodb trigger that are to be configured for AWS Lambda −
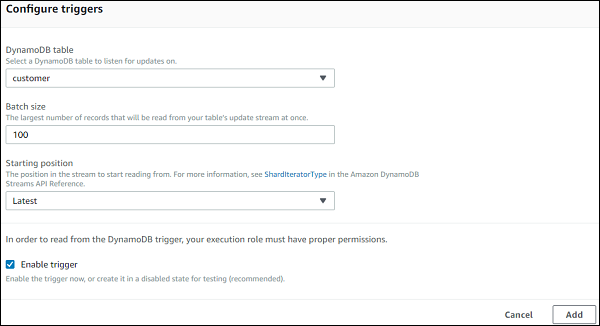
Now, simply click Add to add the trigger to AWS Lambda.
AWS Lambda Trigger to Send Mail
AWS Lambda will get triggered when data is inserted intoAWS Lambda. The event parameter will have the dynamodb data inserted. This will read the data from the event and send email.
Sending an email
To send email, you need to follow the steps given below −
Step 1
Go to AWS service and select SES (simple email service). Validate the email to which we need to send an email as shown −

Step 2
Click the button Verify a New Email Address to add the email address.
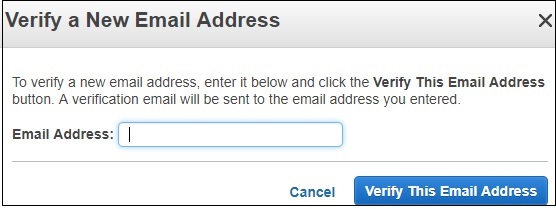
Step 3
Enter an email address to verify it. The email address will receive and activation mail from Amazon which needs to be clicked. Once the activation is done, the email id is verified and can be used with AWS services.
Step 4
The AWS Lambda code which reads data from the event and sends email is given below −
var aws = require('aws-sdk');
var ses = new aws.SES({
   region: 'us-east-1'
});
exports.handler = function(event, context, callback) {
   console.log(event);
   let tabledetails = JSON.parse(JSON.stringify(event.Records[0].dynamodb));
   console.log(tabledetails.NewImage.address.S);
   let customerid = tabledetails.NewImage.cust_id.S;
   let name = tabledetails.NewImage.name.S;
   let address = tabledetails.NewImage.address.S;

   var eParams = {
      Destination: {
         ToAddresses: ["xxxxx@gmail.com"]
      },
      Message: {
         Body: {
            Text: {
               Data: "The data added is as follows:\n CustomerId:"+customerid+"\n Name:"+name+"\nAddress:"+address
            }
         },
         Subject: {
            Data: "Data Inserted in Dynamodb table customer"
         }
      },
      Source: "xxxxx@gmail.com"
   };
   console.log('===SENDING EMAIL===');
   var email = ses.sendEmail(eParams, function(err, data) {
      if (err) console.log(err);
      else {
         console.log("===EMAIL SENT===");
         console.log("EMAIL CODE END");
         console.log('EMAIL: ', email);
         context.succeed(event);
         callback(null, "email is send");
      }
   });
}
Now, save the Lambda function and data in DynamoDB table.
Add Data in DynamoDB
Use the following sequence to add data in DynamoDB.
Step 1
Go to the table customer created in Dynamodb.
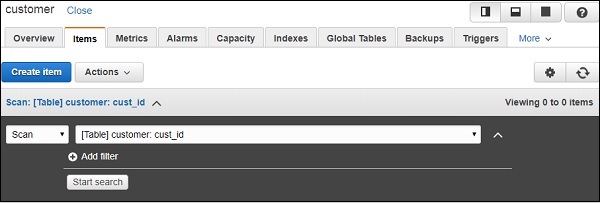
Step 2
Click Create item.
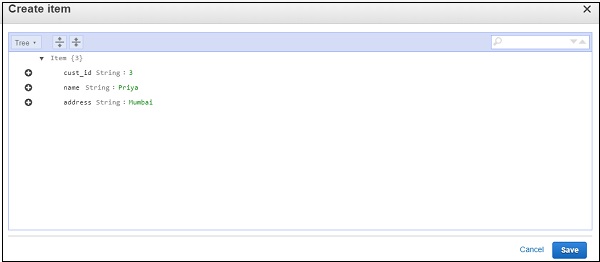
Step 3
Click Save button and check the email id provided in AWS Lambda to see if the mail has been sent by AWS Lambda.
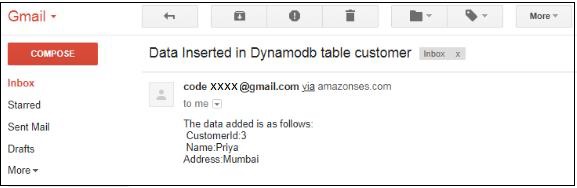
Using Lambda Function with Scheduled Events
Scheduled events are suppose to happen at regular intervals based on a rule set. Scheduled events are used to execute Lambda function after an interval which is defined in cloudwatch services. They are best used for working on cron jobs along with AWS Lambda. This chapter will explain with simple example how to send mail after every 5 minutes using scheduled events and AWS Lambda.
Requisites
The requirements for using Lambda function with Scheduled events are as follows −
- Verify email id using AWS SES
- Create Role to use AWS SES, Cloudwatch and AWS Lambda
- Create Lambda Function to send email
- Add rule for scheduled events from AWS CloudWatch
Example
The example that we are going to consider will add CloudWatch event to the AWS Lambda function. Cloudwatch will trigger AWS Lambda based on the time pattern attached to it. For Example, in the example below we have used 5 minutes as the trigger. It means for every 5 minutes, AWS Lambda will be triggered and AWS Lambda will send mail whenever triggered.
The basic block diagram for the same is shown below −
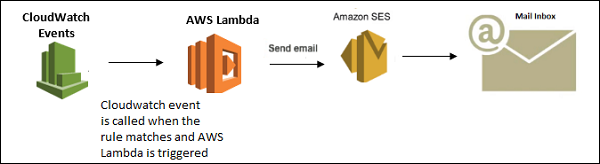
Verify Email ID using AWS SES
Log in to AWS and go to AWS SES service as shown below −
Now, click Simple Email Service as shown −
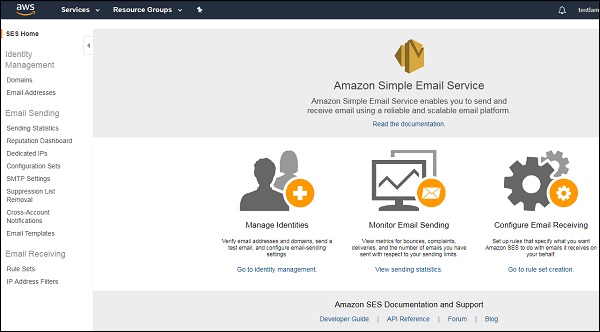
Click Email Addresses on left side as shown −

It displays a button Verify a New Email Address. Click it.
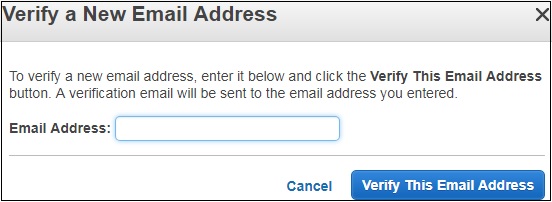
Enter Email Address you want to verify. Click Verify This Email Address button. You will receive mail from AWS on that email id with email subject: Amazon Web Services Email Address Verification Request in region US East (N. Virginia)
Click the link given in the mail to verify email address. Once verified, it will display the email id as follows −
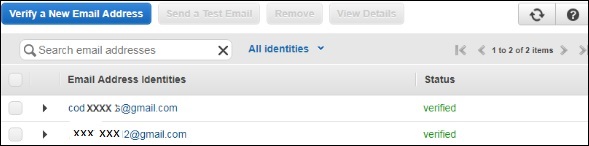
Create Role to use AWS SES, Cloudwatch and AWS Lambda
You can also create a role which gives permission to use the services. For this, go to IAM and select Role. Add the required policies and create the role. Observe that the role created here is events with lambda.
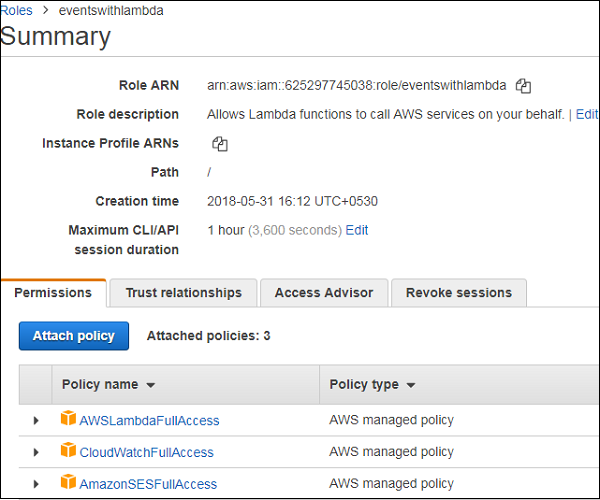
Create Lambda Function to Send Email
You will have to follow the steps to create Lambda function using runtime as nodejs.

Now, add trigger to Lambda as shown −
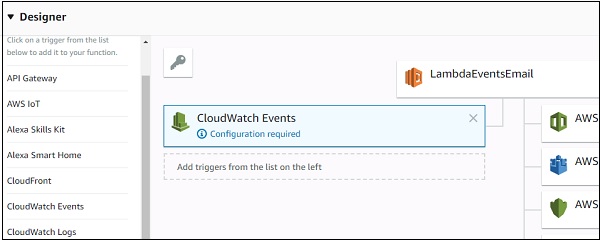
Add details to CloudWatch Events Trigger as shown below −
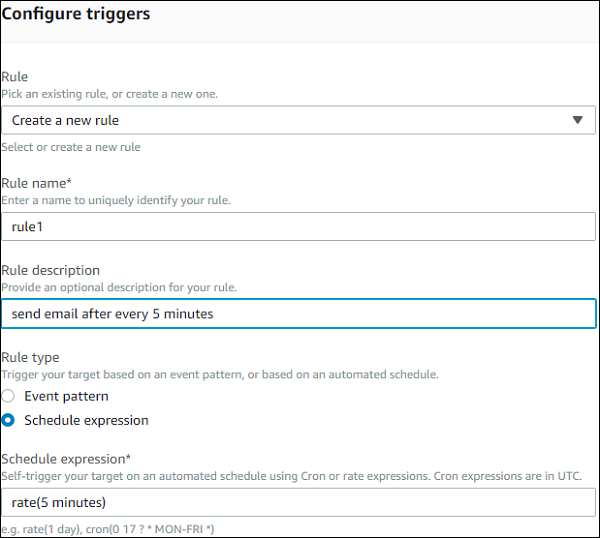
Note that the event will be triggered after every 5 minutes as per the rule trigger created.
The Lambda code for sending an email is given below −
var aws = require('aws-sdk');
var ses = new aws.SES({
   region: 'us-east-1'
});
exports.handler = function(event, context, callback) {
   var eParams = {
      Destination: {
         ToAddresses: ["xxxxxxxt12@gmail.com"]
      },
      Message: {
         Body: {
            Text: {
               Data: "this mail comes from aws lambda event scheduling"
            }
         },
         Subject: {
            Data: "Event scheduling from aws lambda"
         }
      },
      Source: "coxxxxxx@gmail.com"
   };
   console.log('===SENDING EMAIL===');
   var email = ses.sendEmail(eParams, function(err, data) {
      if (err) console.log(err);
      else {
         console.log("===EMAIL SENT===");
         console.log("EMAIL CODE END");
         console.log('EMAIL: ', email);
         context.succeed(event);
         callback(null, "email is send");
      }
   });
};
Now, we need the AWS SES service. You can add this using the code shown as follows −
var aws = require('aws-sdk');
var ses = new aws.SES({
   region: 'us-east-1'
});
To send mail from nodejs, we have created eParams object which has details like the example mail, to mail id and the body with message as follows −
var eParams = {
   Destination: {
      ToAddresses: ["xxxxxxxx12@gmail.com"]
   },
   Message: {
      Body: {
         Text: {
            Data: "this mail comes from aws lambda event scheduling"
         }
      },
      Subject: {
         Data: "Event scheduling from aws lambda"
      }
   },
   Source: "coxxxxxx@gmail.com"
};
The Lambda code to send email is as follows −
var email = ses.sendEmail(eParams, function(err, data) {
   if (err) console.log(err);
   else {
      console.log("===EMAIL SENT===");
      console.log("EMAIL CODE END");
      console.log('EMAIL: ', email);
      context.succeed(event);
      callback(null, "email is send");
   }
});
Now, let us save this Lambda function and check the email id for mails. The screenshot shown below shows that the mail is sent from AWS Lambda after every 5 minutes.
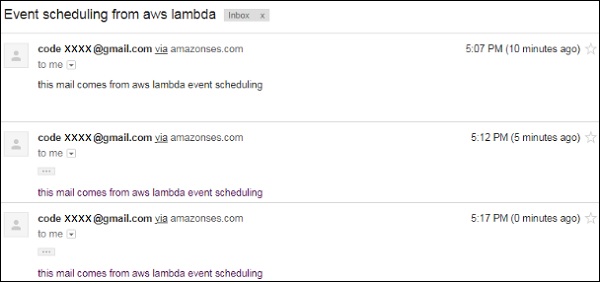
Using Lambda Function with Amazon SNS
Amazon SNS is a service used for push notification. In this chapter, we will explain working of AWS Lambda and Amazon SNS with the help of an example where will perform the following actions −
Create Topic in SNS Service and use AWS Lambda Add Topics to CloudWatch
Send SNS text message on phone number given.
Requisites
To create Topic in SNS Service and use AWS Lambda Add Topics to CloudWatch, we need not follow the steps given below −
- Create Topic in SNS
- Create Role for permission in IAM
- Create AWS Lambda Function
- Publish to topic to activate trigger
- Check the message details in CloudWatch service.
To send SNS text message on phone number given, we need to do the following −
- Add code in AWS Lambda to send message to your phone.
Example
In this example, we will create a topic in SNS. When details are entered in the topic to publish, AWS Lambda is triggered. The topic details are logged in CloudWatch and a message is sent on phone by AWS Lambda.
Here is a basic block diagram which explains the same −
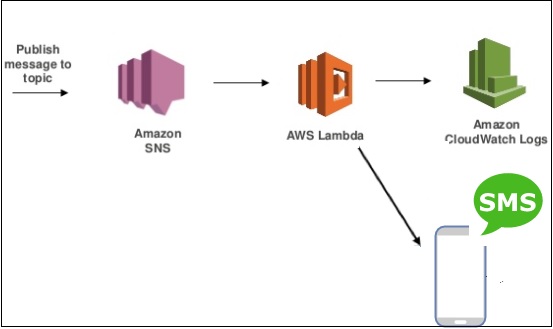
Create Topic in SNS
You will have to follow the steps given below to create topic in SNS −
Step 1
Login to AWS Console and go to SNS service in Amazon as shown below −
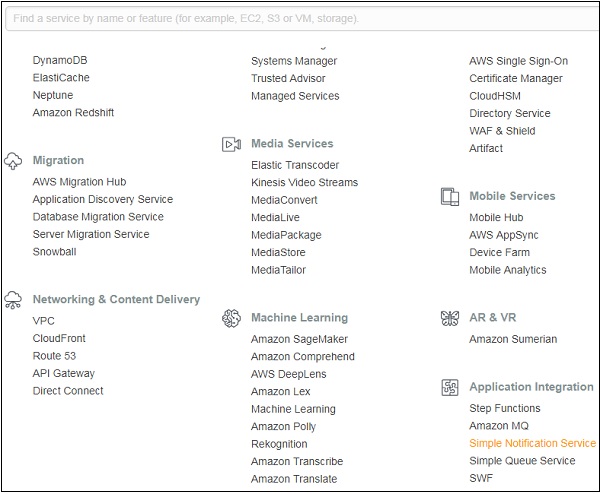
Step 2
Click Simple Notification Service and Create topic in it.
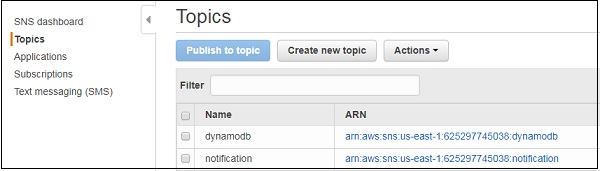
Step 3
Then, you have to click Create new topic button as shown −
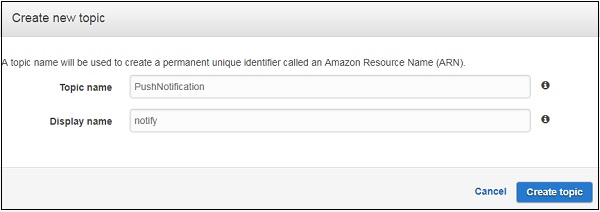
Step 4
Enter the Topic name and Display name and click on Create topic. You should see the topic name in the display as follows −

Create Role for Permission in IAM
To create a Role to work with AWS Lambda and SNS service, we need to login to AWS console. Then, select IAM from Amazon services and click role from left side as shown below.
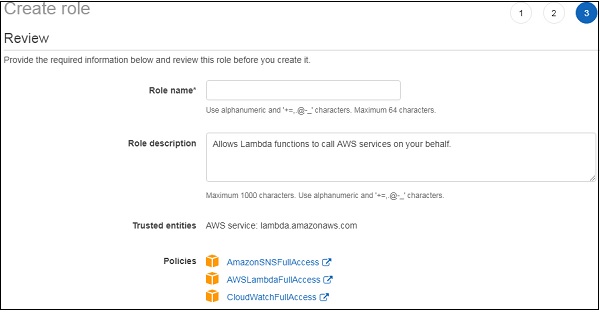
Observe that we have added policies for SNS, Lambda and CloudWatch. Add rolename and click Create role button to complete the process of role creation.
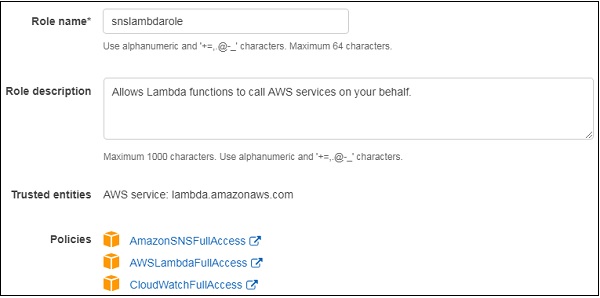
Create AWS Lambda Function
In this section, let us understand how to create AWS Lambda function using nodejs as the runtime.
For this purpose, login to AWS console and choose AWS Lambda from AWS services. Add the function name, role details etc and create the AWS Lambda function as shown.
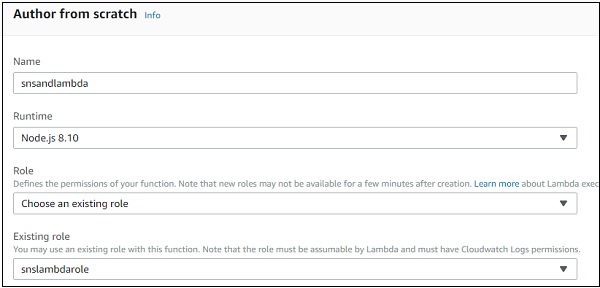
Add SNS Trigger
To add SNS trigger, enter SNS configuration details as shown −
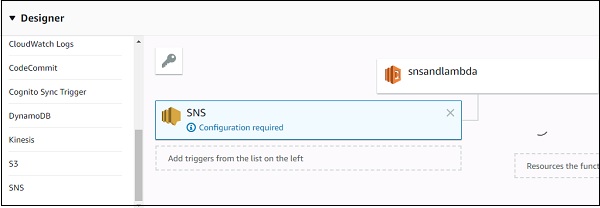
Then, select SNS topic and Add the trigger to AWS Lambda function as shown −
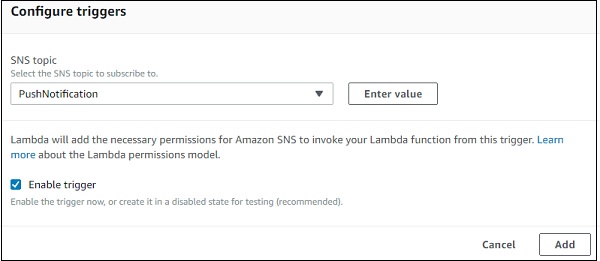
Then, add AWS lambda code given below −
exports.handler = function(event, context, callback) {
   console.log("AWS lambda and SNS trigger ");
   console.log(event);
   const sns = event.Records[0].Sns.Message;
   console.log(sns)
   callback(null, sns);
};
In the above code, event.Records[0].Sns.Message gives the message details added. We have added console logs to see them in CloudWatch. Now, save the Lambda function with required memory and time allocation.
Publish to Topic to Activate Trigger
Recall that we have already created topic in SNS in Step 1. We will now publish in the topic and see the details in CloudWatch which will be triggered by AWS Lambda −
Publish to Topic
First Select name of the topic you want to publish. Click on Publish to topic button −

Enter the Subject and Message details as shown below −
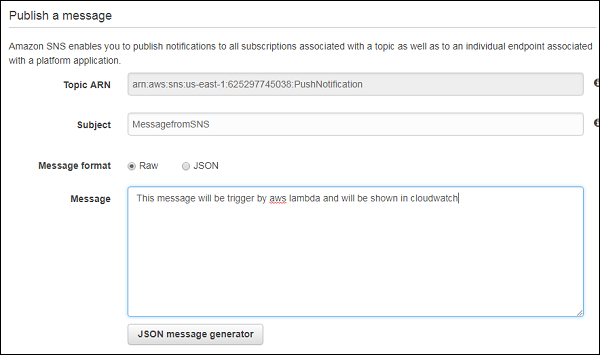
You can also select JSON message format to send in JSON style. Click Publish the message button at the end of the screen.
Check Message Details in CloudWatch Service
Log intoAWS console and open CloudWatch service. Click on logs on left side and select the logs for AWS Lambda function created. You can find the following display for the logs with messages created as shown above −
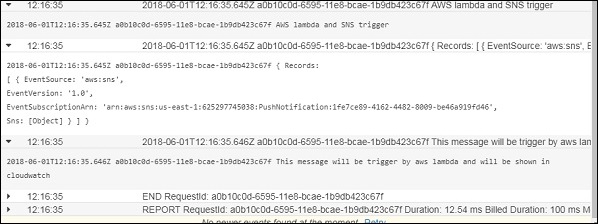
Add Code in AWS Lambda to Send Message to your Phone
Here will use SNS Text messaging to send message on the phone using AWS Lambda. You can use the following code to update AWS Lambda code as follows −
const aws =  require("aws-sdk");
const sns = new aws.SNS({
   region:'us-east-1'
});
exports.handler = function(event, context, callback) {
   console.log("AWS lambda and SNS trigger ");
   console.log(event);
   const snsmessage = event.Records[0].Sns.Message;
   console.log(snsmessage);
   sns.publish({
      Message: snsmessage,
      PhoneNumber: '+911212121212'
   }, function (err, data) {
      if (err) {
         console.log(err);
         callback(err, null);
      } else {
         console.log(data);
         callback(null, data);
      }
   });
};
We have added AWS SDK and the SNS service to use to send message. The message from the event coming from SNS is send as text message on the phone number given.
Observe the following code for example −
sns.publish({
   Message: snsmessage,
   PhoneNumber: '+911212121212'
}, function (err, data) {
   if (err) {
      console.log(err);
      callback(err, null);
   } else {
      console.log(data);
      callback(null, data);
   }
});
Enter the topic now to see the message in cloudwatch and the phone number given above.
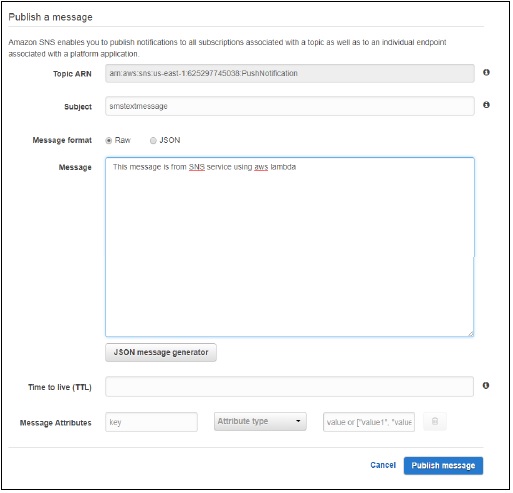
Click Publish message to publish the message. You see a message on the phone number given as follows −
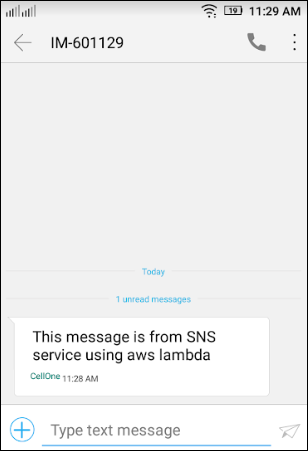
Using Lambda Function with CloudTrail
AWS CloudTrail is a service available with Amazon, which helps to logs all the activities done inside AWS console. It logs all the API calls and stores the history, which can be used later for debugging purpose. Note that we cannot trigger Lambda from CloudTrail. Instead, CloudTrail stores all the history in the form of logs in S3 bucket and we can trigger AWS Lambda from S3. Once any logs are to be processed, AWS Lambda will get triggered whenever any logs are added to S3 bucket.
Requisites
Before you start to work with AWS CloudTrail, S3 and AWS Lambda, you need to perform the following −
- Create S3 bucket to store CloudTrail logs
- Create SNS service
- Create a trail in CloudTrail and assign the S3 bucket and SNS service
- Create IAM role with permission.
- Create aws lambda function
- AWS Lambda configuration
Example
Let s consider an example which shows the working of AWS CloudTrail, S3 and AWS Lambda. Here, we will create a bucket in S3 which will store all the logs for any interaction done in AWS console. Let us create SNS topic and publish it. For this action, the logs will be entered as a file in S3. AWS lambda will get triggered which will send mail using Amazon SES service.
The block diagram for explaining this process is as shown below −

Create S3 Bucket to Store CloudTrail logs
Go to AWS console and click S3 service. Click Create bucket and enter the name of the bucket you want to store cloudtrail logs as shown −
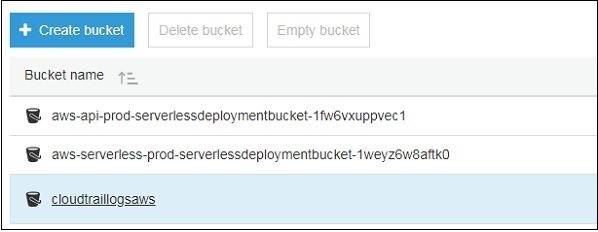
Observe that here we have created a S3 bucket cloudtraillogsaws for storing the logs.
Create SNS Service
Go to AWS console and click Simple notification Service. Select topics from left side and click Create new topic button.

We have created topic called displaytrail to publish a topic. Its details will get stored in S3bucket that is created above.
Create a Trail in Cloudtrail and Assign the S3 bucket and SNS service
Go to AWS console and click CloudTrail service from Management tools as shown −

Click Trails from the left side as shown below −
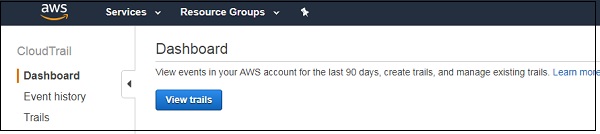

Click Create Trail button. Enter the Trail name, Apply trail to all regions and choose Yes. Then So the logs will be applied for all the region.
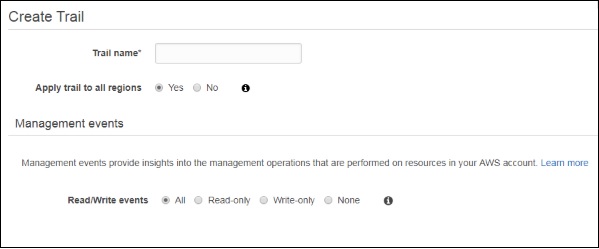
For Read/Write events, choose All. Add the S3 bucket and SNS topic details as shown below. You can create a new one here or add an existing one.
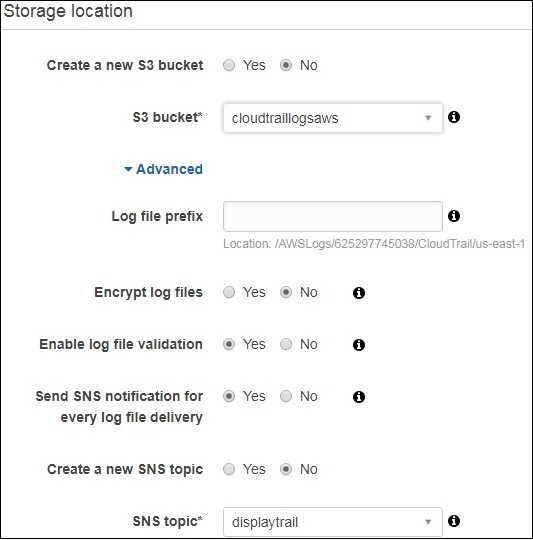
Note that there are options available to encrypt log files, enable log file validation, send sns notification for every log file delivery etc. I have used the default values here. You can allow file encryption and it will ask for encryption key. Click on Create Trail button once the details are added.
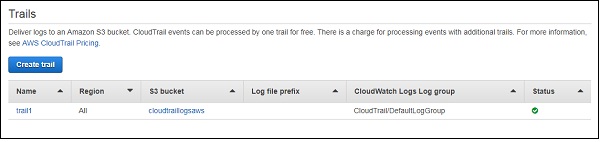
Create IAM Role with Permission
Go to AWS console and select IAM. Create a role with permission for S3, Lambda, CloudTrail and SES for sending email. The role created is as shown below −

Create AWS Lambda Function
Go to AWS service and click Lambda service. Add the function name, select runtime as nodejs, and select the role created for the lambda function. Following is the lambda function created.
AWS Lambda Configuration
Next, we need to add S3 as the trigger for AWS lambda created.
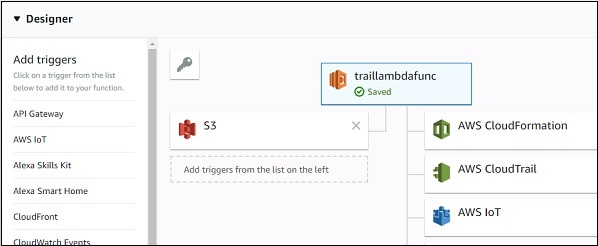
Add the S3 bucket details to add the trigger and add the following AWS Lambda code −
const aws =  require("aws-sdk");
const sns = new aws.SNS({
region:'us-east-1'
});
var ses = new aws.SES({
   region: 'us-east-1'
});
exports.handler = function(event, context, callback) {
   console.log("AWS lambda and SNS trigger ");
   console.log(event);
   const s3message = "Bucket Name:"+event.Records[0].s3.bucket.name+"\nLog details:"+event.Records[0].s3.object.key;
   console.log(s3message);
   var eParams = {
      Destination: {
         ToAddresses: ["xxxxxxxxx12@gmail.com"]
      },
      Message: {
         Body: {
            Text: {
               Data:s3message
            }
         },
         Subject: {
            Data: "cloudtrail logs"
         }
      },
      Source: "coxxxxxx@gmail.com"
   };
   var email = ses.sendEmail(eParams, function(err, data) {
      if (err) console.log(err);
      else {
         console.log("===EMAIL SENT===");
         console.log("EMAIL CODE END");
         console.log('EMAIL: ', email);
         context.succeed(event);
         callback(null, "email is send");
      }
   });
};
Note that we are taking the S3 bucket and log details from the event and sending mail using SES service as shown above.
Whenever any activity takes place in AWS console, the logs will be sent to S3 bucket and at the same time, AWS lambda will get triggered and the mail will be send to the email id mentioned in the code.
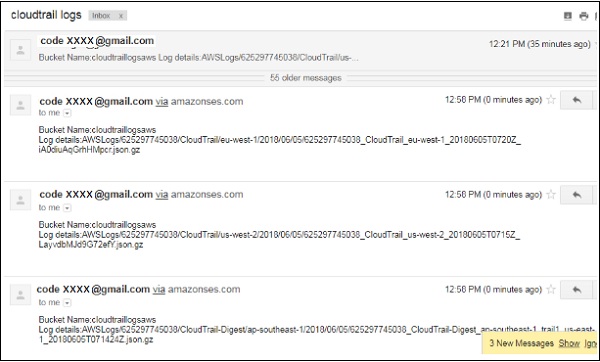
Note that you can process the logs as per your needs in AWS Lambda.
Using Lambda Function with Amazon Kinesis
AWS Kinesis service is used to capture/store real time tracking data coming from website clicks, logs, social media feeds. We can trigger AWS Lambda to perform additional processing on this logs.
Requisites
The basic requirements to get started with Kinesis and AWS Lambda are as shown −
- Create role with required permissions
- Create data stream in Kinesis
- Create AWS Lambda function.
- Add code to AWS Lambda
- Add data to Kinesis data stream
Example
Let us work on an example wherein we will trigger AWS Lambda for processing the data stream from Kinesis and send mail with the data received.
A simple block diagram for explaining the process is shown below −

Create Role with Required Permissions
Go to AWS console and create a role.
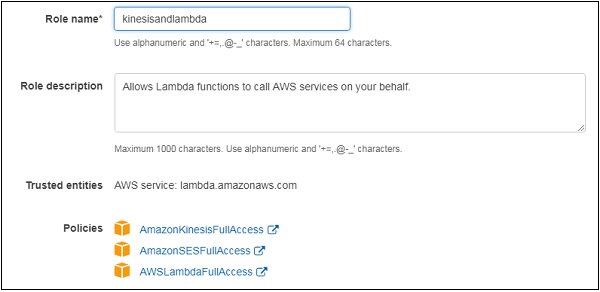
Create Data Stream in Kinesis
Go to AWS console and create data stream in kinesis.
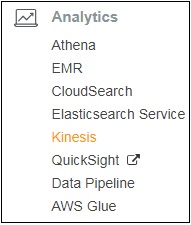
There are 4 options as shown. We will work on Create data stream in this example.
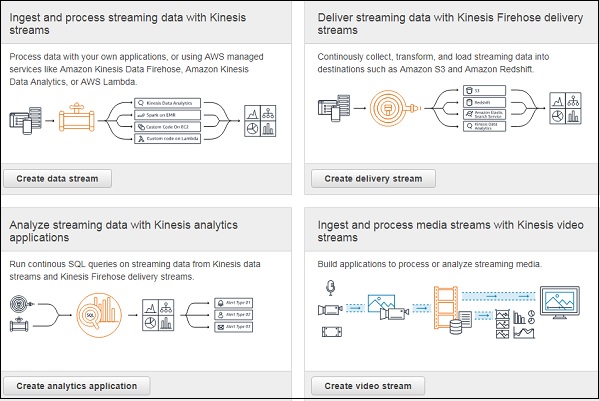
Click Create data stream. Enter the name in Kinesis stream name given below.

Enter number of shards for the data stream.
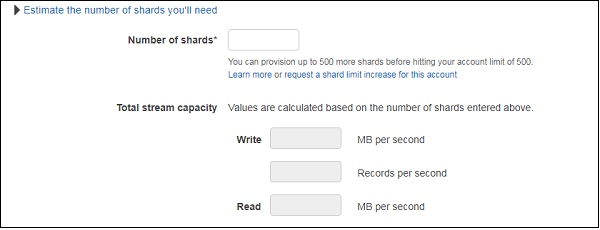
The details of Shards are as shown below −
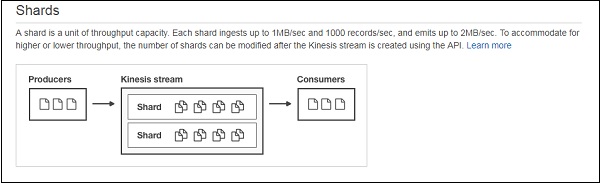
Enter the name and click the Create Kinesis stream button at the bottom.
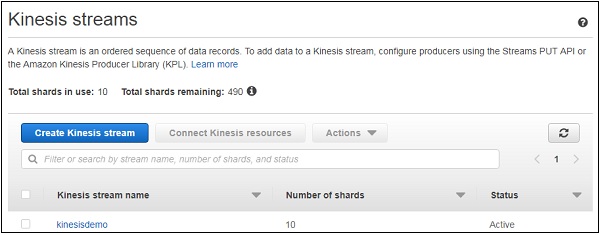
Note that it takes certain time for the stream to go active.
Create AWS Lambda Function
Go to AWS console and click Lambda. Create AWS Lambda function as shown −
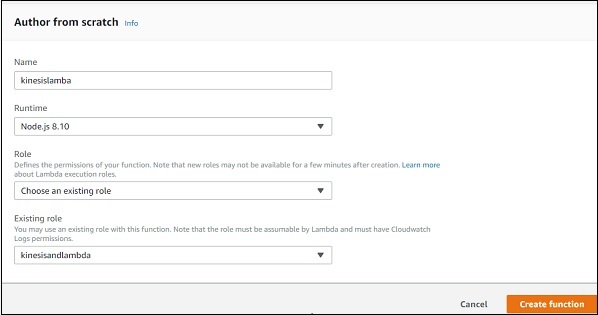
Click Create function button at the end of the screen. Add Kinesis as the trigger to AWS Lambda.
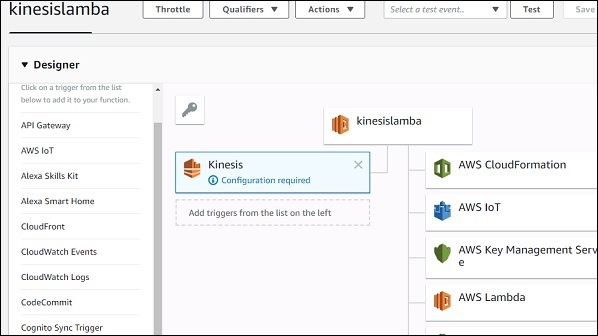
Add configuration details to the Kinesis trigger −
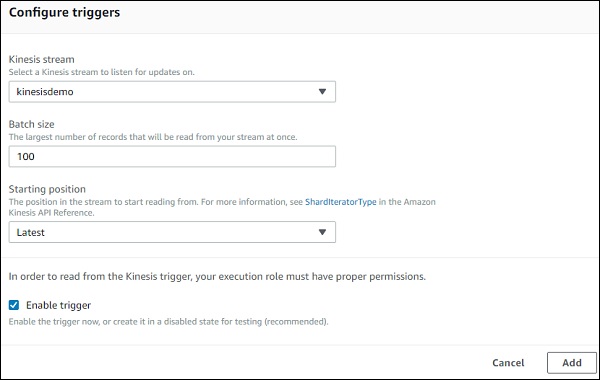
Add the trigger and now add code to AWS Lambda.
Adding Code to AWS Lambda
For this purpose, we will use nodejs as the run-time. We will send mail once AWS Lambda is triggered with kinesis data stream.
const aws =  require("aws-sdk");
var ses = new aws.SES({
   region: 'us-east-1'
});
exports.handler = function(event, context, callback) {
   let payload = "";
   event.Records.forEach(function(record) {
      // Kinesis data is base64 encoded so decode here
      payload = new Buffer(record.kinesis.data, 'base64').toString('ascii');
      console.log('Decoded payload:', payload);
   });
   var eParams = {
      Destination: {
         ToAddresses: ["xxxxxxx@gmail.com"]
      },
      Message: {
         Body: {
            Text: {
               Data:payload
            }
         },
         Subject: {
            Data: "Kinesis data stream"
         }
      },
      Source: "cxxxxxxxxx@gmail.com"
   };
   var email = ses.sendEmail(eParams, function(err, data) {
      if (err) console.log(err);
      else {
         console.log("===EMAIL SENT===");
         console.log("EMAIL CODE END");
         console.log('EMAIL: ', email);
         context.succeed(event);
         callback(null, "email is send");
      }
   });
};
The event param has the data entered in kinesis data stream. The above aws lambda code will get activated once data is entered in kinesis data stream.
Add Data to Kinesis Data Stream
Here we will use AWS CLI to add data kinesis data stream as shown below. For this purpose, we can use the following command −
aws kinesis put-record --stream-name kinesisdemo  --data "hello world" --
partition-key "789675"
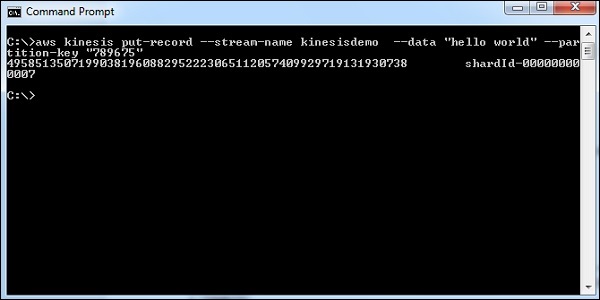
Then, AWS Lambda is activated and the mail is sent.

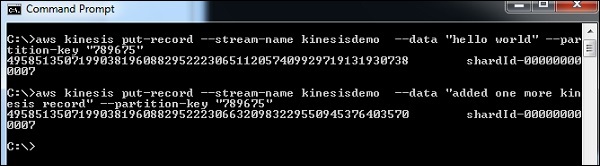
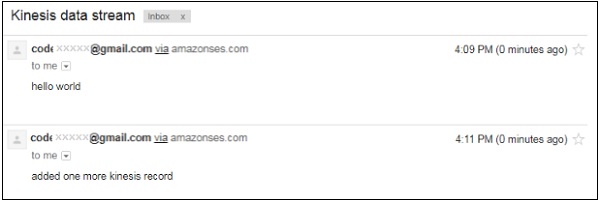
Using Lambda Function with Custom User Applications
We can use AWS lambda function to process using generated events by user application in the following two ways −
- Using AWS Console
- Using AWS CLI
Using AWS Console
From AWS console, we will work with events and AWS Lambda. For this purpose, go to AWS console and create a lambda function.

Next, let us add the code for AWS Lambda −
exports.handler = (event, context, callback) => {
   // TODO implement
   console.log("Hello => "+ event.name);
   console.log("Address =>"+ event.addr);
   callback(null, 'Hello '+event.name +" and address is "+ event.addr);
};
Note that in the above code, we are printing name and address using event.
The details to the event will be given using the test event created as follows −
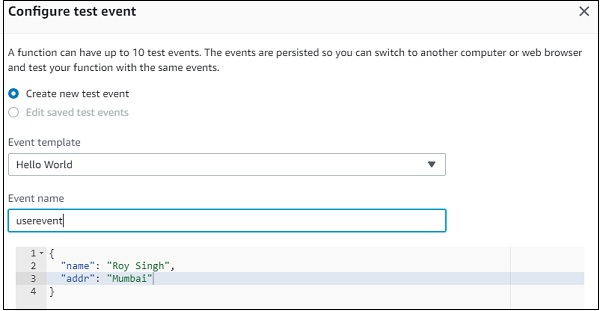
Now, save the event and test it.
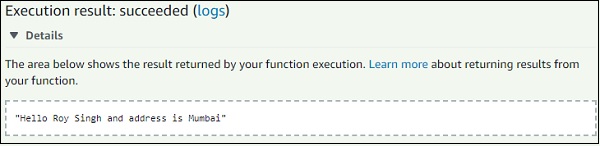
The corresponding log output is as shown here −

Using AWS CLI
We can invoke the above function using AWS CLI as follows −
aws lambda invoke --function-name "lambdauserevent" --log-type Tail --
payload file://C:\clioutput\input.txt C:\clioutput\outputfile.txt
The event details are given to payload and the output is stored at C:\clioutput\outputfile.txt. as follows −
input.txt
{"name":"Roy Singh", "addr":"Mumbai"}
On invoking the Lambda using AWS CLI, you can see the output is as follows −
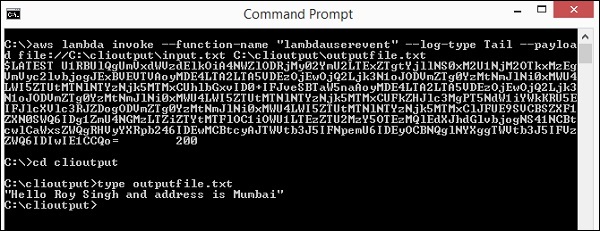
Similarly, in case you want to test AWS Lambda for any other AWS service, you can do so using the test event in AWS console and AWS CLI. A sample event for SNS service is shown below −
{
   "Records": [{
      "EventVersion": "1.0",
      "EventSubscriptionArn": "arnid",
      "EventSource": "aws:sns",
      "Sns": {
         "SignatureVersion": "1",
         "Timestamp": "1970-01-01T00:00:00.000Z",
         "Signature": "EXAMPLE",
         "SigningCertUrl": "EXAMPLE",
         "MessageId": "95df01b4-ee98-5cb9-9903-4c221d41eb5e",
         "Message": "Hello from SNS!",
         "MessageAttributes": {
            "Test": {
               "Type": "String",
               "Value": "TestString"
            },
            "TestBinary": {
               "Type": "Binary",
               "Value": "TestBinary"
            }
         },
         "Type": "Notification",
         "UnsubscribeUrl": "EXAMPLE",
         "TopicArn": "topicarn",
         "Subject": "TestInvoke"
      }
   }]
}
Let us add the sample event shown above and test it as shown −
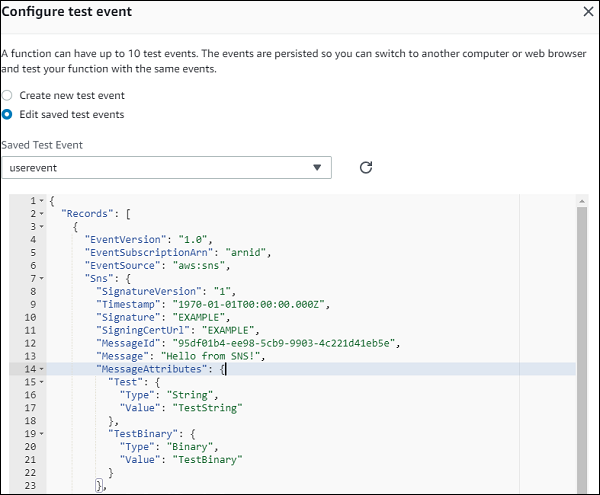
In AWS Lambda, code will print the SNS message as shown in the example given below −
exports.handler = (event, context, callback) => {
   // TODO implement
   console.log(event.Records[0].Sns.Message);
   callback(null, event.Records[0].Sns.Message);};
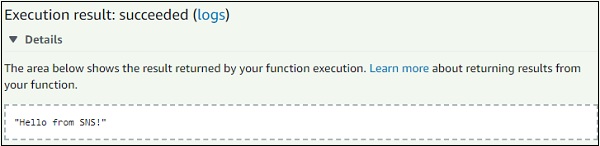
Let us invoke the same using AWS CLI. Let us save the event in a file and use that for payload using the command shown −
aws lambda invoke --function-name "lambdauserevent" --log-type Tail --
payload file://C:\clioutput\sns.txt C:\clioutput\snsoutput.txt
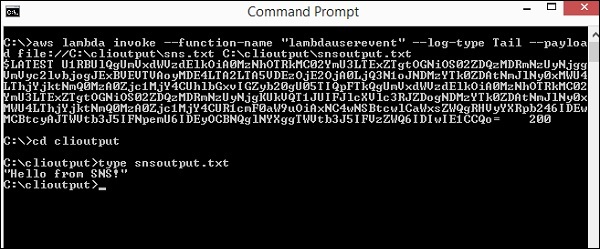
Using AWS Lambda@Edge with CloudFront
Lambda@Edge is an addition to the AWS Lambda compute service which is used to customize the content that cloudfront delivers.
The block diagram which shows the working of AWS Lambda with cloudfront from AWS is shown below −
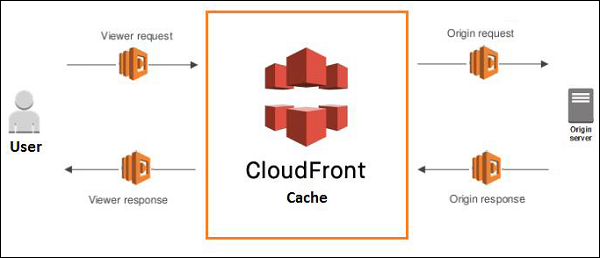
There are four ways in which AWS Lambda can be used −
Viewer Request − End user makes the request called Viewer Request to CloudFront
Origin Request − CloudFront forwards the request to the origin
Origin Response − CloudFront receives the response from the origin
Viewer Response − CloudFront send the response to the viewer
We can use Lambda@Edge for the following purposes −
To change the headers at the request and response time.
Add cookies details to the headers. Carry out AB testing based on the request and response.
Redirect the URL to another site, based on the header details.
We can fetch the user-agent from the headers and find out the details of the browser, OS, etc.
Requisites
To start with working on CloudFront and Lambda@Edge, we need the following −
Create S3 storage bucket with file details
Create role which will allow permission to work with CloudFront and Lambda@Edge
Create CloudFront distribution
Create lambda function
Add lambda function details to cloudfront
Check the cloudfront url in browser
We will work on an example with CloudFront and Lambda@Egde, wherein we will host the page and change the response when detected as desktop and devices.
Create S3 Storage Bucket with File Details
Login to AWS console and create a bucket in S3 and add the . html file which you want to display.
Click on S3 and Create bucket as shown below −
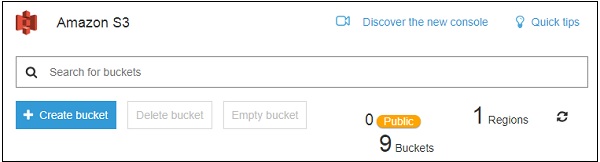
Now, click Create bucket button and add the details of the bucket as shown below −
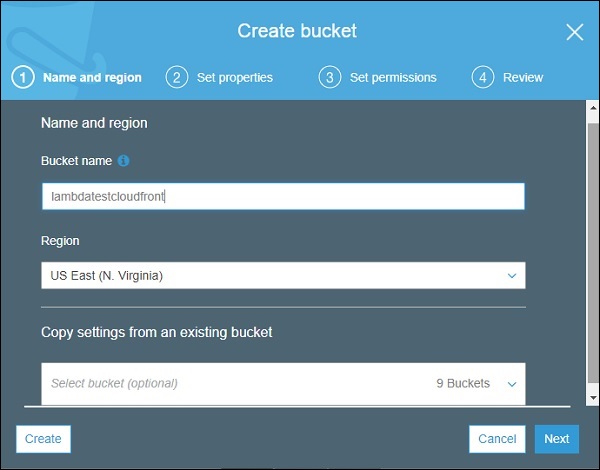
Click on Create button and upload the .html in it.
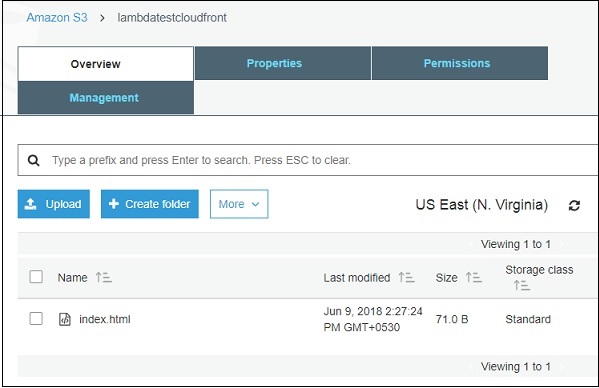
Create Role
Go to AWS console and click IAM.
Now, click Roles -> Create role button as shown −
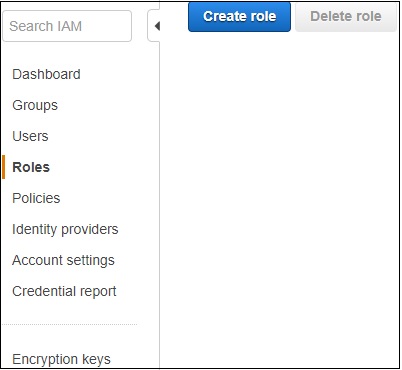
Choose the permission for S3, Lambda and Cloudfront. It is a good practice to create the policy giving permission to only the required function, storage by using the ARN details.
In the example discussed below, we are showing the Full Access permission. Policies for the role name role for cloudfront is added as shown above. Click on Create role.
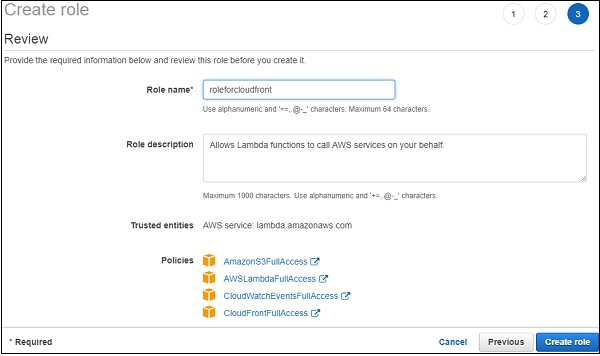
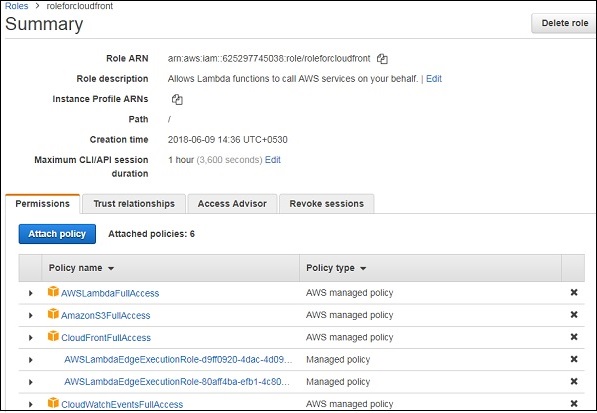
All the policy required for lambda@edge and cloudfront are as shown above. There is a additional step to be done here since incase of cloudfront the url will be available across region and it needs a trust relationship between the services we are using.
Now, for the role created, click on Trust relationships tab as shown −
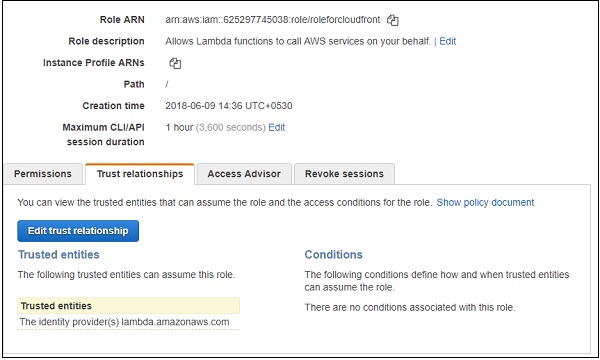
Click on Edit Trust Relationship as shown below −
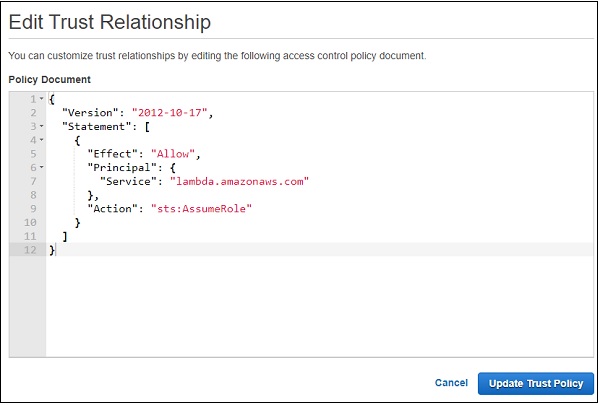
It displays a policy document. We need to add the other services in the Principal -> Service which we are planning to use. The final trust relationship policy document is as shown below −
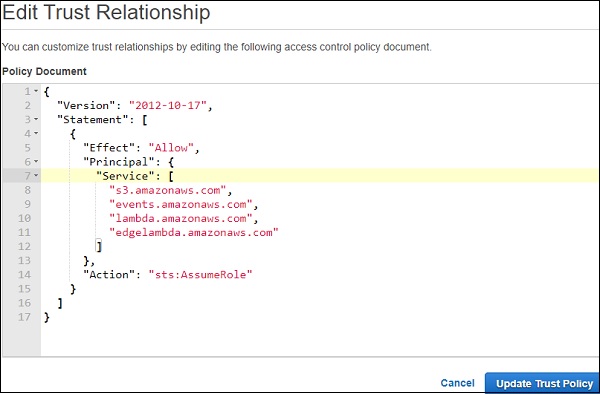
Click Update Trust Policy button to save the changes.
Create CloudFront Distribution
Go to CloudFront service as shown below −
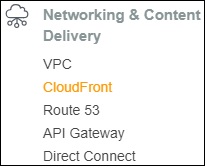
Click on CloudFront service and click on Create Distribution −

Origin Settings, Behaviour Settings and Distribution settings
Let us look into these settings one by one −
Origin Settings
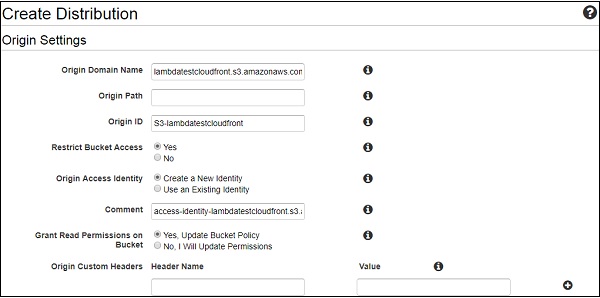
Various parameters of Origin settings are explained as below −
Origin Domain Name − This is the name of the S3 bucket where we have stored the html files. We can also store images, if any, in the S3 bucket by creating folders of our choice.
Origin Path − Here you need to enter the name of the folder where the files are stored. At present, we do not have this folder, so we will keep it blank for now.
Origin ID − It gets populated when the origin domain name is selected. You can change the id as per your choice.
Restrict Bucket Access − In this, we will choose the option yes. Here we need security for the S3 bucket so that no one has the access to the S3 bucket. For this option there are some more options populated like Origin Access Identity, Comment and Grant Read Permission on Bucket.
Origin Access Identity − We have used create a new identity option. You can also choose the existing identity. This creates a new identity which is used by CloudFront to read the details from S3 bucket.
Grand Read Permission on Bucket − For this, choose the option Yes.
Origin Custom Headers − We will keep the headers blank here, as we do not need the details right now.
Next, let us discuss and fill up the Behaviour Settings for Cloudront distribution −
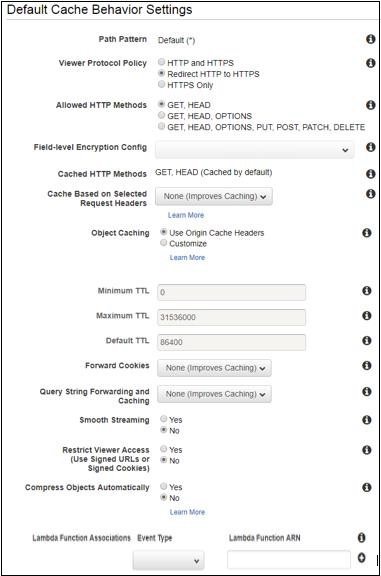
Now, select the protocol https or http, and the caching option. Note that the default caching is 86400 or 24 hrs. You can change this value as per the requirement.
Click Object Caching (customize option) to change the caching. You can use smooth streaming in case if there any videos on your page. Here, we are keeping the default option available. Once the lambda function is created, its details will be added.
The details for distribution settings are shown below −
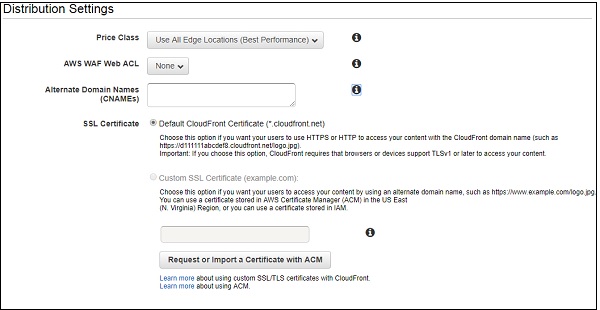
Various parameters of distribution settings are explained below −
Price class − It has details like the origin of users traffic. Note that here we have selected the default one - Use All Edge Locations.
AWS WAF Web ACL − This is for web application firewall selection. Here, it has option as None. First, we need to create the firewall in AWS. It provides security to the site.
Alternate Domain Names − Here you can specify the domain name if you have.
SSL Certificate − This has all the details to be selected for SSL certificate. We will keep the default ones.
Default Root Object − Here we will specify the filename which we have uploaded in S3. For this, we need the content from the .html to be displayed by default.
For the rest, we will keep the default setting.
Click Create Distribution button to add the distribution.

Note that the distribution will take some time to show the status as deployed.
Create AWS Lambda Function
Go to AWS console and create Lambda function.

In AWS Lambda code, we will take the request headers and check the user-agent. If the user-agent is from desktop, we will change the response to display message as DESKTOP : Welcome to AWS Lambda with Cloudfront! and if device the message will beMOBILE DEVICES : Hello from Lambda@Edge!
The corresponding AWS Lambda code is as shown below −
let content = `
<\!DOCTYPE html>
<html lang="en">
   <head>
      <meta charset="utf-8">
      <title>Simple Lambda@Edge Static Content Response</title>
      <meta name="viewport" content="width=device-width, initial-scale=1.0">
   </head>

   <body>
      <h1>MOBILE DEVICES : Hello from Lambda@Edge!</h1>
   </body>
</html>
`;
let content1 = `
<\!DOCTYPE html>
<html lang="en">
   <head>
      <meta charset="utf-8">
      <title>Simple Lambda@Edge Static Content Response</title>
      <meta name="viewport" content="width=device-width, initial-scale=1.0">
   </head>

   <body>
      <h1>DESKTOP : Welcome to AWS Lambda with Cloudfront!</h1>
   </body>
</html>
`;
exports.handler = (event, context, callback) => {
   let request = event.Records[0].cf.request;
   let finalrequest = JSON.stringify(request);
   let headers = request.headers;
   let useragent = JSON.stringify(headers["user-agent"][0].value);
   let str = "";
   if(/Android|webOS|iPhone|iPad|iPod|BlackBerry|IEMobile|Opera Mini|Mobile|mobile|CriOS/i.test(useragent)) {
      str = content;
   } else {
      str = content1;
   }
   const response = {
      status: '200',
      statusDescription: 'OK',
      body: str+useragent,
   };
   callback(null, response);
};
Now, save the Lambda function. Note that we need to publish the Lambda function so that it can be used with all regions. To publish, we need to do the following −
From Actions dropdown, select Publish new version as shown below −
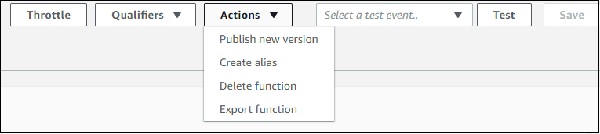
If you, click Publish new version, it displays the following screen −
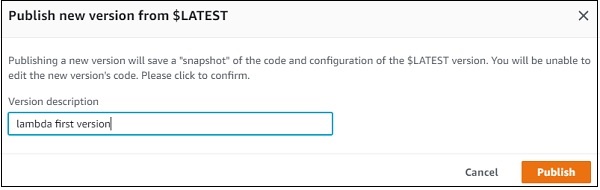
Now, enter the Version description and click Publish. The ARN will display the version of the AWS Lambda function created as shown below −

Add CloudFront trigger to the new version created as shown below −
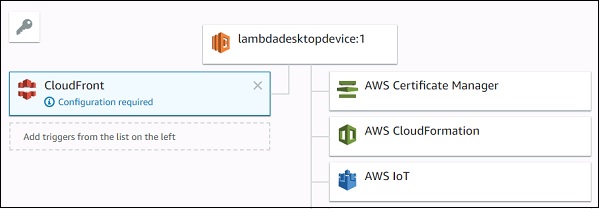
Now, add the configuration details for CloudFront. The CloudFront event has option for Viewer request, Origin request, Origin response, and Viewer response.
Next, choose the CloudFront distribution created earlier. From events, we will select Viewer request. Based on the viewer request, the desktop/device from user-agent will be decided and the response will be changed. Next, add the trigger details.
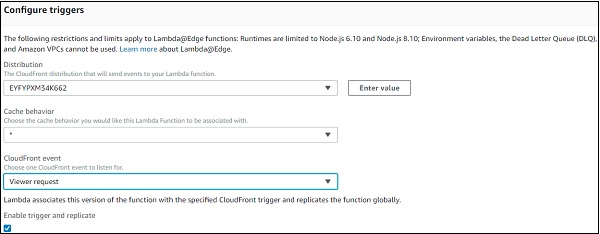
Once the trigger is added, we need to wait for the distribution from CloudFront to be deployed.
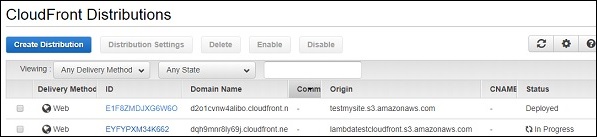
Once the status is changed to Deployed, we can test the CloudFront url and check the domain name in browser.
The display in desktop browser is as shown below. Here we have printed the user-agent from the viewer-request event.

This is the display in mobile device.
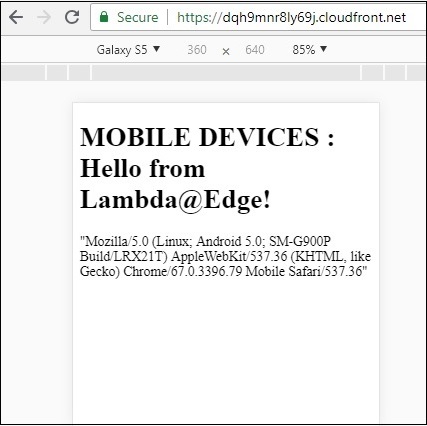
Thus, in the above example, we have used Lambda@Edge to change response on desktop and mobile device.
Monitoring and TroubleShooting using Cloudwatch
Functions created in AWS Lambda are monitored by Amazon CloudWatch. It helps in logging all the requests made to the Lambda function when it is triggered.
Consider that the following code is uploaded in AWS Lambda with function name as lambda and cloudwatch.
exports.handler = (event, context, callback) => {
   // TODO implement
   console.log("Lambda monitoring using amazon cloudwatch");
   callback(null, 'Hello from Lambda');
};
When the function is tested or triggered, you should see an entry in Cloudwatch. For this purpose, go to AWS services and click CloudWatch.
Select logs from left side.
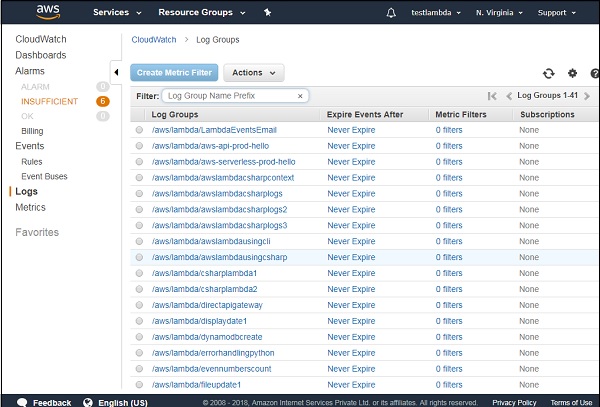
When you click Logs, it has the Log Groups of AWS Lambda function created in your account. Select anyAWS Lambda function and check the details. Here, we are referring to Lambda function with name:lambdaandcloudwatch. The logs added to the Lambda function are displayed here as shown below −
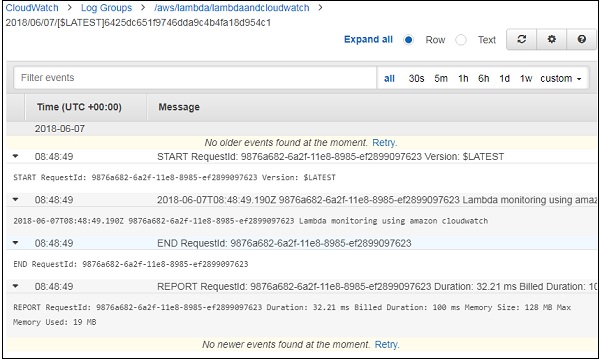
Now, let us add S3 trigger to the Lambda function and see the logs details in CloudWatch as shown below −
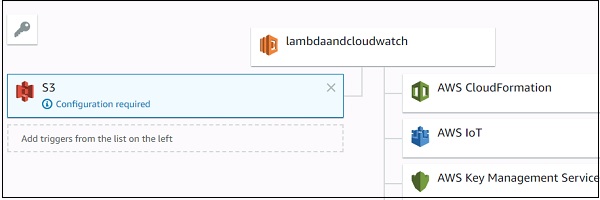
Let us update AWS Lambda code to display the file uploaded and bucket name as shown in the code given below −
exports.handler = (event, context, callback) => {
   // TODO implement
   console.log("Lambda monitoring using amazon cloudwatch");
   const bucket = event.Records[0].s3.bucket.name;
   const filename = event.Records[0].s3.object.key;
   const message = `File is uploaded in - ${bucket} -> ${filename}`;
   console.log(message);
   callback(null, 'Hello from Lambda');
};
Now, add file in s3storetestlambdaEventbucket as shown −
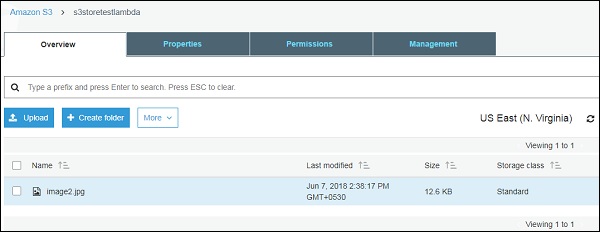
When the file is uploaded, AWS Lambda functions will get triggered and the console log messages from Lambda code are displayed in CloudWatch as shown below −
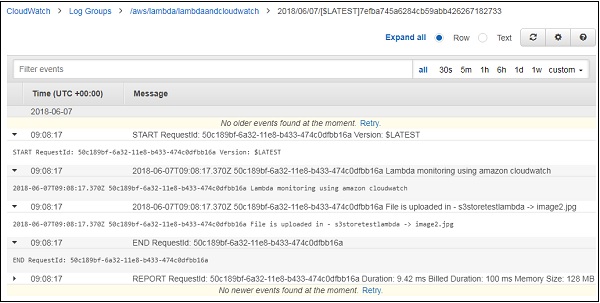
If there is any error, CloudWatch gives the error details as shown below −
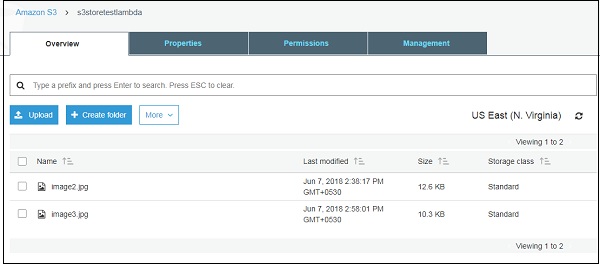
Note that we have referred to the bucket name wrongly in AWS Lambda code as shown −
exports.handler = (event, context, callback) => {
   // TODO implement
   console.log("Lambda monitoring using amazon cloudwatch");
   const bucket = event.Records[0].bucket.name;
   const filename = event.Records[0].s3.object.key;
   const message = `File is uploaded in - ${bucket} -> ${filename}`;
   console.log(message);
   callback(null, 'Hello from Lambda');
};
The bucket name reference from the event is wrong. Thus, we should see an error displayed in CloudWatch as shown below −

CloudWatch Metrics
The details of the Lambda function execution can be seen in the metrics. Click Metrics displayed in the left side.
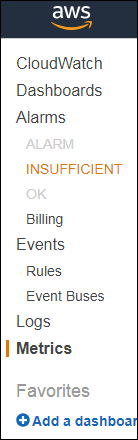
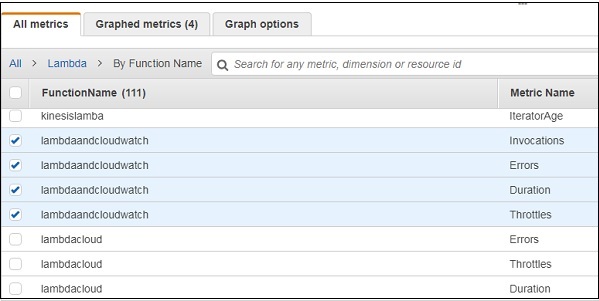
The graph details for the lambda function lambdaandcloudwatch are as shown below −
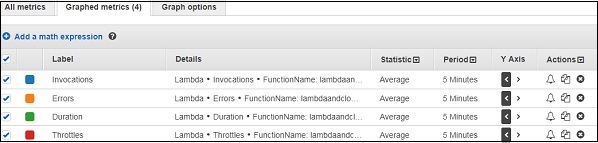
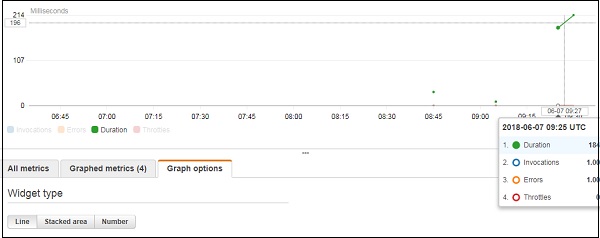
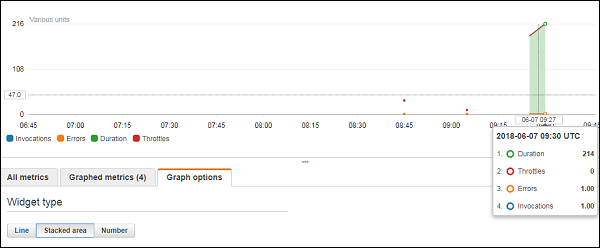
It gives details such as the duration for which the Lambda function is executed, number of times it is invoked and the errors from the Lambda function.
AWS Lambda Additional Example
Till now, we have seen working of AWS Lambda with AWS services. Based on that knowledge, let us create a simple user registration form and post the data using API gateway to AWS Lambda. AWS Lambda will get the data from the event or theAPI gateway trigger and will add those details to DynamoDB table.
Example
Let us consider an example and perform the following functionalities on it −
Create DynamoDB Table
Create Form for User Registration
Create AWS Lambda and API gateway to send message to Phone using AWS SNS service
Create AWS Lambda and API gateway to POST form data and insert in DynamoDb table
Create AWS Lambda and API gateway to read data from Dynamodb table
Final Working of the User Registration Form
Create DynamoDB Table
The data entered will be stored in DynamodDB table. We will use API gateway to share data entered with AWS Lambda and later AWS Lambda will add the details in DynamoDB.
You can use the following details to create DynamodDB table in AWS console. First, go to AWS Service and click DynamoDB. Click Table to create the table as shown below −
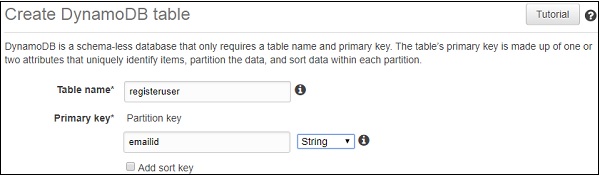
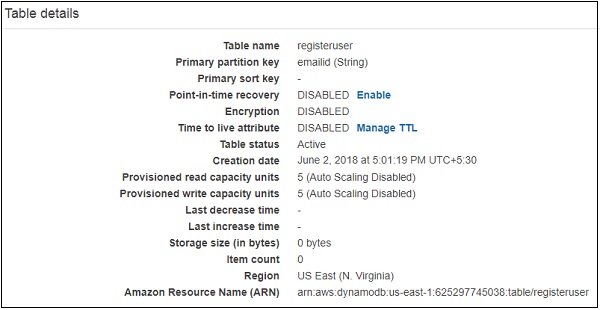
You can use the ARN to create policy for the DynamoDB to be used with AWS Lambda.
Go to IAM and select Policies. Click Create policy, choose service as DynamodDB as shown below −
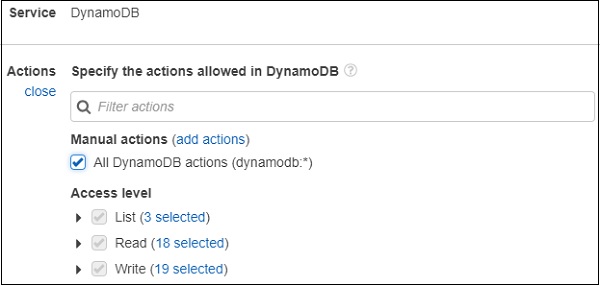
Click All DynamoDB actions as shown above. Choose resource and enter the ARN for table as shown below −
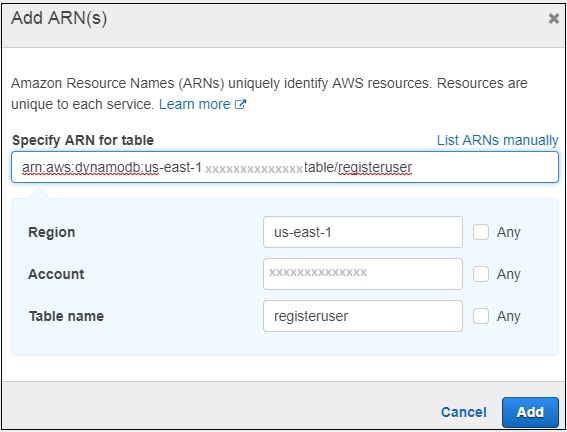
Now, click Add as shown below.
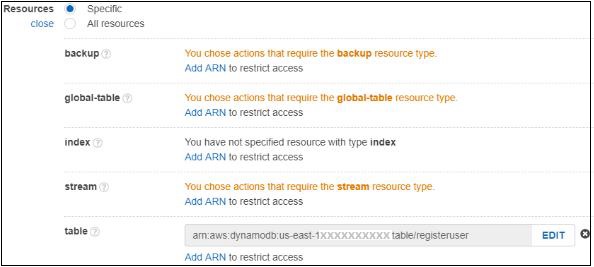
If you click Review policy button at the end of the screen, you can see the following window −
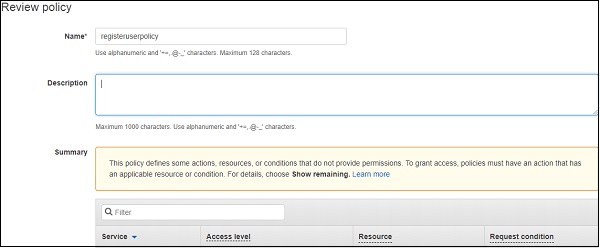
Enter name of the policy and click Create policy button at the end of the page. Now, we need to create role to be used with Lambda. We need permissionsforDynamoDB, APIGateway and Lambda.
Go to AWS services and select IAM. Select Roles from left side and add the required roles.
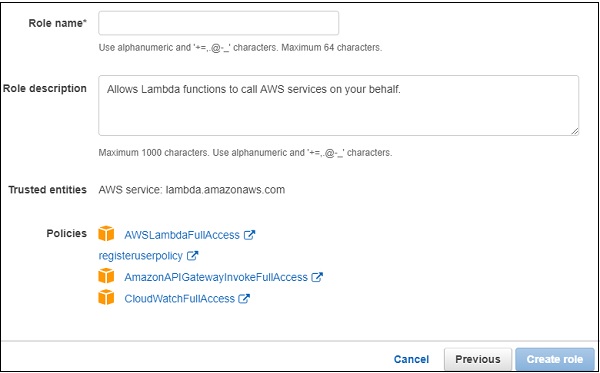
Enter the role name and click Create role. The role created is roleforlambdaexample.
Create Form for User Registration
Here is the display of the user registration form to enter and to read the data from the dynamodb table.
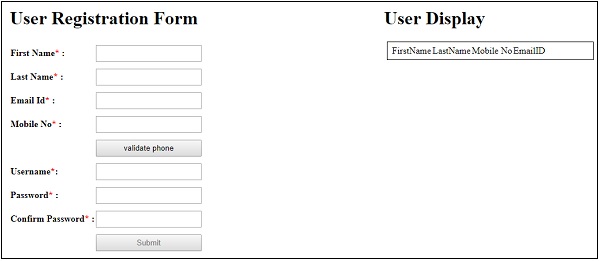
Create AWS Lambda and API Gateway to Send OTP Message to Phone using SNS service
If you see the user registration form, there is a button validate phone. User is suppose to enter phone number and click on validate phone button to validate the phone number.
For this purpose −
When a user clicks this button, the API gateway post method which contains the phone details is called and internally AWS Lambda is triggered.
Then, AWS Lambda sendsOTP to the phone number entered using AWS SNS service.
The user receives the OTP and has to enter thisOTP number.
The textbox to enter OTP will appear when the phone number is entered and validate phone button is clicked.
The OTP received from AWS Lambda and the OTP entered by the user has to match, to allow the user to submit the user registration form.
A simple block diagram that explains the working of phone validation is shown here −

The AWS Lambda function created is as shown here −

The corresponding AWS Lambda code is as given below −
const aws =  require("aws-sdk");
const sns = new aws.SNS({
   region:'us-east-1'
});
exports.handler = function(event, context, callback) {
   let phoneno = event.mphone;
   let otp = Math.floor(100000 + Math.random() * 900000);
   let snsmessage = "Your otp is : "+otp;
   sns.publish({
      Message: snsmessage,
      PhoneNumber: "+91"+phoneno
   }, function (err, data) {
      if (err) {
         console.log(err);
         callback(err, null);
      } else {
         console.log(data);
         callback(null, otp);
      }
   });
};
Note that we are using SNS service to send the OTP code. This code is used to validate the mobile number entered by the user in the user registration form. The API gateway created for above phone validation is as follows −
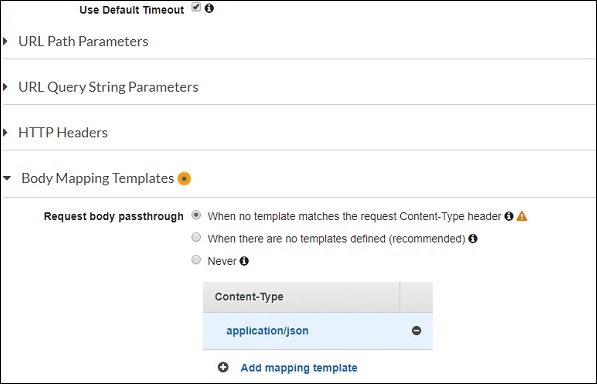
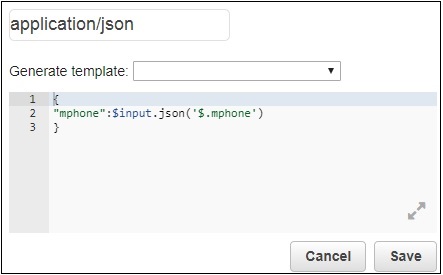
The Lambda function given is phonevalidationexample. We are taking the mobile phone details here to be used inside AWS Lambda. Then, AWS Lambda will send the OTP code to the given mobile number.
Create AWS Lambda and API Gateway to POST Form Data and Insert in DynamoDB Table
For user registration form, all the fields are mandatory. There is anAJAX call made wherein the data entered in the form is posted to the API Gateway URL.
A simple block diagram which explains the working of the submit button is shown here −

Once the form is filled, the submit button will call the API gateway which will trigger AWS Lambda. AWS Lambda will get the details of the form from event or theAPI Gateway and the data will be inserted in the DynamodDB table.
Let us understand the creation of API Gateway and AWS Lambda.
First, go to AWS services and click Lambda. The Lambda function created is as shown here −

Now, to create an API gateway, go to AWS service and select API Gateway. Click on Create API button shown below.
Enter the API name and click on Create API button to add the API.
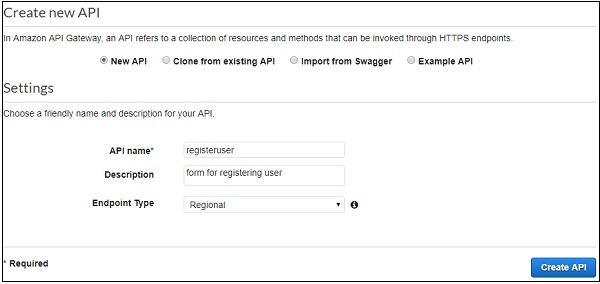
Now, an API is created called as registeruser. Select the API and click Actions dropdown to create Resource.
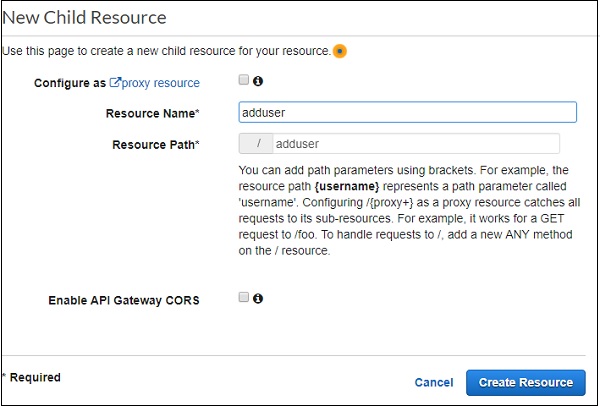
Click Create Resource. Now, let us add the POST method. For this, click on resources created on left side and from Actions dropdown select create method. This will display dropdown as shown below −
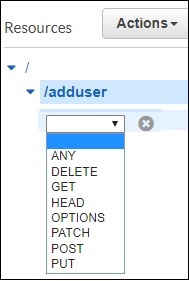
Select the POST method and add the Lambda function that we created above.
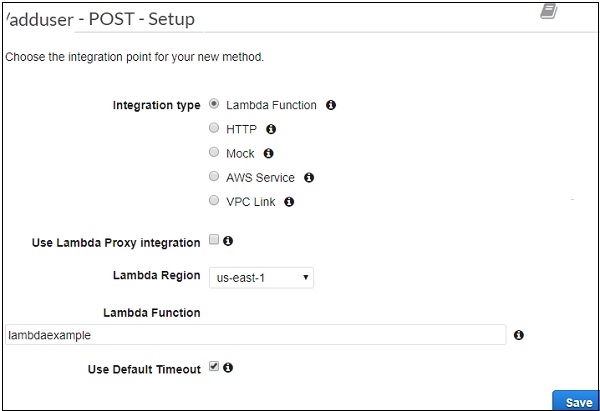
Click Save button to add the method. To send the form details to Lambda function lambdaexample we need to add the Integration Request as shown below −
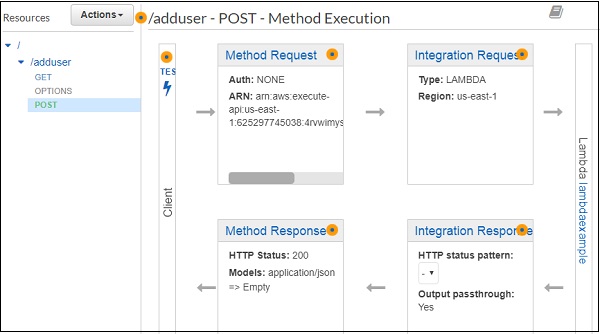
To post the form details, you will have to click Integration Request. It will display below details.
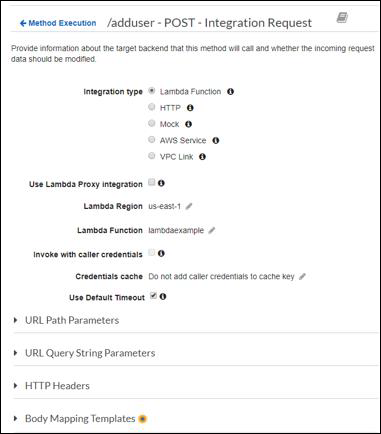
Click Body Mapping Templates to add the form fields to be posted.
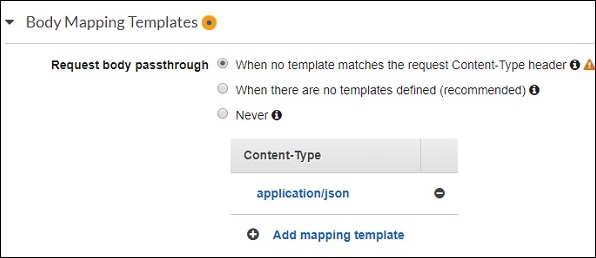
Next, click Add mapping template and enter the content type. Here, we have added application/json as the content type. Click it and here you need to enter the field in json format as shown below −
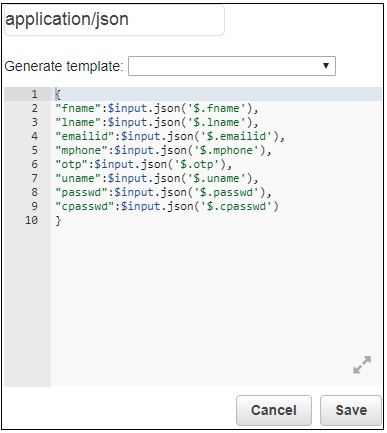
Now, click the Save button and deploy the API as shown below −
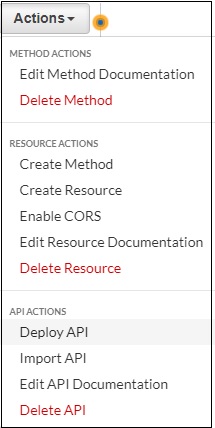
Here is the API created for POST which will use inside our .html file. Please note we need to Enable CORS for the resource created. Will use the api gateway url to make ajax call so the CORS has to enabled.
Select the Methods on which you want to enable the CORS. Click on Enable CORS and replace existing CORS headers.
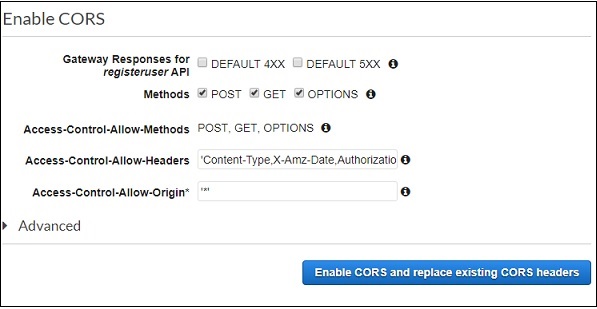
It displays the confirmation screen as follows −
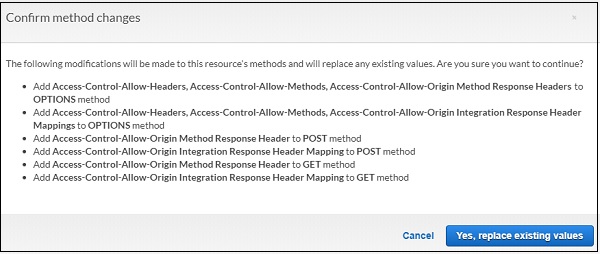
Click Yes, replace existing values to enable CORS.
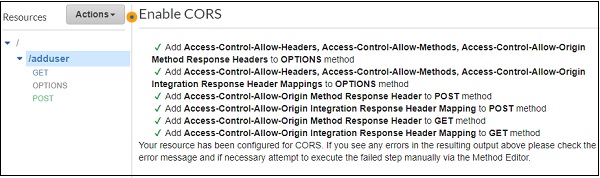
The AWS Lambda code forPOST API Gateway is as shown here −
const aws =  require("aws-sdk");
const docClient = new aws.DynamoDB.DocumentClient({
   region:'us-east-1'
});
exports.handler = function(event, context, callback) {
   console.log(event);
   console.log("Entering Data");
   var data = {
      TableName : "registeruser",
      Item : {
         first_name:event.fname,
         last_name:event.lname,
         emailid:event.emailid,
         mobile_no : event.mphone,
         otp:event.otp,
         username:event.uname,
         password:event.passwd,
         confirm_password:event.cpasswd
      }
   }
   docClient.put(data, function(err, value) {
      if (err) {
         console.log("Error");
         callback(err, null);
      } else {
         console.log("data added successfully");
         callback(null, value);
      }
   });
}
The event parameter in AWS Lambda handler will have all the details which are added earlier in POST integration request. The details from event are added to the DynamodDB table as shown in the code.
Now, we need to get the service details from AWS-SDK as shown below −
const aws =  require("aws-sdk");
const docClient = new aws.DynamoDB.DocumentClient({
   region:'us-east-1'
});
var data = {
   TableName : "registeruser",
   Item : {
      first_name:event.fname,
      last_name:event.lname,
      emailid:event.emailid,
      mobile_no : event.mphone,
      otp:event.otp,
      username:event.uname,
      password:event.passwd,
      confirm_password:event.cpasswd
   }
}
docClient.put(data, function(err, value) {
   if (err) {
		console.log("Error");
      callback(err, null);
   } else {
      console.log("data added successfully");
      callback(null, value);
   }
});
Create AWS Lambda and API Gateway to Read Data from DynamodDB Table
Now, we will create AWS Lambda function to read data from DynamoDB table. We will trigger APIGateway to the AWS Lambda function which will send data to the html form.
The AWS Lambda function created is as shown below −

The corresponding AWS Lambda code is as follows −
const aws =  require("aws-sdk");
const docClient = new aws.DynamoDB.DocumentClient({
   region:'us-east-1'
});
exports.handler = function(event, context, callback) {
   var readdata = {
      TableName : "registeruser",
      Limit : 10
   }
   docClient.scan(readdata, function(err, data) {
      if (err) {
         console.log("Error");
         callback(err, null);
      } else {
         console.log("Data is " + data);
         callback(null, data);
      }
   });
}
Here the data is read from the DynamoDB table and given to the callback. Now, we will create APIGateway and add AWS Lambda function as the trigger.
We will add get method to the API created earlier.
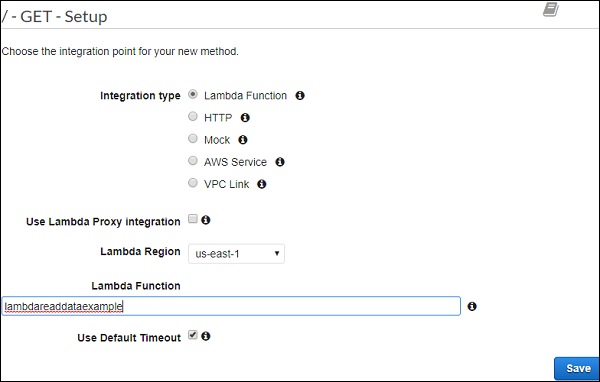
Lambda function added is lambdareaddataexample. Click Save to save the method and deploy the api.
Final Working of the User Registration Form
The final display of the form is as shown below −
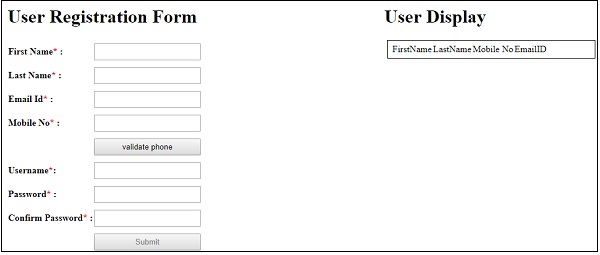
Now, enter the details as shown above. Note that the submit button is disabled. It will be enabled only when all the details are entered as shown −
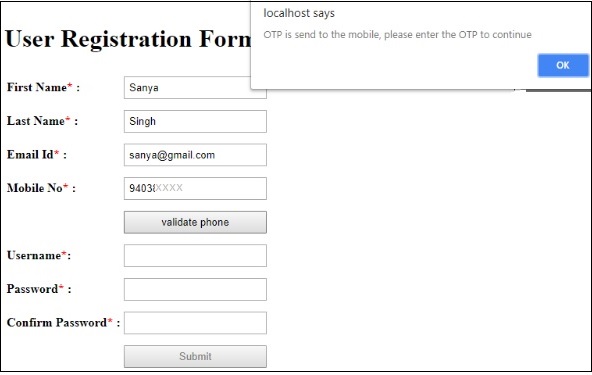
Now, enter the mobile number and click validate phone button. It will display the alert message saying OTP is send to the mobile, please enter the OTP to continue. OTP sent to the mobile number is as follows −
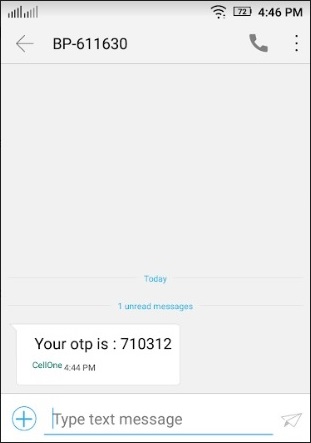
Enter the OTP and remaining details and submit the form.
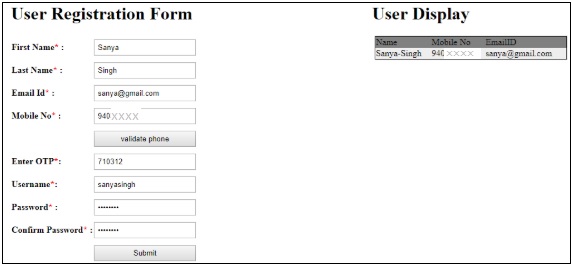
The data in DynamoDB registeruser table after submit is as shown here −
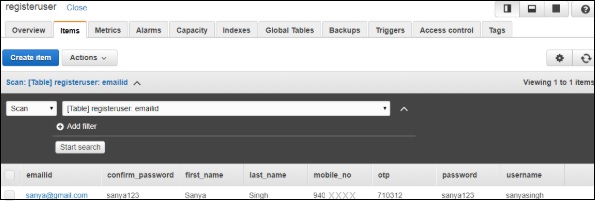
The code details are as given below −
Example1.html
<html>
   <head>
      <script src="https://ajax.googleapis.com/ajax/libs/jquery/3.3.1/jquery.min.js"></script>
      <script type="text/javascript" src="formdet.js"></script>
      <style>
         input[type=text], input[type=password],button {
            width: 100%;
            padding: 5px 5px;
            margin: 5px 0;
            box-sizing: border-box;
         }
         #maincontainer {
            width: 80%;
            margin: auto;
            padding: 10px;
         }
         div#userregistration {
            width: 60%;
            float: left;
         }
         div#userdisplay {
            margin-left: 60%;
         }
      </style>
   </head>

   <body>
      <div id="maincontainer">
         <div id="userregistration">
            <h1>User Registration Form</h1>
            <table border="0">
               <tr>
                  <td><b>First Name<span style="color:red;">*</span> : </b></td>
                  <td><input type="text" value="" name="fname" id="fname" /></td>
                  <td id="tdfname" style="display:none;"><span style="color:red;">Enter First Name</span></td>
               </tr>
               <tr>
                  <td><b>Last Name<span style="color:red;">*</span> : </b></td>
                  <td><input type="text" value="" name="lname" id="lname" /></td>
                  <td id="tdlname" style="display:none;"><span style="color:red;">Enter Last Name</span></td>
               </tr>
               <tr>
                  <td><b>Email Id<span style="color:red;">*</span> : </b></td>
                  <td><input type="text" value="" name="emailid" id="emailid" /></td>
                  <td id="tdemailid" style="display:none;"><span style="color:red;">Enter Email</span></td>
               </tr>
               <tr>
                  <td><b>Mobile No<span style="color:red;">*</span> : </b></td>
                  <td><input type="text" name="mphone" id="mphone"/></td>
                  <td id="tdmphone" style="display:none;"><span style="color:red;">Enter Mobile Number</span></td>
               </tr>
               <tr>
                  <td></td>
                  <td><button id="validatephone">validate phone</button></td>
                  <td></td>
               </tr>
               <tr id="otpdiv" style="display:none;">
                  <td><b>Enter OTP<span style="color:red;">*</span>:</b></td>
                  <td><input type="text" value="" name="otp" id="otp" /></td>
                  <td id="tdotp" style="display:none;"><span style="color:red;">Enter OTP</span></td>
               </tr>
               <tr>
                  <td><b>Username<span style="color:red;">*</span>: </b></td>
                  <td><input type="text" value="" name="uname" id="uname"/></td>
                  <td id="tduname" style="display:none;"><span style="color:red;">Enter Username</span></td>
               </tr>
                  <tr><td><b>Password<span style="color:red;">*</span> :</b></td>
                  <td><input type="password" value="" name="passwd" id="passwd"/></td>
                  <td id="tdpasswd" style="display:none;"><span style="color:red;">Enter Password</span></td>
               </tr>
                  <tr><td><b>Confirm Password<span style="color:red;">*</span> :</b></td>
                  <td><input type="password" value="" name="cpasswd" id="cpasswd"/></td>
                  <td id="tdcpasswd" style="display:none;"><span style="color:red;">Enter Confirm Password</span></td>
               </tr>
               <tr>
                  <td></td>
                  <td><button name="submit" id="submit" style="display:;" disabled="true">Submit</button></td>
                  <td></td>
               </tr>
            </table>
         </div>

         <div id="userdisplay">
            <h1>User Display</h1>
            <table id="displaydetails" style="display:block;width:80%;padding:5px;margin:5px; border: 1px solid black;">
               <tr>
                  <td></td>
                  <td>FirstName</td>
                  <td>LastName</td>
                  <td>Mobile No</td>
                  <td>EmailID</td>
               </tr>
            </table>
         </div>
      </div>
   </body>
</html>
formdet.js
function validateform() {
   var sError="";
   if ($("#fname").val() === "") {
      $("#tdfname").css("display","");
      sError++;
   }
   if ($("#lname").val() === "") {
      $("#tdlname").css("display","");
      sError++;
   }
   if ($("#emailid").val() === "") {
      $("#tdemailid").css("display","");
      sError++;
   }
   if ($("#mphone").val() === "") {
      $("#tdmphone").css("display","");
      sError++;
   }
   if ($("#otp").val() === "") {
      $("#tdotp").css("display","");
      sError++;
   }
   if ($("#uname").val() === "") {
      $("#tduname").css("display","");
      sError++;
   }
   if ($("#passwd").val() === "") {
      $("#tdpasswd").css("display","");
      sError++;
   }
   if ($("#cpasswd").val() === "") {
      $("#tdcpasswd").css("display","");
      sError++;
   }
   if (sError === "") {
      return true;
   } else {
      return false;
   }
}
$("#fname").change(function() {
   if ($("#fname").val() !== "") {
      $("#tdfname").css("display","none");
   } else {
      $("#tdfname").css("display","");
   }
});
$("#lname").change(function() {
   if ($("#lname").val() !== "") {
      $("#tdlname").css("display","none");
   } else {
      $("#tdlname").css("display","");
   }
});
$("#emailid").change(function() {
   if ($("#emailid").val() !== "") {
      $("#tdemailid").css("display","none");
   } else {
      $("#tdemailid").css("display","");
   }
});
$("#mphone").change(function() {
   if ($("#mphone").val() !== "") {
      $("#tdmphone").css("display","none");
   } else {
      $("#tdmphone").css("display","");
   }
});
$("#otp").change(function() {
   if ($("#otp").val() !== "") {
      $("#tdotp").css("display","none");
   } else {
      $("#tdotp").css("display","");
   }
});
$("#uname").change(function() {
   if ($("#uname").val() !== "") {
      $("#tduname").css("display","none");
   } else {
      $("#tduname").css("display","");
   }
});
$("#passwd").change(function() {
   if ($("#passwd").val() !== "") {
      $("#tdpasswd").css("display","none");
   } else {
      $("#tdpasswd").css("display","");
   }
});
$("#cpasswd").change(function() {
   if ($("#cpasswd").val() !== "") {
      $("#tdcpasswd").css("display","none");
   } else {
      $("#tdcpasswd").css("display","");
   }
});

var posturl = "https://4rvwimysc1.execute-api.us-east-1.amazonaws.com/prod/adduser";
var phonevalidationurl = "https://wnvt01y6nc.execute-api.us-east-1.amazonaws.com/prod/validate";
var otpsend = "";
function getdata() {
   var a = 0;
   $.ajax({
      type:'GET',
      url:posturl,
      success: function(data) {
         $("#displaydetails").html('');
         $("#displaydetails").css("display", "");
         console.log(data);
         $("#displaydetails").append('<tr style="padding:5px;margin:5px;background-color:gray;"><td>Name</td><td>Mobile No</td><td>EmailID</td></tr>');
         data.Items.forEach(function(registeruser) {
            var clr = (a%2 === 0) ? "#eee": "white";
            a++;
            $("#displaydetails").append('<tr style="padding:5px;margin:5px;background-color:'+clr+'"><td>'+registeruser.first_name+'-'+registeruser.last_name+'</td><td>'+registeruser.mobile_no+'</td><td>'+registeruser.emailid+'</td></tr>');
         });
      },
      error: function(err) {
         console.log(err);
      }
   });
}

$(document).ready(function() {
   $("#otp").on("change", function() {
      var otpentered = $("#otp").val();
      if (otpsend == otpentered) {
         document.getElementById("submit").disabled = false;
      } else {
         alert("OTP is not valid.Please enter the valid one or validate phone again to continue!");
         document.getElementById("submit").disabled = true;
      }
   });
   $("#validatephone").on("click", function() {
      $.ajax({
         type:'POST',
         url:phonevalidationurl,
         data:JSON.stringify({
            "mphone":$("#mphone").val()
         }),
         success: function(data) {
            $("#otpdiv").css("display", "");
            alert("OTP is send to the mobile, please enter to continue");
            console.log(data);
            otpsend = data;
         },
         error : function(err) {
            $("#otpdiv").css("display", "none");
            alert("Invalid mobile no.");
         }
      });
   });
   $("#submit").on("click", function() {
      if (validateform()) {
         $.ajax({
            type:'POST',
            url:posturl,
            data:JSON.stringify({
               "fname": $("#fname").val(),
               "lname": $("#lname").val(),
               "emailid":$("#emailid").val(),
               "mphone":$("#mphone").val(),
               "otp":$("#otp").val(),
               "uname":$("#uname").val(),
               "passwd":$("#passwd").val(),
               "cpasswd":$("#cpasswd").val()
            }),
            success: function(data) {
               alert("Data added successfully");
               console.log(data);
               getdata();
            }
         });
      }
   });
   getdata();
});
Till now, we have done AJAX call to the API created and posted the data as shown above.
The AJAX call to add the data to the table is as follows −
var posturl = "https://4rvwimysc1.execute-api.us-east-1.amazonaws.com/prod/adduser";
$(document).ready(function() {
   $("#submit").on("click", function() {
      if (validateform()) {
         $.ajax({
            type:'POST',
            url:posturl,
            data:JSON.stringify({
               "fname": $("#fname").val(),
               "lname": $("#lname").val(),
               "emailid":$("#emailid").val(),
               "mphone":$("#mphone").val(),
               "otp":$("#otp").val(),
               "uname":$("#uname").val(),
               "passwd":$("#passwd").val(),
               "cpasswd":$("#cpasswd").val()
            }),
            success: function(data) {
               alert("Data added successfully");
               console.log(data);
               getdata();
            }
         });
      }
   });
});
Note that to read the data, a function is called, whose code is given below −
function getdata() {
   var a = 0;
   $.ajax({
      type:'GET',
      url:posturl,
      success: function(data) {
         $("#displaydetails").html('');
         $("#displaydetails").css("display", "");
         console.log(data);
         $("#displaydetails").append('<tr style="padding:5px;margin:5px;background-color:gray;"><td>Name</td><td>Mobile No</td><td>EmailID</td></tr>');
         data.Items.forEach(function(registeruser) {
            var clr = (a%2 === 0) ? "#eee": "white";
            a++;
            $("#displaydetails").append('<tr style="padding:5px;margin:5px;background-color:'+clr+'"><td>'+registeruser.first_name+'-'+registeruser.last_name+'</td><td>'+registeruser.mobile_no+'</td><td>'+registeruser.emailid+'</td></tr>');
         });
      },
      error: function(err) {
         console.log(err);
      }
   });
}
When you click mobile number validate button, the following code is called and sends the mobile number −
var phonevalidationurl = "https://wnvt01y6nc.execute-api.us-east-1.amazonaws.com/prod/validate";
var otpsend = "";
$("#validatephone").on("click", function() {
   $.ajax({
      type:'POST',
      url:phonevalidationurl,
      data:JSON.stringify({
         "mphone":$("#mphone").val()
      }),
      success: function(data) {
         $("#otpdiv").css("display", "");
         alert("OTP is send to the mobile, please enter the OTP to continue");
         console.log(data);
         otpsend = data;
      },
      error : function(err) {
         $("#otpdiv").css("display", "none");
         alert("Invalid mobile no.");
      }
   });
});

// Validate otp
$("#otp").on("change", function() {
   var otpentered = $("#otp").val();
   if (otpsend == otpentered) {
      document.getElementById("submit").disabled = false;
   } else {
      alert("OTP is not valid.Please enter the valid one or validate phone again to continue!");
      document.getElementById("submit").disabled = true;
   }
}
