- VB.Net Basic Tutorial
- VB.Net - Home
- VB.Net - Overview
- VB.Net - Environment Setup
- VB.Net - Program Structure
- VB.Net - Basic Syntax
- VB.Net - Data Types
- VB.Net - Variables
- VB.Net - Constants
- VB.Net - Modifiers
- VB.Net - Statements
- VB.Net - Directives
- VB.Net - Operators
- VB.Net - Decision Making
- VB.Net - Loops
- VB.Net - Strings
- VB.Net - Date & Time
- VB.Net - Arrays
- VB.Net - Collections
- VB.Net - Functions
- VB.Net - Subs
- VB.Net - Classes & Objects
- VB.Net - Exception Handling
- VB.Net - File Handling
- VB.Net - Basic Controls
- VB.Net - Dialog Boxes
- VB.Net - Advanced Forms
- VB.Net - Event Handling
- VB.Net Advanced Tutorial
- VB.Net - Regular Expressions
- VB.Net - Database Access
- VB.Net - Excel Sheet
- VB.Net - Send Email
- VB.Net - XML Processing
- VB.Net - Web Programming
- VB.Net Useful Resources
- VB.Net - Quick Guide
- VB.Net - Useful Resources
- VB.Net - Discussion
VB.Net - Web Programming
A dynamic web application consists of either or both of the following two types of programs −
Server-side scripting − these are programs executed on a web server, written using server-side scripting languages like ASP (Active Server Pages) or JSP (Java Server Pages).
Client-side scripting − these are programs executed on the browser, written using scripting languages like JavaScript, VBScript, etc.
ASP.Net is the .Net version of ASP, introduced by Microsoft, for creating dynamic web pages by using server-side scripts. ASP.Net applications are compiled codes written using the extensible and reusable components or objects present in .Net framework. These codes can use the entire hierarchy of classes in .Net framework.
The ASP.Net application codes could be written in either of the following languages −
Visual Basic .Net
C#
Jscript
J#
In this chapter, we will give a very brief introduction to writing ASP.Net applications using VB.Net. For detailed discussion, please consult the ASP.Net Tutorial.
ASP.Net Built-in Objects
ASP.Net has some built-in objects that run on a web server. These objects have methods, properties and collections that are used in application development.
The following table lists the ASP.Net built-in objects with a brief description −
| Sr.No. | Object & Description |
|---|---|
| 1 |
Application Describes the methods, properties, and collections of the object that stores information related to the entire Web application, including variables and objects that exist for the lifetime of the application. You use this object to store and retrieve information to be shared among all users of an application. For example, you can use an Application object to create an e-commerce page. |
| 2 | Request Describes the methods, properties, and collections of the object that stores information related to the HTTP request. This includes forms, cookies, server variables, and certificate data. You use this object to access the information sent in a request from a browser to the server. For example, you can use a Request object to access information entered by a user in an HTML form. |
| 3 | Response Describes the methods, properties, and collections of the object that stores information related to the server's response. This includes displaying content, manipulating headers, setting locales, and redirecting requests. You use this object to send information to the browser. For example, you use a Response object to send output from your scripts to a browser. |
| 4 | Server Describes the methods and properties of the object that provides methods for various server tasks. With these methods you can execute code, get error conditions, encode text strings, create objects for use by the Web page, and map physical paths. You use this object to access various utility functions on the server. For example, you may use the Server object to set a time out for a script. |
| 5 | Session Describes the methods, properties, and collections of the object that stores information related to the user's session, including variables and objects that exist for the lifetime of the session. You use this object to store and retrieve information about particular user sessions. For example, you can use Session object to keep information about the user and his preference and keep track of pending operations. |
ASP.Net Programming Model
ASP.Net provides two types of programming models −
Web Forms − this enables you to create the user interface and the application logic that would be applied to various components of the user interface.
WCF Services − this enables you to remote access some server-side functionalities.
For this chapter, you need to use Visual Studio Web Developer, which is free. The IDE is almost same as you have already used for creating the Windows Applications.
Web Forms
Web forms consists of −
User interface
Application logic
User interface consists of static HTML or XML elements and ASP.Net server controls. When you create a web application, HTML or XML elements and server controls are stored in a file with .aspx extension. This file is also called the page file.
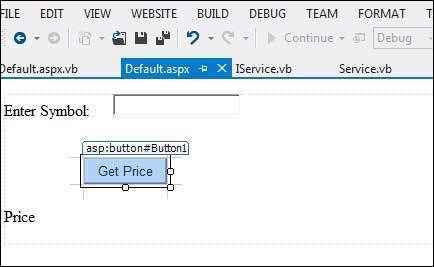
The application logic consists of code applied to the user interface elements in the page. You write this code in any of .Net language like, VB.Net, or C#. The following figure shows a Web Form in Design view −
Example
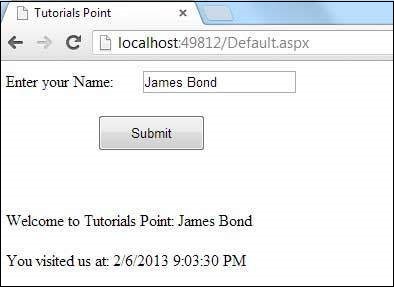
Let us create a new web site with a web form, which will show the current date and time, when a user clicks a button. Take the following steps −
Select File → New → Web Site. The New Web Site Dialog Box appears.
Select the ASP.Net Empty Web Site templates. Type a name for the web site and select a location for saving the files.
You need to add a Default page to the site. Right click the web site name in the Solution Explorer and select Add New Item option from the context menu. The Add New Item dialog box is displayed −
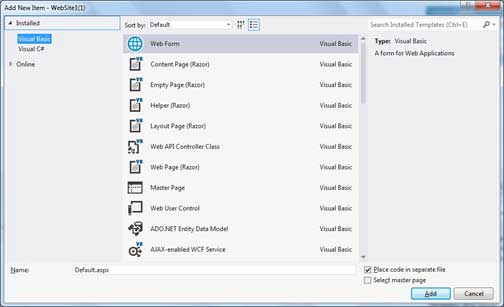
Select Web Form option and provide a name for the default page. We have kept it as Default.aspx. Click the Add button.
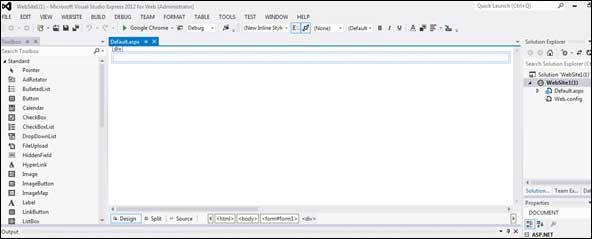
The Default page is shown in Source view
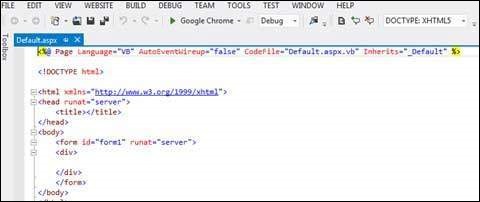
Set the title for the Default web page by adding a value to the <Title> tag of the page, in the Source view −
To add controls on the web page, go to the design view. Add three labels, a text box and a button on the form.
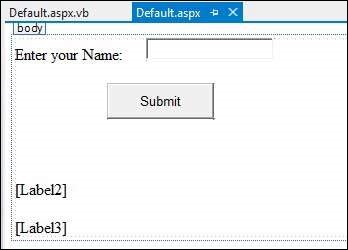
Double-click the button and add the following code to the Click event of the button −
Protected Sub Button1_Click(sender As Object, e As EventArgs) _
Handles Button1.Click
   Label2.Visible = True
   Label2.Text = "Welcome to Tutorials Point: " + TextBox1.Text
   Label3.Text = "You visited us at: " + DateTime.Now.ToString()
End Sub
When the above code is executed and run using Start button available at the Microsoft Visual Studio tool bar, the following page opens in the browser −
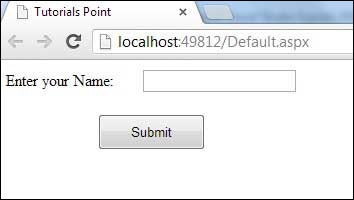
Enter your name and click on the Submit button −
Web Services
A web service is a web application, which is basically a class consisting of methods that could be used by other applications. It also follows a code-behind architecture like the ASP.Net web pages, although it does not have an user interface.
The previous versions of .Net Framework used this concept of ASP.Net Web Service, which had .asmx file extension. However, from .Net Framework 4.0 onwards, the Windows Communication Foundation (WCF) technology has evolved as the new successor of Web Services, .Net Remoting and some other related technologies. It has rather clubbed all these technologies together. In the next section, we will provide a brief introduction to Windows Communication Foundation(WCF).
If you are using previous versions of .Net Framework, you can still create traditional web services. Please consult ASP.Net - Web Services tutorial for detailed description.
Windows Communication Foundation
Windows Communication Foundation or WCF provides an API for creating distributed service-oriented applications, known as WCF Services.
Like Web services, WCF services also enable communication between applications. However, unlike web services, the communication here is not limited to HTTP only. WCF can be configured to be used over HTTP, TCP, IPC, and Message Queues. Another strong point in favour of WCF is, it provides support for duplex communication, whereas with web services we could achieve simplex communication only.
From beginners' point of view, writing a WCF service is not altogether so different from writing a Web Service. To keep the things simple, we will see how to −
Create a WCF Service
Create a Service Contract and define the operations
Implement the contract
Test the Service
Utilize the Service
Example
To understand the concept let us create a simplistic service that will provide stock price information. The clients can query about the name and price of a stock based on the stock symbol. To keep this example simple, the values are hardcoded in a two-dimensional array. This service will have two methods −
GetPrice Method − it will return the price of a stock, based on the symbol provided.
GetName Method − it will return the name of the stock, based on the symbol provided.
Creating a WCF Service
Take the following steps −
Open VS Express for Web 2012
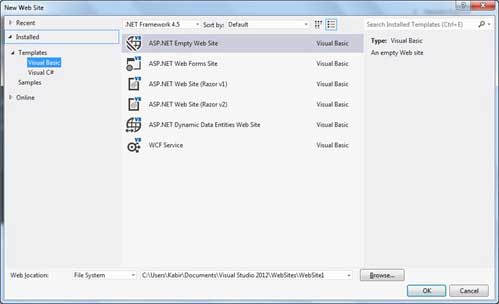
Select New Web Site to open the New Web Site dialog box.
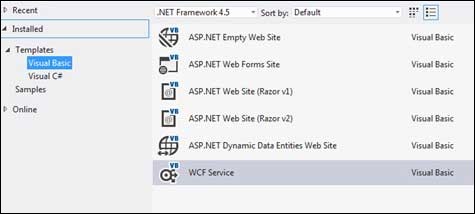
Select WCF Service template from list of templates −
Select File System from the Web location drop-down list.
Provide a name and location for the WCF Service and click OK.
A new WCF Service is created.
Creating a Service Contract and Defining the Operations
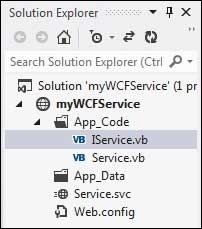
A service contract defines the operation that a service performs. In the WCF Service application, you will find two files automatically created in the App_Code folder in the Solution Explorer
IService.vb − this will have the service contract; in simpler words, it will have the interface for the service, with the definitions of methods the service will provide, which you will implement in your service.
Service.vb − this will implement the service contract.
Replace the code of the IService.vb file with the given code −
Public Interface IService
   <OperationContract()>
   Function GetPrice(ByVal symbol As String) As Double

   <OperationContract()>
   Function GetName(ByVal symbol As String) As String
End Interface
Implementing the Contract
In the Service.vb file, you will find a class named Service which will implement the Service Contract defined in the IService interface.
Replace the code of IService.vb with the following code −
' NOTE: You can use the "Rename" command on the context menu to change the class name "Service" in code, svc and config file together.
Public Class Service
   Implements IService
   Public Sub New()
   End Sub
   Dim stocks As String(,) =
   {
      {"RELIND", "Reliance Industries", "1060.15"},
      {"ICICI", "ICICI Bank", "911.55"},
      {"JSW", "JSW Steel", "1201.25"},
      {"WIPRO", "Wipro Limited", "1194.65"},
      {"SATYAM", "Satyam Computers", "91.10"}
   }

   Public Function GetPrice(ByVal symbol As String) As Double _
   Implements IService.GetPrice

      Dim i As Integer
      'it takes the symbol as parameter and returns price
      For i = 0 To i = stocks.GetLength(0) - 1

         If (String.Compare(symbol, stocks(i, 0)) = 0) Then
            Return Convert.ToDouble(stocks(i, 2))
         End If
      Next i
      Return 0
   End Function

   Public Function GetName(ByVal symbol As String) As String _
   Implements IService.GetName

      ' It takes the symbol as parameter and
      ' returns name of the stock
      Dim i As Integer
      For i = 0 To i = stocks.GetLength(0) - 1

         If (String.Compare(symbol, stocks(i, 0)) = 0) Then
            Return stocks(i, 1)
         End If
      Next i
      Return "Stock Not Found"
   End Function
End Class
Testing the Service
To run the WCF Service, so created, select the Debug → Start Debugging option from the menu bar. The output would be −
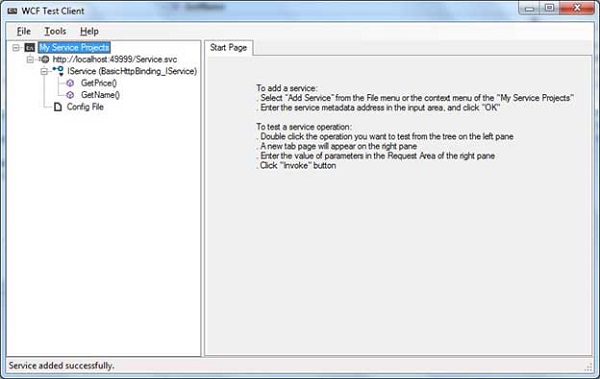
For testing the service operations, double click the name of the operation from the tree on the left pane. A new tab will appear on the right pane.
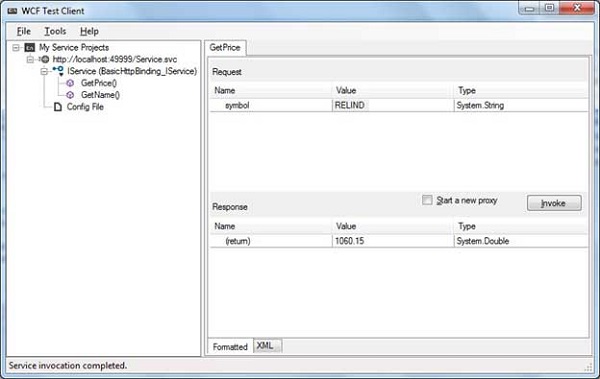
Enter the value of parameters in the Request area of the right pane and click the 'Invoke' button.
The following diagram displays the result of testing the GetPrice operation −
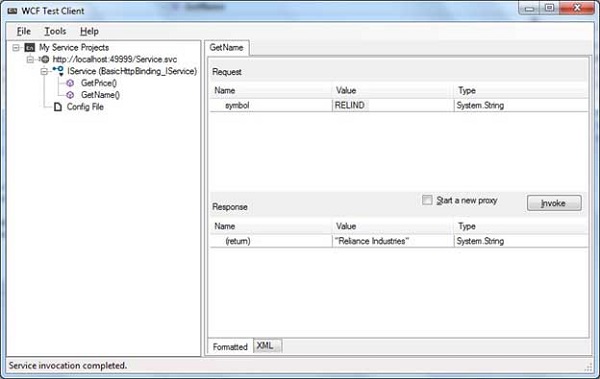
The following diagram displays the result of testing the GetName operation −
Utilizing the Service
Let us add a default page, a ASP.NET web form in the same solution from which we will be using the WCF Service we have just created.
Take the following steps −
Right click on the solution name in the Solution Explorer and add a new web form to the solution. It will be named Default.aspx.
Add two labels, a text box and a button on the form.
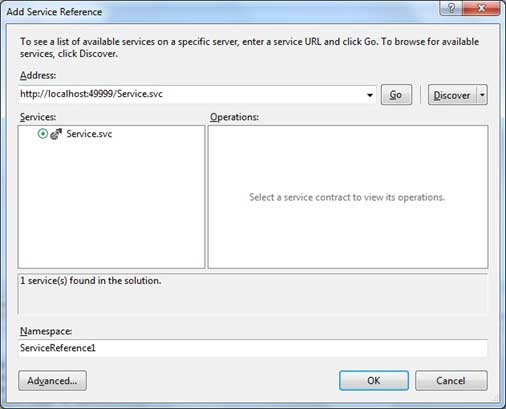
We need to add a service reference to the WCF service we just created. Right click the website in the Solution Explorer and select Add Service Reference option. This opens the Add Service Reference Dialog box.
Enter the URL(location) of the Service in the Address text box and click the Go button. It creates a service reference with the default name ServiceReference1. Click the OK button.
Adding the reference does two jobs for your project −
Creates the Address and Binding for the service in the web.config file.
Creates a proxy class to access the service.
Double click the Get Price button in the form, to enter the following code snippet on its Click event −
Partial Class _Default
   Inherits System.Web.UI.Page

   Protected Sub Button1_Click(sender As Object, e As EventArgs) _
   Handles Button1.Click
      Dim ser As ServiceReference1.ServiceClient = _
      New ServiceReference1.ServiceClient
      Label2.Text = ser.GetPrice(TextBox1.Text).ToString()
   End Sub
End Class
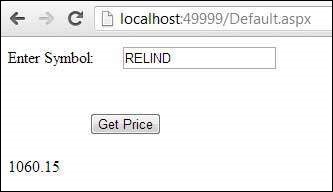
When the above code is executed and run using Start button available at the Microsoft Visual Studio tool bar, the following page opens in the browser −
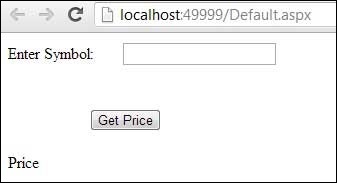
Enter a symbol and click the Get Price button to get the hard-coded price −