- Spring ORM Tutorial
- Spring ORM - Home
- Spring ORM - Overview
- Spring ORM - Environment Setup
- Spring ORM & Hibernate
- Spring ORM - Create Project
- Spring ORM - Maven Hibernate
- Spring ORM - Persistence Hibernate
- Spring ORM - Update Project
- Spring ORM - Run & Test Hibernate
- Spring ORM & EclipseLink
- Spring ORM - Maven EclipseLink
- Spring ORM - Persistence EclipseLink
- Spring ORM - Update Project EclipseLink
- Spring ORM - Run & Test EclipseLink
- Spring ORM Useful Resources
- Spring ORM - Quick Guide
- Spring ORM - Useful Resources
- Spring ORM - Discussion
Spring ORM - Environment Setup
This chapter will guide you on how to prepare a development environment to start your work with Spring Framework. It will also teach you how to set up JDK, Maven and Eclipse on your machine before you set up Spring Framework −
Setup Java Development Kit (JDK)
You can download the latest version of SDK from Oracle's Java site − Java SE Downloads. You will find instructions for installing JDK in downloaded files, follow the given instructions to install and configure the setup. Finally set PATH and JAVA_HOME environment variables to refer to the directory that contains java and javac, typically java_install_dir/bin and java_install_dir respectively.
If you are running Windows and have installed the JDK in C:\jdk-11.0.11, you would have to put the following line in your C:\autoexec.bat file.
set PATH=C:\jdk-11.0.11;%PATH%
set JAVA_HOME=C:\jdk-11.0.11
Alternatively, on Windows NT/2000/XP, you will have to right-click on My Computer, select Properties → Advanced → Environment Variables. Then, you will have to update the PATH value and click the OK button.
On Unix (Solaris, Linux, etc.), if the SDK is installed in /usr/local/jdk-11.0.11 and you use the C shell, you will have to put the following into your .cshrc file.
setenv PATH /usr/local/jdk-11.0.11/bin:$PATH
setenv JAVA_HOME /usr/local/jdk-11.0.11
Alternatively, if you use an Integrated Development Environment (IDE) like Borland JBuilder, Eclipse, IntelliJ IDEA, or Sun ONE Studio, you will have to compile and run a simple program to confirm that the IDE knows where you have installed Java. Otherwise, you will have to carry out a proper setup as given in the document of the IDE.
Setup Eclipse IDE
All the examples in this tutorial have been written using Eclipse IDE. So we would suggest you should have the latest version of Eclipse installed on your machine.
To install Eclipse IDE, download the latest Eclipse binaries from www.eclipse.org/downloads/. Once you download the installation, unpack the binary distribution into a convenient location. For example, in C:\eclipse on Windows, or /usr/local/eclipse on Linux/Unix and finally set PATH variable appropriately.
Eclipse can be started by executing the following commands on Windows machine, or you can simply double-click on eclipse.exe
%C:\eclipse\eclipse.exe
Eclipse can be started by executing the following commands on Unix (Solaris, Linux, etc.) machine −
$/usr/local/eclipse/eclipse
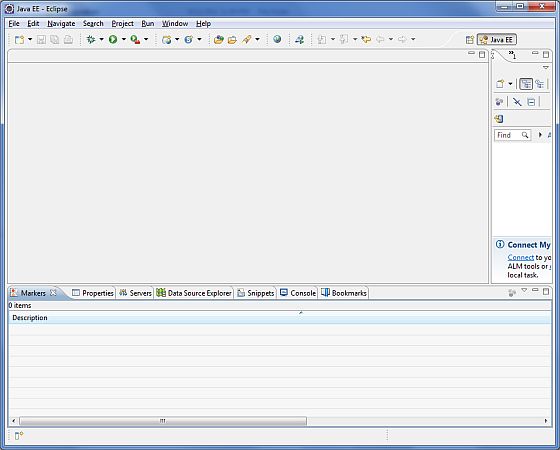
After a successful startup, if everything is fine then it should display the following result −
Install MySQL Database
The most important thing you will need, of course is an actual running database with a table that you can query and modify.
MySQL DB − MySQL is an open source database. You can download it from MySQL Official Site. We recommend downloading the full Windows installation.
In addition, download and install MySQL Administrator as well as MySQL Query Browser. These are GUI based tools that will make your development much easier.
Finally, download and unzip MySQL Connector/J (the MySQL JDBC driver) in a convenient directory. For the purpose of this tutorial we will assume that you have installed the driver at C:\Program Files\MySQL\mysql-connector-java-5.1.8.
Accordingly, set CLASSPATH variable to C:\Program Files\MySQL\mysql-connector-java-5.1.8\mysql-connector-java-5.1.8-bin.jar. Your driver version may vary based on your installation.
Set Database Credential
When we install MySQL database, its administrator ID is set to root and it gives provision to set a password of your choice.
Using root ID and password you can either create another user ID and password, or you can use root ID and password for your JDBC application.
There are various database operations like database creation and deletion, which would need administrator ID and password.
If you do not have sufficient privilege to create new users, then you can ask your Database Administrator (DBA) to create a user ID and password for you.
Create Database
To create the TUTORIALSPOINT database, use the following steps −
Step 1
Open a Command Prompt and change to the installation directory as follows −
C:\>
C:\>cd Program Files\MySQL\bin
C:\Program Files\MySQL\bin>
Note − The path to mysqld.exe may vary depending on the install location of MySQL on your system. You can also check documentation on how to start and stop your database server.
Step 2
Start the database server by executing the following command, if it is already not running.
C:\Program Files\MySQL\bin>mysqld
C:\Program Files\MySQL\bin>
Step 3
Create the TUTORIALSPOINT database by executing the following command −
C:\Program Files\MySQL\bin> create database TUTORIALSPOINT;
Note − The path to mysqld.exe may vary depending on the install location of MySQL on your system. You can also check documentation on how to start and stop your database server.
For a complete understanding on MySQL database, study the MySQL Tutorial.
Set Maven
In this tutorial, we are using maven to run and build the spring based examples. Follow the Maven - Environment Setup to install maven.
To Continue Learning Please Login