- Learning Ruby on Rails
- Rails 2.1 Home
- Rails 2.1 Introduction
- Rails 2.1 Installation
- Rails 2.1 Framework
- Rails 2.1 Dir Structure
- Rails 2.1 Examples
- Rails 2.1 Database Setup
- Rails 2.1 Active Records
- Rails 2.1 Migrations
- Rails 2.1 Controllers
- Rails 2.1 Views
- Rails 2.1 Layouts
- Rails 2.1 Scaffolding
- Rails 2.1 and AJAX
- Rails 2.1 Uploads Files
- Rails 2.1 Sends Emails
- Advanced Ruby on Rails 2.1
- Rails 2.1 RMagick Guide
- Rails 2.1 Basic HTTP Auth
- Rails 2.1 Error Handling
- Rails 2.1 Routes System
- Rails 2.1 Unit Testing
- Advanced Ruby on Rails 2.1
- Rails 2.1 Tips & Tricks
- Quick Reference Guide
- Quick Reference Guide
- Ruby on Rails 2.1 Useful Resources
- Ruby on Rails 2.1 - Resources
- Ruby on Rails 2.1 - Discussion
Ruby on Rails 2.1 - Layouts
A layout defines the surroundings of an HTML page. It's the place to define the common look and feel of your final output. Layout files reside in app/views/layouts.
The process involves defining a layout template and then letting the controller know that it exists and is available for use. First, let's create the template.
Add a new file called standard.rhtml to app/views/layouts. You let the controllers know what template to use by the name of the file, so following a same naming same is advised.
Add the following code to the new standard.rhtml file and save your changes −
<!DOCTYPE html PUBLIC "-//W3C//DTD XHTML 1.0 Transitional//EN"
"http://www.w3.org/TR/xhtml1/DTD/xhtml1-transitional.dtd">
<html xmlns="http://www.w3.org/1999/xhtml">
   <head>
      <meta http-equiv="Content-Type" content="text/html;.
         charset=iso-8859-1" />

      <meta http-equiv="Content-Language" content="en-us" />

      <title>Library Info System</title>

      <%= stylesheet_link_tag "style" %>
   </head>

   <body id="library">

      <div id="container">

         <div id="header">
            <h1>Library Info System</h1>
            <h3>Library powered by Ruby on Rails</h3>
         </div>

         <div id="content">
            <%= yield -%>
         </div>

         <div id="sidebar"></div>

      </div>

   </body>
</html>
Everything you just added are standard HTML elements except the two lines with the stylesheet_link_tag helper method that outputs a stylesheet <link>. In this instance, we are linking the style.css stylesheet. The yield command lets Rails know that it should put the RHTML for the method called here.
Now open book_controller.rb and add the following line just below the first line −
class BookController < ApplicationController
   layout 'standard'
   def list
      @books = Book.find(:all)
   end
...................
It directs the controller that we want to use a layout available in the standard.rhtml file. Now, try browsing books that will produce the following screen.

Adding a Stylesheet
Till now, we have not created any stylesheet, so Rails is using the default stylesheet. Now, let's create a new file called style.css and save it in /public/stylesheets. Add the following code to this file.
body {
   font-family: Helvetica, Geneva, Arial, sans-serif;
   font-size: small;
   font-color: #000;
   background-color: #fff;
}
a:link, a:active, a:visited {
   color: #CD0000;
}
input {
   margin-bottom: 5px;
}
p {
   line-height: 150%;
}
div#container {
   width: 760px;
   margin: 0 auto;
}
div#header {
   text-align: center;
   padding-bottom: 15px;
}
div#content {
   float: left;
   width: 450px;
   padding: 10px;
}
div#content h3 {
   margin-top: 15px;
}
ul#books {
   list-style-type: none;
}
ul#books li {
   line-height: 140%;
}
div#sidebar {
   width: 200px;
   margin-left: 480px;
}
ul#subjects {
   width: 700px;
   text-align: center;
   padding: 5px;
   background-color: #ececec;
   border: 1px solid #ccc;
   margin-bottom: 20px;
}
ul#subjects li {
   display: inline;
   padding-left: 5px;
}
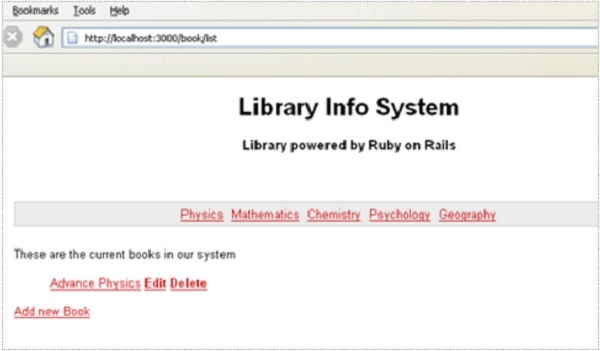
Now, refresh your browser and see the difference −
What is Next?
The next chapter explains how to develop applications with Rails Scaffolding to give user access to add, delete, and modify the records in any database.