- Robot Framework Tutorial
- Robot Framework - Home
- Robot Framework - Overview
- Environment Setup
- Unix and Linux Installation
- Introduction to Ride
- First Test Case Using Ride
- Writing and Executing Test Cases
- Keyword and Data Driven Test Cases
- Working With Browsers Using Selenium Library
- Working With Textbox
- Working With Radio Button
- Working With Checkbox
- Working With Dropdown
- Working With Keywords
- Working With Variables
- Working With Command Line
- Working With Setup And Teardown
- Working with Built-In Library
- Working With External Database libraries
- Testing Login Page Using Robot Framework
- Robot Framework Useful Resources
- Robot Framework - Quick Guide
- Robot Framework - Useful Resources
- Robot Framework - Discussion
Robot Framework - Working With Checkbox
For testing, it becomes important to understand how to interact with the browser and locate the html elements. It is very easy to work with input fields with robot framework. In this chapter, we will learn how to work with checkbox using Selenium Library. To work with checkbox, we need the locator, which is the main unique identifier for that checkbox. The locator can be id, name, class, etc.
Project Setup for Checkbox Testing
We will first create a project in Ride to work with browsers. Open ride using ride.py from the command line.
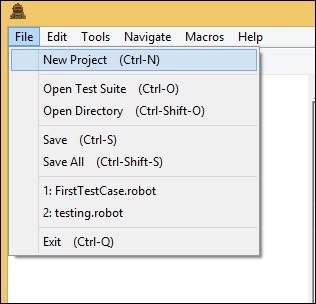
Click on New Project and enter Name of your project as shown in the screenshot below.

The name given for the project is Checkbox. Click OK to save the project.
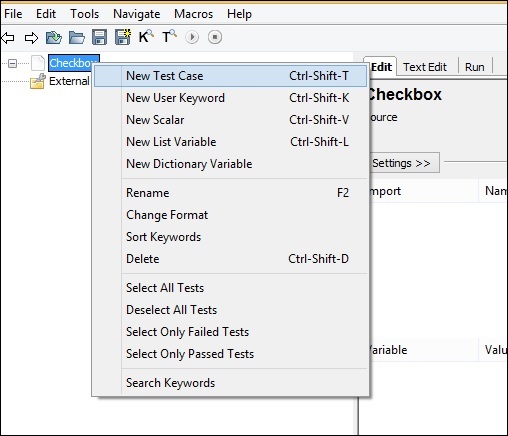
Right-click on the name of the project created and click New Test Case −

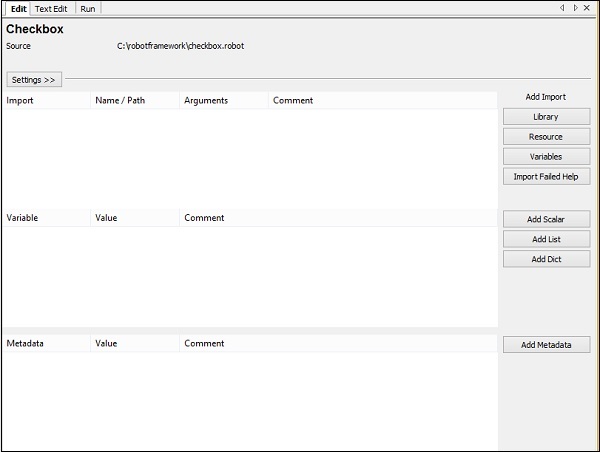
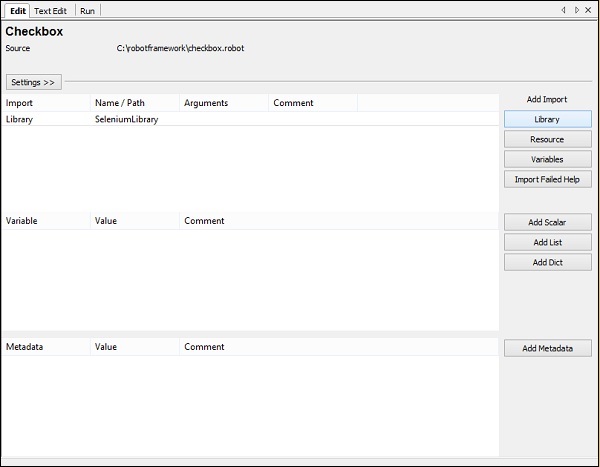
Give name to the test case and click OK. We are done with the project setup. Now we will write test cases for checkbox. Since we need Selenium library, we need to import the same in our project.
Click on your project on the left side and use Library from Add Import.
Now, click Library. A screen will appear where you need to enter the library name −
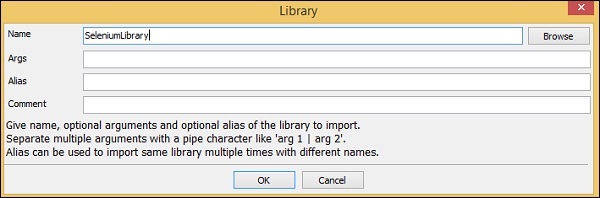
Click OK and the library will get displayed in the settings.
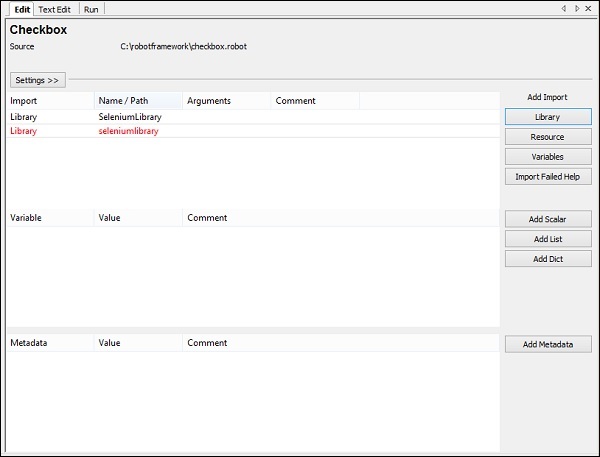
The name given has to match with the name of the folder installed in site-packages. If the names do not match, the library name will show in red −
Test Case for Checkbox
In the test case, we will select the checkbox. To select the checkbox, we need the identifier locator.
Now consider the following html display for checkbox −
<input type="checkbox" name="option1" value="Car"> Car
For checkbox, we have the name as the locator. In the above example, the name is option1. We also need the value so that we can select the same. Car holds the value in the above example.
Now, we will create a test page with checkbox. Open the checkbox in the browser and select the value.
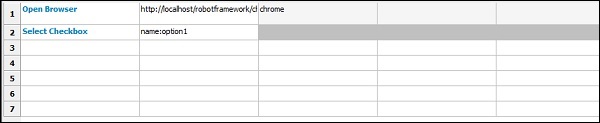
The test case details will be as follows −
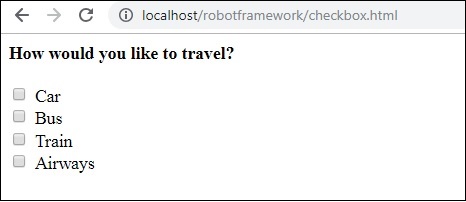
Open browser − URL – http://localhost/robotframework/checkbox.html in Chrome
Enter details of checkbox.
Execute the test case.
While writing the keyword for test cases, press Ctrl + Spacebar. It gives all the details of the command.Details of checkbox.
The keywords to be used for checkbox is −
Select checkbox name:nameofcheckbox value
The command details from ride is as follows −
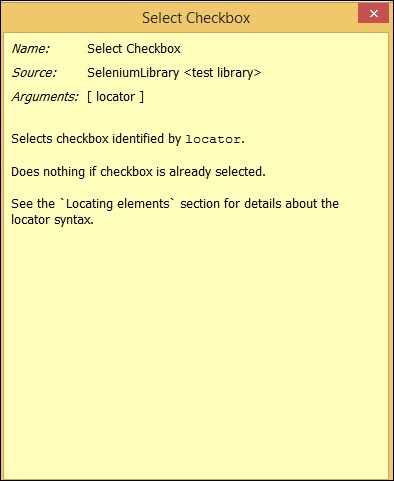
So, arguments is the locator for the checkbox. Here are the details of the test case for Checkbox selection −
This is how the URL is −
checkbox.html
<html>
   <head>
      <title>Checkbox Test Page>/title>
   </head>
   <body>
      <form name="myform" method="POST">
         <b>How would you like to travel?</b>
         <div><br>
            <input type="checkbox" name="option1" value="Car"> Car<br>
            <input type="checkbox" name="option2" value="Bus"> Bus<br>
            <input type="checkbox" name="option3" value="Train"> Train<br>
            <input type="checkbox" name="option4" value="Air"> Airways<br>
            <br>
         </div>
      </form>
   </body>
</html>
In the above form, we are planning to select Car, which is a checkbox. The details are given in the test case. Now, we will execute the test case and check the selection of the checkbox for the above form.

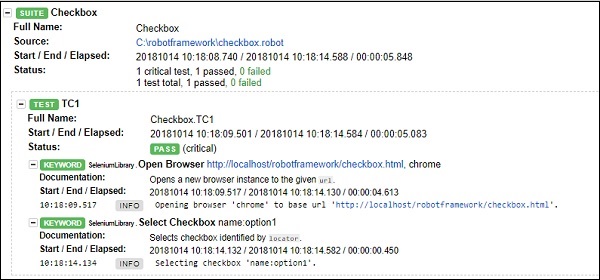
When the test case is executed, it opens the URL http://localhost/robotframework/checkbox.html and selects the name Car given in the test case.
Here are the execution details −
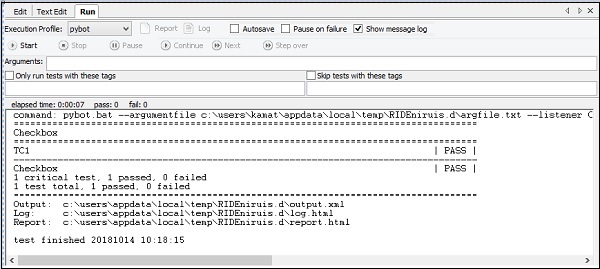
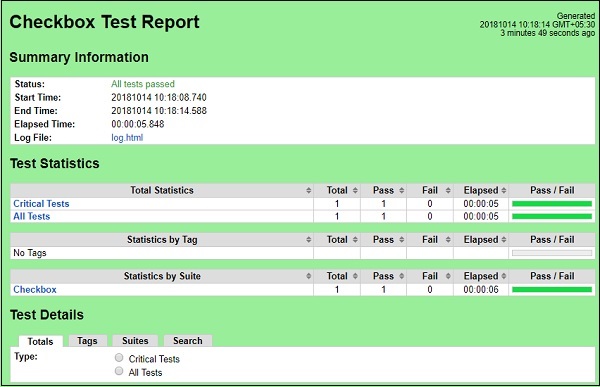
Details of Report
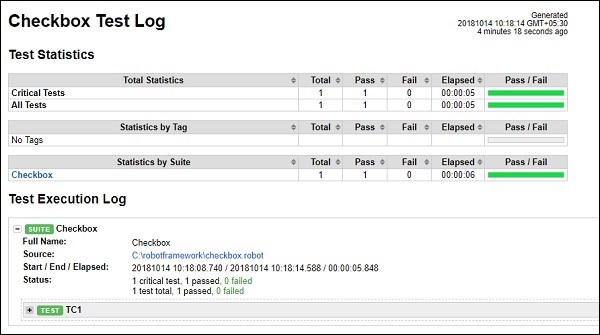
Details of Log
Conclusion
In this chapter, we learnt how we can select a checkbox by giving the locator of the checkbox. The log and Reports give the details of the execution of the test case along with the time spent for each test case.
To Continue Learning Please Login