- Python Web Development Libraries
- Home
- Introduction
- Python Frameworks
- Django Framework
- Flask Framework
- Web2py Framework
- Pyramid Framework
- Dash Framework
- Choosing a Better Framework
- Useful Resources
- Quick Guide
- Useful Resources
- Discussion
Flask Framework
Flask is micro-framework which has very little dependency on external libraries. It is a very light framework and gives us freedom to do whatever we want.
In this chapter, we are going to build a project using Python and Flask framework.
Flask Startup and Configuration
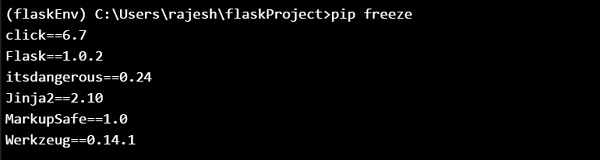
Like most widely used python libraries, the Flask package is installable from the Python Package Index (PPI). Let’s create a directory first (In this chapter, we have created a directory called flaskProject) then created a virtual environment (and called it as flaskEnv) where all the project related dependencies will be loaded (including flask). You can also install flask-sqlalchemy so that your flask application has a simple way to communicate with SQL database.
After installing the flask, your flaskEnv (our virtualEnvironment name) will show something like below −
Creating an app with flask
By installing flask, we can create a simple “hello application in flask” with very few lines of code as follows −

Type the following in the terminal −
$python flaskapp.py
And you can see the following output −
Running on http://127.0.0.1:5000/ or on localhost:5000

Below is the explanation of what we did in our example code −
Firstly, we import the Flask class library. An instance from this class is the WSGI app.
Secondly, we create an instance of this class. Application package or module name is our first argument. It is mandatory that flask knows where to find static files, templates and other files.
Next is the route() decorator we use to know which URL should trigger our method/function.
Creating URL Routing
URL Routing makes URLs in your Web app easy to remember. We will now create some URL routes −
/hello
/members
/members/name
We can write the following code based on the above URL and save it as app.py.
from flask import Flask, render_template

app = Flask(__name__)

@app.route('/')
def index():
   return "Index!"

@app.route('/Hello')
def hello():
   return "Hello, World!"

@app.route("/members")
def members():
   return "Members"

@app.route("/members/<name>/")
def getMember(name):
   return name

if __name__ == '__main__':
   app.run(debug=True)
On restarting the application, we use the below lines of code to get different outputs on various URLs −
$ python app.py
Running on http://localhost:5000/
We will get the following output in our browser −

We can try other URLs in our browser as follows −
Running on http://localhost:5000/hello, will give the following output −

Running on http://localhost:5000/members, will give −

Running on http://localhost:5000/members/TutorialsPoint/, will give you the following output −

But normally we don’t want to return a string (as above), we return templates. For that we want to use a function “render_template” from flask, and return render_template with some input. So, below function will do our work −
from flask import render_template
return render_template(‘home.html’)
Let us create a folder template and place home.html file in it.
Next, we will discuss about layout. Instead of using html head tag and body tag for every single template, we will design a layout to include head & body tags and wrap the current views or current template. For that, we have to create one separate file and call it layout.html. In this, we can put our normal head tag, body tag and all the other required tags.
We can create our new layout.html with the following lines of code −
<!DOCTYPE html>
<html>
   <head>
      <meta charset="utf-8">
      <title>MyFlaskApp</title>
      <link rel="stylesheet" href="https://stackpath.bootstrapcdn.com/bootstrap/4.1.3/css/bootstrap.min.css">
   </head>
   <body>
      {% include 'includes/_navbar.html' %}
      <div class="container">
      {% block body %}
      {% endblock %}
      </div>
      <script src="https://stackpath.bootstrapcdn.com/bootstrap/4.1.3/js/bootstrap.min.js">
      </script>
   </body>
</html>
In above code, we have given the title track, MyFlaskAp, use css cdn in the head, and javascript in body block to enable the bootstrap.
Now, we have to create navbar for every single page. For that, we have to first create an include folder and then create _navbar.html file inside it. Now in the _navbar.html, we have to use the standard starter template from getbootstrap.com. The newly created _navbar.html file will be as follows −
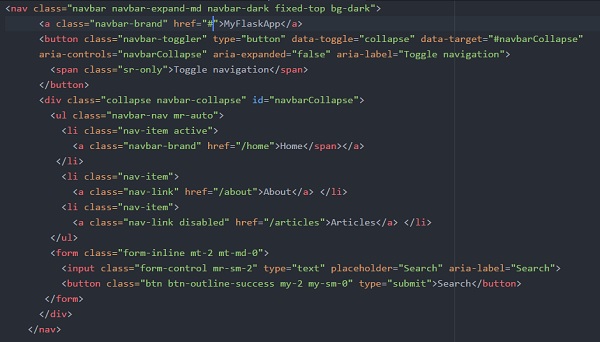
And include this _navbar.html file into our layout.html file.
{% include 'includes/_navbar.html' %}
As we have the layout block, we can extend this block in our home file (home.html).
Our home.html file can be created using the below code −
{% extends 'layout.html' %}
{% block body %}
   <div class="jumbotron text-center">
      <h1>Welcome to FlaskApp</h1>
      <p>This application is built on Flask webframework!</p>
   </div>
{% endblock %}
Using this if we try to run our flaskapp.py file, then we could see the below output in our browser −

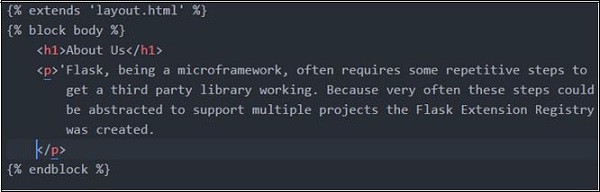
Now we want to activate (currently the tabs are not working) our about tab. Create a route for the about tab and create a template file, about.html.
About tab route in appflask.py will be as shown below −

about.html file will have the below content −
So Home and About are now taken care of. For Articles, we can create a new file (data.py) in the root directory, where we put the data and call it in our webpage.
data.py
def Articles():
   articles = [
      {
         'uid': 1,
         'title': 'Article_One',
         'body': 'Flask, being a microframework, often requires some repetitive step
            to get a third party library working. Because very often these steps could
            be abstracted to support multiple projects the Flask Extension Registry
            was created.',
         'Author': 'Rajesh Joshi',
         'Created-on': '07-09-2018'
      },
      {
         'uid': 2,
         'title': 'Article_Two',
         'body': "Flask, being a microframework, often requires some repetitive steps
            to get a third party library working. Because very often these steps could
            be abstracted to support multiple projects the Flask Extension Registry
            was created.",
         'Author': 'Rajesh J',
         'Created-on': '07-09-2018'
      },
      {
         'uid': 3,
         'title': 'Article_Three',
         'body': 'Flask, being a microframework, often requires some repetitive steps
            to get a third party library working. Because very often these steps could be
            abstracted to support multiple projects the Flask Extension Registry
            was created.',
         'Author': 'Joshi Rajesh',
         'Created-on': '07-09-2018'
      }
   ]
   return articles
Below is the code for articles.html, which will display article titles for each uid.
{% extends 'layout.html' %}
{% block body %}
   <h1>Articles</h1>
   {% for article in articles %}
      <li class="list-group-item">
         <a href="article/{{article.uid}}"> {{article.title}}</a>
      </li>
   {% endfor %}
{% endblock %}
To summarize, Flask is one of the most popular python web frameworks because of its lightweight. Although it is micro it is an extensible python web framework. By providing the required functionality, flask accelerates the development of simple web application. So Flask, is more suitable for smaller, less complicated applications.