- Protobuf Tutorial
- Protobuf - Home
- Protobuf - Introduction
- Protobuf - Basic App
- Protobuf - Constructs
- Protobuf - Class/Member
- Protobuf - Strings
- Protobuf - Numbers
- Protobuf - Boolean
- Protobuf - Enum
- Protobuf - List/Repeated
- Protobuf - Map
- Protobuf - Nested Class
- Protobuf - Optionality & Defaults
- Protobuf - Language Independence
- Protobuf - Compound Data Types
- Protobuf - Command Line Usage
- Protobuf - Rules to Update Definition
- Protobuf - Integration with Kafka
- Protobuf - In Other Languages
- Protobuf Useful Resources
- Protobuf - Quick Guide
- Protobuf - Useful Resources
- Protobuf - Discussion
Protobuf - Quick Guide
Protobuf - Introduction
Before we jump into Protocol Buffer, let us go over a brief background of Serialization which is what Protocol Buffer does.
What is Serialization and Deserialization?
Serialization is the process of converting an object (of any language) into bytes and storing them in persistent memory system. This memory system could be a file on the disk, messaging queue or a database. The major intention with serialization of object is that we can reuse the data and recreate the object on same or different machine. In deserialization, we convert the stored bytes back to an object.
Why do we need Serialization and Deserialization?
While there are a few other use-cases, the most basic and important one is that it provides a way to transfer object data over a network to a different service/machine etc. and then to recreate object for its further use. Transferring object data via API, database or messaging queue requires the object to be converted into bytes so that it can be sent over a network. And this is where serialization becomes important.
In microservice architecture, the application is broken down into small services and these services communicate with each other via messaging queue and APIs. And all of this communication happens over a network which requires frequent conversion of object to bytes and back to objects. So, serialization and deserialization becomes very critical aspects when it comes to distributed environment.
Why Google Protobuf?
Google Protobuf performs the serialization and deserialization of the objects to bytes which can be transferred over the network. But there are some other libraries and mechanisms to transfer data as well.
So, what makes Google Protobuf special? Here are some of its important features −
Language independent − Multiple languages have protobuf library, few famous ones being Java, Python, Go, etc. So, a Java object can be serialized into bytes from a Java program and can be deserialized to a a Python object.
Efficient Data Compaction − In microservice environment, given that multiple communications take place over a network, it is critical that the data that we are sending is as succinct as possible. We need to avoid any superfluous information to ensure that the data is quickly transferred. Google Protobuf has that as one of the focus areas.
Efficient serialization and deserialization − In microservice environment, given that multiple communications take place over a network, it is critical how fast can we serialize and deserialize. Google Protobuf ensures that it is as quick as possible in serializing and deserializing the data.
Simple to use − Protobuf library auto-generates serialization code (as we will see in the upcoming chapters), has a versioning scheme to ensure that the creator of data and the user of data can have separate versions of the serialization definition, etc.
Protobuf vs Others (XML/JSON/Java serialization)
Let's take a look how other ways to transfer data over a network stack up against Protobuf.
| Feature | Protobuf | JSON | XML |
|---|---|---|---|
| Language independent | Yes | Yes | Yes |
| Serialized data size | Least of three | Less than XML | Highest among the three |
| Human Readable | No, as it uses separate encoding schema | Yes, as it uses text based format | Yes, as it uses text based format |
| Serialization speed | Fastest among the three | Faster than XML | Slowest among the three |
| Data type support | Richer than other two. Supports complex data types like Any, one of etc. | Supports basic data types | Supports basic data types |
| Support for evolving schema | Yes | No | No |
Protobuf - Basic App
Let us now use Google Protocol Buffer and see how it works with a simple Greeting app. In this example, we will create a simple application which would do the following −
Greeting the Writer −
Take greeting and username from the user
Store the above information in a file in the disk
Greeting Reader −
Reads the same file which we stored in the above file
Convert that data into an object and print the data
Protocol Buffer Definition file
The protocol buffer "definition file" contains the schema definition of the data we want to serialize. The data is stored in a human readable file with the extension ".proto".
Let us store the following data in "greeting.proto" and we will use this in our first application.
syntax = "proto3";
package tutorial;
option java_package = "com.tutorialspoint.greeting";

message Greet {
   string greeting = 1;
   string username = 2;
}
Now, let us take a closer look at the data and see what each line of code does in the above code block.
syntax = "proto3";
The "syntax" here represents what version of Protobuf we are using. So, we are using the latest version 3 and the schema thus can use all the syntax which is valid for version 3.
package tutorial;
The package here is used for conflict resolution if, say, we have multiple classes/members with same name.
option java_package = "com.tutorialspoint.greeting";
This argument is specific to Java, i.e., the package where the code from the ".proto" file will be auto-generated.
message Greet
Name of the base class for the object which would be created/recreated.
string greeting = 1;
string username = 2;
These are the attributes of the Greet class along with the data type and the position of the tag in the schema. If a new tag is to be added, it should have "3" as the position. Note that this position integer is important to ensure that the actual data is compact and there is scope of schema evolution.
Protocol Buffer Code Generation
Now that we have defined, let us install the "proto" binary which we will use to autogenerate the code for the above Greet class. The binaries can be found at "https://github.com/protocolbuffers/protobuf/releases/".
Choose the correct binary based on the OS. We will install proto binary on Windows but the steps are not very different for Linux.
Once installed, ensure that you are able to access it via command line −
protoc --version

libprotoc 3.15.6
It confirms that Protobuf is correctly installed. Now let us move to creating the Greeting app described above for Java.
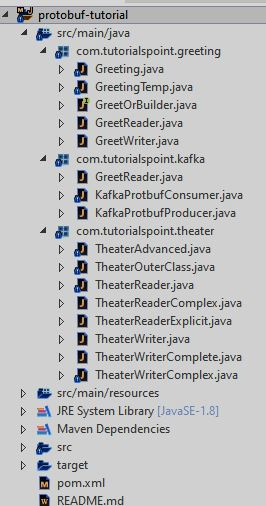
Project Structure
Here is the overall project structure that we would have −
Code related to individual languages go to their respective directories. And we have a separate directory to store our "proto" files.

And here is the project structure that we would be having for Java −
Greeting App in Java
Now that we have installed protoc, we can auto-generate the code from the proto files using protoc. Let us first create a Java project though.
Following is the Maven configuration that we will use for our Java project. Note that it contains the required library for Protobuf as well.
<?xml version="1.0" encoding="UTF-8"?>
<project xmlns="http://maven.apache.org/POM/4.0.0"
   xmlns:xsi="http://www.w3.org/2001/XMLSchema-instance"
   xsi:schemaLocation="http://maven.apache.org/POM/4.0.0 http://maven.apache.org/xsd/maven-4.0.0.xsd">

   <modelVersion>4.0.0</modelVersion>
   <groupId>com.tutorials.point</groupId>
   <artifactId>protobuf-tutorial</artifactId>
   <version>1.0</version>
   <packaging>jar</packaging>

   <properties>
      <maven.compiler.source>1.8</maven.compiler.source>
      <maven.compiler.target>1.8</maven.compiler.target>
   </properties>

   <dependencies>
      <!-- https://mvnrepository.com/artifact/com.google.protobuf/protobuf-java -->
      <dependency>
         <groupId>com.google.protobuf</groupId>
         <artifactId>protobuf-java</artifactId>
         <version>3.15.8</version>
      </dependency>
   </dependencies>

   <build>
      <plugins>
         <plugin>
            <groupId>org.apache.maven.plugins</groupId>
            <artifactId>maven-shade-plugin</artifactId>
            <version>3.2.4</version>
            <configuration>
               <!--Put your configurations here-->
            </configuration>
            <executions>
               <execution>
                  <phase>package</phase>
                     <goals>
                     <goal>shade</goal>
                  </goals>
               </execution>
            </executions>
         </plugin>
      </plugins>
   </build>
</project>
All of our code would be present under src/main/java.
With the project structure out of the way, let us generate the code for the Greet class −
protoc --java_out=java/src/main/java proto_files/greeting.proto
Post execution of the command, you will notice two auto-generated classes.
Greeting.java
GreetOrBuilder.java
These two classes would help us with serialization and deserialization of the Greet object.
Now, let us write the writer of the data, which will take the username and the greeting as its inputs −
package com.tutorialspoint.greeting;

import java.io.FileOutputStream;
import java.io.IOException;
import com.tutorialspoint.greeting.Greeting.Greet;

public class GreetWriter{
   public static void main(String[] args) throws IOException {
      Greet greeting = Greet.newBuilder()
         .setGreeting(args[0])
         .setUsername(args[1])
         .build();

      String filename = "greeting_protobuf_output";
      System.out.println("Saving greeting to file: " + filename);

      try(FileOutputStream output = new FileOutputStream(filename)){
         greeting.writeTo(output);
      }
      System.out.println("Saved greeting with following data to disk: \n" + greeting);
   }
}
The writer simply takes CLI arguments, creates the Greet object, serializes it and then dumps it to a file.
Now let us write a reader which will read the file −
package com.tutorialspoint.greeting;

import java.io.FileInputStream;
import java.io.IOException;
import com.tutorialspoint.greeting.Greeting.Greet;

public class GreetReader{
   public static void main(String[] args) throws IOException {
      Greet.Builder greetBuilder = Greet.newBuilder();

      String filename = "greeting_protobuf_output";
      System.out.println("Reading from file " + filename);

      try(FileInputStream input = new FileInputStream(filename)) {
         Greet greet = greetBuilder.mergeFrom(input).build();
         System.out.println("Greeting: " + greet.getGreeting() + "\n" + "Username: " + greet.getUsername());
      }
   }
}
The reader simply reads from the same file, deserializes it, and prints the data about the greeting.
Now that we have set up the reader and the writer, let us compile the project.
mvn clean install
And now, let us first execute the writer.
java -cp .\target\protobuf-tutorial-1.0.jar com.tutorialspoint.greeting.GreetWriter Hello John

Saving greeting to file:
greeting_protobuf_output

Saved greeting with following data to disk:
greeting: Hello
username: John
And then, let us execute the reader.
java -cp .\target\protobuf-tutorial-1.0.jar com.tutorialspoint.greeting.GreetReader

Reading from file greeting_protobuf_output
Greeting: Hello
Username: John
So, as we see the data that was serialized by the writer and saved to the file, that exact data is correctly deserialized by the reader and printed accordingly.
Greeting App in Python
Let us now write the same example as a Python project −
We will need to install protobuf pip package before we proceed.
pip install protobuf
All of our code would be present under "google-protobuf/python".
With the project structure out of the way, let us generate the code for Greet class −
protoc --python_out=python proto_files/greeting.proto
Post execution of this command, you will notice an auto-generated class " * proto_files/greeting_pb2.py " under the Python directory. This class would help us with serialization and deserialization of the Greet object.
Now, let us write the writer of the data, which will take the username and the greeting as its input −
from .proto_files import greeting_pb2

import sys

greet = greeting_pb2.Greet()
greet.username = sys.argv[1]
greet.greeting = sys.argv[2]

filename = "greeting_protobuf_output";
print("Saving to file: " + filename)

f = open(filename, "wb")
f.write(greet.SerializeToString())
f.close()
print("Saved following greeting to disk: \n" + str(greet))
The writer simply takes CLI arguments, creates the Greet object, serializes it, and then dumps it to a file.
Now let us create a reader which will read the file −
from proto_files import greeting_pb2

greet = greeting_pb2.Greet()

filename = "greeting_protobuf_output";
print("Reading from file: " + filename)

f = open(filename, "rb")
greet.ParseFromString(f.read())
f.close()

print("Read greeting from disk: \n" + str(greet))
The reader simply reads from the same file, deserializes it, and prints the data about the greeting.
Now, let us first execute the writer.
python greetWriter.py Hola Jane

Saving to file: greeting_protobuf_output
Saved following greeting to disk:
greeting: "Hola"
username: "Jane"
And then, let us execute the reader.
python greetReader.py

Reading from file: greeting_protobuf_output
Read greeting from disk:
greeting: "Hola"
username: "Jane"
So, as we see, the data that was serialized by the writer and saved to a file. Next, the same data is correctly deserialized by the reader and printed accordingly.
Protobuf - Constructs
Let us now look at a few basic data structures and data types which Google Protobuf provides. We will look at these data structures using an example of a Movie theater.
Note that for this structure while we will be using Java code, using them in Python code should also be equally simple and possible.
In the next few chapters, we will discuss the following Protobuf data types one by one −
- Protobuf Class/Member
- Protobuf Strings
- Protobuf Numbers
- Protobuf Boolean
- Protobuf Enum
- Protobuf List/Repeated
- Protobuf Map
- Protobuf Nested Class
Protobuf - Class/Member
The very basic building block of Protobuf is the member attribute. This translates to a class in the languages that we use, for example, Java, Python, etc.
Following is the syntax that we need to have to instruct Protobuf that we will be creating instances of a given class −
syntax = "proto3";
package theater;
option java_package = "com.tutorialspoint.theater";

message Theater {
}
We will save the above in "theater.proto" and we will use this when we explore other data structures.
The "syntax" here represents what version of Protobuf are we using. So, we are using the latest version 3 and the schema thus can use all the syntax which is valid for version 3.
syntax = "proto3";
The package here is used for conflict resolution, if, say, we have multiple class/message with the same name.
package tutorial;
This argument is specific to Java, i.e., the package where the code from the ".proto" file will be auto-generated.
option java_package = "com.tutorialspoint.greeting";
Now that we are done with the prerequisites, the last item here is −
message Theater
This is nothing but the class name of the base class for the object which would be created/recreated. Note that it is useless in its current shape, as it does not have any other attributes. But we will be more adding attributes as we move along.
A single proto file can also have multiple classes/messages. For example, if we want, we can add a Visitors message/class as well in the same file. Protobuf would ensure to create two separate and independent classes for the same. For example −
syntax = "proto3";

package theater;

option java_package = "com.tutorialspoint.theater";

message Theater {
}
message Visitor {
}
To use Protobuf, we will now have to use protoc binary to create the required classes from this ".proto" file. Let us see how to do that −
protoc --java_out=java/src/main/java proto_files\theater.proto
Well, that is it! The above command should create the required files and now we can use it in our Java code −
Theater theater = Theater.newBuilder().build()
Visitor visitor = Visitor.newBuilder().build()
At this stage, it is not very useful, as we have not added any attributes to the members/classed. Let us do that when we look at strings.
Protobuf - Strings
Protobuf strings translate to a string in the languages that we use, for example, Java, Python, etc. Continuing on the theater example, following is the syntax that we need to have to instruct Protobuf that we will be creating a string −
syntax = "proto3";
package theater;
option java_package = "com.tutorialspoint.theater";

message Theater {
   string name = 1;
   string address = 2;
}
Now our class/message contains two string attributes. Each of them also has a position which is what Protobuf uses while serialization and deserialization. Each attribute of a member needs to have a unique position attribute.
To use Protobuf, we will now have to use protoc binary to create the required classes from this ".proto" file. Let us see how to do that −
protoc --java_out=java/src/main/java proto_files\theater.proto
The above command should create the required files and now we can use it in our Java code. First let's create a writer to write the theater information −
package com.tutorialspoint.theater;

import java.io.FileOutputStream;
import java.io.IOException;
import com.tutorialspoint.theater.TheaterOuterClass.Theater;

public class TheaterWriter{
   public static void main(String[] args) throws IOException {
      Theater theater = Theater.newBuilder()
         .setName("Silver Screener")
         .setAddress("212, Maple Street, LA, California")
         .build();

      String filename = "theater_protobuf_output";
      System.out.println("Saving theater information to file: " + filename);

      try(FileOutputStream output = new FileOutputStream(filename)){
         theater.writeTo(output);
      }
      System.out.println("Saved theater information with following data to disk: \n" + theater);
   }
}
Next, we will have a reader to read the theater information −
package com.tutorialspoint.theater;

import java.io.FileInputStream;
import java.io.FileOutputStream;
import java.io.IOException;
import com.tutorialspoint.greeting.Greeting.Greet;
import com.tutorialspoint.theater.TheaterOuterClass.Theater;
import com.tutorialspoint.theater.TheaterOuterClass.Theater.Builder;

public class TheaterReader{
   public static void main(String[] args) throws IOException {
      Builder theaterBuilder = Theater.newBuilder();

      String filename = "theater_protobuf_output";
      System.out.println("Reading from file " + filename);

      try(FileInputStream input = new FileInputStream(filename)) {
         Theater theater = theaterBuilder.mergeFrom(input).build();
         System.out.println(theater);
      }
   }
}
Now, post compilation, let us execute the writer first −
java -cp .\target\protobuf-tutorial-1.0.jar com.tutorialspoint.theater.TheaterWriter

Saving theater information to file: theater_protobuf_output
Saved theater information with following data to disk:
name: "Silver Screener"
address: "212, Maple Street, LA, California"
Now, let us execute the reader to read from the same file −
java -cp .\target\protobuf-tutorial-1.0.jar com.tutorialspoint.theater.TheaterReader

Reading from file theater_protobuf_output
name: "Silver Screener"
address: "212, Maple Street, LA, California"
So, as we see, we are able to read the serialized strings by deserializing the binary data to the Theater object. Let us now look at numbers in the next chapter.
Protobuf - Numbers
Numbers include protobuf types like int32, int64, float, double, which are basic building blocks of Protobuf. It translates to int, long float, double, respectively, in the languages that we use, for example, Java, Python, etc.
Continuing with our theater example, following is the syntax that we need to have to instruct Protobuf that we will be creating numbers −
syntax = "proto3";
package theater;
option java_package = "com.tutorialspoint.theater";

message Theater {
   int32 total_capcity = 3;
   int64 mobile = 4;
   float base_ticket_price = 5;
}
Now our class/message contains numerical attributes. Each of them also has a position which is what Protobuf uses while serialization and deserialization. Each attribute of a member needs to have a unique number assigned.
To use Protobuf, we will now have to use protoc binary to create the required classes from this ".proto" file. Let us see how to do that −
protoc --java_out=java/src/main/java proto_files\theater.proto
The above command will create the required files and now we can use it in our Java code. First, let's create a writer to write the theater information −
package com.tutorialspoint.theater;

import java.io.FileOutputStream;
import java.io.IOException;
import com.tutorialspoint.theater.TheaterOuterClass.Theater;

public class TheaterWriter{
   public static void main(String[] args) throws IOException {
      Theater theater = Theater.newBuilder()
         .setTotalCapcity(320)
         .setMobile(98234567189L)
         .setBaseTicketPrice(22.45f)
         .build();

      String filename = "theater_protobuf_output";
      System.out.println("Saving theater information to file: " + filename);

      try(FileOutputStream output = new FileOutputStream(filename)){
         theater.writeTo(output);
      }
      System.out.println("Saved theater information with following data to disk: \n" + theater);
   }
}
Next, we will have a reader to read the theater information −
package com.tutorialspoint.theater;

import java.io.FileInputStream;
import java.io.FileOutputStream;
import java.io.IOException;
import com.tutorialspoint.greeting.Greeting.Greet;
import com.tutorialspoint.theater.TheaterOuterClass.Theater;
import com.tutorialspoint.theater.TheaterOuterClass.Theater.Builder;

public class TheaterReader{
   public static void main(String[] args) throws IOException {
      Builder theaterBuilder = Theater.newBuilder();

      String filename = "theater_protobuf_output";
      System.out.println("Reading from file " + filename);

      try(FileInputStream input = new FileInputStream(filename)) {
         Theater theater = theaterBuilder.mergeFrom(input).build();
         System.out.println(theater.getBaseTicketPrice());
         System.out.println(theater);
      }
   }
}
Now, post compilation, let us execute the writer first −
> java -cp .\target\protobuf-tutorial-1.0.jar
com.tutorialspoint.theater.TheaterWriter

Saving theater information to file: theater_protobuf_output
Saved theater information with following data to disk:
total_capcity: 320
mobile: 98234567189
base_ticket_price: 22.45
Now, let us execute the reader to read from the same file −
java -cp .\target\protobuf-tutorial-1.0.jar
com.tutorialspoint.theater.TheaterReader

Reading from file theater_protobuf_output
22.45
total_capcity: 320
mobile: 98234567189
base_ticket_price: 22.45
So, as we see, we are able to read the serialized int, float, and long by deserializing the binary data to Theater object. In the next chapter, we will look at the Boolean type.
Protobuf - Boolean
The "bool" data type is one of the basic building blocks of Protobuf. It translates to Boolean in the languages that we use, for example, Java, Python, etc.
Continuing with the theater example, following is the syntax that we need to have to instruct Protobuf that we will be creating a Boolean attribute −
syntax = "proto3";
package theater;
option java_package = "com.tutorialspoint.theater";

message Theater {
   bool drive_in = 6;
}
Now our message class contains a Boolean attribute. It also has a position which is what Protobuf uses while serialization and deserialization. Each attribute of a member needs to have a unique number assigned.
To use Protobuf, we will now have to use protoc binary to create the required classes from this ".proto" file. Let us see how to do that −
protoc --java_out=java/src/main/java proto_files\theater.proto
The above command will create the required files and now we can use it in our Java code. First let's create a writer to write the theater information −
package com.tutorialspoint.theater;

import java.io.FileOutputStream;
import java.io.IOException;
import com.tutorialspoint.theater.TheaterOuterClass.Theater;

public class TheaterWriter {
   public static void main(String[] args) throws IOException {
      Theater theater = Theater.newBuilder()
         .setTotalCapcity(320)
         .setMobile(98234567189L)
         .setBaseTicketPrice(22.45f)
         .build();

      String filename = "theater_protobuf_output";
      System.out.println("Saving theater information to file: " + filename);

      try(FileOutputStream output = new FileOutputStream(filename)){
         theater.writeTo(output);
      }
      System.out.println("Saved theater information with following data to disk: \n" + theater);
   }
}
Next, we will have a reader to read the theater information −
package com.tutorialspoint.theater;

import java.io.FileInputStream;
import java.io.FileOutputStream;
import java.io.IOException;
import com.tutorialspoint.greeting.Greeting.Greet;
import com.tutorialspoint.theater.TheaterOuterClass.Theater;
import com.tutorialspoint.theater.TheaterOuterClass.Theater.Builder;

public class TheaterReader{
   public static void main(String[] args) throws IOException {
      Builder theaterBuilder = Theater.newBuilder();

      String filename = "theater_protobuf_output";
      System.out.println("Reading from file " + filename);

      try(FileInputStream input = new FileInputStream(filename)) {
         Theater theater = theaterBuilder.mergeFrom(input).build();
         System.out.println(theater.getBaseTicketPrice());
         System.out.println(theater);
      }
   }
}
Now, post compilation, let us execute the writer first −
> java -cp .\target\protobuf-tutorial-1.0.jar com.tutorialspoint.theater.TheaterWriter

Saving theater information to file: theater_protobuf_output
Saved theater information with following data to disk:
drive_in: true
Now, let us execute the reader to read from the same file −
java -cp .\target\protobuf-tutorial-1.0.jar com.tutorialspoint.theater.TheaterReader

Reading from file theater_protobuf_output
drive_in: true
So, as we see, we are able to read the serialized Boolean by deserializing the binary data to Theater object.
Protobuf - Enums
enum is one of the composite datatypes of Protobuf. It translates to an enum in the languages that we use, for example, Java.
Continuing with our theater example, following is the syntax that we need to have to instruct Protobuf that we will be creating an enum −
syntax = "proto3";
package theater;
option java_package = "com.tutorialspoint.theater";

message Theater {
   enum PAYMENT_SYSTEM{
      CASH = 0;
      CREDIT_CARD = 1;
      DEBIT_CARD = 2;
      APP = 3;
   }
   PAYMENT_SYSTEM payment = 7;
}
Now our message class contains an Enum for payment. Each of them also has a position which is what Protobuf uses while serialization and deserialization. Each attribute of a member needs to have a unique number assigned.
We define the enum and use it below as the data type along with "payment" attribute. Note that although we have defined enum inside the message class, it can also reside outside of it.
To use Protobuf, we will now have to use protoc binary to create the required classes from this ".proto" file. Let us see how to do that −
protoc --java_out=java/src/main/java proto_files\theater.proto
The above command should create the required files and now we can use it in our Java code. First, we will create a writer to write the theater information −
package com.tutorialspoint.theater;

import java.io.FileOutputStream;
import java.io.IOException;
import com.tutorialspoint.theater.TheaterOuterClass.Theater;
import com.tutorialspoint.theater.TheaterOuterClass.Theater.PAYMENT_SYSTEM;

public class TheaterWriter{
   public static void main(String[] args) throws IOException {
      Theater theater = Theater.newBuilder()
         .setPayment(PAYMENT_SYSTEM.CREDIT_CARD)
         .build();

      String filename = "theater_protobuf_output";
      System.out.println("Saving theater information to file: " + filename);

      try(FileOutputStream output = new FileOutputStream(filename)){
         theater.writeTo(output);
      }

      System.out.println("Saved theater information with following data to disk: \n" + theater);
   }
}
Next, we have a reader to read the theater information −
package com.tutorialspoint.theater;

import java.io.FileInputStream;
import java.io.FileOutputStream;
import java.io.IOException;
import com.tutorialspoint.greeting.Greeting.Greet;
import com.tutorialspoint.theater.TheaterOuterClass.Theater;
import com.tutorialspoint.theater.TheaterOuterClass.Theater.Builder;

public class TheaterReader{
   public static void main(String[] args) throws IOException {
      Builder theaterBuilder = Theater.newBuilder();

      String filename = "theater_protobuf_output";
      System.out.println("Reading from file " + filename);

      try(FileInputStream input = new FileInputStream(filename)) {
         Theater theater = theaterBuilder.mergeFrom(input).build();
         System.out.println(theater.getBaseTicketPrice());
         System.out.println(theater);
      }
   }
}
Now, post compilation, let us execute the writer first −
> java -cp .\target\protobuf-tutorial-1.0.jar com.tutorialspoint.theater.TheaterWriter

Saving theater information to file: theater_protobuf_output
Saved theater information with following data to disk:
payment: CREDIT_CARD
Now, let us execute the reader to read from the same file −
java -cp .\target\protobuf-tutorial-1.0.jar com.tutorialspoint.theater.TheaterReader

Reading from file theater_protobuf_output
payment: CREDIT_CARD
So, as we see, we are able to read the serialized enum by deserializing the binary data to Theater object. In the next chapter, we will take a look at Protobuf lists.
Protobuf - List/Repeated
Lists are one of the composite datatypes of Protobuf. Protobuf translates this to a java.util.list interface in Java.
Continuing with our theater example, following is the syntax that we need to have to instruct Protobuf that we will be creating a list −
syntax = "proto3";
package theater;
option java_package = "com.tutorialspoint.theater";

message Theater {
   repeated string snacks = 8;
}
Now our message class contains a list for snacks. Note that although we have a string list, we can as well have number, Boolean, custom data type list.
To use Protobuf, we will now have to use protoc binary to create the required classes from this ".proto" file. Let us see how to do that −
protoc --java_out=java/src/main/java proto_files\theater.proto
The above command should create the required files and now we can use it in our Java code. First, we will have a writer to write the theater information −
package com.tutorialspoint.theater;

import java.util.List;
import java.io.FileOutputStream;
import java.io.IOException;
import java.util.ArrayList;
import com.tutorialspoint.theater.TheaterOuterClass.Theater;

public class TheaterWriter{
   public static void main(String[] args) throws IOException {
      List<String> snacks = new ArrayList<>();
      snacks.add("Popcorn");
      snacks.add("Coke");
      snacks.add("Chips");
      snacks.add("Soda");

      Theater theater = Theater.newBuilder()
         .addAllSnacks(snacks)
         .build();

      String filename = "theater_protobuf_output";
      System.out.println("Saving theater information to file: " + filename);

      try(FileOutputStream output = new FileOutputStream(filename)){
         theater.writeTo(output);
      }
      System.out.println("Saved theater information with following data to disk: \n" + theater);
   }
}
Next, we will have a reader to read the theater information −
package com.tutorialspoint.theater;

import java.io.FileInputStream;
import java.io.FileOutputStream;
import java.io.IOException;
import com.tutorialspoint.greeting.Greeting.Greet;
import com.tutorialspoint.theater.TheaterOuterClass.Theater;
import com.tutorialspoint.theater.TheaterOuterClass.Theater.Builder;

public class TheaterReader{
   public static void main(String[] args) throws IOException {
      Builder theaterBuilder = Theater.newBuilder();

      String filename = "theater_protobuf_output";
      System.out.println("Reading from file " + filename);

      try(FileInputStream input = new FileInputStream(filename)) {
         Theater theater = theaterBuilder.mergeFrom(input).build();
         System.out.println(theater);
      }
   }
}
Now, post compilation, let us execute the writer first −
> java -cp .\target\protobuf-tutorial-1.0.jar com.tutorialspoint.theater.TheaterWriter

Saving theater information to file: theater_protobuf_output
Saved theater information with following data to disk:
snacks: "Popcorn"
snacks: "Coke"
snacks: "Chips"
snacks: "Soda"
Now, let us execute the reader to read from the same file −
java -cp .\target\protobuf-tutorial-1.0.jar com.tutorialspoint.theater.TheaterReader

Reading from file theater_protobuf_output
snacks: "Popcorn"
snacks: "Coke"
snacks: "Chips"
snacks: "Soda"
So, as we see, we are able to read the serialized list by deserializing the binary data to Theater object. In the next chapter, we will look at the map data type of Protobuf.
Protobuf - Map
Map is one of the composite datatypes of Protobuf. Protobuf translates this to a java.util.Map interface in Java.
Continuing with our theater example, following is the syntax that we need to have to instruct Protobuf that we will be creating a map −
syntax = "proto3";
package theater;
option java_package = "com.tutorialspoint.theater";

message Theater {
   map<string, int32> movieTicketPrice = 9;
}
Now our class/message contains a map of movie and their ticket price. Note that although we have "string -> int" map, we can as well have number, Boolean, and custom data types. However, note that we cannot have a nested map.
To use Protobuf, we will now have to use the protoc binary to create the required classes from this ".proto" file. Let us see how to do that −
protoc --java_out=java/src/main/java proto_files\theater.proto
The above command will create the required files and now we can use it in our Java code. First, we will create a writer to write the theater information −
package com.tutorialspoint.theater;

import java.util.List;
import java.util.Map;
import java.io.FileOutputStream;
import java.io.IOException;
import java.util.ArrayList;
import java.util.HashMap;
import com.tutorialspoint.theater.TheaterOuterClass.Theater;

public class TheaterWriter{
   public static void main(String[] args) throws IOException {
      Map<String, Integer> ticketPrice = new HashMap<>();

      ticketPrice.put("Avengers Endgame", 700);
      ticketPrice.put("Captain America", 200);
      ticketPrice.put("Wonder Woman 1984", 400);

      Theater theater = Theater.newBuilder()
         .putAllMovieTicketPrice(ticketPrice)
         .build();

      String filename = "theater_protobuf_output";
      System.out.println("Saving theater information to file: " + filename);

      try(FileOutputStream output = new FileOutputStream(filename)){
         theater.writeTo(output);
      }
      System.out.println("Saved theater information with following data to disk: \n" + theater);
   }
}
Next, we will have a reader to read the theater information −
package com.tutorialspoint.theater;

import java.io.FileInputStream;
import java.io.FileOutputStream;
import java.io.IOException;
import com.tutorialspoint.greeting.Greeting.Greet;
import com.tutorialspoint.theater.TheaterOuterClass.Theater;
import com.tutorialspoint.theater.TheaterOuterClass.Theater.Builder;

public class TheaterReader{
   public static void main(String[] args) throws IOException {
	   Builder theaterBuilder = Theater.newBuilder();

      String filename = "theater_protobuf_output";
      System.out.println("Reading from file " + filename);

      try(FileInputStream input = new FileInputStream(filename)) {
         Theater theater = theaterBuilder.mergeFrom(input).build();
         System.out.println(theater);
      }
   }
}
Now, post compilation, let us execute the writer first −
> java -cp .\target\protobuf-tutorial-1.0.jar com.tutorialspoint.theater.TheaterWriter

Saving theater information to file: theater_protobuf_output
Saved theater information with following data to disk:
movieTicketPrice {
   key: "Avengers Endgame"
   value: 700
}
movieTicketPrice {
   key: "Captain America"
   value: 200
}
movieTicketPrice {
   key: "Wonder Woman 1984"
   value: 400
}
Now, let us execute the reader to read from the same file −
java -cp .\target\protobuf-tutorial-1.0.jar com.tutorialspoint.theater.TheaterReader

Reading from file theater_protobuf_output
movieTicketPrice {
   key: "Avengers Endgame"
   value: 700
}
movieTicketPrice {
   key: "Captain America"
   value: 200
}
movieTicketPrice {
   key: "Wonder Woman 1984"
   value: 400
}
So, as we see, we are able to read the serialized map by deserializing the binary data to Theater object. In the next chapter, we will see how to create a nested class in Protobuf.
Protobuf - Nested Class
Here, we will see how to create a nested class. Protobuf translates this to a nested Java class.
Continuing with the theater example, following is the syntax that we need to have to instruct Protobuf that we will be creating a nested class −
syntax = "proto3";
package theater;
option java_package = "com.tutorialspoint.theater";

message Theater {
   TheaterOwner owner = 10;
}
message TheaterOwner{
   string name = 1;
   string address = 2;
}
Now our class/message contains a nested class, i.e., information about the owner of the theater.
To use Protobuf, we will now have to use the protoc binary to create the required classes from this ".proto" file. Let us see how to do that −
protoc --java_out=java/src/main/java proto_files\theater.proto
The above command should create the required files and now we can use it in our Java code. First, let's create a writer to write the theater information −
package com.tutorialspoint.theater;

import java.io.FileOutputStream;
import java.io.IOException;
import com.tutorialspoint.theater.TheaterOuterClass.Theater;
import com.tutorialspoint.theater.TheaterOuterClass.TheaterOwner;

public class TheaterWriter{
   public static void main(String[] args) throws IOException {
      TheaterOwner owner = TheaterOwner.newBuilder()
         .setName("Anthony Gonsalves")
         .setAddress("513, St Paul Street, West Coast, California")
         .build();

      Theater theater = Theater.newBuilder()
         .setOwner(owner)
         .build();

      String filename = "theater_protobuf_output";
      System.out.println("Saving theater information to file: " + filename);

      try(FileOutputStream output = new FileOutputStream(filename)){
         theater.writeTo(output);
      }
      System.out.println("Saved theater information with following data to disk: \n" + theater);
   }
}
Next, we have a reader to read the theater information −
package com.tutorialspoint.theater;

import java.io.FileInputStream;
import java.io.FileOutputStream;
import java.io.IOException;
import com.tutorialspoint.greeting.Greeting.Greet;
import com.tutorialspoint.theater.TheaterOuterClass.Theater;
import com.tutorialspoint.theater.TheaterOuterClass.Theater.Builder;

public class TheaterReader{
   public static void main(String[] args) throws IOException {
      Builder theaterBuilder = Theater.newBuilder();

      String filename = "theater_protobuf_output";
      System.out.println("Reading from file " + filename);

      try(FileInputStream input = new FileInputStream(filename)) {
         Theater theater = theaterBuilder.mergeFrom(input).build();
         System.out.println(theater);
      }
   }
}
Now, post compilation, let us execute the writer first −
> java -cp .\target\protobuf-tutorial-1.0.jar com.tutorialspoint.theater.TheaterWriter

Saving theater information to file: theater_protobuf_output
Saved theater information with following data to disk:
owner {
   name: "Anthony Gonsalves"
   address: "513, St Paul Street, West Coast, California"
}
Now, let us execute the reader to read from the same file −
java -cp .\target\protobuf-tutorial-1.0.jar com.tutorialspoint.theater.TheaterReader

Reading from file theater_protobuf_output
owner {
   name: "Anthony Gonsalves"
   address: "513, St Paul Street, West Coast, California"
}
So, as we see, we are able to read the serialized nested class data by deserializing the binary data to Theater object.
Protobuf - Optionality & Defaults
While we looked at various data types and how to use them. What happens if we do not specify the values while serialization? Google Protobuf 2 supported "required" and "optional" tag which helped in figuring out if the serialization/deserialization should fail if the required parsing logic is unavailable. But these tags are not available in the latest version. The failing part needs to be handled by respective code.
Let us look at the default values of the data types −
| Data Type | Default value |
|---|---|
| Int32 / Int64 | 0 |
| Float/double | 0.0 |
| String | Empty string |
| Boolean | False |
| Enum | First Enum item, that is the one with "index=0" |
| Repeated type | Empty list |
| Map | Empty Map |
| Nested Class | null |
So, if one does not specify the data for these data types, then they would take the above default values. Now, let's continue with our theater example to demonstrate how it works.
In this example, we will let all the fields default. The only field which would be specified would be the name of the theater.
syntax = "proto3";
package theater;
option java_package = "com.tutorialspoint.theater";

message Theater {
   string name = 1;
   string address = 2;

   int32 total_capcity = 3;
   int64 mobile = 4;
   float base_ticket_price = 5;

   bool drive_in = 6;

   enum PAYMENT_SYSTEM {
      CASH = 0;
      CREDIT_CARD = 1;
      DEBIT_CARD = 2;
      APP = 3;
   }

   PAYMENT_SYSTEM payment = 7;
   repeated string snacks = 8;
   map<string, int32> movieTicketPrice = 9;
   TheaterOwner owner = 10;
}
message TheaterOwner{
   string name = 1;
   string address = 2;
}
Now our class/message contains multiple attributes. To use Protobuf, we will have to use protoc binary to create the required classes from this ".proto" file. Let us see how to do that −
protoc --java_out=java/src/main/java proto_files\theater.proto
The above command should create the required files and now we can use it in our Java code. First, let's create a writer to write the theater information −
package com.tutorialspoint.theater;

import java.io.FileOutputStream;
import java.io.IOException;
import com.tutorialspoint.theater.TheaterOuterClass.Theater;

public class TheaterWriter {
   public static void main(String[] args) throws IOException {
      Theater theater = Theater.newBuilder()
         .setName("SilverScreen")
         .build();

      String filename = "theater_protobuf_output";
      System.out.println("Saving theater information to file: " + filename);

      try(FileOutputStream output = new FileOutputStream(filename)){
         theater.writeTo(output);
      }
      System.out.println("Saved theater information with following data to disk: \n" + theater);
   }
}
Next, we will have a reader to read the theater information −
package com.tutorialspoint.theater;

import java.io.FileInputStream;
import java.io.FileOutputStream;
import java.io.IOException;
import java.util.Map;
import com.google.protobuf.DescriptorProtos.FileDescriptorProto;
import com.google.protobuf.Descriptors.FieldDescriptor;
import com.google.protobuf.Descriptors.FileDescriptor;
import com.tutorialspoint.greeting.Greeting.Greet;
import com.tutorialspoint.theater.TheaterOuterClass.Theater;
import com.tutorialspoint.theater.TheaterOuterClass.Theater.Builder;

public class TheaterReaderExplicit{
   public static void main(String[] args) throws IOException {
      Builder theaterBuilder = Theater.newBuilder();

      String filename = "theater_protobuf_output";
      System.out.println("Reading from file " + filename);

      try(FileInputStream input = new FileInputStream(filename)) {
         Theater theater = theaterBuilder.mergeFrom(input).build();
         System.out.println(
            "Name:" + theater.getName() + "\n" +
            "Address:" + theater.getAddress() + "\n" +
            "Drive_In:" + theater.getDriveIn() + "\n" +
            "Total Capacity:" + theater.getTotalCapcity() + "\n" +
            "Base Ticket Prices: " + theater.getBaseTicketPrice() + "\n" +
            "Owner: " + theater.getOwner() + "\n" +
            "Snacks: " + theater.getSnacksList() + "\n" +
            "Payment: " + theater.getPayment()
         );

         //Map<FieldDescriptor, Object> f = theater.getAllFields();
         System.out.println("List of fields explicitly specified: " + theater.getAllFields());
      }
   }
}
Now, post compilation, let us execute the writer first −
> java -cp .\target\protobuf-tutorial-1.0.jar com.tutorialspoint.theater.TheaterWriter

Saving theater information to file: theater_protobuf_output
Saved theater information with following data to disk:
name: "SilverScreen"
Now, let us execute the reader to read from the same file −
java -cp .\target\protobuf-tutorial-1.0.jar com.tutorialspoint.theater.TheaterReader

Reading from file theater_protobuf_output
Name:SilverScreen
Address:
Drive_In:false
Total Capacity:0
Base Ticket Prices: 0.0
Owner:
Snacks: []
Payment: CASH
List of fields explicitly specified: {theater.Theater.name=SilverScreen}
So, as we see, all the values defaulted accordingly apart from name which we have explicitly specified as seen in the bottom most line.
Protobuf - Language Independence
Till now, we have been using Java to serialize and deserialize the Movie Theater data. However, one of the key features that Google Protobuf provides is "language independence". In this chapter, we will see how to serialize using Java and deserialize using Python.
Sample Proto file
syntax = "proto3";
package theater;
option java_package = "com.tutorialspoint.theater";

message Theater {
   string name = 1;
   string address = 2;

   int32 total_capcity = 3;
   int64 mobile = 4;
   float base_ticket_price = 5;

   bool drive_in = 6;

   enum PAYMENT_SYSTEM {
      CASH = 0;
      CREDIT_CARD = 1;
      DEBIT_CARD = 2;
      APP = 3;
   }
   PAYMENT_SYSTEM payment = 7;
   repeated string snacks = 8;
   map<string, int32> movieTicketPrice = 9;
   TheaterOwner owner = 10;
}
message TheaterOwner{
   string name = 1;
   string address = 2;
}
Serialization using Java
To use Protobuf with Java, we will now have to use protoc binary to create the required classes from this ".proto" file. Let us see how to do that −
protoc --java_out=java/src/main/java proto_files\theater.proto
The above command should create the required files and now we can use it in our Java code. First, we will create a writer to write the theater information −
package com.tutorialspoint.theater;

import java.io.FileOutputStream;
import java.io.IOException;
import java.util.ArrayList;
import java.util.HashMap;
import java.util.List;
import java.util.Map;
import com.tutorialspoint.theater.TheaterOuterClass.Theater;
import com.tutorialspoint.theater.TheaterOuterClass.TheaterOwner;
import com.tutorialspoint.theater.TheaterOuterClass.Theater.PAYMENT_SYSTEM;

public class TheaterWriterComplete{
   public static void main(String[] args) throws IOException {
      TheaterOwner owner = TheaterOwner.newBuilder()
         .setName("Anthony Gonsalves")
         .setAddress("513, St Paul Street, West Coast, California")
         .build();

      List<String> snacks = new ArrayList<>();
      snacks.add("Popcorn");
      snacks.add("Coke");
      snacks.add("Chips");
      snacks.add("Soda");

      Map<String, Integer> ticketPrice = new HashMap<>();
      ticketPrice.put("Avengers Endgame", 700);
      ticketPrice.put("Captain America", 200);
      ticketPrice.put("Wonder Woman 1984", 400);

      Theater theater = Theater.newBuilder()
         .setName("Silver Screener")
         .setAddress("212, Maple Street, LA, California")
         .setDriveIn(true)
         .setTotalCapcity(320)
         .setMobile(98234567189L)
         .setBaseTicketPrice(22.45f)
         .setPayment(PAYMENT_SYSTEM.CREDIT_CARD)
         .putAllMovieTicketPrice(ticketPrice)
         .addAllSnacks(snacks)
         .setOwner(owner)
         .build();

      String filename = "theater_protobuf_output";
      System.out.println("Saving theater information to file: " + filename);

      try(FileOutputStream output = new FileOutputStream(filename)){
         theater.writeTo(output);
      }
      System.out.println("Saved theater information with following data to disk: \n" + theater);
   }
}
Now, post compilation, let us execute the writer first −
> java -cp .\target\protobuf-tutorial-1.0.jar com.tutorialspoint.theater.TheaterWriter

Saving theater information to file: theater_protobuf_output
Saved theater information with following data to disk:
name: "Silver Screener"
address: "212, Maple Street, LA, California"
total_capcity: 320
mobile: 98234567189
base_ticket_price: 22.45
drive_in: true
payment: CREDIT_CARD
snacks: "Popcorn"
snacks: "Coke"
snacks: "Chips"
snacks: "Soda"
movieTicketPrice {
   key: "Avengers Endgame"
   value: 700
}
movieTicketPrice {
   key: "Captain America"
   value: 200
}
movieTicketPrice {
   key: "Wonder Woman 1984"
   value: 400
}
owner {
   name: "Anthony Gonsalves"
   address: "513, St Paul Street, West Coast, California"
}
Deserialization using Python
Next, we will have a reader to read the theater information −
package com.tutorialspoint.theater;

import java.io.FileInputStream;
import java.io.FileOutputStream;
import java.io.IOException;
import java.util.Map;
import com.google.protobuf.DescriptorProtos.FileDescriptorProto;
import com.google.protobuf.Descriptors.FieldDescriptor;
import com.google.protobuf.Descriptors.FileDescriptor;
import com.tutorialspoint.greeting.Greeting.Greet;
import com.tutorialspoint.theater.TheaterOuterClass.Theater;
import com.tutorialspoint.theater.TheaterOuterClass.Theater.Builder;

public class TheaterReaderExplicit {
   public static void main(String[] args) throws IOException {
      Builder theaterBuilder = Theater.newBuilder();

      String filename = "theater_protobuf_output";
      System.out.println("Reading from file " + filename);

      try(FileInputStream input = new FileInputStream(filename)) {
         Theater theater = theaterBuilder.mergeFrom(input).build();
         System.out.println(
            "Name:" + theater.getName() + "\n" +
            "Address:" + theater.getAddress() + "\n" +
            "Drive_In:" + theater.getDriveIn() + "\n" +
            "Total Capacity:" + theater.getTotalCapcity() + "\n" +
            "Base Ticket Prices: " + theater.getBaseTicketPrice() + "\n" +
            "Owner: " + theater.getOwner() + "\n" +
            "Snacks: " + theater.getSnacksList() + "\n" +
            "Payment: " + theater.getPayment()
         );

         //Map<FieldDescriptor, Object> f = theater.getAllFields();
         System.out.println("List of fields explicitly specified: " + theater.getAllFields());
      }
   }
}
Output
Saving theater information to file: theater_protobuf_output
Saved theater information with following data to disk:
name: "SilverScreen"
To use Protobuf with Python, we will now have to use protoc binary to create the required classes from this ".proto" file. Let us see how to do that −
protoc --python_out=python proto_files\theater.proto
The above command should create the required files and now we can use it in our Python code. Now, let us write a Python reader −
from proto_files import theater_pb2
from pathlib import Path
path = Path()

filename = str(path.parent.absolute().parent.joinpath("java").joinpath("theater_protobuf_output"));
print("Reading from file: " + filename)

theater = theater_pb2.Theater()

f = open(filename, "rb")
theater.ParseFromString(f.read())
f.close()

print("Read greeting from disk: \n" + str(theater))
We read the theater_protobuf_output file which is generated in the Java directory. Now, let us execute the code −
python theaterReader.py

Reading from file: google-protobuf\java\theater_protobuf_output
Read greeting from disk:
name: "Silver Screener"
address: "212, Maple Street, LA, California"
total_capcity: 320
mobile: 98234567189
base_ticket_price: 22.45
drive_in: true
payment: CREDIT_CARD
snacks: "Popcorn"
snacks: "Coke"
snacks: "Chips"
snacks: "Soda"
movieTicketPrice {
   key: "Avengers Endgame"
   value: 700
}
movieTicketPrice {
   key: "Captain America"
   value: 200
}
movieTicketPrice {
   key: "Wonder Woman 1984"
   value: 400
}
owner {
   name: "Anthony Gonsalves"
   address: "513, St Paul Street, West Coast, California"
}
So, as we see, all the values which were written by the Java client were correctly deserialized and read by our Python client which effectively means Protobuf is language independent.
Protobuf - Compound Data Types
There are two more compound data types which may be useful for complicated use cases. They are "OneOf" and "Any". In this chapter, we will see how to use these two data types of Protobuf.
OneOf
We pass a few parameters to this OneOf data type and Protobuf ensures that only one of them is set. If we set one of them and try to set the other one, the first attribute gets reset. Let's us understand this via an example.
Continuing with our theater example, say, we have an API which is used to fetch the count of available employees. The value returned from this API is then set to 'count' tag in the following file. But if that API errors out, we can't really 'count', instead we attach the error log.
Ideally, we will always have one of them set, i.e., either the call is successful and we get the count OR the count calculation fails and we get the error message.
Following is the syntax that we need to have to instruct Protobuf that we will be creating an OneOf attribute −
syntax = "proto3";
package theater;
option java_package = "com.tutorialspoint.theater";

message Theater {
   string name = 1;
   string address = 2;

   repeated google.protobuf.Any peopleInside = 3;

   oneof availableEmployees {
      int32 count = 4;
      string errorLog = 5;
   }
}
Now our class/message contains an OneOf attribute, i.e., information about the available employees.
To use Protobuf, we will have to use protoc binary to create the required classes from this ".proto" file. Let us see how to do that −
protoc --java_out=java/src/main/java proto_files\theater_advanced.proto
The above command should create the required files and now we can use it in our Java code. First, we will create a writer to write the theater information −
package com.tutorialspoint.theater;

import java.util.List;
import java.io.FileOutputStream;
import java.io.IOException;
import java.util.ArrayList;
import com.google.protobuf.Any;
import com.tutorialspoint.theater.TheaterAdvanced.Employee;
import com.tutorialspoint.theater.TheaterAdvanced.Viewer;
import com.tutorialspoint.theater.TheaterAdvanced.Theater;

public class TheaterWriterComplex{
   public static void main(String[] args) throws IOException {
      List<Any> people = new ArrayList<>();
      people.add(Any.pack(Employee.newBuilder().setName("John").build()));
      people.add(Any.pack(Viewer.newBuilder().setName("Jane").setAge(30).build()));
      people.add(Any.pack(Employee.newBuilder().setName("Simon").build()));
      people.add(Any.pack(Viewer.newBuilder().setName("Janice").setAge(25).build()));

      Theater theater = Theater.newBuilder()
         .setName("SilverScreen")
         .addAllPeopleInside(people)
         .build();

      String filename = "theater_protobuf_output_silver";
      System.out.println("Saving theater information to file: " + filename);

      try(FileOutputStream output = new FileOutputStream(filename)){
         theater.writeTo(output);
      }

      System.out.println("Saved theater information with following data to disk: \n" + theater);
   }
}
Next, we will have a reader to read the theater information −
package com.tutorialspoint.theater;

import java.io.FileInputStream;
import java.io.IOException;
import com.google.protobuf.Any;
import com.tutorialspoint.theater.TheaterAdvanced.Theater;
import com.tutorialspoint.theater.TheaterAdvanced.Theater.AvailableEmployeesCase;
import com.tutorialspoint.theater.TheaterAdvanced.Theater.Builder;
import com.tutorialspoint.theater.TheaterAdvanced.Viewer;
import com.tutorialspoint.theater.TheaterAdvanced.Employee;

public class TheaterReaderComplex{
   public static void main(String[] args) throws IOException {

      Builder theaterBuilder = Theater.newBuilder();

      String filename = "theater_protobuf_output_silver";
      System.out.println("Reading from file " + filename);

      try(FileInputStream input = new FileInputStream(filename)) {
         Theater theater = theaterBuilder.mergeFrom(input).build();
         System.out.println("Name:" + theater.getName() + "\n");

         for (Any anyPeople : theater.getPeopleInsideList()) {
            if(anyPeople.is(Employee.class)) {
               Employee employee = anyPeople.unpack(Employee.class);
               System.out.println("Employee:" + employee + "\n");
            }

            if(anyPeople.is(Viewer.class)) {
               Viewer viewer = anyPeople.unpack(Viewer.class);
               System.out.println("Viewer:" + viewer + "\n");
            }
         }
      }
   }
}
Now, post compilation, let us execute the writer first −
> java -cp .\target\protobuf-tutorial-1.0.jar com.tutorialspoint.theater.TheaterWriter

Saving theater information to file: theater_protobuf_output_silver
Saved theater information with following data to disk:
name: "SilverScreen"
peopleInside {
   type_url: "type.googleapis.com/theater.Employee"
   value: "\n\004John"
}
peopleInside {
   type_url: "type.googleapis.com/theater.Viewer"
   value: "\n\004Jane\020\036"
}
peopleInside {
   type_url: "type.googleapis.com/theater.Employee"
   value: "\n\005Simon"
}
peopleInside {
   type_url: "type.googleapis.com/theater.Viewer"
   value: "\n\006Janice\020\031"
}
Now, let us execute the reader to read from the same file −
java -cp .\target\protobuf-tutorial-1.0.jar com.tutorialspoint.theater.TheaterReader

Reading from file theater_protobuf_output_silver
Name:SilverScreen

Employee:name: "John"

Viewer:name: "Jane"
age: 30

Employee:name: "Simon"

Viewer:name: "Janice"
age: 25
So, as we see, in the list, we are able to figure out the Any type and find the respective underlying datatype employee/viewer. Let us now look at defaults and AnyOf.
Any
The next data type that can be of use for complicated uses cases is Any. We can pass any type/message/class to this data type and Protobuf would not complain. Let us understand this via an example.
Continuing with the theater example, say, we want to track people inside the theater. Some of them could be employees and others could be viewers. But ultimately they are people, so we will pass them in a single list which would contain both the types.
Following is the syntax that we need to have to instruct Protobuf that we will be creating a list −
syntax = "proto3";
package theater;
option java_package = "com.tutorialspoint.theater";

import "google/protobuf/any.proto";

message Theater {
   string name = 1;
   string address = 2;

   repeated google.protobuf.Any peopleInside = 3;
}
message Employee{
   string name = 1;
   string address = 2;
}
message Viewer{
   string name = 1;
   int32 age = 2;
   string sex = 3;
}
Now our class/message contains an Any attribute 'peopleInside' list along with Viewer and Employee class, i.e., information about the people inside theater. Let us see this in action.
To use Protobuf, we will now have to use protoc binary to create the required classes from this ".proto" file. Let us see how to do that −
protoc --java_out=java/src/main/java proto_files\theater_advanced.proto
The above command should create the required files and now we can use it in our Java code. First, we will create a writer to write the theater information −
package com.tutorialspoint.theater;

import java.util.List;
import java.io.FileOutputStream;
import java.io.IOException;
import java.util.ArrayList;

import com.google.protobuf.Any;
import com.tutorialspoint.theater.TheaterAdvanced.Employee;
import com.tutorialspoint.theater.TheaterAdvanced.Viewer;
import com.tutorialspoint.theater.TheaterAdvanced.Theater;

public class TheaterWriter{
   public static void main(String[] args) throws IOException {

   List<Any> people = new ArrayList<>();
   people.add(Any.pack(Employee.newBuilder().setName("John").build()));
   people.add(Any.pack(Viewer.newBuilder().setName("Jane").setAge(30).build()));
   people.add(Any.pack(Employee.newBuilder().setName("Simon").build()));
   people.add(Any.pack(Viewer.newBuilder().setName("Janice").setAge(25).build()));

   Theater theater = Theater.newBuilder()
      .setName("SilverScreen")
      .addAllPeopleInside(people)
      .build();

      String filename = "theater_protobuf_output_silver";
      System.out.println("Saving theater information to file: " + filename);

      try(FileOutputStream output = new FileOutputStream(filename)){
         theater.writeTo(output);
      }

      System.out.println("Saved theater information with following data to disk: \n" + theater);
   }
}
Next, we will have a reader to read the theater information −
package com.tutorialspoint.theater;

import java.io.FileInputStream;
import java.io.IOException;
import com.google.protobuf.Any;
import com.tutorialspoint.theater.TheaterAdvanced.Theater;
import com.tutorialspoint.theater.TheaterAdvanced.Theater.AvailableEmployeesCase;
import com.tutorialspoint.theater.TheaterAdvanced.Theater.Builder;
import com.tutorialspoint.theater.TheaterAdvanced.Viewer;
import com.tutorialspoint.theater.TheaterAdvanced.Employee;

public class TheaterReaderComplex{
   public static void main(String[] args) throws IOException {
	   Builder theaterBuilder = Theater.newBuilder();

      String filename = "theater_protobuf_output_silver";
      System.out.println("Reading from file " + filename);

      try(FileInputStream input = new FileInputStream(filename)) {
         Theater theater = theaterBuilder.mergeFrom(input).build();

         System.out.println("Name:" + theater.getName() + "\n");

         for (Any anyPeople : theater.getPeopleInsideList()) {
            if(anyPeople.is(Employee.class)) {
               Employee employee = anyPeople.unpack(Employee.class);
               System.out.println("Employee:" + employee + "\n");
            }

            if(anyPeople.is(Viewer.class)) {
               Viewer viewer = anyPeople.unpack(Viewer.class);
               System.out.println("Viewer:" + viewer + "\n");
            }
         }
      }
   }
}
Now, post compilation, let us execute the writer first −
> java -cp .\target\protobuf-tutorial-1.0.jar com.tutorialspoint.theater.TheaterWriter

Saving theater information to file: theater_protobuf_output_silver
Saved theater information with following data to disk:
name: "SilverScreen"
peopleInside {
   type_url: "type.googleapis.com/theater.Employee"
   value: "\n\004John"
}
peopleInside {
   type_url: "type.googleapis.com/theater.Viewer"
   value: "\n\004Jane\020\036"
}
peopleInside {
   type_url: "type.googleapis.com/theater.Employee"
   value: "\n\005Simon"
}
peopleInside {
   type_url: "type.googleapis.com/theater.Viewer"
   value: "\n\006Janice\020\031"
}
Note − There are two points to note −
In case of Any, Protobuf packs/serializes the contents inside any tag to bytes and then stores it as 'value'. Basically, that allows us to send any message type with this 'Any' tag.
We also see "type.googleapis.com/theater.Viewer" and "type.googleapis.com/theater.Employee". This is used by Protobuf to save the type of object along with the data as the type of data in the Any data type can vary.
Now let us execute the reader to read from the same file −
java -cp .\target\protobuf-tutorial-1.0.jar com.tutorialspoint.theater.TheaterReader

Reading from file theater_protobuf_output_silver
Name:SilverScreen

Employee:name: "John"

Viewer:name: "Jane"
age: 30

Employee:name: "Simon"

Viewer:name: "Janice"
age: 25
So, as we see, our reader code is successfully able to differentiate between Employee and the Viewer, even though they come in the same array.
Protobuf - Command Line Usage
Protobuf serializes the data and stores it in a binary format. While this may not be a problem if we are dealing simply with strings, because ultimately Protobuf uses UTF-8. So, any text that it stores would be human readable if you are using a UTF8 enabled reader. However, things like int32, Boolean, list, maps are encoded using specific techniques to reduce space consumption.
That is why, at times, encoding/decoding a message via simple command line utility is useful for testing purposes. Let us see this in action −
Suppose we use the following simple "greeting_cli.proto" −
syntax = "proto3";
package tutorial;
option java_package = "com.tutorialspoint.greeting";

message Greet {
   string greeting = 1;
   string username = 2;
   int32 age = 3;
}
And we create a message in cli_greeting_message −
greeting: "Yo"
username : "John"
age : 50
Now, let us encode this message using Protobuf CLI tool −
cat .\cli_greeting_msg.proto | protoc --encode=tutorial.Greet .\greeting_cli.proto > encoded_greeting
If we look at what is inside this file or cat this file −
cat .\encoded_greeting

☻Yo↕♦John↑2
You will notice some weird characters apart from "Yo" and "John". That is because these encoding may not be a valid unicode/UTF-8 encoding. UTF-8 is what is used, generally speaking, at most of the places. And this is used for string in case of Protobuf, but ints, maps, Boolean, list have separate formats. Plus, this file also contains a metadata of the data.
That is why, we need a decoder/deserializer to read this data. Let us use that.
cat .\encoded_greeting | protoc --decode=tutorial.Greet .\greeting_cli.proto

greeting: "Yo"
username : "John"
age : 50
So, as we see, we are able to get the data back which was serialized and looked weird in the file.
Protobuf - Rules to Update Definition
Assume you came out with the definition of the proto file that you will use in the production environment. There will obviously be times in future when this definition would have to change. In that case, it is essential that the changes we make adhere to certain rules so that the changes are backwards compatible. Let us see this in action with a few do's and dont's.
Add a new field in the writer, while the reader retains the older version of code.
Suppose, you decide to add a new field. Ideally, to have the new field to be added, we will have to update the writer and the reader simultaneously. However, in a large-scale deployment, this is not possible. There will be cases where the writer has been updated, but the reader is yet to be updated with the new field. This is where the above situation occurs. Let us see that in action.
Continuing with our theater example, say, we just have a single tag which is 'name' in our proto file. Following is the syntax that we need to have to instruct Protobuf −
syntax = "proto3";
package theater;
option java_package = "com.tutorialspoint.theater";

message Theater {
   string name = 1;
}
To use Protobuf, we will now have to use the protoc binary to create the required classes from this ".proto" file. Let us see how to do that −
protoc --java_out=java/src/main/java proto_files\theater.proto
The above command should create the required files and now we can use it in our Java code. First, we will create a writer to write the theater information −
package com.tutorialspoint.theater;
package com.tutorialspoint.theater;

import java.io.FileOutputStream;
import java.io.IOException;
import com.tutorialspoint.theater.TheaterOuterClass.Theater;

public class TheaterWriter{
   public static void main(String[] args) throws IOException {
      Theater theater = Theater.newBuilder()
         .setName("Silver Screener")
         .build();

      String filename = "theater_protobuf_output";
      System.out.println("Saving theater information to file: " + filename);

      try(FileOutputStream output = new FileOutputStream(filename)){
         theater.writeTo(output);
      }

      System.out.println("Saved theater information with following data to disk: \n" + theater);
   }
}
Next, we will have a reader to read the theater information −
package com.tutorialspoint.theater;

import java.io.FileInputStream;
import java.io.FileOutputStream;
import java.io.IOException;
import com.google.protobuf.ProtocolStringList;
import com.tutorialspoint.greeting.Greeting.Greet;
import com.tutorialspoint.theater.TheaterOuterClass.Theater;
import com.tutorialspoint.theater.TheaterOuterClass.Theater.Builder;

public class TheaterReader{
   public static void main(String[] args) throws IOException {

      Builder theaterBuilder = Theater.newBuilder();

      String filename = "theater_protobuf_output";
      System.out.println("Reading from file " + filename);

      try(FileInputStream input = new FileInputStream(filename)) {
         Theater theater = theaterBuilder.mergeFrom(input).build();
         System.out.println(theater);
         System.out.println("Unknwon fields: " + theater.getUnknownFields());
      }
   }
}
Now, post compilation, let us execute the writer first −
> java -cp .\target\protobuf-tutorial-1.0.jar com.tutorialspoint.theater.TheaterWriter

Saving theater information to file: theater_protobuf_output
Saved theater information with following data to disk:
name: "Silver Screener"
Now let us execute the reader to read from the same file −
java -cp .\target\protobuf-tutorial-1.0.jar com.tutorialspoint.theater.TheaterReader

Reading from file theater_protobuf_output
name: "Silver Screener"
Unknown Fields
We just wrote a simple string as per our Protobuf definition and the reader was able to read the string. And we also saw that there were no unknown fields that the reader was not aware of.
But now, let us suppose we want add a new string 'address' to our Protobuf definition. Now, it will look like this −
syntax = "proto3";
package theater;
option java_package = "com.tutorialspoint.theater";

message Theater {
   string name = 1;
   string address = 2;
}
We will also update our writer and add an address field −
Theater theater = Theater.newBuilder()
   .setName("Silver Screener")
   .setAddress("212, Maple Street, LA, California")
   .build();
Before compiling, rename the JAR from the previous compilation to protobuf-tutorial-old-1.0.jar. And then compile.
Now, post compilation, let us execute the writer first −
> java -cp .\target\protobuf-tutorial-1.0.jar com.tutorialspoint.theater.TheaterWriter

Saving theater information to file: theater_protobuf_output
Saved theater information with following data to disk:
name: "Silver Screener"
address: "212, Maple Street, LA, California"
Now let us execute the reader to read from the same file but from the older JAR −
java -cp .\target\protobuf-tutorial-old-1.0.jar com.tutorialspoint.theater.TheaterReader

Reading from file theater_protobuf_output
Reading from file theater_protobuf_output
name: "Silver Screener"
2: "212, Maple Street, LA, California"

Unknown fields: 2: "212, Maple Street, LA, California"
As you can see from the last line of the output, the old reader is unaware of the address field which was added by the new writer. It just shows how a combination of "new writer - old reader" functions.
Deleting a Field
Suppose, you decide to delete an existing field. Ideally, for the deleted field to have an effect immediately, we will have to update the writer and the reader simultaneously. However, in a large-scale deployment, this is not possible. There will be cases where the writer has been updated, but the reader is yet to be updated. In such a case, the reader will still attempt to read the deleted field. Let us see that in action.
Continuing with the theater example, say, we just have two tags in our proto file. Following is the syntax that we need to have to instruct Protobuf −
syntax = "proto3";
package theater;
option java_package = "com.tutorialspoint.theater";

message Theater {
   string name = 1;
   string address = 2;
}
To use Protobuf we will now have to use the protoc binary to create the required classes from this ".proto" file. Let us see how to do that −
protoc --java_out=java/src/main/java proto_files\theater.proto
The above command should create the required files and now we can use it in our Java code. First, we will create a writer to write the theater information −
package com.tutorialspoint.theater;

import java.io.FileOutputStream;
import java.io.IOException;
import com.tutorialspoint.theater.TheaterOuterClass.Theater;

public class TheaterWriter{
   public static void main(String[] args) throws IOException {
      Theater theater = Theater.newBuilder()
         .setName("Silver Screener")
         .setAddress("212, Maple Street, LA, California")
         .build();

      String filename = "theater_protobuf_output";
      System.out.println("Saving theater information to file: " + filename);

      try(FileOutputStream output = new FileOutputStream(filename)){
         theater.writeTo(output);
      }

      System.out.println("Saved theater information with following data to disk: \n" + theater);
   }
}
Next, we will have a reader to read the theater information −
package com.tutorialspoint.theater;

import java.io.FileInputStream;
import java.io.FileOutputStream;
import java.io.IOException;
import com.google.protobuf.ProtocolStringList;
import com.tutorialspoint.greeting.Greeting.Greet;
import com.tutorialspoint.theater.TheaterOuterClass.Theater;
import com.tutorialspoint.theater.TheaterOuterClass.Theater.Builder;

public class TheaterReader{
   public static void main(String[] args) throws IOException {
      Builder theaterBuilder = Theater.newBuilder();

      String filename = "theater_protobuf_output";
      System.out.println("Reading from file " + filename);

      try(FileInputStream input = new FileInputStream(filename)) {
         Theater theater = theaterBuilder.mergeFrom(input).build();
         System.out.println(theater);
         System.out.println("Unknwon fields: " + theater.getUnknownFields());
      }
   }
}
Now, post compilation, let us execute the writer first −
> java -cp .\target\protobuf-tutorial-1.0.jar com.tutorialspoint.theater.TheaterWriter

Saving theater information to file: theater_protobuf_output
Saved theater information with following data to disk:
name: "Silver Screener"
address: "212, Maple Street, LA, California"
Now let us execute the reader to read from the same file −
java -cp .\target\protobuf-tutorial-1.0.jar com.tutorialspoint.theater.TheaterReader

Reading from file theater_protobuf_output
name: "Silver Screener"
address: "212, Maple Street, LA, California"
So, nothing new here, we just wrote a simple string as per our Protobuf definition and the reader was able to read the string.
But now, let us suppose we want to delete the string 'address' from our Protobuf definition. So, the definition would look like this −
syntax = "proto3";
package theater;
option java_package = "com.tutorialspoint.theater";

message Theater {
   string name = 1;
}
We will also update our writer as follows −
Theater theater = Theater.newBuilder()
   .setName("Silver Screener")
   .build();
Before compiling, rename the JAR from the previous compilation to protobuf-tutorial-old-1.0.jar. And then compile.
Now, post compilation, let us execute the writer first −
> java -cp .\target\protobuf-tutorial-1.0.jar com.tutorialspoint.theater.TheaterWriter

Saving theater information to file: theater_protobuf_output
Saved theater information with following data to disk:
name: "Silver Screener"
Now let us execute the reader to read from the same file but from the older JAR −
java -cp .\target\protobuf-tutorial-old-1.0.jar com.tutorialspoint.theater.TheaterReader

Reading from file theater_protobuf_output
Reading from file theater_protobuf_output
name: "Silver Screener"
address:
As you can see from the last line of the output, the old reader defaults to the value of "address". It shows how a combination of "new writer - old reader" functions.
Avoid Reusing Serial Number of the Field
There may be cases where, by mistake, we update the "serial number" of a field. This can be problematic, as the serial number is very critical for Protobuf to understand and deserialize the data. And some old reader may be relying on this serial number to deserialize the data. So, it is recommended that you −
Do not change serial number of field
Do not reuse serial number of deleted field.
Let us see that in action by interchanging the field tags.
Continuing with the theater example, let's assume we just have two tags in our proto file. Following is the syntax that we need to have to instruct Protobuf −
syntax = "proto3";
package theater;
option java_package = "com.tutorialspoint.theater";

message Theater {
   string name = 1;
   string address = 2;
}
To use Protobuf, we will now have to use the protoc binary to create the required classes from this ".proto" file. Let us see how to do that −
protoc --java_out=java/src/main/java proto_files\theater.proto
The above command should create the required files and now we can use it in our Java code. First, we will create a writer to write the theater information −
package com.tutorialspoint.theater;

import java.io.FileOutputStream;
import java.io.IOException;
import com.tutorialspoint.theater.TheaterOuterClass.Theater;

public class TheaterWriter{
   public static void main(String[] args) throws IOException {
      Theater theater = Theater.newBuilder()
         .setName("Silver Screener")
         .setAddress("212, Maple Street, LA, California")
         .build();

      String filename = "theater_protobuf_output";
      System.out.println("Saving theater information to file: " + filename);

      try(FileOutputStream output = new FileOutputStream(filename)){
         theater.writeTo(output);
      }
      System.out.println("Saved theater information with following data to disk: \n" + theater);
   }
}
Next, we will have a reader to read the theater information −
package com.tutorialspoint.theater;

import java.io.FileInputStream;
import java.io.FileOutputStream;
import java.io.IOException;
import com.google.protobuf.ProtocolStringList;
import com.tutorialspoint.greeting.Greeting.Greet;
import com.tutorialspoint.theater.TheaterOuterClass.Theater;
import com.tutorialspoint.theater.TheaterOuterClass.Theater.Builder;

public class TheaterReader{
   public static void main(String[] args) throws IOException {
      Builder theaterBuilder = Theater.newBuilder();
      String filename = "theater_protobuf_output";
      System.out.println("Reading from file " + filename);

      try(FileInputStream input = new FileInputStream(filename)) {
         Theater theater = theaterBuilder.mergeFrom(input).build();
         System.out.println(theater);
         System.out.println("Unknwon fields: " + theater.getUnknownFields());
      }
   }
}
Now, post compilation, let us execute the writer first −
> java -cp .\target\protobuf-tutorial-1.0.jar com.tutorialspoint.theater.TheaterWriter

Saving theater information to file: theater_protobuf_output
Saved theater information with following data to disk:
name: "Silver Screener"
address: "212, Maple Street, LA, California"
Next, let us execute the reader to read from the same file −
java -cp .\target\protobuf-tutorial-1.0.jar com.tutorialspoint.theater.TheaterReader

Reading from file theater_protobuf_output
name: "Silver Screener"
address: "212, Maple Street, LA, California"
Here, we just wrote simple strings as per our Protobuf definition and the reader was able to read the string. But now, let us interchange the serial number in our Protobuf definition and to make it like this −
syntax = "proto3";
package theater;
option java_package = "com.tutorialspoint.theater";

message Theater {
   string name = 2;
   string address = 1;
}
Before compiling, rename the JAR from previous compilation to protobuf-tutorial-old-1.0.jar. And then compile.
Now, post compilation, let us execute the writer first −
> java -cp .\target\protobuf-tutorial-1.0.jar com.tutorialspoint.theater.TheaterWriter

Saving theater information to file: theater_protobuf_output
Saved theater information with following data to disk:
address: "212, Maple Street, LA, California"
name: "Silver Screener"
Now let us execute the reader to read from the same file but from the older JAR −
java -cp .\target\protobuf-tutorial-old-1.0.jar com.tutorialspoint.theater.TheaterReader

Reading from file theater_protobuf_output
name: "212, Maple Street, LA, California"
address: "Silver Screener"
As you can see from the output, the old reader interchanged the address and the name. It shows that updating the serial number along with a combination of "new writer-old reader" does not function as expected.
More importantly, here we had two strings, which is why we get to see the data. If we had used different data types, for example, int32, Boolean, map, etc., Protobuf would have given up and treated that as an unknown field.
So, it is imperative to not change the serial number of a field or reuse the serial number of a deleted field.
Changing the Field Type
There may be cases where we need to update the type of an attribute/field. Protobuf has certain compatibility rules for this. Not all the types can be converted to other types. Few basic ones to be aware of −
string and bytes are compatible if the bytes are UTF-8. This is because, strings are anyways encoded/decoded as UTF-8 by Protobuf.
enum is compatible with int32 and int64 in terms of the value, however, the client may not deserialize this as expected.
int32, int64 (unsigned also) along with bool are compatible and thus can be interchanged. Excessive characters may get truncated similar to how casting works in languages.
But we need to be very careful when changing types. Let us see that in action with an incorrect example of converting int64 to int32.
Continuing with the theater example, suppose we just have two tags in our proto file. Following is the syntax that we need to have to instruct Protobuf −
syntax = "proto3";
package theater;
option java_package = "com.tutorialspoint.theater";
message Theater {
   string name = 1;
   int64 total_capacity = 2;
}
To use Protobuf, we will now have to use the protoc binary to create the required classes from this ".proto" file. Let us see how to do that −
protoc --java_out=java/src/main/java proto_files\theater.proto
The above command should create the required files and now we can use it in our Java code. First, we will create a writer to write the theater information −
package com.tutorialspoint.theater;

import java.io.FileOutputStream;
import java.io.IOException;
import com.tutorialspoint.theater.TheaterOuterClass.Theater;

public class TheaterWriter{
   public static void main(String[] args) throws IOException {
      Theater theater = Theater.newBuilder()
         .setName("Silver Screener")
         .setTotalCapacity(2300000000L)
         .build();

      String filename = "theater_protobuf_output";
      System.out.println("Saving theater information to file: " + filename);

      try(FileOutputStream output = new FileOutputStream(filename)){
         theater.writeTo(output);
      }

      System.out.println("Saved theater information with following data to disk: \n" + theater);
   }
}
Now, post compilation, let us execute the writer first −
> java -cp .\target\protobuf-tutorial-1.0.jar com.tutorialspoint.theater.TheaterWriter

Saving theater information to file: theater_protobuf_output
Saved theater information with following data to disk:
name: "Silver Screener"
total_capacity: 2300000000
Let us suppose, we use a different version of proto file for the reader −
syntax = "proto3";
package theater;
option java_package = "com.tutorialspoint.theater";

message Theater {
   string name = 1;
   int64 total_capacity = 2;
}
Next, we will have a reader to read the theater information −
package com.tutorialspoint.theater;

import java.io.FileInputStream;
import java.io.FileOutputStream;
import java.io.IOException;
import com.google.protobuf.ProtocolStringList;
import com.tutorialspoint.greeting.Greeting.Greet;
import com.tutorialspoint.theater.TheaterOuterClass.Theater;
import com.tutorialspoint.theater.TheaterOuterClass.Theater.Builder;

public class TheaterReader{
   public static void main(String[] args) throws IOException {
      Builder theaterBuilder = Theater.newBuilder();

      String filename = "theater_protobuf_output";
      System.out.println("Reading from file " + filename);

      try(FileInputStream input = new FileInputStream(filename)) {
         Theater theater = theaterBuilder.mergeFrom(input).build();
         System.out.println(theater);
         System.out.println("Unknwon fields: " + theater.getUnknownFields());
      }
   }
}
Now let us execute the reader to read from the same file −
java -cp .\target\protobuf-tutorial-old-1.0.jar com.tutorialspoint.theater.TheaterReader

Reading from file theater_protobuf_output
name: "Silver Screener"
address: "212, Maple Street, LA, California"
So, nothing new here, we just wrote simple strings as per our Protobuf definition and the reader was able to read the string. But now, let us interchange the serial number in our Protobuf definition and make it like this −
syntax = "proto3";
package theater;
option java_package = "com.tutorialspoint.theater";

message Theater {
   string name = 2;
   int32 total_capacity = 2;
}
Before compiling, rename the JAR from previous compilation to protobuf-tutorial-old-1.0.jar. And then compile.
Now, post compilation, let us execute the writer first −
> java -cp .\target\protobuf-tutorial-1.0.jar com.tutorialspoint.theater.TheaterWriter

Reading from file theater_protobuf_output
address: "Silver Screener"
total_capcity: -1994967296
As you can see from the output, the old reader converted the number from int64, however, the given int32 does not have enough space to contain the data, it wrapped around to negative number. This wrapping is Java specific and is not related to Protobuf.
So, we need to upgrade to int64 from int32 instead of other way around. If we still want to convert from int64 to int32, we need to ensure that the values can be actually held in 31 bits (1 bit for sign bit).
Protobuf - Integration with Kafka
We have covered quite a lot of examples of Protobuf and its data types. In this chapter, let us take another example and see how Protobuf integrates with a Schema Registry used by Kafka. Let us first understand what a "schema registry" is.
Schema Registry
Kafka is one of the widely used messaging queues. It is used to apply the publisher-subscriber model at scale. More information about Kafka can be found here − https://www.tutorialspoint.com/apache_kafka/index.htm
However, at the basic level, a Kafka producer is supposed to send a message, i.e., a piece of information which the Kafka consumer can read. And this sending and consuming of message is where we need a schema. It is especially required in large-scale organization where there are multiple teams reading/writing to Kafka topic. Kafka provides a way to store this schema in a schema registry which are then created/consumed when the producer/consumer creates/consumes the message.
There are two major benefits of maintaining a schema −
Compatibility − In larger organizations, it is necessary that the team producing the message does not break the downstream tools which consume these messages. Schema registry ensures that changes are backwards compatible.
Efficient encoding − Sending in a field name, its type with every message is space and compute inefficient. With schemas in place, we do not need to send this information with each message.
The schema registry supports Avro, Google Protobuf and JSON Schema as the schema language. The schema in these languages can be stored in the schema registry. For this tutorial, we would require Kafka setup and Schema registry setup.
For installation of Kafka, you can check the following links −
Once you have Kafka installed, you can then setup the Schema Registry by updating the /etc/schema-registry/schema-registry.properties file.
# where should schema registry listen on
listeners=http://0.0.0.0:8081

# Schema registry uses Kafka beneath it, so we need to tell where are the Kafka brokers available
kafkastore.bootstrap.servers=PLAINTEXT://hostname:9092,SSL://hostname2:9092
Once done, you can then run:
sudo systemctl start confluent-schema-registry
With the setup out of the way, let us start using Google Protobuf along with the Schema Registry.
Kafka Producer with Protobuf Schema
Let us continue with our theater example. We will use the following Protobuf schema −
syntax = "proto3";
package theater;
option java_package = "com.tutorialspoint.theater";

message Theater {
   string name = 1;
   string address = 2;

   int32 total_capcity = 3;
   int64 mobile = 4;
   float base_ticket_price = 5;

   bool drive_in = 6;

   enum PAYMENT_SYSTEM{
      CASH = 0;
      CREDIT_CARD = 1;
      DEBIT_CARD = 2;
      APP = 3;
   }
   PAYMENT_SYSTEM payment = 7;
   repeated string snacks = 8;

   map<string, int32> movieTicketPrice = 9;
}
Now, let us create a simple Kafka writer which would write the message encoded in this format to the Kafka topic. But for doing that, first, we need to add a few dependencies to our Maven POM −
Kafka Client to use Kafka producer and consumer
Kafka Protobuf serializer to serialize and deserialize the message
Slf4j simple to ensure we get logs from Kafka
<dependency>
   <groupId>org.apache.kafka</groupId>
   <artifactId>kafka-clients</artifactId>
   <version>2.5.0</version>
</dependency>

<!-- https://mvnrepository.com/artifact/io.confluent/kafka-protobuf-serializer -->
<dependency>
   <groupId>io.confluent</groupId>
   <artifactId>kafka-protobuf-serializer</artifactId>
   <version>5.5.1</version>
</dependency>

<!-- https://mvnrepository.com/artifact/org.slf4j/slf4j-simple -->
<dependency>
   <groupId>org.slf4j</groupId>
   <artifactId>slf4j-simple</artifactId>
   <version>1.7.30</version>
</dependency>
Once this is done, let us now create a Kafka producer. This producer will create and send a message which will contain the theater object.
package com.tutorialspoint.kafka;

import java.util.ArrayList;
import java.util.HashMap;
import java.util.List;
import java.util.Map;
import java.util.Properties;
import org.apache.kafka.clients.producer.Producer;
import org.apache.kafka.clients.producer.KafkaProducer;
import org.apache.kafka.clients.producer.ProducerRecord;
import com.tutorialspoint.theater.TheaterOuterClass.Theater;
import com.tutorialspoint.theater.TheaterOuterClass.Theater.PAYMENT_SYSTEM;

public class KafkaProtbufProducer {
   public static void main(String[] args) throws Exception{
      String topicName = "testy1";
      Properties props = new Properties();
      props.put("bootstrap.servers", "localhost:9092");
      props.put("clientid", "foo");
      props.put("key.serializer", "org.apache.kafka.common.serialization.StringSerializer");
      props.put("value.serializer", "io.confluent.kafka.serializers.protobuf.KafkaProtobufSerializer");
      props.put("schema.registry.url", "http://localhost:8081");
      props.put("auto.register.schemas", "true");

      Producer<String, Theater> producer = new KafkaProducer<>(props);
      producer.send(new ProducerRecord<String, Theater>(topicName, "SilverScreen", getTheater())).get();
      System.out.println("Sent to Kafka: \n" + getTheater());
      producer.flush();
      producer.close();
   }
   public static Theater getTheater() {
      List<String> snacks = new ArrayList<>();
      snacks.add("Popcorn");
      snacks.add("Coke");
      snacks.add("Chips");
      snacks.add("Soda");

      Map<String, Integer> ticketPrice = new HashMap<>();
      ticketPrice.put("Avengers Endgame", 700);
      ticketPrice.put("Captain America", 200);
      ticketPrice.put("Wonder Woman 1984", 400);

      Theater theater = Theater.newBuilder()
         .setName("Silver Screener")
         .setAddress("212, Maple Street, LA, California")
         .setDriveIn(true)
         .setTotalCapacity(320)
         .setMobile(98234567189L)
         .setBaseTicketPrice(22.45f)
         .setPayment(PAYMENT_SYSTEM.CREDIT_CARD)
         .putAllMovieTicketPrice(ticketPrice)
         .addAllSnacks(snacks)
         .build();
      return theater;
   }
}
Here is a list of a few points that we need to be aware of −
We need to pass the Schema Registry URL to the Producer.
We also need to pass the correct Protobuf Serializer which is specific to the Schema Registry.
Schema registry would automatically store the schema of the theater object when we are done sending.
Lastly, we created a theater object from our auto-generated Java code and that is what we will be sending.
Let us now compile and execute the code −
mvn clean install ; java -cp .\target\protobuf-tutorial-1.0.jar com.tutorialspoint.kafka.KafkaProtbufProducer
We will get to see the following output −
[main] INFO org.apache.kafka.common.utils.AppInfoParser - Kafka version: 2.5.0
[main] INFO org.apache.kafka.common.utils.AppInfoParser - Kafka commitId: 66563e712b0b9f84
[main] INFO org.apache.kafka.common.utils.AppInfoParser - Kafka startTimeMs: 1621692205607
[kafka-producer-network-thread | producer-1] INFO org.apache.kafka.clients.Metadata -
[Producer clientId=producer-1] Cluster ID: 7kwQVXjYSz--bE47MiXmjw
Sent to Kafka
name: "Silver Screener"
address: "212, Maple Street, LA, California"
total_capacity: 320
mobile: 98234567189
base_ticket_price: 22.45
drive_in: true
payment: CREDIT_CARD
snacks: "Popcorn"
snacks: "Coke"
snacks: "Chips"
snacks: "Soda"
movieTicketPrice {
   key: "Avengers Endgame"
   value: 700
}
movieTicketPrice {
   key: "Captain America"
   value: 200
}
movieTicketPrice {
   key: "Wonder Woman 1984"
   value: 400
}
[main] INFO org.apache.kafka.clients.producer.KafkaProducer -
[Producer clientId=producer-1] Closing the Kafka producer with timeoutMillis = 9223372036854775807 ms.
It means that our message has been sent.
Now, let us confirm that the schema has been stored in the Schema Registry.
curl -X GET http://localhost:8081/subjects | jq
And the output which is displayed is "topicName" + "key/value"
[
   "testy1-value"
]
We can also see the schema which is stored by the registry −
curl  -X GET http://localhost:8081/schemas/ids/1 | jq {
   "schemaType": "PROTOBUF",
   "schema": "syntax = \"proto3\";\npackage theater;\n\noption java_package = \"com.tutorialspoint.theater\";\n\nmessage Theater {
      \n  string name = 1;\n  string address = 2;\n  int64 total_capacity = 3;\n
      int64 mobile = 4;\n  float base_ticket_price = 5;\n  bool drive_in = 6;\n
      .theater.Theater.PAYMENT_SYSTEM payment = 7;\n  repeated string snacks = 8;\n
      repeated .theater.Theater.MovieTicketPriceEntry movieTicketPrice = 9;\n\n
      message MovieTicketPriceEntry {\n    option map_entry = true;\n  \n
      string key = 1;\n    int32 value = 2;\n  }\n  enum PAYMENT_SYSTEM {
         \n CASH = 0;\n    CREDIT_CARD = 1;\n    DEBIT_CARD = 2;\n    APP = 3;\n
      }\n
   }\n"
}
Kafka Consumer with Protobuf Schema
Let us now create a Kafka consumer. This consumer will consume the message which contains the theater object.
package com.tutorialspoint.kafka;
import java.util.ArrayList;
import java.util.HashMap;
import java.util.List;
import java.util.Map;
import java.util.Properties;
import org.apache.kafka.clients.producer.Producer;
import org.apache.kafka.clients.producer.KafkaProducer;
import org.apache.kafka.clients.producer.ProducerRecord;
import com.tutorialspoint.theater.TheaterOuterClass.Theater;
import com.tutorialspoint.theater.TheaterOuterClass.Theater.PAYMENT_SYSTEM;

public class KafkaProtbufProducer {
   public static void main(String[] args) throws Exception{
      String topicName = "testy1";
      Properties props = new Properties();
      props.put("bootstrap.servers", "localhost:9092");
      props.put("clientid", "foo");
      props.put("key.serializer", "org.apache.kafka.common.serialization.StringSerializer");

      props.put("value.serializer", "io.confluent.kafka.serializers.protobuf.KafkaProtobufSerializer");
      props.put("schema.registry.url", "http://localhost:8081");
      props.put("auto.register.schemas", "true");
      Producer<String, Theater> producer = new KafkaProducer<>(props);
      producer.send(new ProducerRecord<String, Theater>(topicName, "SilverScreen", getTheater())).get();

      System.out.println("Sent to Kafka: \n" + getTheater());
      producer.flush();
      producer.close();
   }
   public static Theater getTheater() {
      List<String> snacks = new ArrayList<>();
      snacks.add("Popcorn");
      snacks.add("Coke");
      snacks.add("Chips");
      snacks.add("Soda");

      Map<String, Integer> ticketPrice = new HashMap<>();
      ticketPrice.put("Avengers Endgame", 700);
      ticketPrice.put("Captain America", 200);
      ticketPrice.put("Wonder Woman 1984", 400);

      Theater theater = Theater.newBuilder()
         .setName("Silver Screener")
         .setAddress("212, Maple Street, LA, California")
         .setDriveIn(true)
         .setTotalCapacity(320)
         .setMobile(98234567189L)
         .setBaseTicketPrice(22.45f)
         .setPayment(PAYMENT_SYSTEM.CREDIT_CARD)
         .putAllMovieTicketPrice(ticketPrice)
         .addAllSnacks(snacks)
         .build();
      return theater;
   }
}
Here is a list of points that we need to be aware of −
We need to pass the Schema Registry URL to the Consumer.
We also need to pass the correct Protobuf Deserializer which is specific to the Schema Registry.
The Schema Registry would automatically read the stored schema of the theater object when we are done consuming.
Lastly, we created a theater object from our auto-generated Java code and that is what we will be sending.
Let us now compile and execute the code −
mvn clean install ; java -cp .\target\protobuf-tutorial-1.0.jar com.tutorialspoint.kafka.KafkaProtbufConsumer

offset = 0, key = SilverScreen, value = May 22, 2021 7:50:15 PM com.google.protobuf.TextFormat$Printer$MapEntryAdapter compareTo
May 22, 2021 7:50:15 PM com.google.protobuf.TextFormat$Printer$MapEntryAdapter compareTo

name: "Silver Screener"
address: "212, Maple Street, LA, California"
total_capacity: 320
mobile: 98234567189
base_ticket_price: 22.45
drive_in: true
payment: CREDIT_CARD
snacks: "Popcorn"
snacks: "Coke"
snacks: "Chips"
snacks: "Soda"
movieTicketPrice {
   key: "Captain America"
   value: 200
}
movieTicketPrice {
   key: "Wonder Woman 1984"
   value: 400
}
movieTicketPrice {
   key: "Avengers Endgame"
   value: 700
}
So, as we can see, the message which was written into Kafka was correctly consumed by the Consumer. Plus, the Registry stored the schema which can also be accessed by a REST API.
Protobuf - In Other Languages
We have been using Protobuf in Java and Python. But there are multiple languages it supports including C++, C#, Kotlin, Dart, Go, etc. The basic stuff mostly remains the same, i.e., writing a proto schema, generating the source code via protoc binary which our code can use. Let us write a basic example for Go and Dart as part of this section.
We will use the following proto file −
syntax = "proto3";
package tutorial;
message Greet {
   string greeting = 1;
   string username = 2;
}
Using Google Protobuf in Go Lang
To use the above Protobuf file, we will first have to generate the code for the Greet class in Go language. For that, we need to do the following −
Install the Go Protobuf plugin (protoc-gen-go) which is a prerequisite for the protoc file which we have been using −
go install google.golang.org/protobuf/cmd/protoc-gen-go
Then, run the protoc with the provided ".proto" file and we will instruct it to generate the code under the "go" directory.
protoc --go_out=go proto_files/greeting.proto
Post execution of the above command, you will notice an auto-generated class − "greeting.pb.go". This class would help us with the serialization and deserialization of the Greet object.
Now, let us create the writer of the data, which will take the username and greeting as its input −
import "fmt"
import "io/ioutil"

func main() {
   greet := Greeting{}
   greet.username = "John"
   greet.greeting = "Hello"
   out, err := proto.Marshal(greet)

   ioutil.WriteFile("greeting_go_out", out , 0644)

   fmt.Println("Saved greeting with following data to disk:")
   fmt.Println(p)
}
Now let us create the reader which will read the file −
import "fmt"
import "io/ioutil"

func main() {
   in, err := ioutil.ReadFile("greeting_go_out")

   greet := &pb.Greet{}
   proto.Unmarshal(in, greet)

   fmt.Println("Reading from file greeting_protobuf_output:")
   fmt.Println(greet)
}
The reader simply reads from the same file, deserializes it, and prints the data about the greeting.
Now that we have setup the reader and the writer, let us compile the project.
Next, let us first execute the writer −
go run greeting_writer.go

Saved greeting with following data to disk:
{greeting: Hello, username: John}
Then, let us execute the reader −
go run greeting_reader.go

Reading from file greeting_protobuf_output
{greeting: Hello, username: John}
So, as we can see, the data that was serialized by the writer and saved to the file, that exact data is correctly deserialized by the reader and printed accordingly.
Using Google Protobuf in Dart
To use the above Protobuf file, we will first have to install and generate the code for the Greet class in Dart language. For that, we need to do the following −
Install the Dart Protobuf plugin (protoc-gen-go) which is the prerequisite for the protoc file which we have been using. https://github.com/dart-lang/protobuf/tree/master/protoc_plugin#how-to-build-and-use
Then, run the protoc with the provided ".proto" file and we will instruct it to generate the code under the "dart" directory.
protoc --go_out=dart proto_files/greeting.proto
Post execution of the above command, you will notice an auto-generated class − "greeting.pb.dart". This class would help us with the serialization and deserialization of the Greet object.
Now, let us create the writer of the data, which will take the username and greeting as its input −
import 'dart:io';
import 'dart/greeting.pb.dart';

main(List arguments) {
   Greeting greet = Greeting();
   greet.greeting = "Hello";
   greet.username = "John";

   File file = File("greeting_go_out");

   print("Saved greeting with following data to disk:")
   file.writeAsBytes(greet.writeToBuffer());
   print(greet)
}
Next, let us create a reader which will read the file −
import 'dart:io';
import 'dart/greeting.pb.dart';

main(List arguments) {
   File file = File("greeting_go_out");

   print("Reading from file greeting_protobuf_output:")
   Greeting greet = Greeting.fromBuffer(file.readAsBytesSync());
   print(greet)
}
The reader simply reads from the same file, deserializes it, and prints the data about the greeting.
Now that we have setup the reader and the writer, let us compile the project.
Next, let us first execute the writer −
dart run greeting_writer.dart

Saved greeting with following data to disk:
greeting: Hello
username: John
And then, let us execute the reader.
dart run greeting_reader.dart

Reading from file greeting_protobuf_output
greeting: Hello
username: John
So, as we can see, the data that was serialized by the writer and saved to the file, that exact data is correctly deserialized by the reader and printed accordingly.