- Jenkins Tutorial
- Jenkins - Home
- Jenkins - Overview
- Jenkins - Installation
- Jenkins - Tomcat Setup
- Jenkins - Git Setup
- Jenkins - Maven Setup
- Jenkins - Configuration
- Jenkins - Management
- Jenkins - Setup Build Jobs
- Jenkins - Unit Testing
- Jenkins - Automated Testing
- Jenkins - Notification
- Jenkins - Reporting
- Jenkins - Code Analysis
- Jenkins - Distributed Builds
- Jenkins - Automated Deployment
- Jenkins - Metrics and Trends
- Jenkins - Server Maintenance
- Jenkins - Continuous Deployment
- Jenkins - Managing Plugins
- Jenkins - Security
- Jenkins - Backup Plugin
- Jenkins - Remote Testing
- Jenkins Useful Resources
- Jenkins - Quick Guide
- Jenkins - Useful Resources
- Jenkins - Discussion
Jenkins - Quick Guide
Jenkins - Overview
Why Jenkins?
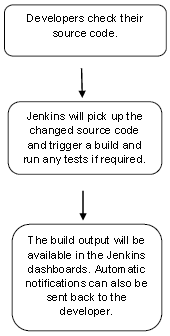
Jenkins is a software that allows continuous integration. Jenkins will be installed on a server where the central build will take place. The following flowchart demonstrates a very simple workflow of how Jenkins works.
Along with Jenkins, sometimes, one might also see the association of Hudson. Hudson is a very popular open-source Java-based continuous integration tool developed by Sun Microsystems which was later acquired by Oracle. After the acquisition of Sun by Oracle, a fork was created from the Hudson source code, which brought about the introduction of Jenkins.
What is Continuous Integration?
Continuous Integration is a development practice that requires developers to integrate code into a shared repository at regular intervals. This concept was meant to remove the problem of finding later occurrence of issues in the build lifecycle. Continuous integration requires the developers to have frequent builds. The common practice is that whenever a code commit occurs, a build should be triggered.
System Requirements
| JDK | JDK 1.5 or above |
| Memory | 2 GB RAM (recommended) |
| Disk Space | No minimum requirement. Note that since all builds will be stored on the Jenkins machines, it has to be ensured that sufficient disk space is available for build storage. |
| Operating System Version | Jenkins can be installed on Windows, Ubuntu/Debian, Red Hat/Fedora/CentOS, Mac OS X, openSUSE, FReeBSD, OpenBSD, Gentoo. |
| Java Container | The WAR file can be run in any container that supports Servlet 2.4/JSP 2.0 or later.(An example is Tomcat 5). |
Jenkins - Installation
Download Jenkins
The official website for Jenkins is Jenkins. If you click the given link, you can get the home page of the Jenkins official website as shown below.

By default, the latest release and the Long-Term support release will be available for download. The past releases are also available for download. Click the Long-Term Support Release tab in the download section.
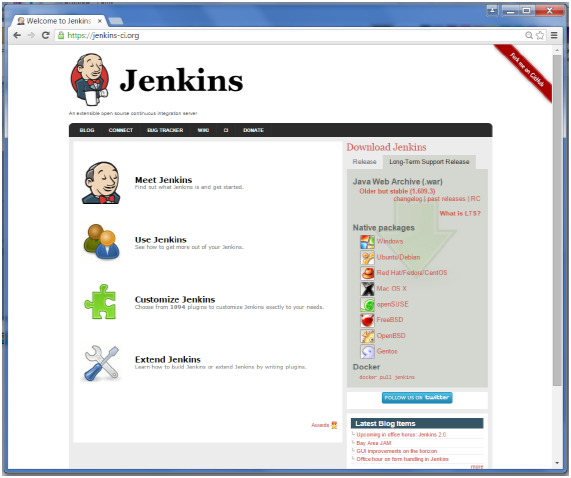
Click the link “Older but stable version” to download the Jenkins war file.
Starting Jenkins
Open the command prompt. From the command prompt, browse to the directory where the jenkins.war file is present. Run the following command
D:\>Java –jar Jenkins.war
After the command is run, various tasks will run, one of which is the extraction of the war file which is done by an embedded webserver called winstone.
D:\>Java –jar Jenkins.war
Running from: D:\jenkins.war
Webroot: $user.home/ .jenkins
Sep 29, 2015 4:10:46 PM winstone.Logger logInternal
INFO: Beginning extraction from war file
Once the processing is complete without major errors, the following line will come in the output of the command prompt.
INFO: Jenkins is fully up and running
Accessing Jenkins
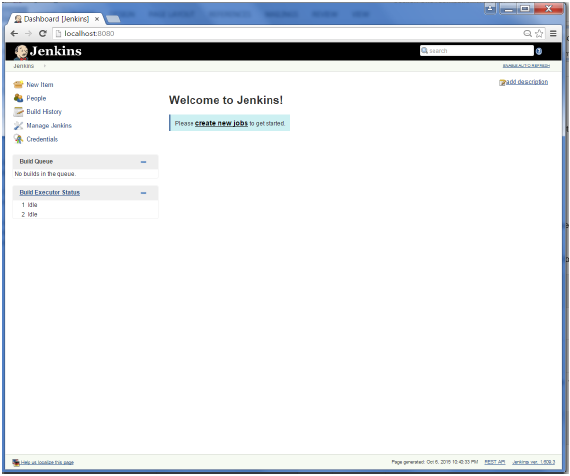
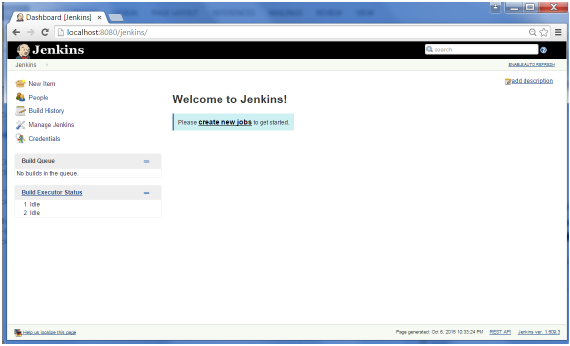
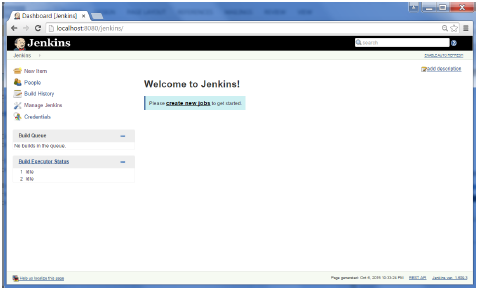
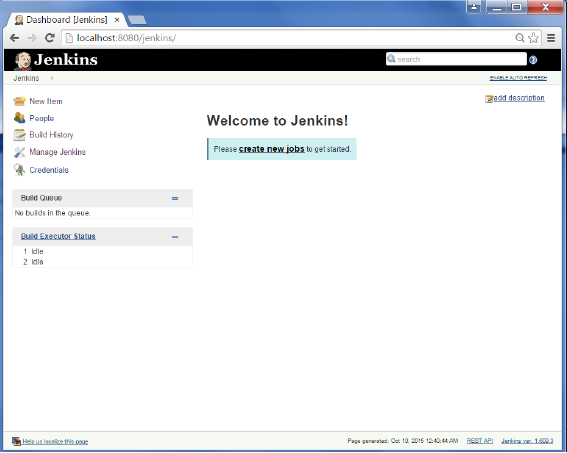
Once Jenkins is up and running, one can access Jenkins from the link − http://localhost:8080
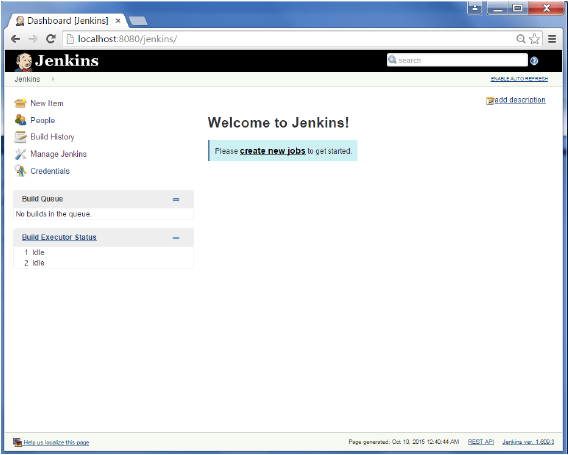
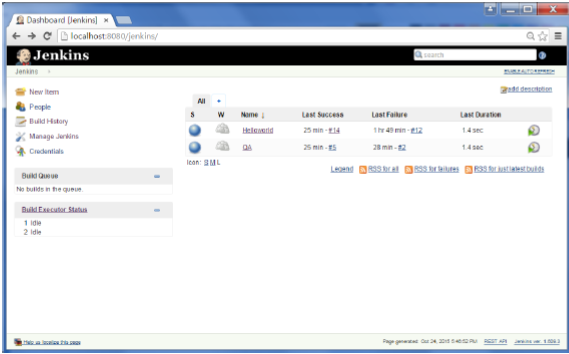
This link will bring up the Jenkins dashboard.
Jenkins – Tomcat Setup
The following prerequisites must be met for Jenkins Tomcat setup.
Step 1: Verifying Java Installation
To verify Java installation, open the console and execute the following java command.
| OS | Task | Command |
|---|---|---|
| Windows | Open command console | \>java –version |
| Linux | Open command terminal | $java –version |
If Java has been installed properly on your system, then you should get one of the following outputs, depending on the platform you are working on.
| OS | Output |
|---|---|
| Windows |
Java version "1.7.0_60" Java (TM) SE Run Time Environment (build 1.7.0_60-b19) Java Hotspot (TM) 64-bit Server VM (build 24.60-b09, mixed mode) |
| Linux |
java version "1.7.0_25" Open JDK Runtime Environment (rhel-2.3.10.4.el6_4-x86_64) Open JDK 64-Bit Server VM (build 23.7-b01, mixed mode) |
We assume the readers of this tutorial have Java 1.7.0_60 installed on their system before proceeding for this tutorial.
In case you do not have Java JDK, you can download it from the link Oracle
Step 2: Verifying Java Installation
Set the JAVA_HOME environment variable to point to the base directory location where Java is installed on your machine. For example,
| OS | Output |
|---|---|
| Windows | Set Environmental variable JAVA_HOME to C:\ProgramFiles\java\jdk1.7.0_60 |
| Linux | export JAVA_HOME=/usr/local/java-current |
Append the full path of the Java compiler location to the System Path.
| OS | Output |
|---|---|
| Windows | Append the String; C:\Program Files\Java\jdk1.7.0_60\bin to the end of the system variable PATH. |
| Linux | export PATH=$PATH:$JAVA_HOME/bin/ |
Verify the command java-version from command prompt as explained above.
Step 3: Download Tomcat
The official website for tomcat is Tomcat. If you click the given link, you can get the home page of the tomcat official website as shown below.
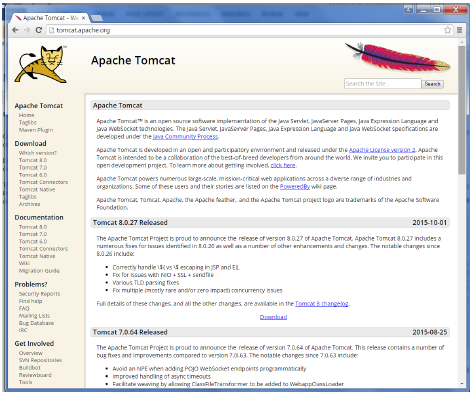
Browse to the link https://tomcat.apache.org/download-70.cgi to get the download for tomcat.
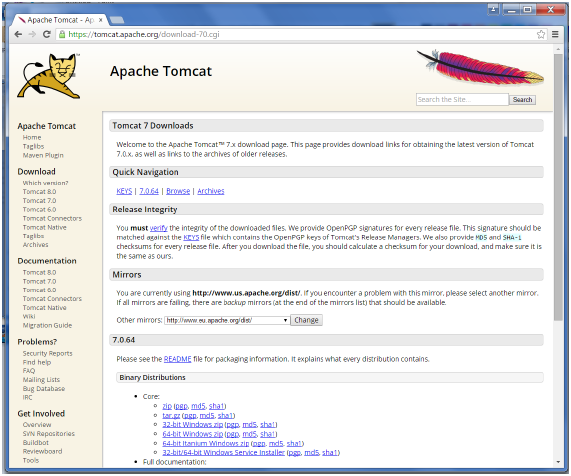
Go to the ‘Binary Distributions’ section. Download the 32-bit Windows zip file.
Then unzip the contents of the downloaded zip file.
Step 4: Jenkins and Tomcat Setup
Copy the Jenkis.war file which was downloaded from the previous section and copy it to the webapps folder in the tomcat folder.
Now open the command prompt. From the command prompt, browse to the directory where the tomcat7 folder is location. Browse to the bin directory in this folder and run the start.bat file
E:\Apps\tomcat7\bin>startup.bat
Once the processing is complete without major errors, the following line will come in the output of the command prompt.
INFO: Server startup in 1302 ms
Open the browser and go to the link − http://localhost:8080/jenkins. Jenkins will be up and running on tomcat.

Jenkins - Git Setup
For this exercise, you have to ensure that Internet connectivity is present from the machine on which Jenkins is installed. In your Jenkins Dashboard (Home screen), click the Manage Jenkins option on the left hand side.
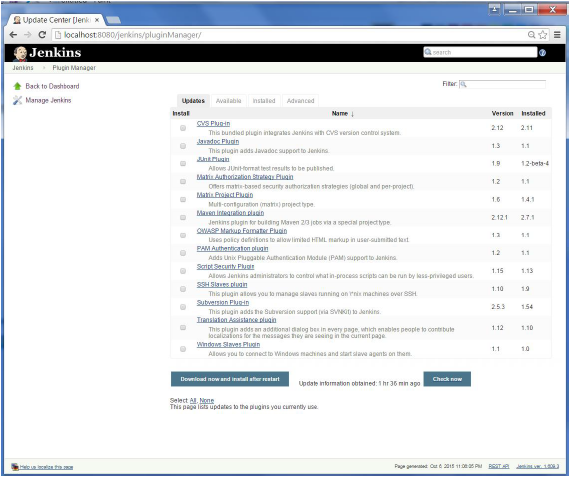
In the next screen, click the ‘Manage Plugins’ option.

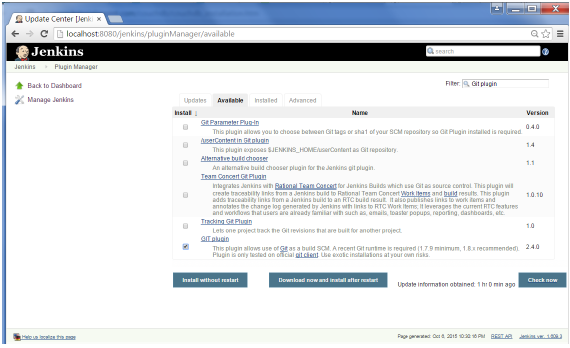
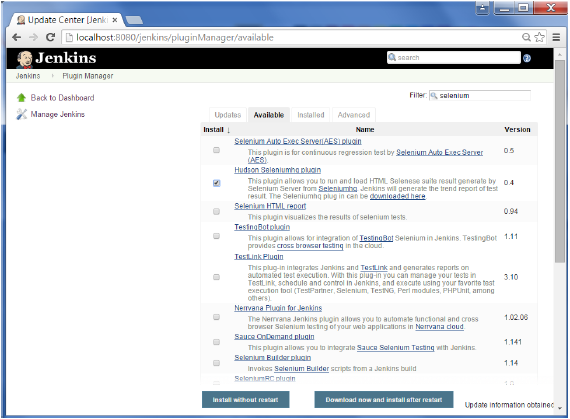
In the next screen, click the Available tab. This tab will give a list of plugins which are available for downloading. In the ‘Filter’ tab type ‘Git plugin’

The list will then be filtered. Check the Git Plugin option and click on the button ‘Install without restart’
The installation will then begin and the screen will be refreshed to show the status of the download.
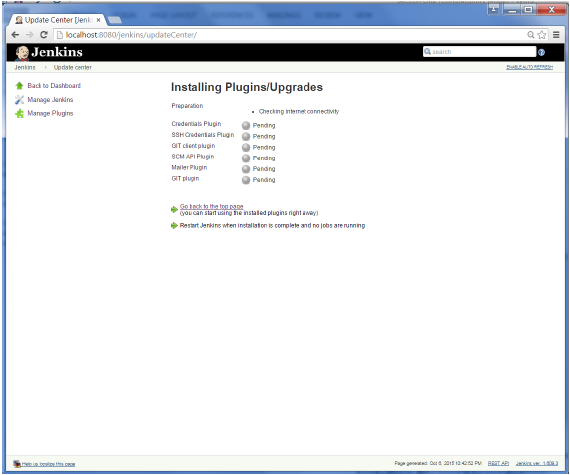
Once all installations are complete, restart Jenkins by issue the following command in the browser. http://localhost:8080/jenkins/restart
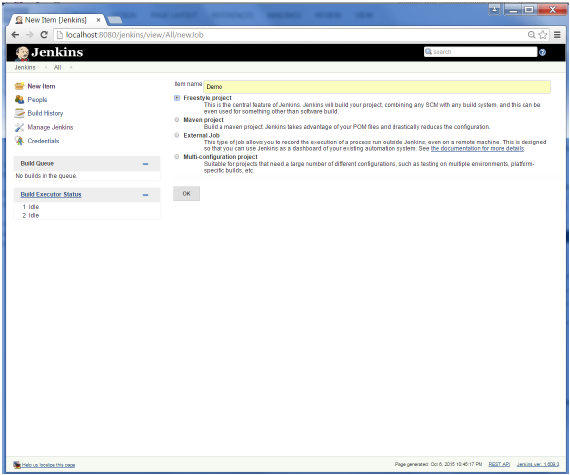
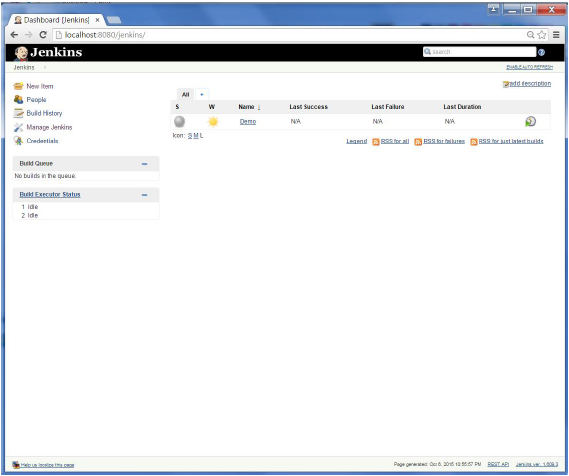
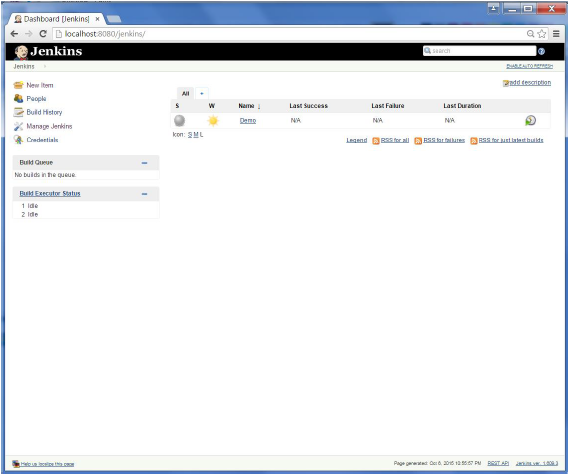
After Jenkins is restarted, Git will be available as an option whilst configuring jobs. To verify, click on New Item in the menu options for Jenkins. Then enter a name for a job, in the following case, the name entered is ‘Demo’. Select ‘Freestyle project’ as the item type. Click the Ok button.
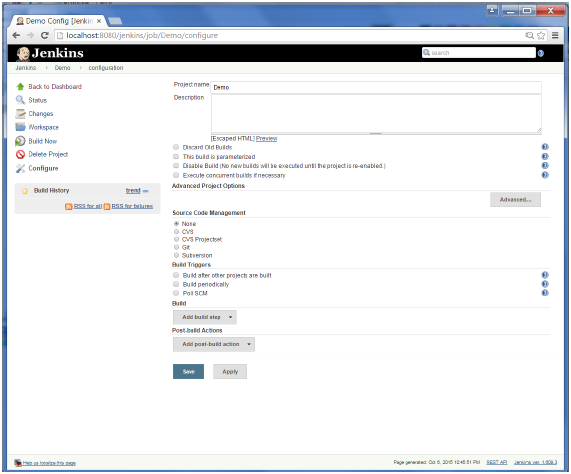
In the next screen, if you browse to the Source code Management section, you will now see ‘Git’ as an option.
Jenkins – Maven Setup
Step 1: Downloading and Setting Up Maven
The official website for maven is Apache Maven. If you click the given link, you can get the home page of the maven official website as shown below.
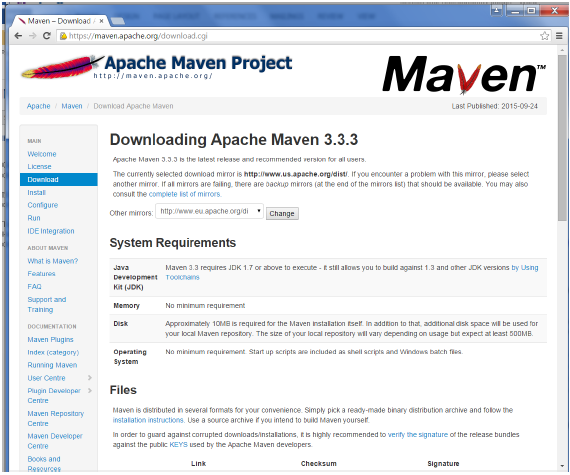
While browsing to the site, go to the Files section and download the link to the Binary.zip file.
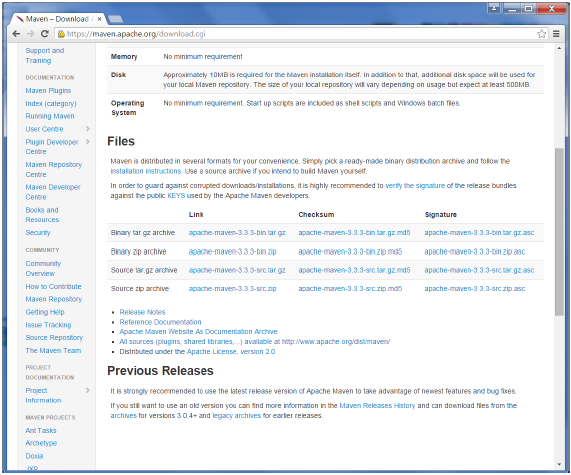
Once the file is downloaded, extract the files to the relevant application folder. For this purpose, the maven files will be placed in E:\Apps\apache-maven-3.3.3.
Step 2: Setting up Jenkins and Maven
In the Jenkins dashboard (Home screen), click Manage Jenkins from the left-hand side menu.
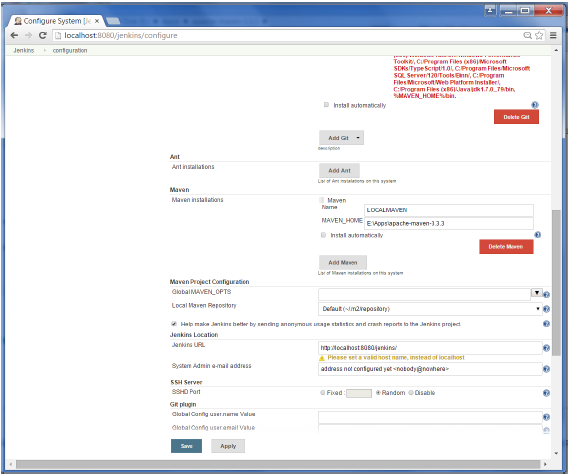
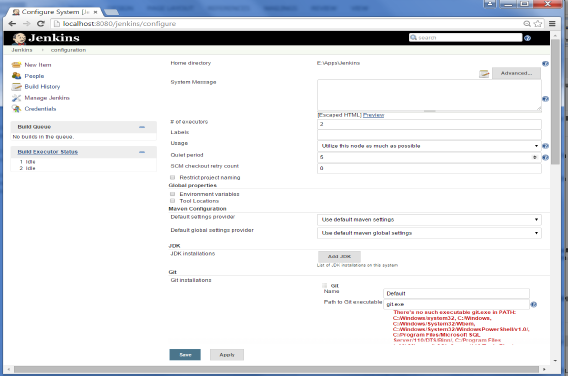
Then, click on ‘Configure System’ from the right hand side.
In the Configure system screen, scroll down till you see the Maven section and then click on the ‘Add Maven’ button.
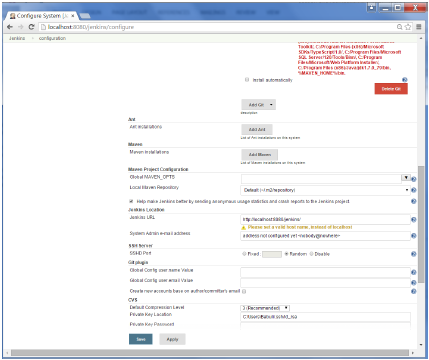
Uncheck the ‘Install automatically’ option.
Add any name for the setting and the location of the MAVEN_HOME.
Then, click on the ‘Save’ button at the end of the screen.
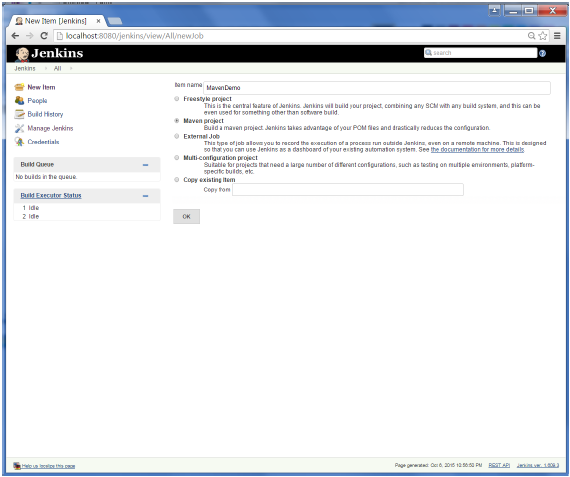
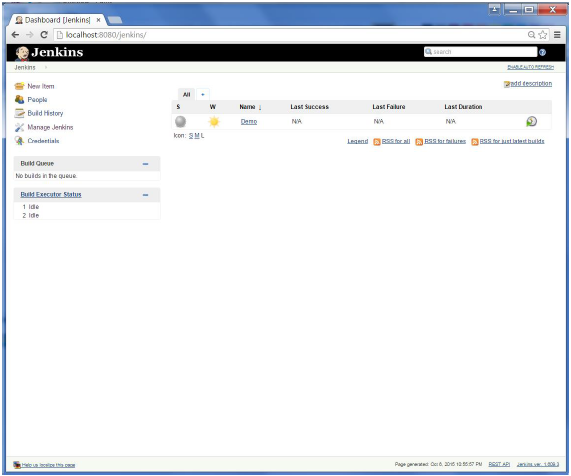
You can now create a job with the ‘Maven project’ option. In the Jenkins dashboard, click the New Item option.
Jenkins - Configuration
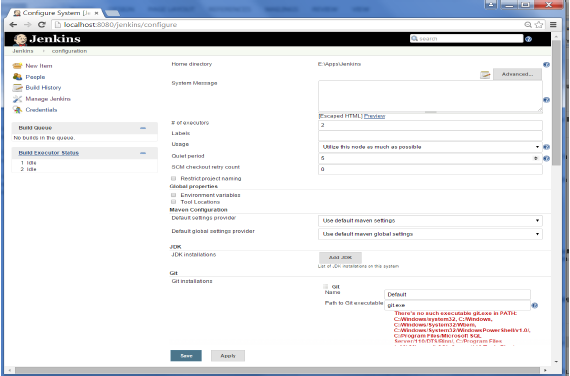
You probably would have seen a couple of times in the previous exercises wherein we had to configure options within Jenkins. The following shows the various configuration options in Jenkins.
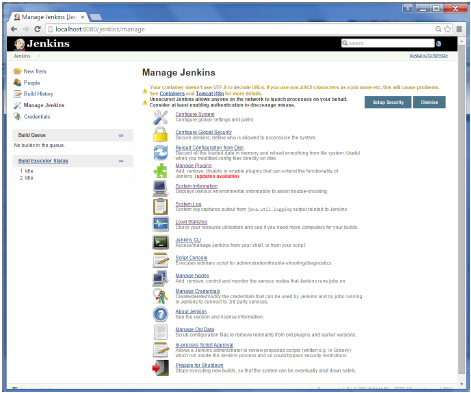
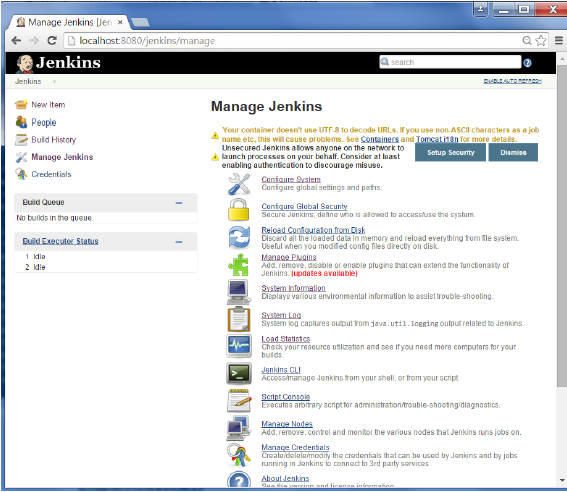
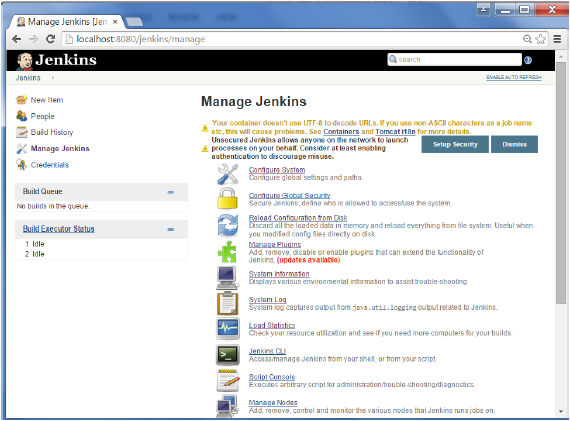
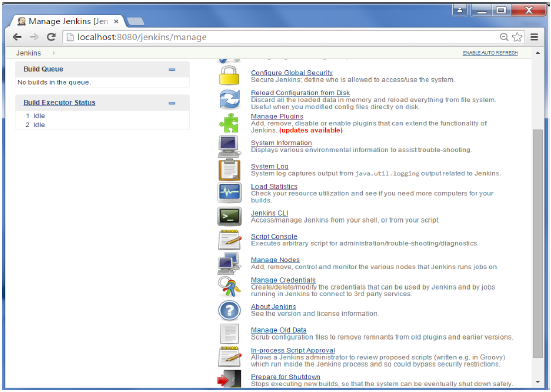
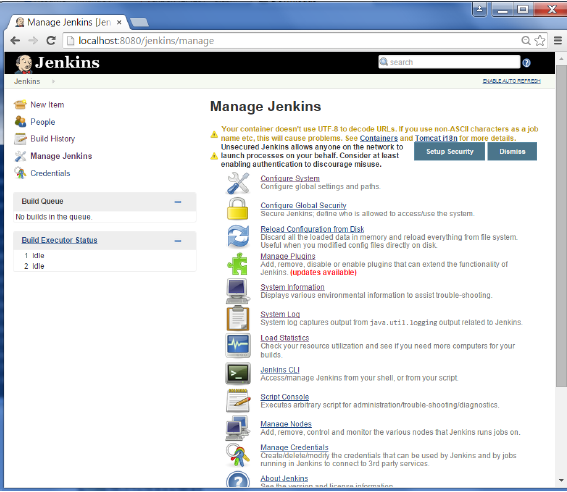
So one can get the various configuration options for Jenkins by clicking the ‘Manage Jenkins’ option from the left hand menu side.
You will then be presented with the following screen −

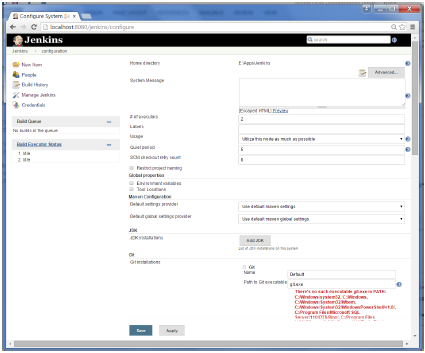
Click on Configure system. Discussed below are some of the Jenkins configuration settings which can be carried out.
Jenkins Home Directory
Jenkins needs some disk space to perform builds and keep archives. One can check this location from the configuration screen of Jenkins. By default, this is set to ~/.jenkins, and this location will initially be stored within your user profile location. In a proper environment, you need to change this location to an adequate location to store all relevant builds and archives. Once can do this in the following ways
Set "JENKINS_HOME" environment variable to the new home directory before launching the servlet container.
Set "JENKINS_HOME" system property to the servlet container.
Set JNDI environment entry "JENKINS_HOME" to the new directory.
The following example will use the first option of setting the "JENKINS_HOME" environment variable.
First create a new folder E:\Apps\Jenkins. Copy all the contents from the existing ~/.jenkins to this new directory.
Set the JENKINS_HOME environment variable to point to the base directory location where Java is installed on your machine. For example,
| OS | Output |
|---|---|
| Windows | Set Environmental variable JENKINS_HOME to you’re the location you desire. As an example you can set it to E:\Apps\Jenkins |
| Linux | export JENKINS_HOME =/usr/local/Jenkins or the location you desire. |
In the Jenkins dashboard, click Manage Jenkins from the left hand side menu. Then click on ‘Configure System’ from the right hand side.
In the Home directory, you will now see the new directory which has been configured.
# of executors
This refers to the total number of concurrent job executions that can take place on the Jenkins machine. This can be changed based on requirements. Sometimes the recommendation is to keep this number the same as the number of CPU on the machines for better performance.
Environment Variables
This is used to add custom environment variables which will apply to all the jobs. These are key-value pairs and can be accessed and used in Builds wherever required.
Jenkins URL
By default, the Jenkins URL points to localhost. If you have a domain name setup for your machine, set this to the domain name else overwrite localhost with IP of machine. This will help in setting up slaves and while sending out links using the email as you can directly access the Jenkins URL using the environment variable JENKINS_URL which can be accessed as ${JENKINS_URL}.
Email Notification
In the email Notification area, you can configure the SMTP settings for sending out emails. This is required for Jenkins to connect to the SMTP mail server and send out emails to the recipient list.
Jenkins - Management
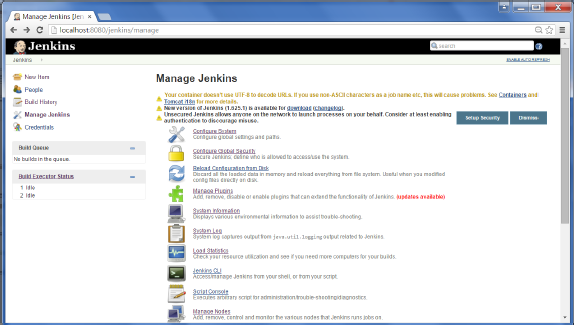
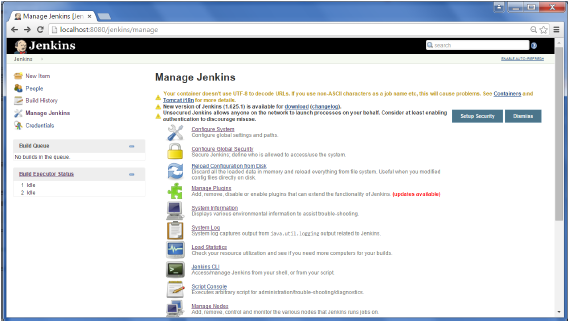
To manage Jenkins, click on the ‘Manage Jenkins’ option from the left hand menu side.
So one can get the various configuration options for Jenkins by clicking the ‘Manage Jenkins’ option from the left hand menu side.
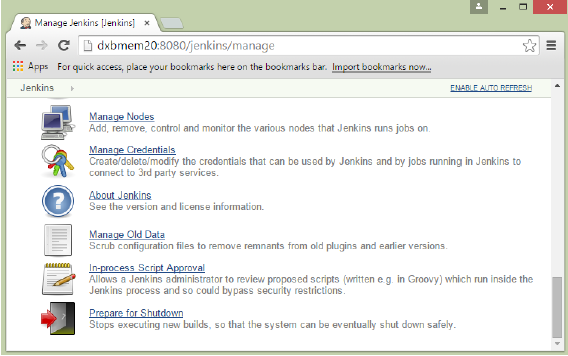
You will then be presented with the following screen −
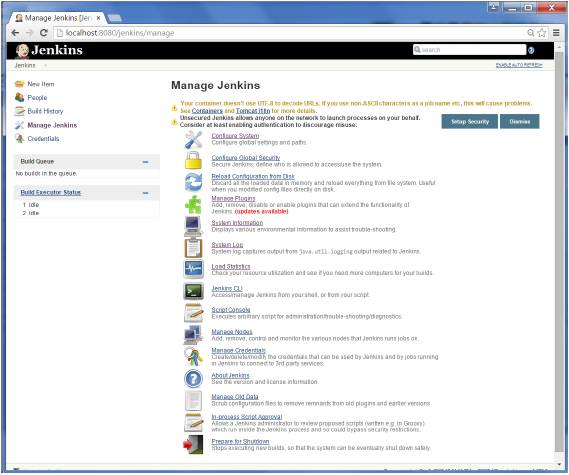
Some of the management options are as follows −
Configure System
This is where one can manage paths to the various tools to use in builds, such as the JDKs, the versions of Ant and Maven, as well as security options, email servers, and other system-wide configuration details. When plugins are installed. Jenkins will add the required configuration fields dynamically after the plugins are installed.
Reload Configuration from Disk
Jenkins stores all its system and build job configuration details as XML files which is stored in the Jenkins home directory. Here also all of the build history is stored. If you are migrating build jobs from one Jenkins instance to another, or archiving old build jobs, you will need to add or remove the corresponding build job directories to Jenkins’s builds directory. You don’t need to take Jenkins offline to do this—you can simply use the “Reload Configuration from Disk” option to reload the Jenkins system and build job configurations directly.
Manage Plugin
Here one can install a wide variety of third-party plugins right from different Source code management tools such as Git, Mercurial or ClearCase, to code quality and code coverage metrics reporting. Plugins can be installed, updated and removed through the Manage Plugins screen.
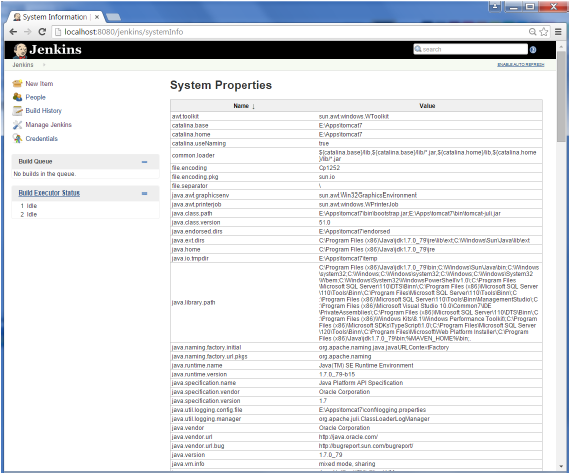
System Information
This screen displays a list of all the current Java system properties and system environment variables. Here one can check exactly what version of Java Jenkins is running in, what user it is running under, and so forth.
The following screenshot shows some of the name-value information available in this section.
System Log
The System Log screen is a convenient way to view the Jenkins log files in real time. Again, the main use of this screen is for troubleshooting.
Load Statistics
This pages displays graphical data on how busy the Jenkins instance is in terms of the number of concurrent builds and the length of the build queue which gives an idea of how long your builds need to wait before being executed. These statistics can give a good idea of whether extra capacity or extra build nodes is required from an infrastructure perspective.
Script Console
This screen lets you run Groovy scripts on the server. It is useful for advanced troubleshooting since it requires a strong knowledge of the internal Jenkins architecture.
Manage nodes
Jenkins is capable of handling parallel and distributed builds. In this screen, you can configure how many builds you want. Jenkins runs simultaneously, and, if you are using distributed builds, set up build nodes. A build node is another machine that Jenkins can use to execute its builds.
Prepare for Shutdown
If there is a need to shut down Jenkins, or the server Jenkins is running on, it is best not to do so when a build is being executed. To shut down Jenkins cleanly, you can use the Prepare for Shutdown link, which prevents any new builds from being started. Eventually, when all of the current builds have finished, one will be able to shut down Jenkins cleanly.
Jenkins - Setup Build Jobs
For this exercise, we will create a job in Jenkins which picks up a simple HelloWorld application, builds and runs the java program.
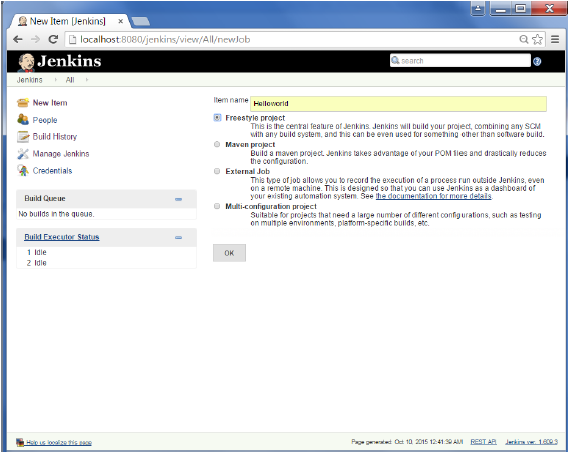
Step 1 − Go to the Jenkins dashboard and Click on New Item

Step 2 − In the next screen, enter the Item name, in this case we have named it Helloworld. Choose the ‘Freestyle project option’
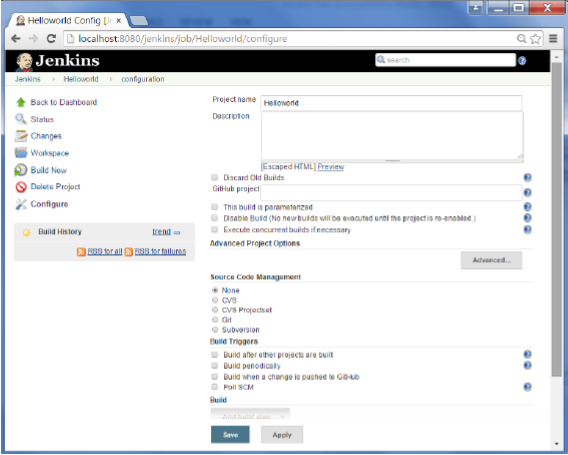
Step 3 − The following screen will come up in which you can specify the details of the job.
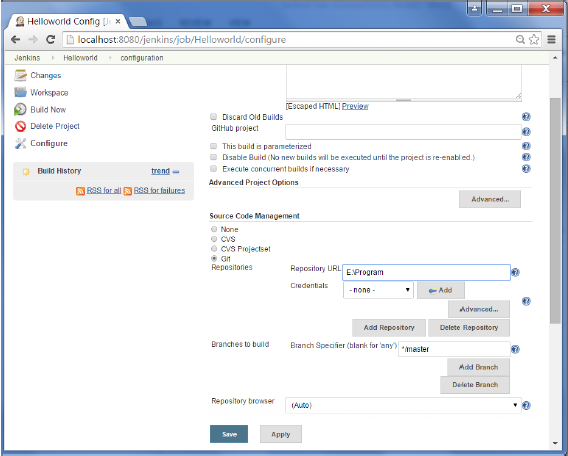
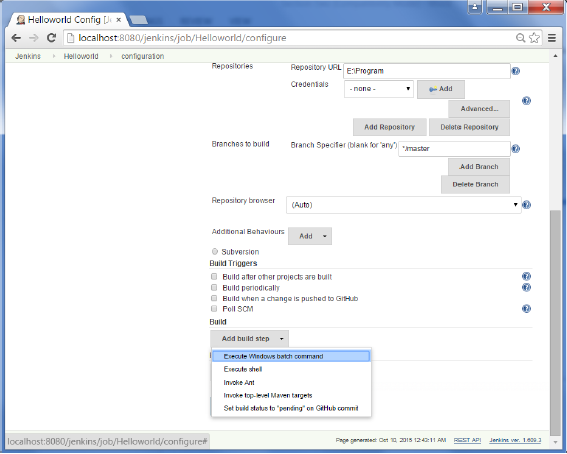
Step 4 − We need to specify the location of files which need to be built. In this example, we will assume that a local git repository(E:\Program) has been setup which contains a ‘HelloWorld.java’ file. Hence scroll down and click on the Git option and enter the URL of the local git repository.
Note − If you repository if hosted on Github, you can also enter the url of that repository here. In addition to this, you would need to click on the Add button for the credentials to add a user name and password to the github repository so that the code can be picked up from the remote repository.
Step 5 − Now go to the Build section and click on Add build step → Execute Windows batch command
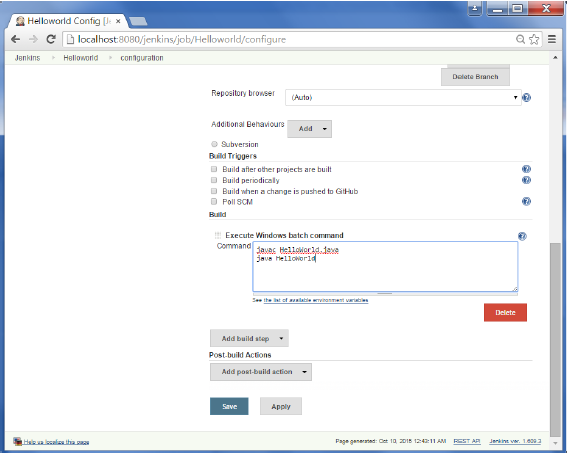
Step 6 − In the command window, enter the following commands and then click on the Save button.
Javac HelloWorld.java
Java HelloWorld
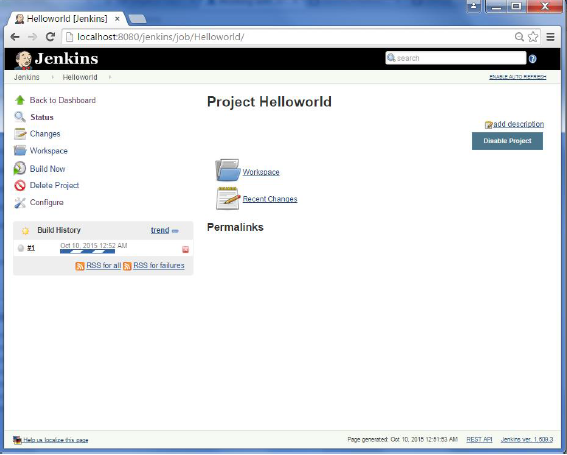
Step 7 − Once saved, you can click on the Build Now option to see if you have successfully defined the job.

Step 8 − Once the build is scheduled, it will run. The following Build history section shows that a build is in progress.
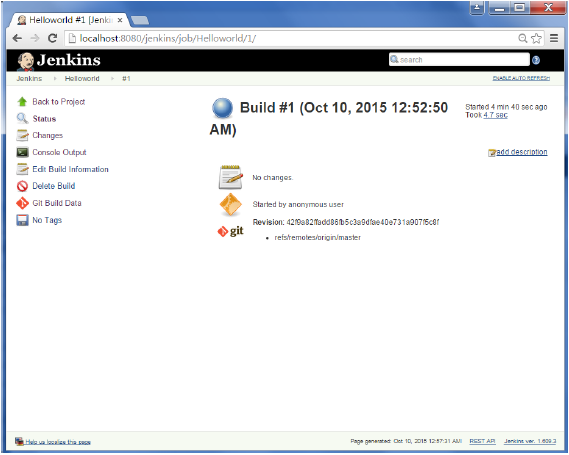
Step 9 − Once the build is completed, a status of the build will show if the build was successful or not. In our case, the following build has been executed successfully. Click on the #1 in the Build history to bring up the details of the build.
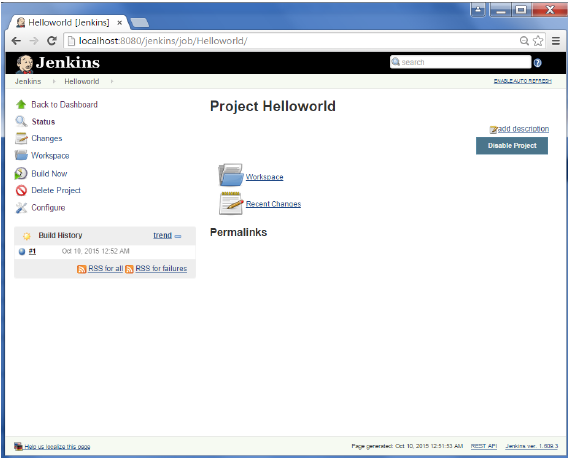
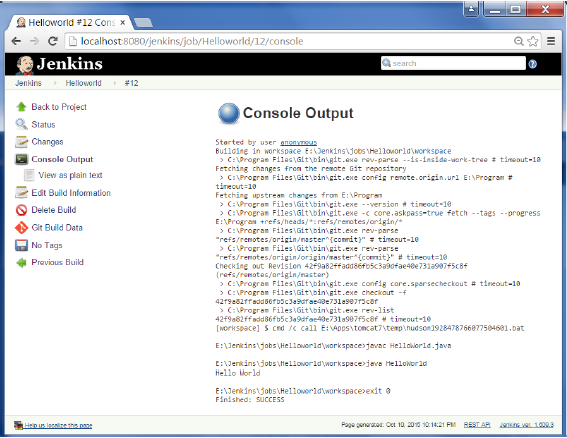
Step 10 − Click on the Console Output link to see the details of the build
Apart from the steps shown above there are just so many ways to create a build job, the options available are many, which what makes Jenkins such a fantastic continuous deployment tool.
Jenkins - Unit Testing
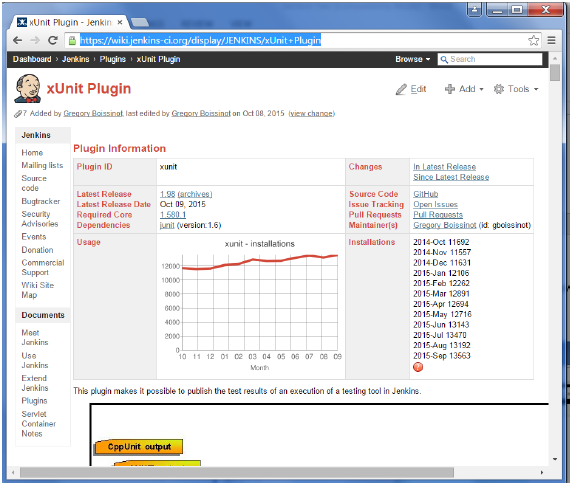
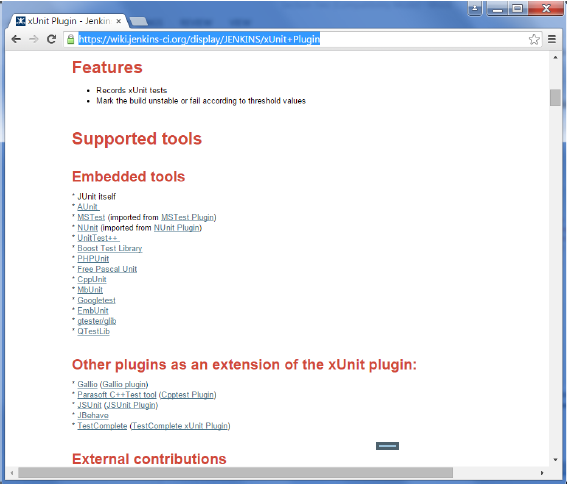
Jenkins provides an out of box functionality for Junit, and provides a host of plugins for unit testing for other technologies, an example being MSTest for .Net Unit tests. If you go to the link https://wiki.jenkins-ci.org/display/JENKINS/xUnit+Plugin it will give the list of Unit Testing plugins available.
Example of a Junit Test in Jenkins
The following example will consider
- A simple HelloWorldTest class based on Junit.
- Ant as the build tool within Jenkins to build the class accordingly.
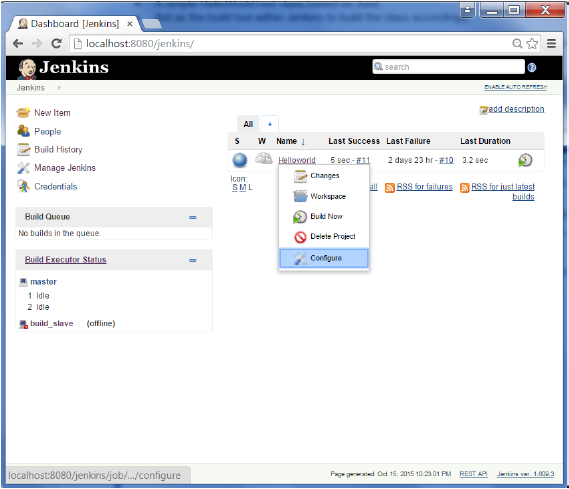
Step 1 − Go to the Jenkins dashboard and Click on the existing HelloWorld project and choose the Configure option
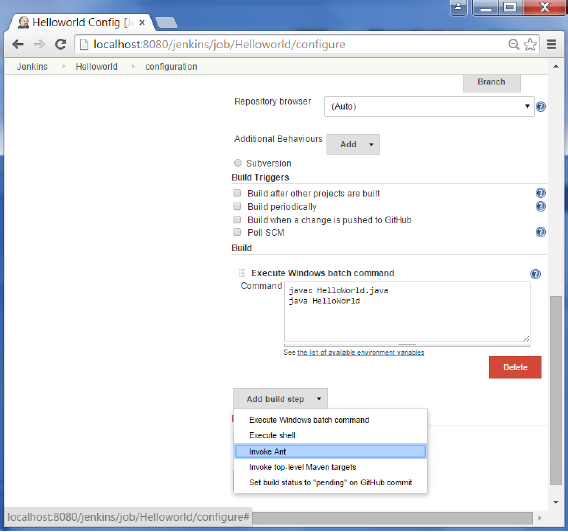
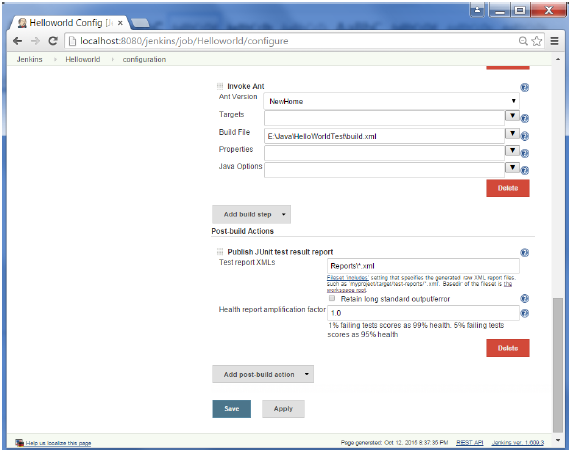
Step 2 − Browse to the section to Add a Build step and choose the option to Invoke Ant.
Step 3 − Click on the Advanced button.
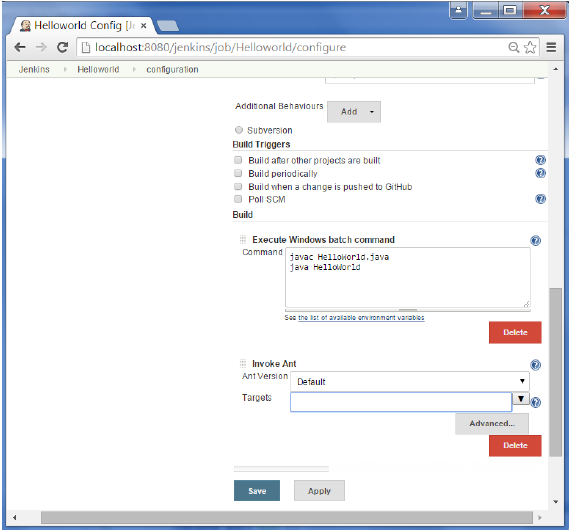
Step 4 − In the build file section, enter the location of the build.xml file.
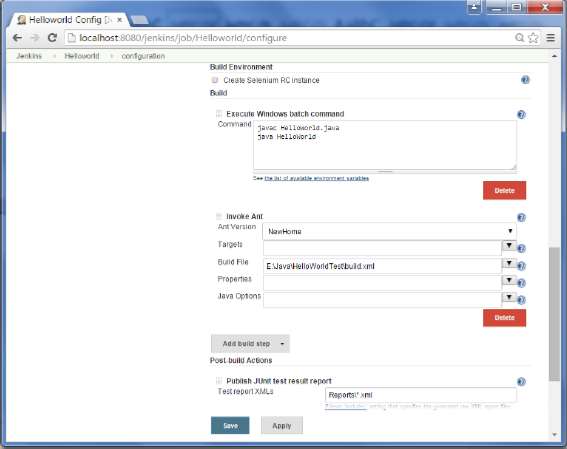
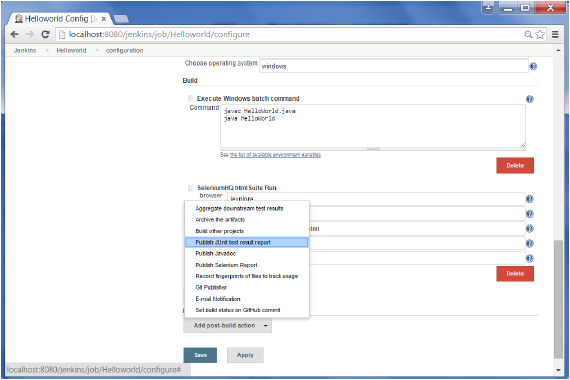
Step 5 − Next click the option to Add post-build option and choose the option of “Publish Junit test result report”
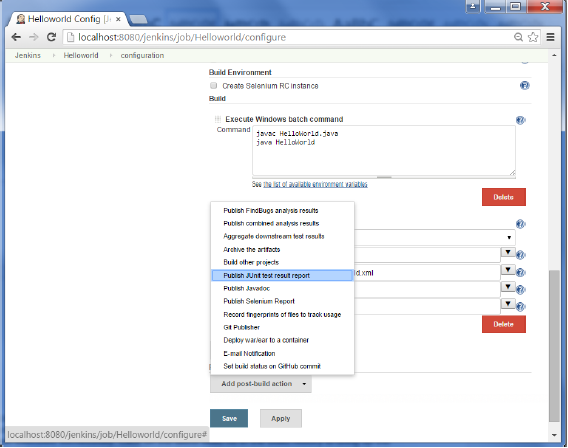
Step 6 − In the Test reports XML’s, enter the location as shown below. Ensure that Reports is a folder which is created in the HelloWorld project workspace. The “*.xml” basically tells Jenkins to pick up the result xml files which are produced by the running of the Junit test cases. These xml files which then be converted into reports which can be viewed later.
Once done, click the Save option at the end.
Step 7 − Once saved, you can click on the Build Now option.
Once the build is completed, a status of the build will show if the build was successful or not. In the Build output information, you will now notice an additional section called Test Result. In our case, we entered a negative Test case so that the result would fail just as an example.
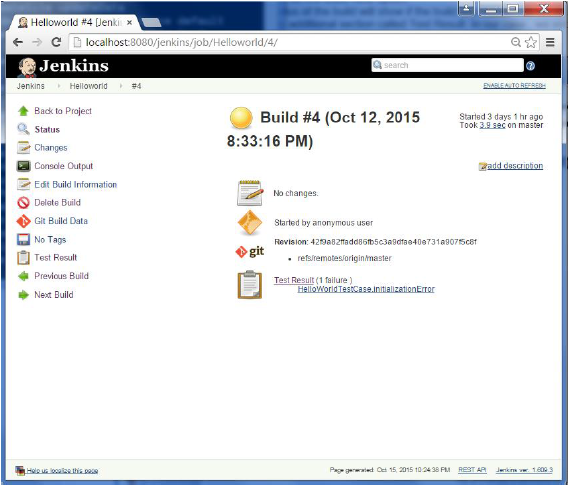
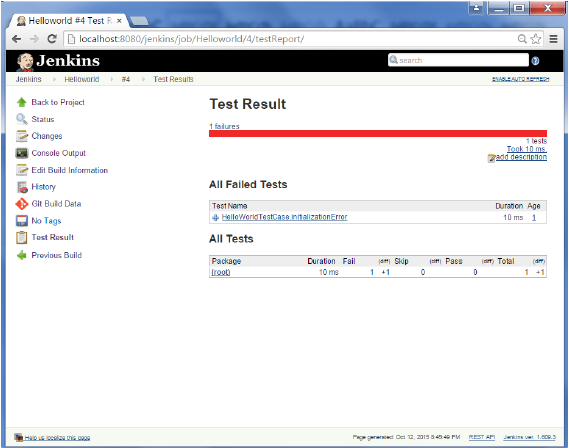
One can go to the Console output to see further information. But what’s more interesting is that if you click on Test Result, you will now see a drill down of the Test results.
Jenkins - Automated Testing
One of the basic principles of Continuous Integration is that a build should be verifiable. You have to be able to objectively determine whether a particular build is ready to proceed to the next stage of the build process, and the most convenient way to do this is to use automated tests. Without proper automated testing, you find yourself having to retain many build artifacts and test them by hand, which is hardly in the spirit of Continuous Integration. The following example shows how to use Selenium to run automated web tests.
Step 1 − Go to Manage Plugins.
Step 2 − Find the Hudson Selenium Plugin and choose to install. Restart the Jenkins instance.
Step 3 − Go to Configure system.
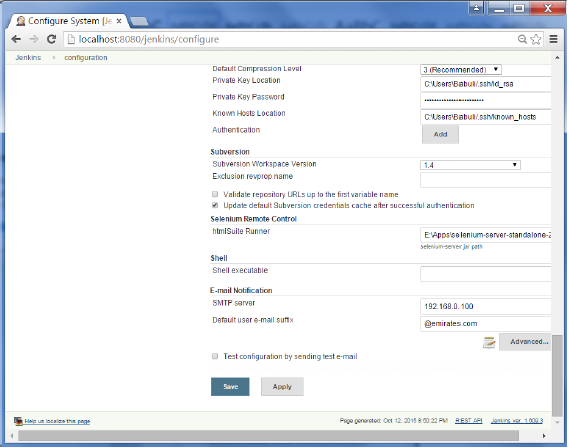
Step 4 − Configure the selenium server jar and click on the Save button.
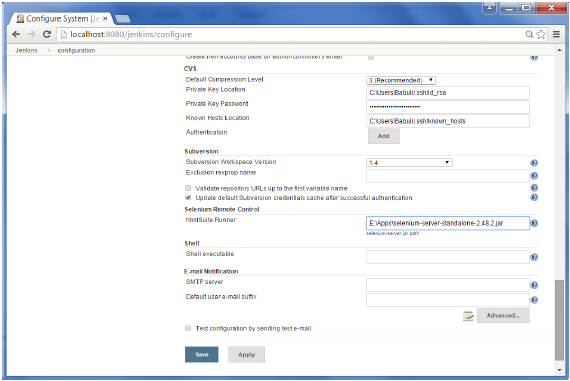
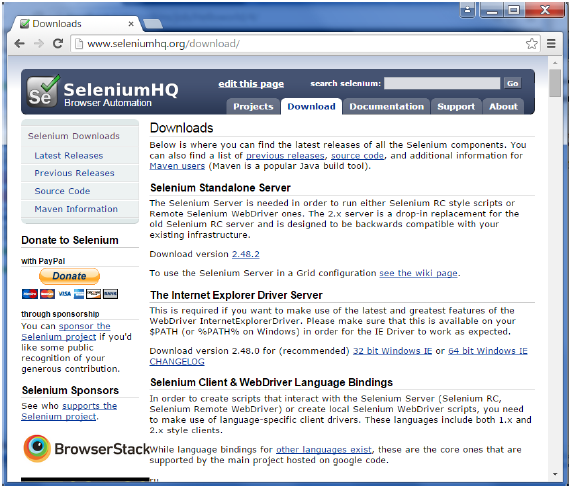
Note − The selenium jar file can be downloaded from the location SeleniumHQ
Click on the download for the Selenium standalone server.
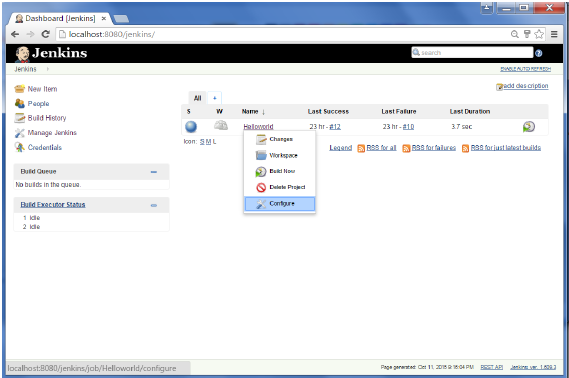
Step 5 − Go back to your dashboard and click on the Configure option for the HelloWorld project.
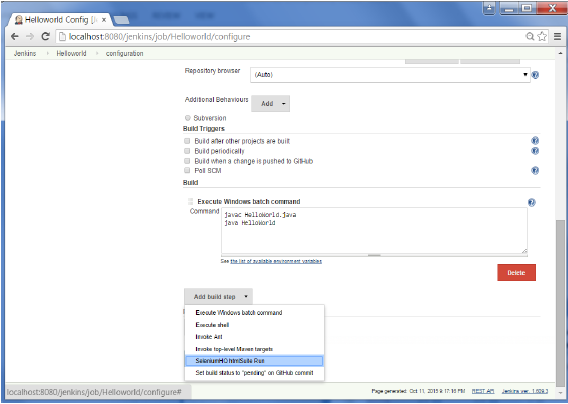
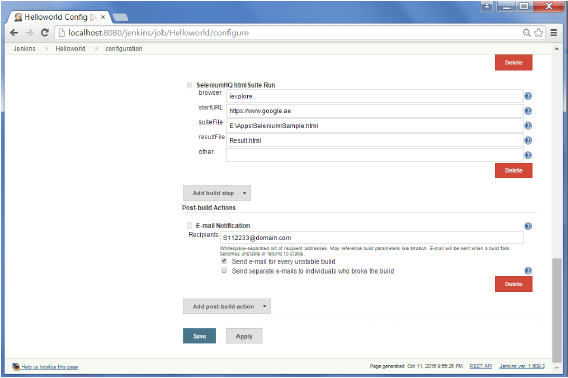
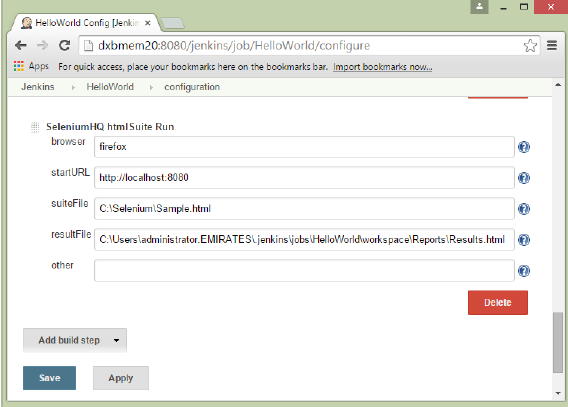
Step 6 − Click on Add build step and choose the optin of “SeleniumHQ htmlSuite Run”
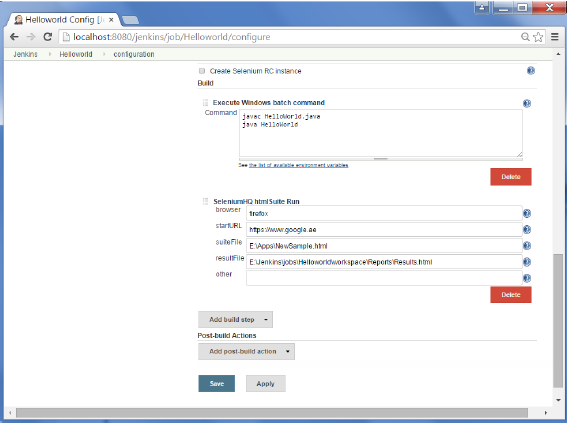
Step 7 − Add the necessary details for the selenium test. Here the suiteFile is the TestSuite generated by using the Selenium IDE. Click on Save and execute a build. Now the post build will launch the selenium driver, and execute the html test.
Jenkins - Notification
Jenkins comes with an out of box facility to add an email notification for a build project.
Step 1 − Configuring an SMTP server. Goto Manage Jenkins → Configure System. Go to the E-mail notification section and enter the required SMTP server and user email-suffix details.
Step 2 − Configure the recipients in the Jenkins project - When you configure any Jenkins build project, right at the end is the ability to add recipients who would get email notifications for unstable or broken builds. Then click on the Save button.
Apart from the default, there are also notification plugin’s available in the market. An example is the notification plugin from Tikal Knowledge which allows sending Job Status notifications in JSON and XML formats. This plugin enables end-points to be configured as shown below.
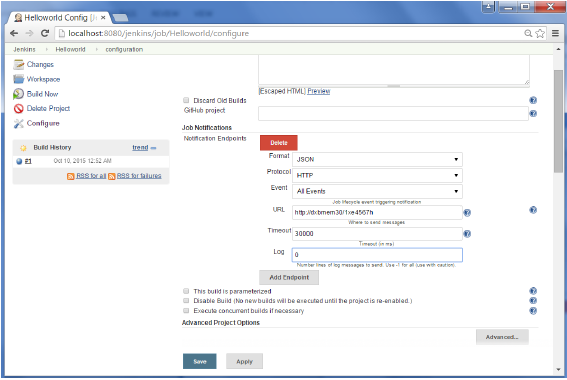
Here are the details of each option −
"Format" − This is the notification payload format which can either be JSON or XML.
"Protocol" − protocol to use for sending notification messages, HTTP, TCP or UDP.
"Event" − The job events that trigger notifications: Job Started, Job Completed, Job Finalized or All Events (the default option).
"URL" − URL to send notifications to. It takes the form of "http://host" for HTTP protocol, and
"host:port"for TCP and UDP protocols."Timeout" − Timeout in milliseconds for sending notification request, 30 seconds by default.
Jenkins - Reporting
As demonstrated in the earlier section, there are many reporting plugins available with the simplest one being the reports available for jUnit tests.
In the Post-build action for any job, you can define the reports to be created. After the builds are complete, the Test Results option will be available for further drill-down.
Jenkins - Code Analysis
Jenkins has a host of Code Analysis plugin. The various plugins can be found at https://wiki.jenkins-ci.org/display/JENKINS/Static+Code+Analysis+Plugins
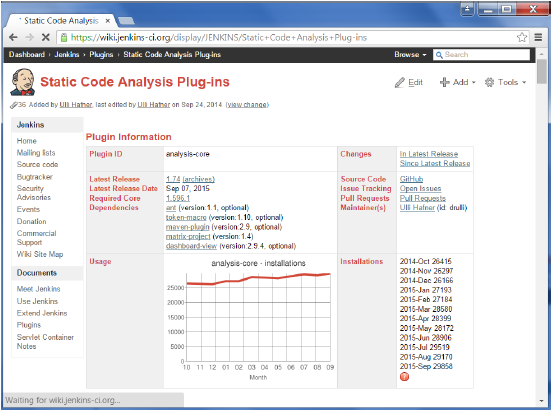
This plugin provides utilities for the static code analysis plugins. Jenkins can parse the results file from various Code Analysis tools such as CheckStyle, FindBugs, PMD etc. For each corresponding code analysis tool, a plugin in Jenkins needs to be installed.
Additionally the add-on plugin Static Analysis Collector is available that combines the individual results of these plugins into a single trend graph and view.
The plugins can provide information such as
- The total number of warnings in a job
- A showing of the new and fixed warnings of a build
- Trend Reports showing the number of warnings per build
- Overview of the found warnings per module, package, category, or type
- Detailed reports of the found warnings optionally filtered by severity (or new and fixed)
Jenkins - Distributed Builds
Sometimes many build machines are required if there are instances wherein there are a larger and heavier projects which get built on a regular basis. And running all of these builds on a central machine may not be the best option. In such a scenario, one can configure other Jenkins machines to be slave machines to take the load off the master Jenkins server.
Sometimes you might also need several different environments to test your builds. In this case using a slave to represent each of your required environments is almost a must.
A slave is a computer that is set up to offload build projects from the master and once setup this distribution of tasks is fairly automatic. The exact delegation behavior depends on the configuration of each project; some projects may choose to "stick" to a particular machine for a build, while others may choose to roam freely between slaves.
Since each slave runs a separate program called a "slave agent" there is no need to install the full Jenkins (package or compiled binaries) on a slave. There are various ways to start slave agents, but in the end the slave agent and Jenkins master needs to establish a bi-directional communication link (for example a TCP/IP socket.) in order to operate.
To set up slaves/nodes in Jenkins follow the steps given below.
Step 1 − Go to the Manage Jenkins section and scroll down to the section of Manage Nodes.
Step 2 − Click on New Node
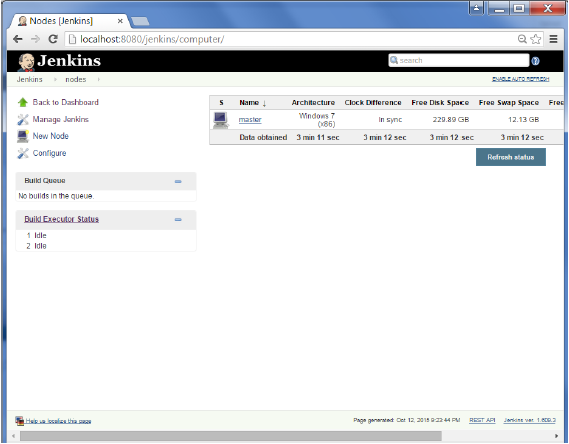
Step 3 − Give a name for the node, choose the Dumb slave option and click on Ok.

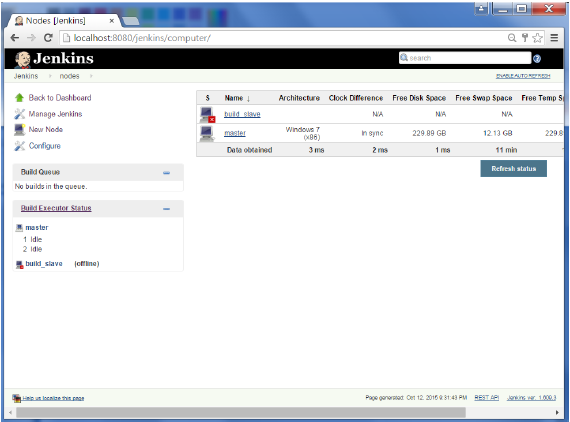
Step 4 − Enter the details of the node slave machine. In the below example, we are considering the slave machine to be a windows machine, hence the option of “Let Jenkins control this Windows slave as a Windows service” was chosen as the launch method. We also need to add the necessary details of the slave node such as the node name and the login credentials for the node machine. Click the Save button. The Labels for which the name is entered as “New_Slave” is what can be used to configure jobs to use this slave machine.

Once the above steps are completed, the new node machine will initially be in an offline state, but will come online if all the settings in the previous screen were entered correctly. One can at any time make the node slave machine as offline if required.
Jenkins - Automated Deployment
There are many plugins available which can be used to transfer the build files after a successful build to the respective application/web server. On example is the “Deploy to container Plugin”. To use this follow the steps given below.
Step 1 − Go to Manage Jenkins → Manage Plugins. Go to the Available section and find the plugin “Deploy to container Plugin” and install the plugin. Restart the Jenkins server.
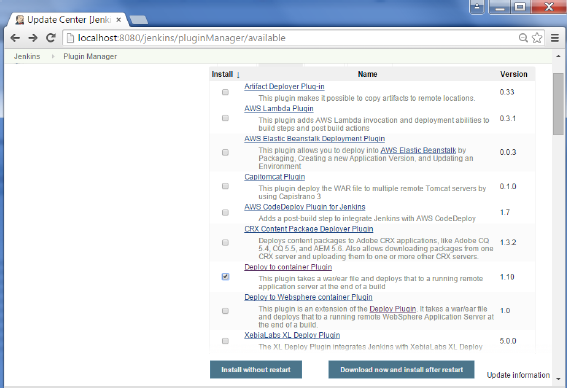
This plugin takes a war/ear file and deploys that to a running remote application server at the end of a build.
Tomcat 4.x/5.x/6.x/7.x
JBoss 3.x/4.x
Glassfish 2.x/3.x
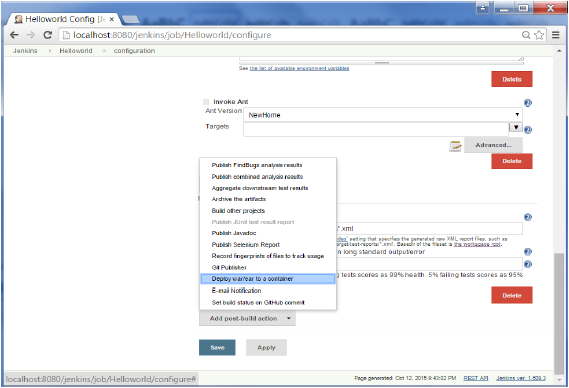
Step 2 − Go to your Build project and click the Configure option. Choose the option “Deploy war/ear to a container”
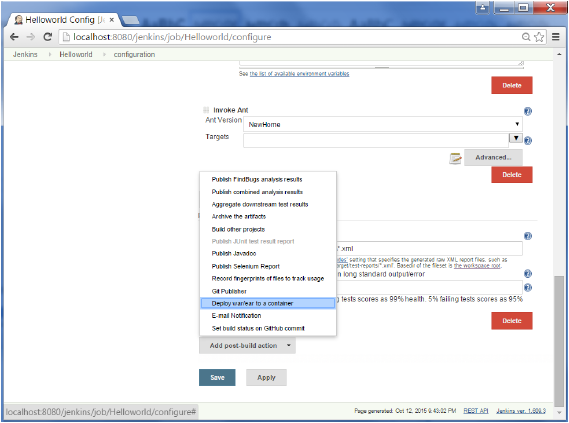
Step 3 − In the Deploy war/ear to a container section, enter the required details of the server on which the files need to be deployed and click on the Save button. These steps will now ensure that the necessary files get deployed to the necessary container after a successful build.

Jenkins - Metrics & Trends
There are various plugins which are available in Jenkins to showcase metrics for builds which are carried out over a period of time. These metrics are useful to understand your builds and how frequently they fail/pass over time. As an example, let’s look at the ‘Build History Metrics plugin’.
This plugin calculates the following metrics for all of the builds once installed
- Mean Time To Failure (MTTF)
- Mean Time To Recovery (MTTR)
- Standard Deviation of Build Times
Step 1 − Go to the Jenkins dashboard and click on Manage Jenkins
Step 2 − Go to the Manage Plugins option.
Step 3 − Go to the Available tab and search for the plugin ‘Build History Metrics plugin’ and choose to ‘install without restart’.
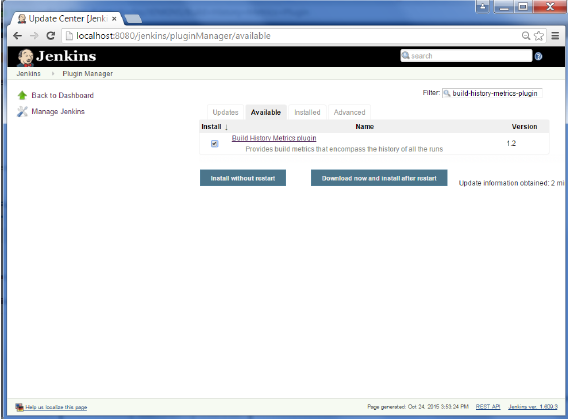
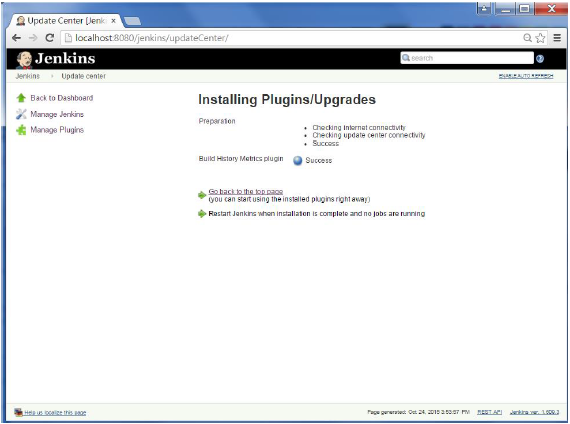
Step 4 − The following screen shows up to confirm successful installation of the plugin. Restart the Jenkins instance.
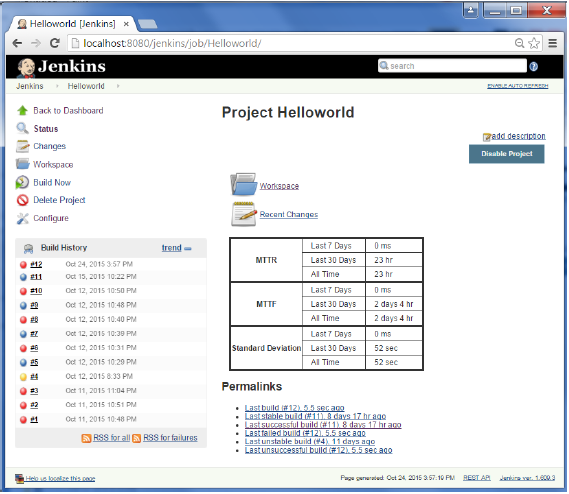
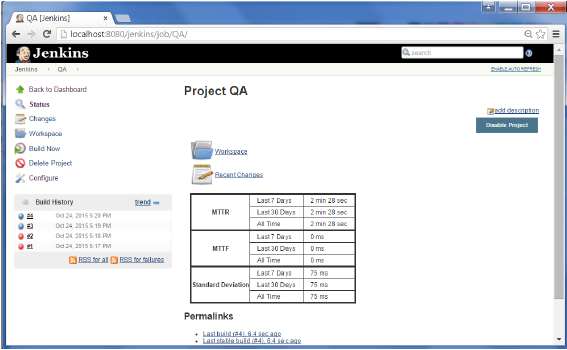
When you go to your Job page, you will see a table with the calculated metrics. Metric’s are shown for the last 7 days, last 30 days and all time.
To see overall trends in Jenkins, there are plugins available to gather information from within the builds and Jenkins and display them in a graphical format. One example of such a plugin is the ‘Hudson global-build-stats plugin’. So let’s go through the steps for this.
Step 1 − Go to the Jenkins dashboard and click on Manage Jenkins
Step 2 − Go to the Manage Plugins option

Step 3 − Go to the Available tab and search for the plugin ‘Hudson global-build-stats plugin’ and choose to ‘install without restart’.
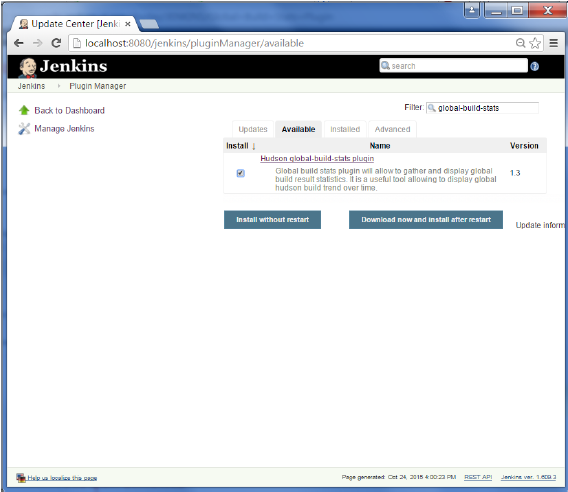
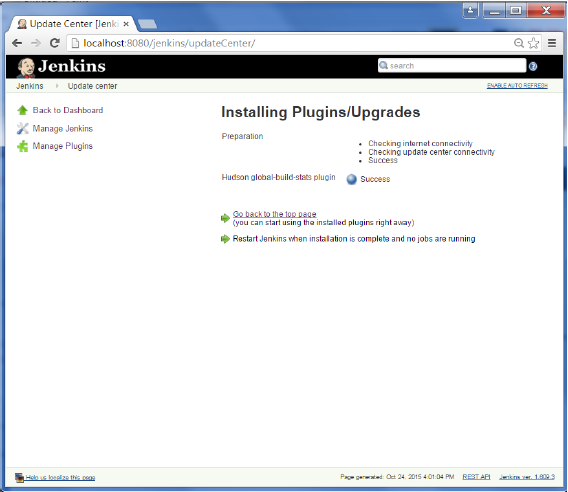
Step 4 − The following screen shows up to confirm successful installation of the plugin. Restart the Jenkins instance.
To see the Global statistics, please follow the Step 5 through 8.
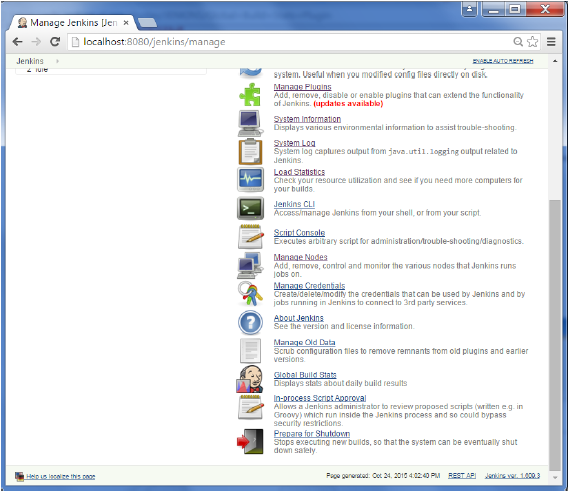
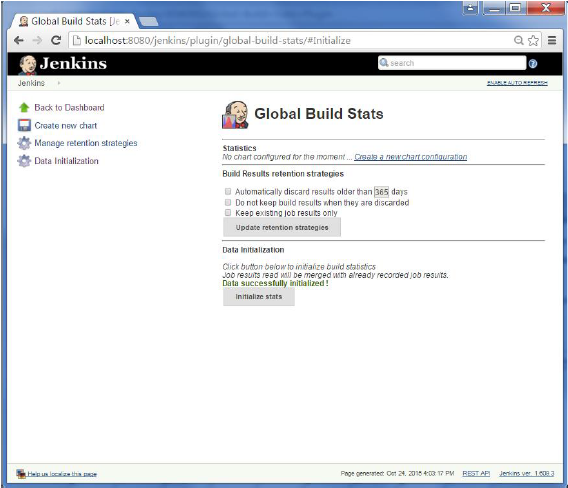
Step 5 − Go to the Jenkins dashboard and click on Manage Jenkins. In the Manage Jenkins screen, scroll down and now you will now see an option called ‘Global Build Stats’. Click on this link.
Step 6 − Click on the button ‘Initialize stats’. What this does is that it gather’s all the existing records for builds which have already been carried out and charts can be created based on these results.
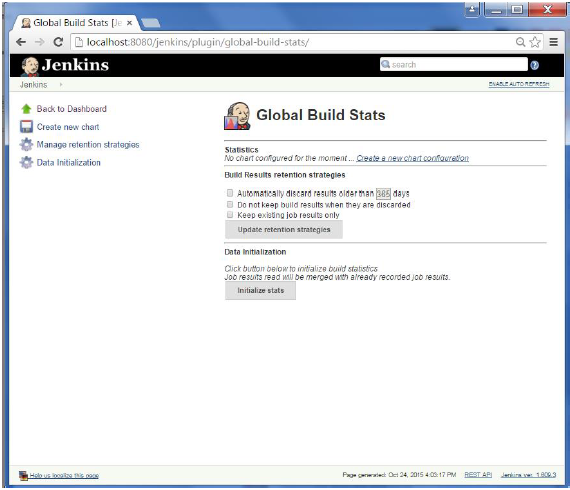
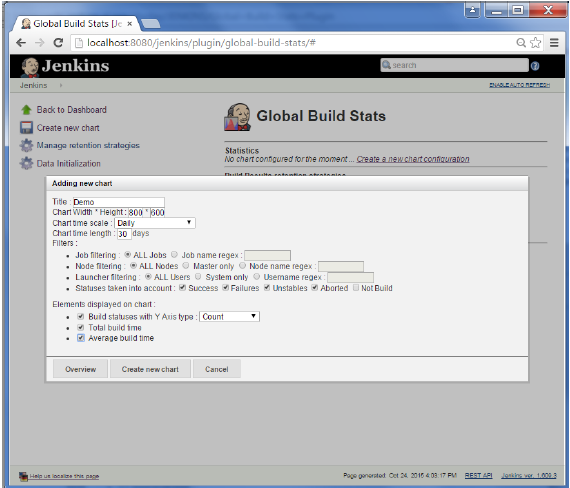
Step 7 − Once the data has been initialized, it’s time to create a new chart. Click on the ‘Create new chart’ link.
Step 8 − A pop-up will come to enter relevant information for the new chart details. Enter the following mandatory information
- Title – Any title information, for this example is given as ‘Demo’
- Chart Width – 800
- Chart Height – 600
- Chart time scale – Daily
- Chart time length – 30 days
The rest of the information can remain as it is. Once the information is entered, click on Create New chart.
You will now see the chart which displays the trends of the builds over time.
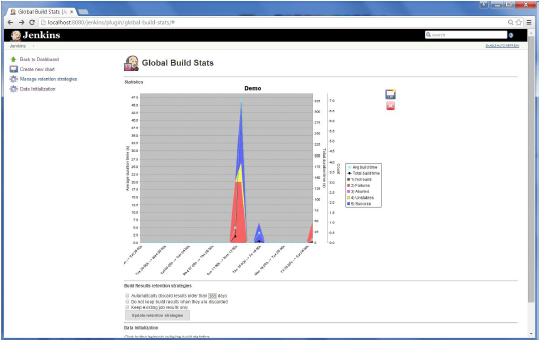
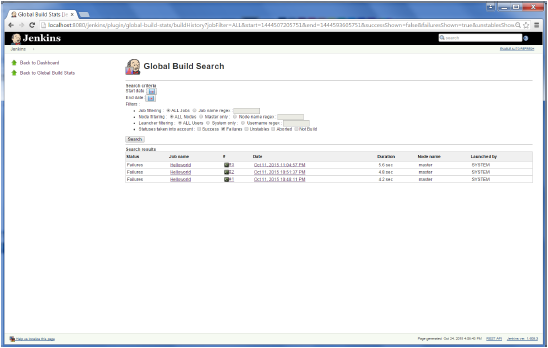
If you click on any section within the chart, it will give you a drill down of the details of the job and their builds.
Jenkins - Server Maintenance
The following are some of the basic activities you will carry out, some of which are best practices for Jenkins server maintenance
URL Options
The following commands when appended to the Jenkins instance URL will carry out the relevant actions on the Jenkins instance.
http://localhost:8080/jenkins/exit − shutdown jenkins
http://localhost:8080/jenkins/restart − restart jenkins
http://localhost:8080/jenkins/reload − to reload the configuration
Backup Jenkins Home
The Jenkins Home directory is nothing but the location on your drive where Jenkins stores all information for the jobs, builds etc. The location of your home directory can be seen when you click on Manage Jenkins → Configure system.
Set up Jenkins on the partition that has the most free disk-space – Since Jenkins would be taking source code for the various jobs defined and doing continuous builds, always ensure that Jenkins is setup on a drive that has enough hard disk space. If you hard disk runs out of space, then all builds on the Jenkins instance will start failing.
Another best practice is to write cron jobs or maintenance tasks that can carry out clean-up operations to avoid the disk where Jenkins is setup from becoming full.
Jenkins - Continuous Deployment
Jenkins provides good support for providing continuous deployment and delivery. If you look at the flow of any software development through deployment, it will be as shown below.
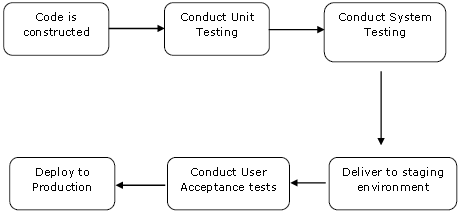
The main part of Continuous deployment is to ensure that the entire process which is shown above is automated. Jenkins achieves all of this via various plugins, one of them being the “Deploy to container Plugin” which was seen in the earlier lessons.
There are plugins available which can actually give you a graphical representation of the Continuous deployment process. But first lets create another project in Jenkins, so that we can see best how this works.
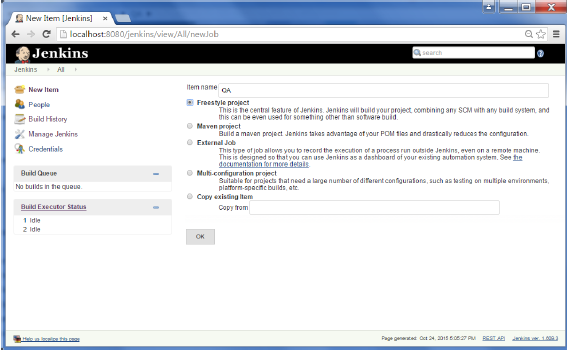
Let’s create a simple project which emulates the QA stage, and does a test of the Helloworld application.
Step 1 − Go to the Jenkins dashboard and click on New Item. Choose a ‘Freestyle project’ and enter the project name as ‘QA’. Click on the Ok button to create the project.
Step 2 − In this example, we are keeping it simple and just using this project to execute a test program for the Helloworld application.
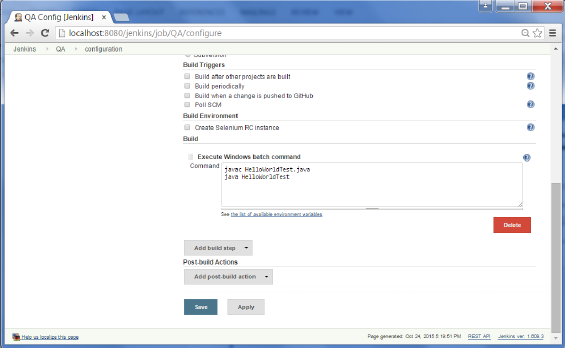
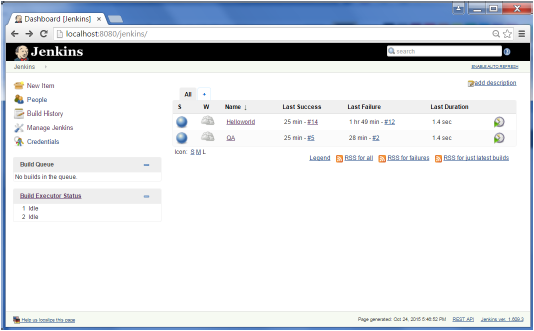
So our project QA is now setup. You can do a build to see if it builds properly.
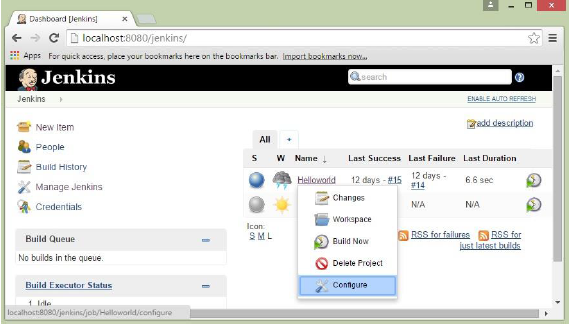
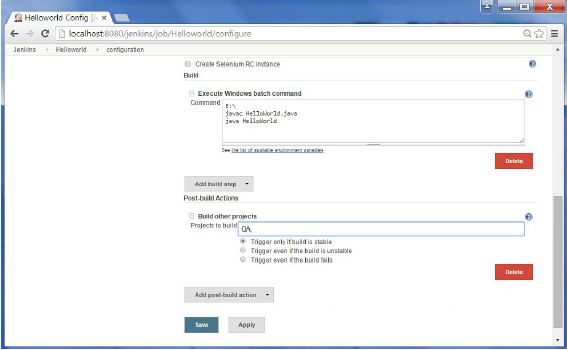
Step 3 − Now go to you Helloworld project and click on the Configure option
Step 4 − In the project configuration, choose the ‘Add post-build action’ and choose ‘Build other projects’
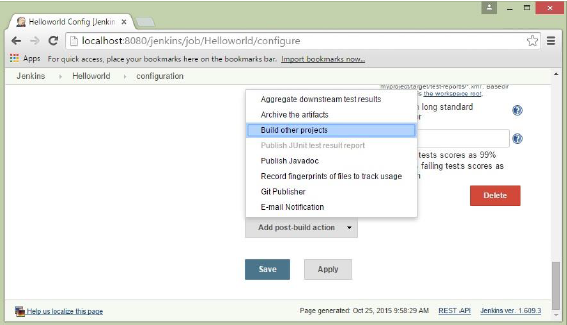
Step 5 − In the ‘Project to build’ section, enter QA as the project name to build. You can leave the option as default of ‘Trigger only if build is stable’. Click on the Save button.
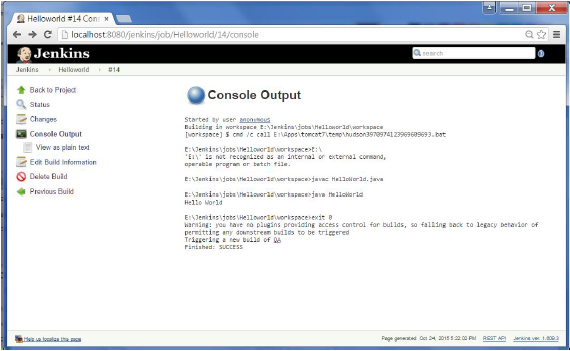
Step 6 − Build the Helloworld project. Now if you see the Console output, you will also see that after the Helloworld project is successfully built, the build of the QA project will also happen.
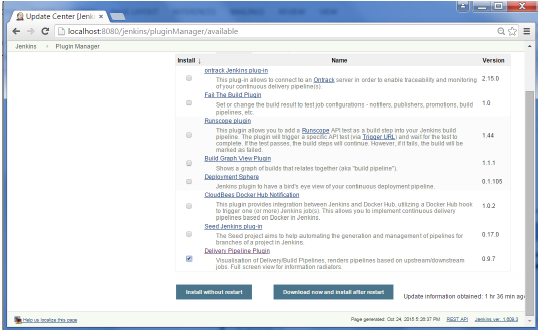
Step 7 − Let now install the Delivery pipeline plugin. Go to Manage Jenkins → Manage Plugin’s. In the available tab, search for ‘Delivery Pipeline Plugin’. Click On Install without Restart. Once done, restart the Jenkins instance.
Step 8 − To see the Delivery pipeline in action, in the Jenkins Dashboard, click on the + symbol in the Tab next to the ‘All’ Tab.
Step 9 − Enter any name for the View name and choose the option ‘Delivery Pipeline View’.
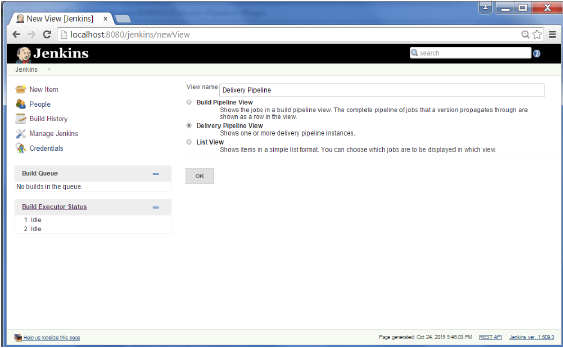
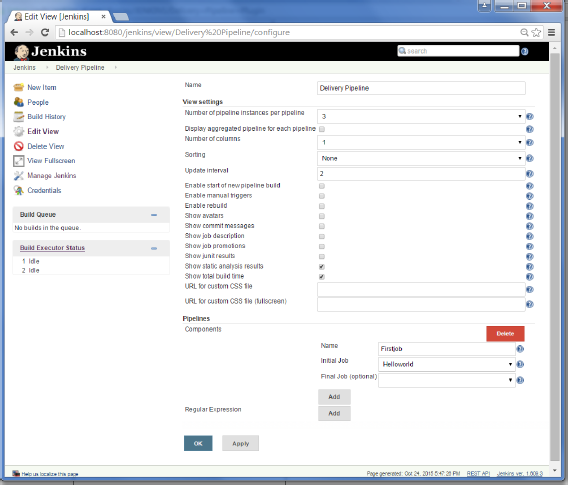
Step 10 − In the next screen, you can leave the default options. One can change the following settings −
- Ensure the option ‘Show static analysis results’ is checked.
- Ensure the option ‘Show total build time’ is checked.
- For the Initial job – Enter the Helloworld project as the first job which should build.
- Enter any name for the Pipeline
- Click the OK button.
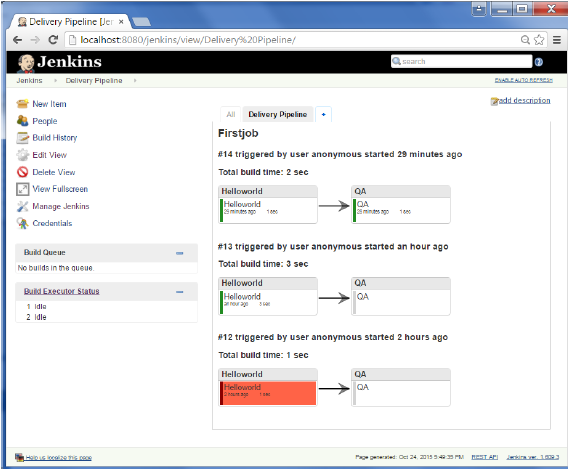
You will now see a great view of the entire delivery pipeline and you will be able to see the status of each project in the entire pipeline.
Another famous plugin is the build pipeline plugin. Let’s take a look at this.
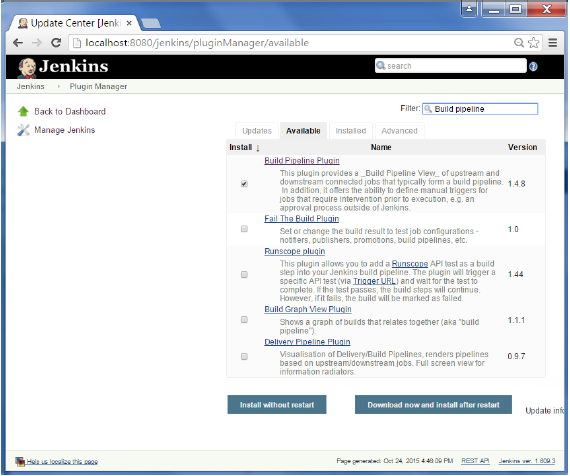
Step 1 − Go to Manage Jenkins → Manage Plugin’s. In the available tab, search for ‘Build Pipeline Plugin’. Click On Install without Restart. Once done, restart the Jenkins instance.
Step 2 − To see the Build pipeline in action, in the Jenkins Dashboard, click on the + symbol in the Tab next to the ‘All’ Tab.
Step 3 − Enter any name for the View name and choose the option ‘Build Pipeline View’.
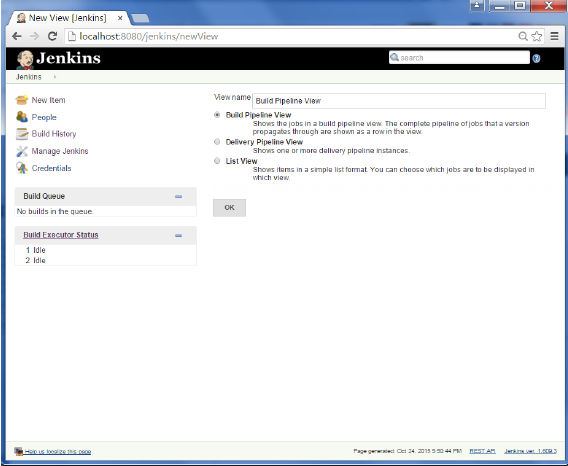
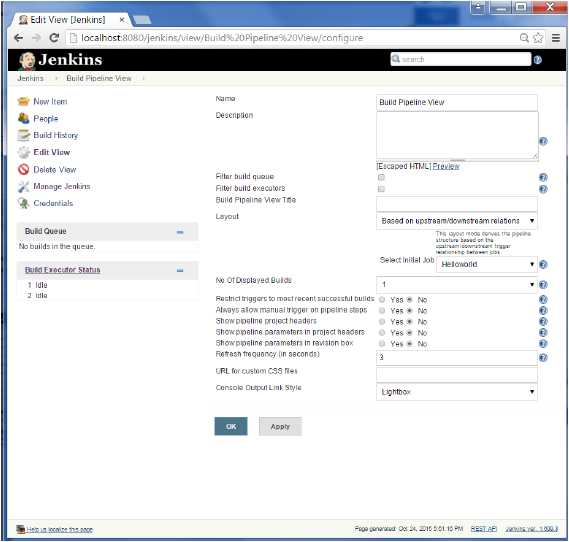
Step 4 − Accept the default settings, just in the Selected Initial job, ensure to enter the name of the Helloworld project. Click on the Ok button.
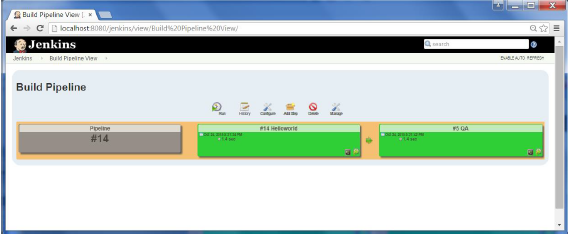
You will now see a great view of the entire delivery pipeline and you will be able to see the status of each project in the entire pipeline.
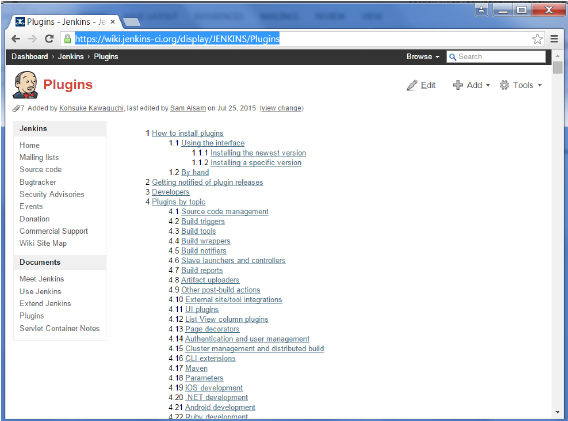
Jenkins - Managing Plugins
To get the list of all plugins available within Jenkins, one can visit the link − https://wiki.jenkins-ci.org/display/JENKINS/Plugins
We’ve already seen many instances for installing plugins, let’s look at some other maintenance tasks with regards to plugins
Uninstalling Plugins
To uninstall a plugin, Go to Manage Jenkins → Manage plugins. Click on the Installed tab. Some of the plugins will have the Uninstall option. You can click these buttons to uninstall the plugins. Ensure to restart your Jenkins instance after the uninstallation.

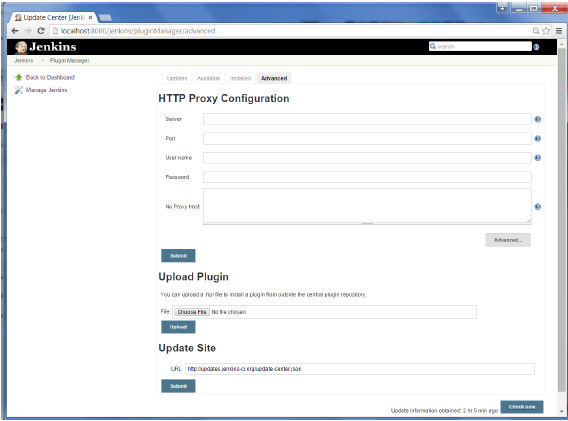
Installing another Version of a Plugin
Sometimes it may be required to install an older version of a plugin, in such a case, you can download the plugin from the relevant plugin page on the Jenkins web site. You can then use the Upload option to upload the plugin manually.
Jenkins - Security
In Jenkins you have the ability to setup users and their relevant permissions on the Jenkins instance. By default you will not want everyone to be able to define jobs or other administrative tasks in Jenkins. So Jenkins has the ability to have a security configuration in place.
To configure Security in Jenkins, follow the steps given below.
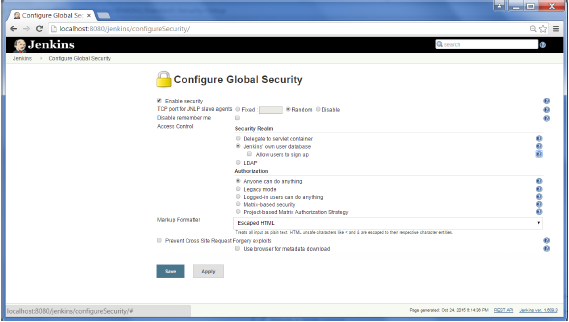
Step 1 − Click on Manage Jenkins and choose the ‘Configure Global Security’ option.
Step 2 − Click on Enable Security option. As an example, let’s assume that we want Jenkins to maintain it’s own database of users, so in the Security Realm, choose the option of ‘Jenkins’ own user database’.
By default you would want a central administrator to define users in the system, hence ensure the ‘Allow users to sign up’ option is unselected. You can leave the rest as it is for now and click the Save button.
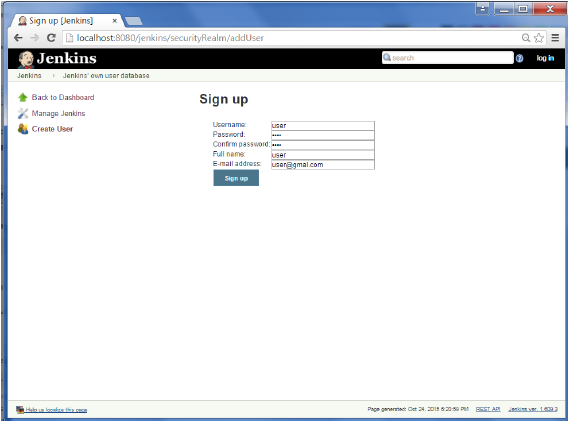
Step 3 − You will be prompted to add your first user. As an example, we are setting up an admin users for the system.

Step 4 − It’s now time to setup your users in the system. Now when you go to Manage Jenkins, and scroll down, you will see a ‘Manage Users’ option. Click this option.
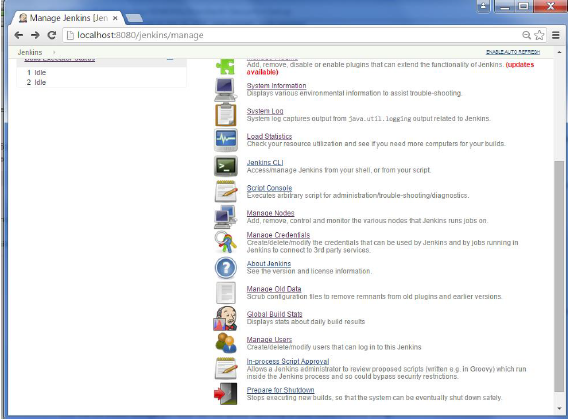
Step 5 − Just like you defined your admin user, start creating other users for the system. As an example, we are just creating another user called ‘user’.
Step 6 − Now it’s time to setup your authorizations, basically who has access to what. Go to Manage Jenkins → Configure Global Security.
Now in the Authorization section, click on ‘Matrix based security’
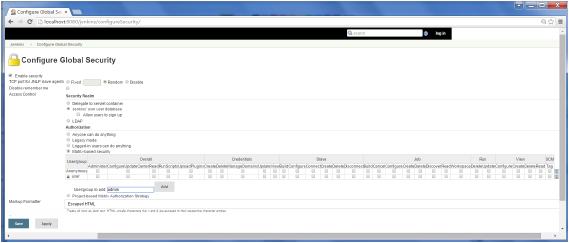
Step 7 − If you don’t see the user in the user group list, enter the user name and add it to the list. Then give the appropriate permissions to the user.
Click on the Save button once you have defined the relevant authorizations.
Your Jenkins security is now setup.
Note − For Windows AD authentication, one has to add the Active Directory plugin to Jenkins.
Jenkins - Backup Plugin
Jenkins has a backup plugin which can used to backup critical configuration settings related to Jenkins. Follow the steps given below to have a backup in place.
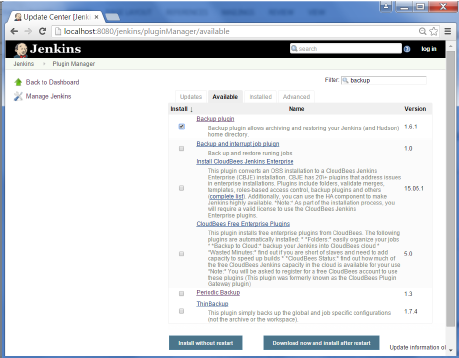
Step 1 − Click on Manage Jenkins and choose the ‘Manage Plugins’ option.
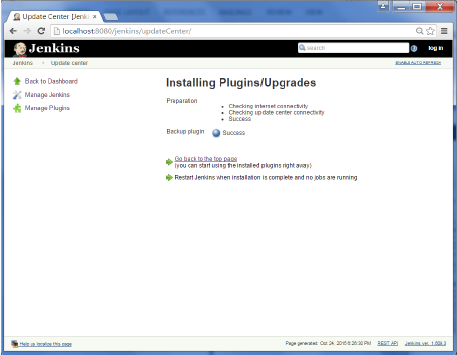
Step 2 − In the available tab, search for ‘Backup Plugin’. Click On Install without Restart. Once done, restart the Jenkins instance
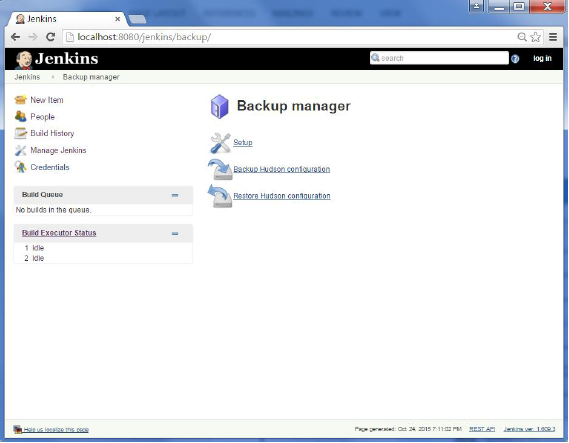
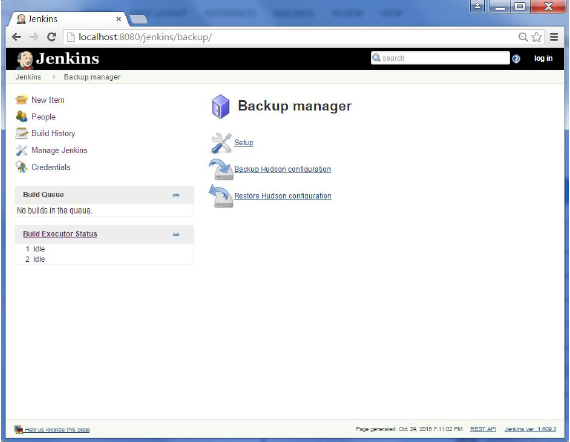
Step 3 − Now when you go to Manage Jenkins, and scroll down you will see ‘Backup Manager’ as an option. Click on this option.

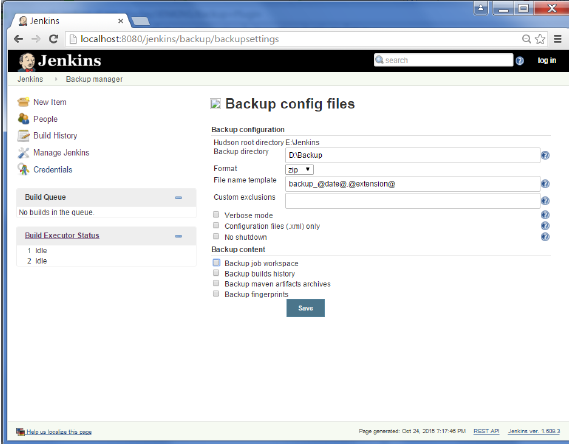
Step 4 − Click on Setup.
Step 5 − Here, the main field to define is the directory for your backup. Ensure it’s on another drive which is different from the drive where your Jenkins instance is setup. Click on the Save button.
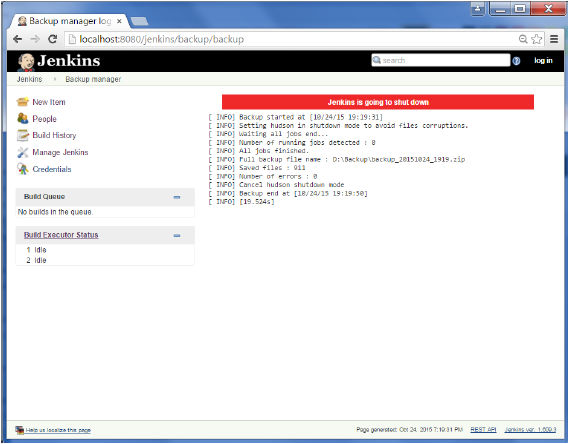
Step 6 − Click on the ‘Backup Hudson configuration’ from the Backup manager screen to initiate the backup.

The next screen will show the status of the backup
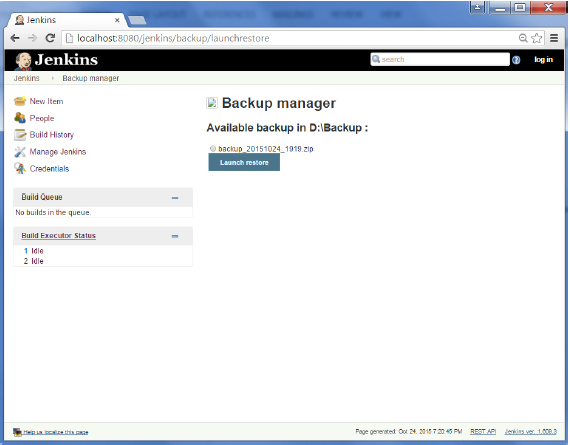
To recover from a backup, go to the Backup Manager screen, click on Restore Hudson configuration.
The list of backup’s will be shown, click on the appropriate one to click on Launch Restore to begin the restoration of the backup.
Jenkins - Remote Testing
Web tests such as selenium tests can be run on remote slave machines via the master slave and selenium suite plugin installation. The following steps show how to run remote tests using this configuration.
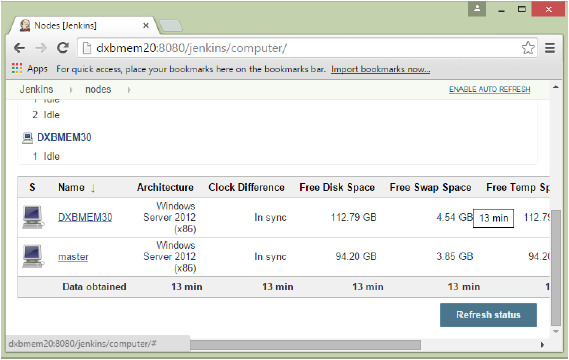
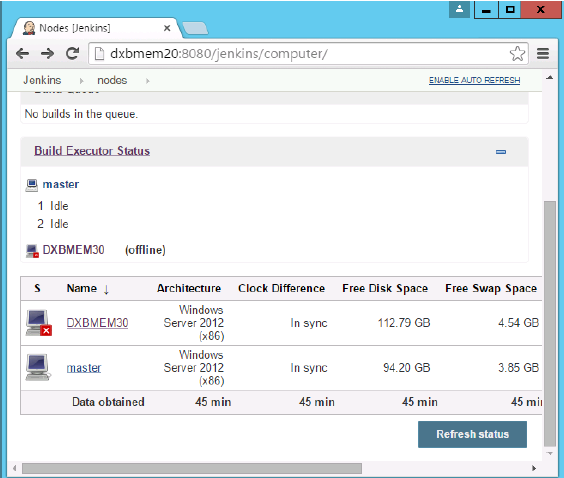
Step 1 − Ensure your master slave configuration is in place. Go to your master Jenkins server. Go to Manage Jenkins → Manage Nodes.
In our node list, the DXBMEM30 label is the slave machine. In this example, both the master and slave machines are windows machines.
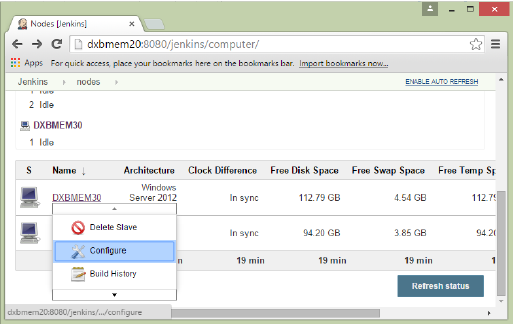
Step 2 − Click on configure for the DXBMEM30 slave machine.
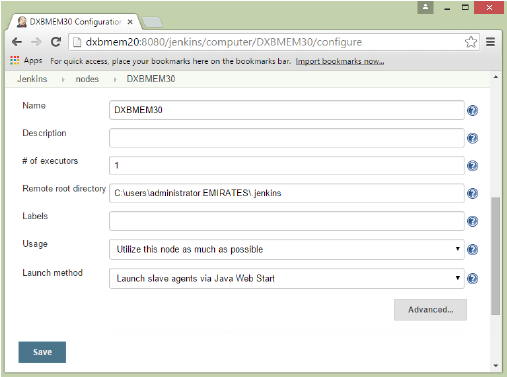
Step 3 − Ensure the launch method is put as ‘Launch slave agents via Java Web Start’
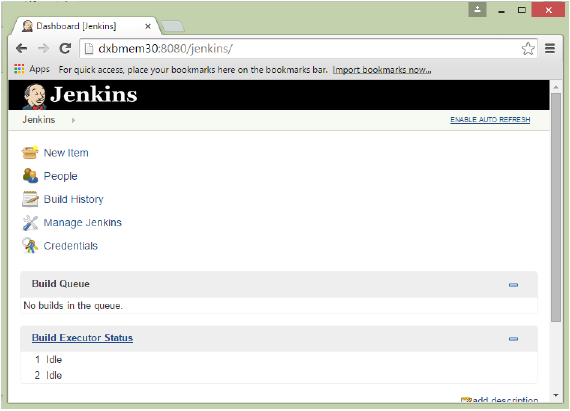
Step 4 − Now go to your slave machine and from there, open a browser instance to your Jenkins master instance. Then go to Manage Jenkins → Manage Nodes. Go to DXBMEM30 and click on
Step 5 − Click on the DXBMEM30 instance.
Step 6 − Scroll down and you will see the Launch option which is the option to Start ‘Java Web Start’
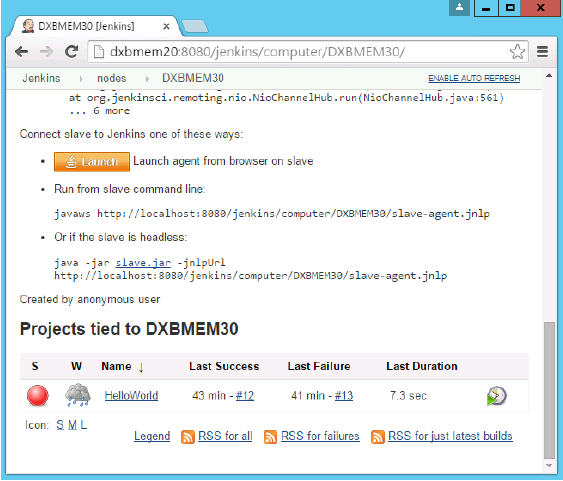
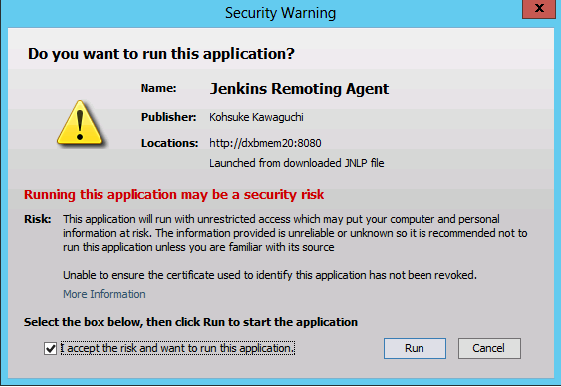
Step 7 − You will be presented with a Security Warning. Click on the Acceptance checkbox and click on run.
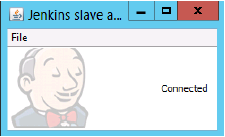
You will now see a Jenkins Slave window opened and now connected.
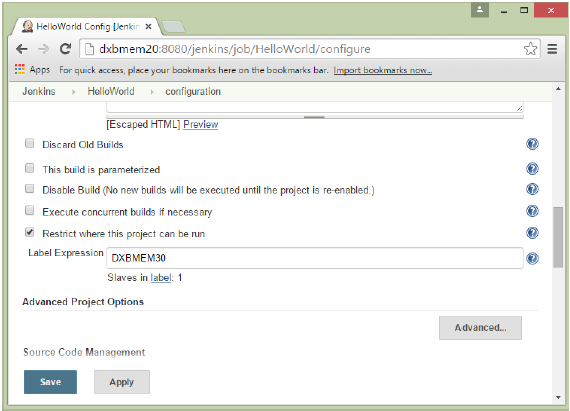
Step 8 − Configuring your tests to run on the slave. Here, you have to ensure that the job being created is meant specifically to only run the selenium tests.
In the job configuration, ensure the option ‘Restrict where this project can be run’ is selected and in the Label expression put the name of the slave node.
Step 9 − Ensure the selenium part of your job is configured. You have to ensure that the Sample.html file and the selenium-server.jar file is also present on the slave machine.
Once you have followed all of the above steps, and click on Build, this project will run the Selenium test on the slave machine as expected.