- Angular 4 Tutorial
- Angular 4 - Home
- Angular 4 – Overview
- Angular 4 – Environment Setup
- Angular 4 – Project Setup
- Angular 4 – Components
- Angular 4 – Module
- Angular 4 – Data Binding
- Angular 4 – Event Binding
- Angular 4 – Templates
- Angular 4 – Directives
- Angular 4 – Pipes
- Angular 4 – Routing
- Angular 4 – Services
- Angular 4 – Http Service
- Angular 4 – Forms
- Angular 4 – Animations
- Angular 4 – Materials
- Angular 4 – CLI
- Angular 4 – Examples
- Angular 4 Useful Resources
- Angular 4 - Quick Guide
- Angular 4 - Useful Resources
- Angular 4 - Discussion
Angular 4 - Project Setup
AngularJS is based on the model view controller, whereas Angular 2 is based on the components structure. Angular 4 works on the same structure as Angular2 but is faster when compared to Angular2.
Angular4 uses TypeScript 2.2 version whereas Angular 2 uses TypeScript version 1.8. This brings a lot of difference in the performance.
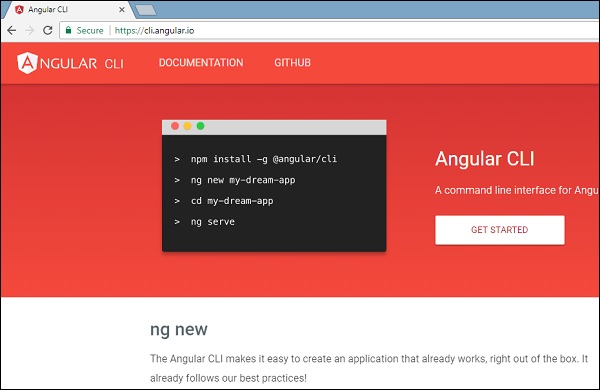
To install Angular 4, the Angular team came up with Angular CLI which eases the installation. You need to run through a few commands to install Angular 4.
Go to this site https://cli.angular.io to install Angular CLI.
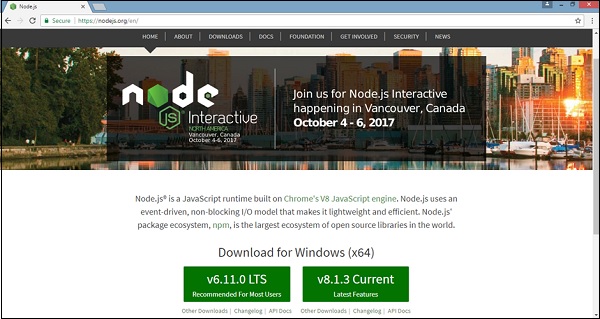
To get started with the installation, we first need to make sure we have nodejs and npm installed with the latest version. The npm package gets installed along with nodejs.
Go to the nodejs site https://nodejs.org/en/.
The latest version of Nodejs v6.11.0 is recommended for users. Users who already have nodejs greater than 4 can skip the above process. Once nodejs is installed, you can check the version of node in the command line using the command, node –v, as shown below −
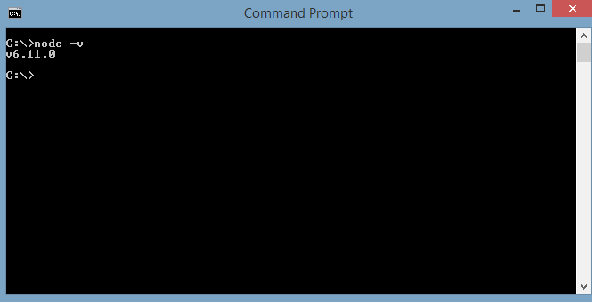
The command prompt shows v6.11.0. Once nodejs is installed, npm will also get installed along with it.
To check the version of npm, type command npm –v in the terminal. It will display the version of npm as shown below.
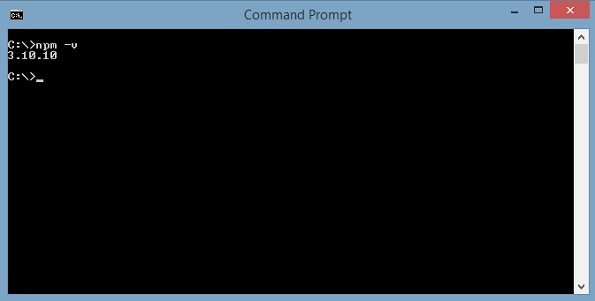
The version of npm is 3.10.10. Now that we have nodejs and npm installed, let us run the angular cli commands to install Angular 4. You will see the following commands on the webpage −
npm install -g @angular/cli //command to install angular 4

ng new Angular 4-app // name of the project

cd my-dream-app

ng serve
Let us start with the first command in the command line and see how it works.
To start with, we will create an empty directory wherein, we will run the Angular CLI command.
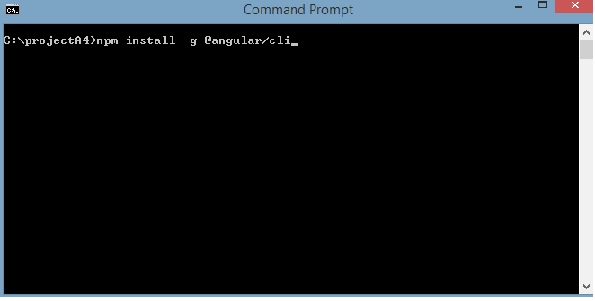
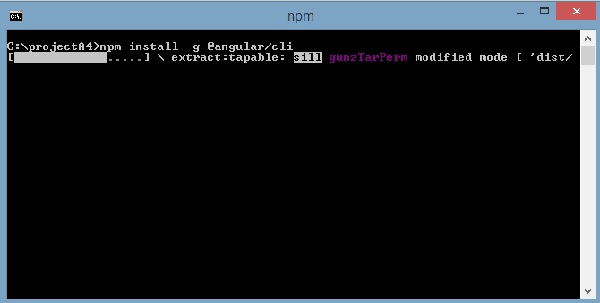
Enter the above command to install Angular 4. The installation process will start and will take a few minutes to complete.
Once the above command to install is complete, the following Command Prompt appears −
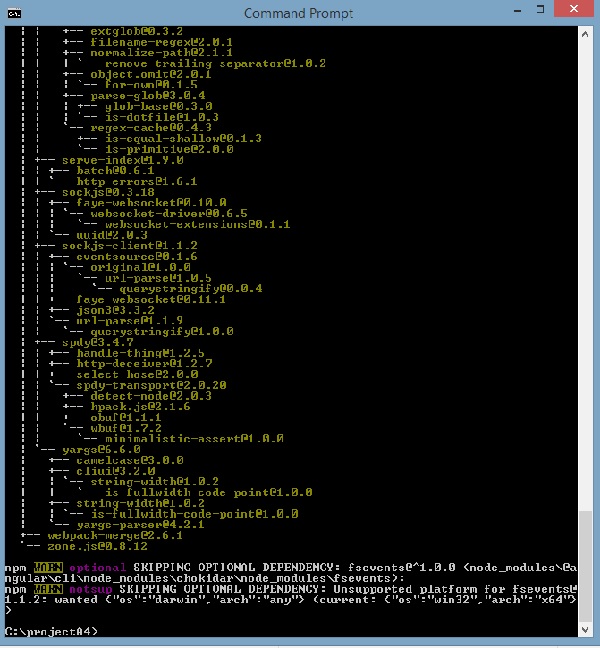
We have created an empty folder ProjectA4 and installed the Angular CLI command. We have also used -g to install Angular CLI globally. Now, you can create your Angular 4 project in any directory or folder and you don’t have to install Angular CLI project wise, as it is installed on your system globally and you can make use of it from any directory.
Let us now check whether Angular CLI is installed or not. To check the installation, run the following command in the terminal −
ng -v
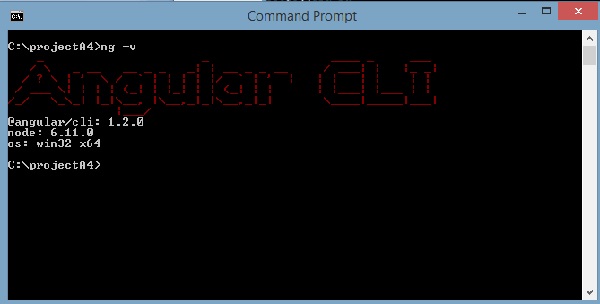
We get the @angular/cli version, which is at present 1.2.0. The node version running is 6.11.0 and also the OS details. The above details tell us that we have installed angular cli successfully and now we are ready to commence with our project.
We have now installed Angular 4. Let us now create our first project in Angular 4. To create a project in Angular 4, we will use the following command −
ng new projectname
We will name the project ng new Angular 4-app.
Let us now run the above command in the command line.
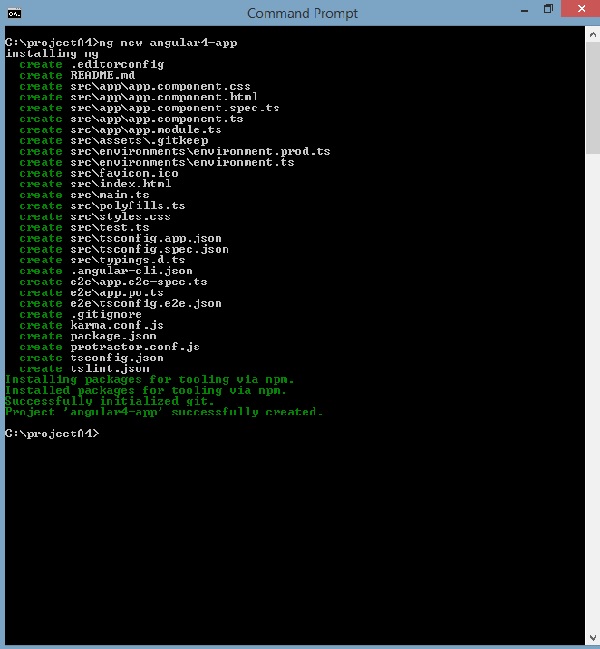
The project Angular 4-app is created successfully. It installs all the required packages necessary for our project to run in Angular 4. Let us now switch to the project created, which is in the directory Angular 4-app. Change the directory in the command line - cd Angular 4-app.
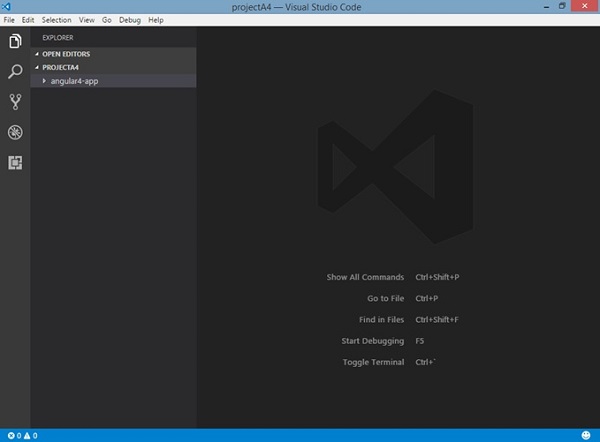
We will use Visual Studio Code IDE for working with Angular 4; you can use any IDE, i.e., Atom, WebStorm, etc.
To download Visual Studio Code, go to https://code.visualstudio.com/ and click Download for Windows.
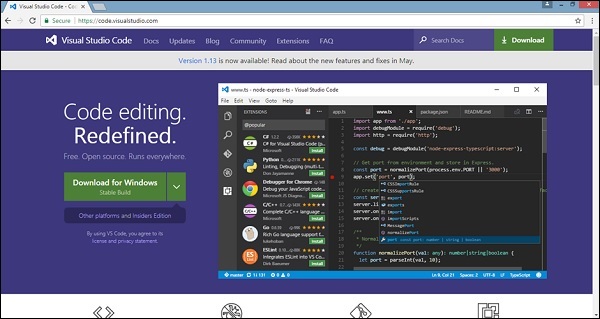
Click Download for Windows for installing the IDE and run the setup to start using IDE.
The Editor looks as follows −
We have not started any project in it. Let us now take the project we have created using angular-cli.
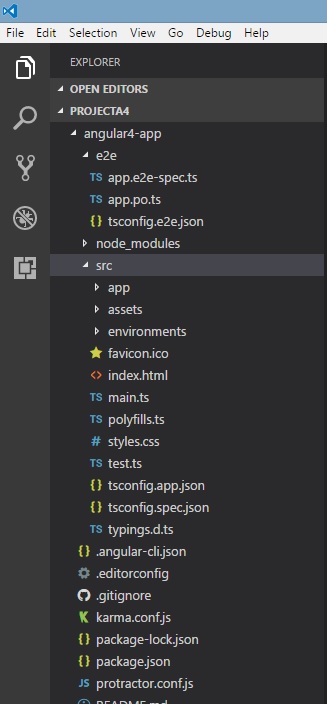
We will consider the Angular 4-app project. Let us open the Angular 4-app and see how the folder structure looks like.
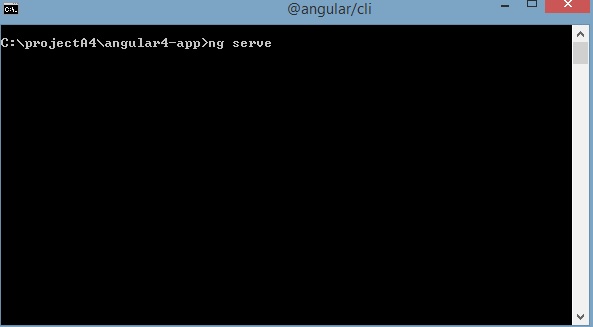
Now that we have the file structure for our project, let us compile our project with the following command −
ng serve
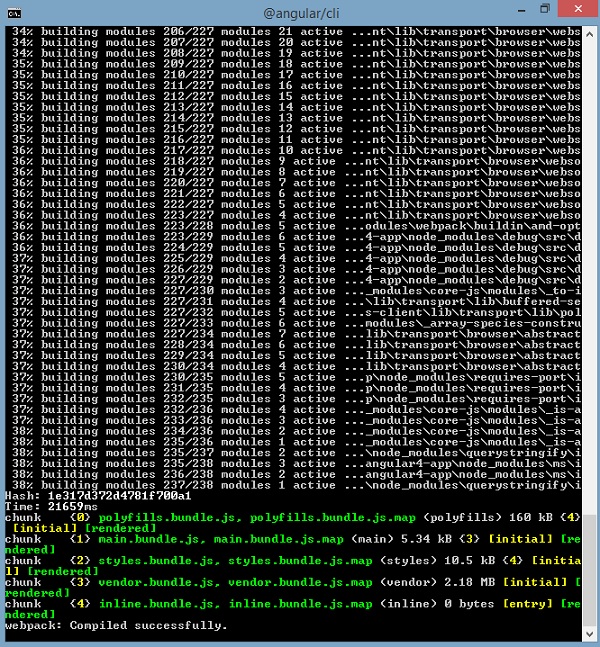
The ng serve command builds the application and starts the web server.
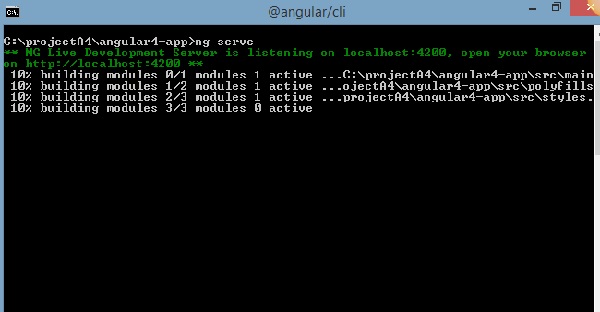
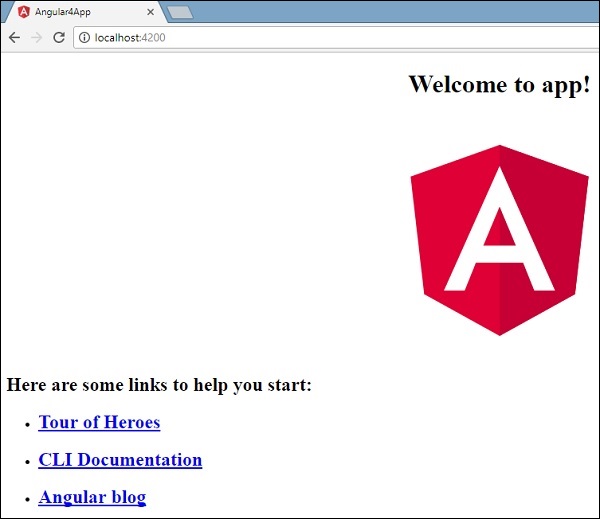
The web server starts on port 4200. Type the url http://localhost:4200/ in the browser and see the output. Once the project is compiled, you will receive the following output −
Once you run http://localhost:4200/ in the browser, you will be directed to the following screen −
Let us now make some changes to display the following content −
“Welcome to Angular 4 project”

We have made changes in the files – app.component.html and app.component.ts. We will discuss more about this in our subsequent chapters.
Let us complete the project setup. If you see we have used port 4200, which is the default port that angular–cli makes use of while compiling. You can change the port if you wish using the following command −
ng serve --host 0.0.0.0 –port 4205
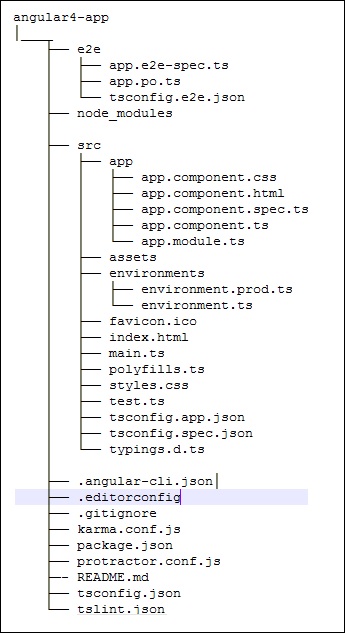
The Angular 4 app folder has the following folder structure −
e2e − end to end test folder. Mainly e2e is used for integration testing and helps ensure the application works fine.
node_modules − The npm package installed is node_modules. You can open the folder and see the packages available.
src − This folder is where we will work on the project using Angular 4.
The Angular 4 app folder has the following file structure −
.angular-cli.json − It basically holds the project name, version of cli, etc.
.editorconfig − This is the config file for the editor.
.gitignore − A .gitignore file should be committed into the repository, in order to share the ignore rules with any other users that clone the repository.
karma.conf.js − This is used for unit testing via the protractor. All the information required for the project is provided in karma.conf.js file.
package.json − The package.json file tells which libraries will be installed into node_modules when you run npm install.
At present, if you open the file in the editor, you will get the following modules added in it.
"@angular/animations": "^4.0.0",
"@angular/common": "^4.0.0",
"@angular/compiler": "^4.0.0",
"@angular/core": "^4.0.0",
"@angular/forms": "^4.0.0",
"@angular/http": "^4.0.0",
"@angular/platform-browser": "^4.0.0",
"@angular/platform-browser-dynamic": "^4.0.0",
"@angular/router": "^4.0.0",
In case you need to add more libraries, you can add those over here and run the npm install command.
protractor.conf.js − This is the testing configuration required for the application.
tsconfig.json − This basically contains the compiler options required during compilation.
tslint.json − This is the config file with rules to be considered while compiling.
The src folder is the main folder, which internally has a different file structure.
app
It contains the files described below. These files are installed by angular-cli by default.
app.module.ts − If you open the file, you will see that the code has reference to different libraries, which are imported. Angular-cli has used these default libraries for the import – angular/core, platform-browser. The names itself explain the usage of the libraries.
They are imported and saved into variables such as declarations, imports, providers, and bootstrap.
import { BrowserModule } from '@angular/platform-browser';
import { NgModule } from '@angular/core';
import { AppComponent } from './app.component';

@NgModule({
   declarations: [
      AppComponent
   ],
   imports: [
      BrowserModule
   ],
   providers: [],
   bootstrap: [AppComponent]
})

export class AppModule { }
declarations − In declarations, the reference to the components is stored. The Appcomponent is the default component that is created whenever a new project is initiated. We will learn about creating new components in a different section.
imports − This will have the modules imported as shown above. At present, BrowserModule is part of the imports which is imported from @angular/platform-browser.
providers − This will have reference to the services created. The service will be discussed in a subsequent chapter.
bootstrap − This has reference to the default component created, i.e., AppComponent.
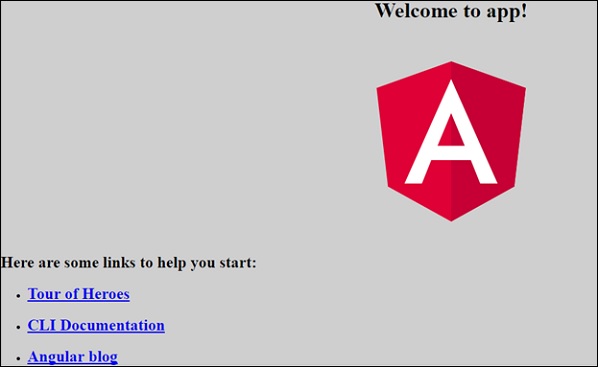
app.component.css − You can write your css structure over here. Right now, we have added the background color to the div as shown below.
.divdetails{
   background-color: #ccc;
}
app.component.html − The html code will be available in this file.
<!--The content below is only a placeholder and can be replaced.-->
<div class = "divdetails">
   <div style = "text-align:center">
      <h1>
         Welcome to {{title}}!
      </h1>
      <img width = "300" src = "data:image/svg+xml;base64,PD94bWwgdmVyc2lvbj0iMS4wIiBlbmNv
      ZGluZz0idXRmLTgiPz4NCjwhLS0gR2VuZXJhdG9yOiBBZG9iZSBJbGx1c3RyYXRvciAxOS4xLjAsIFNWRyBFe
      HBvcnQgUGx1Zy1JbiAuIFNWRyBWZXJzaW9uOiA2LjAwIEJ1aWxkIDApICAtLT4NCjxzdmcgdmVyc2lvbj0iMS4
      xIiBpZD0iTGF5ZXJfMSIgeG1sbnM9Imh0dHA6Ly93d3cudzMub3JnLzIwMDAvc3ZnIiB4bWxuczp4bGluaz0iaH
      R0cDovL3d3dy53My5vcmcvMTk5OS94bGluayIgeD0iMHB4IiB5PSIwcHgiDQoJIHZpZXdCb3g9IjAgMCAyNTAg
      MjUwIiBzdHlsZT0iZW5hYmxlLWJhY2tncm91bmQ6bmV3IDAgMCAyNTAgMjUwOyIgeG1sOnNwYWNlPSJwcmVzZXJ2
      ZSI+DQo8c3R5bGUgdHlwZT0idGV4dC9jc3MiPg0KCS5zdDB7ZmlsbDojREQwMDMxO30NCgkuc3Qxe2ZpbGw6I0M
      zMDAyRjt9DQoJLnN0MntmaWxsOiNGRkZGRkY7fQ0KPC9zdHlsZT4NCjxnPg0KCTxwb2x5Z29uIGNsYXNzPSJzdD
      AiIHBvaW50cz0iMTI1LDMwIDEyNSwzMCAxMjUsMzAgMzEuOSw2My4yIDQ2LjEsMTg2LjMgMTI1LDIzMCAxMjUsMj
      MwIDEyNSwyMzAgMjAzLjksMTg2LjMgMjE4LjEsNjMuMiAJIi8+DQoJPHBvbHlnb24gY2xhc3M9InN0MSIgcG9pbn
      RzPSIxMjUsMzAgMTI1LDUyLjIgMTI1LDUyLjEgMTI1LDE1My40IDEyNSwxNTMuNCAxMjUsMjMwIDEyNSwyMzAgMj
      AzLjksMTg2LjMgMjE4LjEsNjMuMiAxMjUsMzAgCSIvPg0KCTxwYXRoIGNsYXNzPSJzdDIiIGQ9Ik0xMjUsNTIuMU
      w2Ni44LDE4Mi42aDBoMjEuN2gwbDExLjctMjkuMmg0OS40bDExLjcsMjkuMmgwaDIxLjdoMEwxMjUsNTIuMUwxMj
      UsNTIuMUwxMjUsNTIuMUwxMjUsNTIuMQ0KCQlMMTI1LDUyLjF6IE0xNDIsMTM1LjRIMTA4bDE3LTQwLjlMMTQyLD
      EzNS40eiIvPg0KPC9nPg0KPC9zdmc+DQo=">
   </div>
   <h2>Here are some links to help you start: </h2>
   <ul>
      <li>
         <h2>
            <a target = "_blank" href="https://angular.io/tutorial">Tour of Heroes</a>
         </h2>
      </li>
      <li>
         <h2>
            <a target = "_blank" href = "https://github.com/angular/angular-cli/wiki">
               CLI Documentation
            </a>
         </h2>
      </li>
      <li>
         <h2>
            <a target="_blank" href="http://angularjs.blogspot.ca/">Angular blog</a>
         </h2>
      </li>
   </ul>
</div>
This is the default html code currently available with the project creation.
app.component.spec.ts − These are automatically generated files which contain unit tests for source component.
app.component.ts − The class for the component is defined over here. You can do the processing of the html structure in the .ts file. The processing will include activities such as connecting to the database, interacting with other components, routing, services, etc.
The structure of the file is as follows −
import { Component } from '@angular/core';

@Component({
   selector: 'app-root',
   templateUrl: './app.component.html',
   styleUrls: ['./app.component.css']
})
export class AppComponent {
   title = 'app';
}
Assets
You can save your images, js files in this folder.
Environment
This folder has the details for the production or the dev environment. The folder contains two files.
- environment.prod.ts
- environment.ts
Both the files have details of whether the final file should be compiled in the production environment or the dev environment.
The additional file structure of Angular 4 app folder includes the following −
favicon.ico
This is a file that is usually found in the root directory of a website.
index.html
This is the file which is displayed in the browser.
<!doctype html>
<html lang = "en">
   <head>
      <meta charset = "utf-8">
      <title>HTTP Search Param</title>
      <base href = "/">
      <link href = "https://fonts.googleapis.com/icon?family=Material+Icons" rel="stylesheet">
      <link href = "https://fonts.googleapis.com/css?family=Roboto|Roboto+Mono" rel="stylesheet">
      <link href = "styles.c7c7b8bf22964ff954d3.bundle.css" rel="stylesheet">
      <meta name = "viewport" content="width=device-width, initial-scale=1">
      <link rel = "icon" type="image/x-icon" href="favicon.ico">
   </head>

   <body>
      <app-root></app-root>
   </body>
</html>
The body has <app-root></app-root>. This is the selector which is used in app.component.ts file and will display the details from app.component.html file.
main.ts
main.ts is the file from where we start our project development. It starts with importing the basic module which we need. Right now if you see angular/core, angular/platform-browser-dynamic, app.module and environment is imported by default during angular-cli installation and project setup.
import { enableProdMode } from '@angular/core';
import { platformBrowserDynamic } from '@angular/platform-browser-dynamic';

import { AppModule } from './app/app.module';
import { environment } from './environments/environment';

if (environment.production) {
   enableProdMode();
}
platformBrowserDynamic().bootstrapModule(AppModule);
The platformBrowserDynamic().bootstrapModule(AppModule) has the parent module reference AppModule. Hence, when it executes in the browser, the file that is called is index.html. Index.html internally refers to main.ts which calls the parent module, i.e., AppModule when the following code executes −
platformBrowserDynamic().bootstrapModule(AppModule);
When AppModule is called, it calls app.module.ts which further calls the AppComponent based on the boostrap as follows −
bootstrap: [AppComponent]
In app.component.ts, there is a selector: app-root which is used in the index.html file. This will display the contents present in app.component.html.
The following will be displayed in the browser −
polyfill.ts
This is mainly used for backward compatibility.
styles.css
This is the style file required for the project.
test.ts
Here, the unit test cases for testing the project will be handled.
tsconfig.app.json
This is used during compilation, it has the config details that need to be used to run the application.
tsconfig.spec.json
This helps maintain the details for testing.
typings.d.ts
It is used to manage the TypeScript definition.
The final file structure looks as follows −