- Angular 4 Tutorial
- Angular 4 - Home
- Angular 4 – Overview
- Angular 4 – Environment Setup
- Angular 4 – Project Setup
- Angular 4 – Components
- Angular 4 – Module
- Angular 4 – Data Binding
- Angular 4 – Event Binding
- Angular 4 – Templates
- Angular 4 – Directives
- Angular 4 – Pipes
- Angular 4 – Routing
- Angular 4 – Services
- Angular 4 – Http Service
- Angular 4 – Forms
- Angular 4 – Animations
- Angular 4 – Materials
- Angular 4 – CLI
- Angular 4 – Examples
- Angular 4 Useful Resources
- Angular 4 - Quick Guide
- Angular 4 - Useful Resources
- Angular 4 - Discussion
Angular 4 - Event Binding
In this chapter, we will discuss how Event Binding works in Angular 4. When a user interacts with an application in the form of a keyboard movement, a mouse click, or a mouseover, it generates an event. These events need to be handled to perform some kind of action. This is where event binding comes into picture.
Let us consider an example to understand this better.
app.component.html
<!--The content below is only a placeholder and can be replaced.-->
<div style = "text-align:center">
   <h1>
      Welcome to {{title}}.
   </h1>
</div>

<div> Months :
   <select>
      <option *ngFor = "let i of months">{{i}}</option>
   </select>
</div>
<br/>

<div>
   <span *ngIf = "isavailable; then condition1 else condition2">
      Condition is valid.
   </span>
   <ng-template #condition1>Condition is valid</ng-template>
   <ng-template #condition2>Condition is invalid</ng-template>
</div>
<button (click)="myClickFunction($event)">
   Click Me
</button>
In the app.component.html file, we have defined a button and added a function to it using the click event.
Following is the syntax to define a button and add a function to it.
(click)="myClickFunction($event)"
The function is defined in the .ts file: app.component.ts
import { Component } from '@angular/core';
@Component({
selector: 'app-root',
templateUrl: './app.component.html',
styleUrls: ['./app.component.css']
})
export class AppComponent {
title = 'Angular 4 Project!';
//array of months.
months = ["January", "Feburary", "March", "April",
"May", "June", "July", "August", "September",
"October", "November", "December"];
isavailable = true;
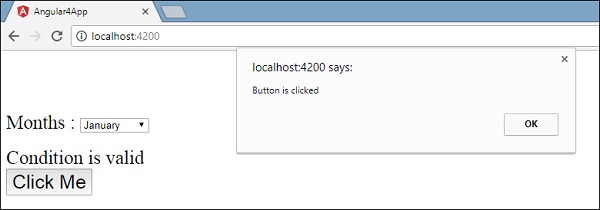
myClickFunction(event) {
//just added console.log which will display the event details in browser on click of the button.
alert("Button is clicked");
console.log(event);
}
}
Upon clicking the button, the control will come to the function myClickFunction and a dialog box will appear, which displays the Button is clicked as shown in the following screenshot −
Let us now add the change event to the dropdown.
The following line of code will help you add the change event to the dropdown −
<!--The content below is only a placeholder and can be replaced.-->
<div style = "text-align:center">
   <h1>
      Welcome to {{title}}.
   </h1>
</div>

<div> Months :
   <select (change) = "changemonths($event)">
      <option *ngFor = "let i of months">{{i}}</option>
   </select>
</div>
<br/>

<div>
   <span *ngIf = "isavailable; then condition1 else condition2">
      Condition is valid.
   </span>
   <ng-template #condition1>Condition is valid</ng-template>
   <ng-template #condition2>Condition is invalid</ng-template>
</div>

<button (click) = "myClickFunction($event)">Click Me</button>
The function is declared in the app.component.ts file −
import { Component } from '@angular/core';
@Component({
selector: 'app-root',
templateUrl: './app.component.html',
styleUrls: ['./app.component.css']
})
export class AppComponent {
title = 'Angular 4 Project!';
//array of months.
months = ["January", "Feburary", "March", "April",
"May", "June", "July", "August", "September",
"October", "November", "December"];
isavailable = true;
myClickFunction(event) {
alert("Button is clicked");
console.log(event);
}
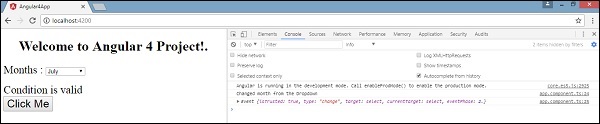
changemonths(event) {
console.log("Changed month from the Dropdown");
console.log(event);
}
}
The console message “Changed month from the Dropdown” is displayed in the console along with the event.
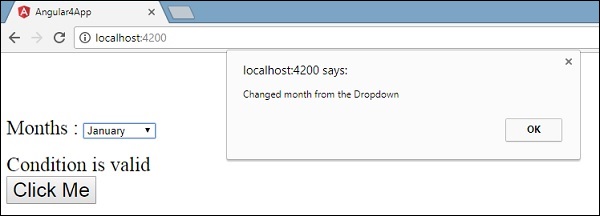
Let us add an alert message in app.component.ts when the value from the dropdown is changed as shown below −
import { Component } from '@angular/core';

@Component({
   selector: 'app-root',
   templateUrl: './app.component.html',
   styleUrls: ['./app.component.css']
})

export class AppComponent {
   title = 'Angular 4 Project!';
   //array of months.
   months = ["January", "February", "March", "April",
            "May", "June", "July", "August", "September",
            "October", "November", "December"];

   isavailable = true;
   myClickFunction(event) {
      //just added console.log which will display the event details in browser
      on click of the button.
      alert("Button is clicked");
      console.log(event);
   }
   changemonths(event) {
      alert("Changed month from the Dropdown");
   }
}
When the value in dropdown is changed, a dialog box will appear and the following message will be displayed - “Changed month from the Dropdown”.