- Unity - Home
- Unity - Introduction
- Unity - Installation and Setting Up
- Unity - Creating Sprites
- Unity - Modifying Sprites
- Transforms and Object Parenting
- Unity - Internal Assets
- Unity - Saving and Loading Scenes
- Unity - Basic Movement Scripting
- Unity - Understanding Collisions
- Unity - Rigidbodies and Physics
- Unity - Custom Collision Boundaries
- Understanding Prefabs and Instantiation
- Unity - GameObject Destruction
- Unity - Coroutines
- Unity - The Console
- Unity - Introduction to Audio
- Unity - Starting with UI
- Unity - The Button
- Unity - Text Element
- Unity - The Slider
- Unity - Materials and Shaders
- Unity - The Particle System
- Unity - Using the Asset Store
Unity - Starting with UI
In this section, we will learn about the design process for User Interface or UI elements in Unity. This includes the base setup, as well as an overview of the common elements that ship with Unity.
The workflow for designing UI in Unity follows a slightly different path than the one we have been going through so far. For starters, UI elements are not standard GameObjects and cannot be used as such. UI elements are designed differently; a menu button which looks correct in a 4:3 resolution may look stretched or distorted in a 16:9 resolution if not set up right.
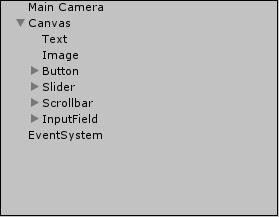
UI elements in Unity are not placed directly onto the scene. They are always placed as children of a special GameObject called the Canvas. The Canvas is like a drawing sheet for UI on the scene, where all UI elements will render. Creating a UI element from the Create context menu without an existing Canvas will automatically generate one.
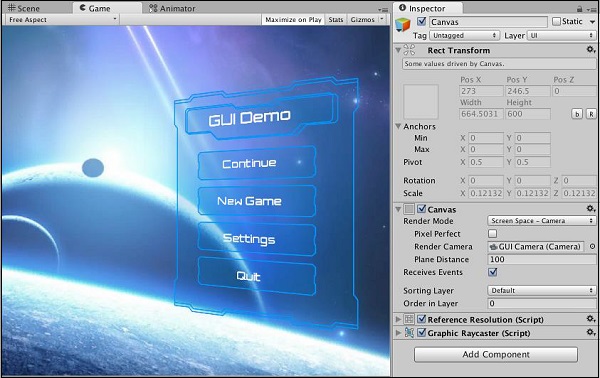
Let us now look at the Canvas GameObject to know about the additional new components −
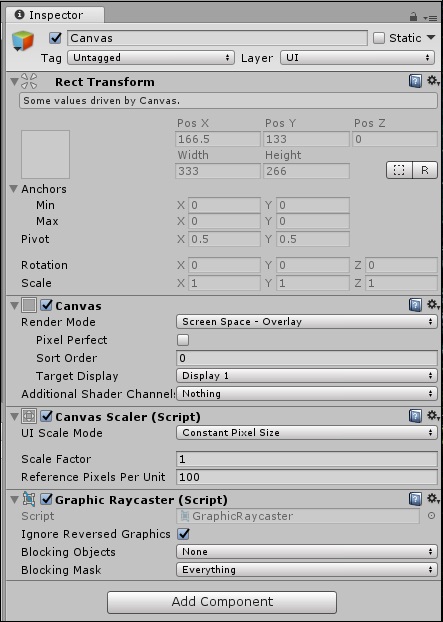
The Rect Transform at the top appears to have many new properties that a standard GameObjects Transform does not have.
This is because while a normal GameObjects Transform describes an imaginary point in 3D space, a RectTransform defines an imaginary rectangle. This means we need additional properties for defining exactly where the rectangle is, how big it is and how it is oriented.
We can see some standard properties of a rectangle like the Height and Width, as well as two new properties called Anchors. Anchors are points that other entities can lock onto in the Canvas. This means that if a UI element (say, a button) is anchored to the Canvas on the right, resizing the Canvas will ensure that the Button is always on the relative right of the Canvas.
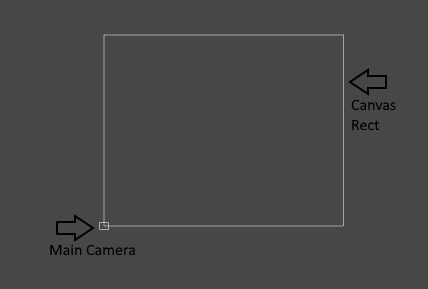
By default, you will not be able to modify the shape of the canvas area, and it will be a comparatively gigantic rectangle around your scene.
Next is the Canvas Component. This is the master component that holds a couple of universal options as to how the UI is drawn.
The first option we see is the Render Mode. This property defines the method that is used to draw the Canvas onto the games view.
We have three options in the dropdown list. Let us learn about the options in our subsequent sections.
Screen Space - Overlay
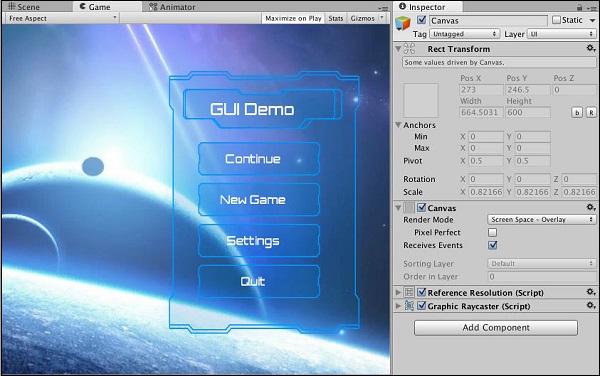
This mode is the most standard for menus, HUDs and so on. It renders UI on top of everything else in the scene, exactly how it is arranged and without exception. It also scales the UI nicely when the screen or game window size changes. This is the default Render Mode in the Canvas.
Screen Space - Camera
Screen Space - Camera creates an imaginary projection plane, a set distance from the camera, and projects all UI onto it. This means that the appearance of the UI in the scene depends heavily on the settings used by the camera; this includes perspective, field of view, and so on.
World Space
In World Space mode, UI elements behave as if they were normal GameObjects placed into the world. They are similar to sprites, however, so they are typically used as part of the game world instead of for the player, like in-game monitors and displays. Because of this nature, you can directly modify the values of the Canvas RectTransform in this mode.
The Canvas Scaler is a set of options that lets you adjust the scale and appearance of the UI elements in a more definitive way; it allows you to define how UI elements resize themselves when the size of the screen changes. For example, UI elements can remain the same size regardless of as well as in ratio to the screen size, or they can scale according to a Reference Resolution.
The Graphics Raycaster deals primarily with raycasting (link to Unity Documentation for Raycasting) the UI elements and ensuring user-initiated events like clicks and drags work correctly.
