- Unity - Home
- Unity - Introduction
- Unity - Installation and Setting Up
- Unity - Creating Sprites
- Unity - Modifying Sprites
- Transforms and Object Parenting
- Unity - Internal Assets
- Unity - Saving and Loading Scenes
- Unity - Basic Movement Scripting
- Unity - Understanding Collisions
- Unity - Rigidbodies and Physics
- Unity - Custom Collision Boundaries
- Understanding Prefabs and Instantiation
- Unity - GameObject Destruction
- Unity - Coroutines
- Unity - The Console
- Unity - Introduction to Audio
- Unity - Starting with UI
- Unity - The Button
- Unity - Text Element
- Unity - The Slider
- Unity - Materials and Shaders
- Unity - The Particle System
- Unity - Using the Asset Store
Unity - Introduction to Audio
There is a reason games put emphasis on audio; it is quite crucial to add aesthetic value to the game. From the very first Pong, one can hear beeps and boops from the ball hitting the paddles alternatingly. It was a really simple short square wave sample at the time, but what more could you want from the grandfather of all video games?
In real life, many things affect the way you perceive sound; the speed of the object, what type of scenario it is in, and what direction it is coming from.
There are a number of factors that can create unnecessary load on our engine. Instead, we try to create an idea of how our sound would work in our game, and build around that. This becomes especially prominent in 3D games, where there are 3 axes to deal with.
In Unity, we have dedicated components for audio perception and playback. These components work together to create a believable sound system that feels natural to the game.
Unity provides us with an array of useful tools and effects like reverb, the Doppler effect, real-time mixing and effects, etc. We will learn about these in our subsequent chapters.
The Audio Components
In this section, we will learn about the 3 primary components related to audio in Unity.
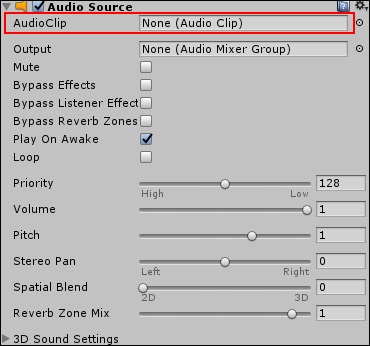
AudioSource
The AudioSource component is the primary component that you will attach to a GameObject to make it play sound. It will play back an AudioClip when triggered through the mixer, through code or by default, when it awakes.
An AudioClip is simply a sound file that is loaded into an AudioSource. It can be any standard audio file, such as .mp3, .wav and so on. An AudioClip is a component within itself as well.
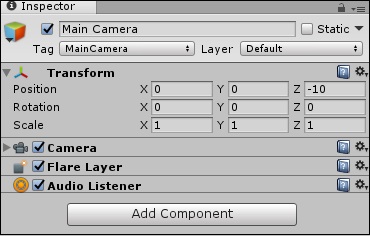
AudioListener
An AudioListener is the component that listens to all audio playing in the scene, and transfers it to the computers speakers. It acts like the ears of the game. All audio you hear is in perspective of the positioning of this AudioListener. Only one AudioListener should be in a scene for it to function properly. By default, the main camera has the Listener attached to it. The Listener doesnt have any exposed properties that the designer would want to care about.
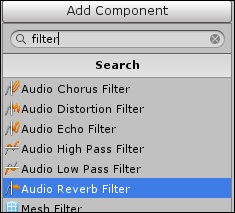
Audio Filters
The output of an AudioSource or intake of an AudioListener can be modified with the help of Audio Filters. These are specific components that can change the reverb, chorus, filtering, and so on. Each specific filter comes as its own component with exposed values to tweak how it sounds.
Playing a Sound
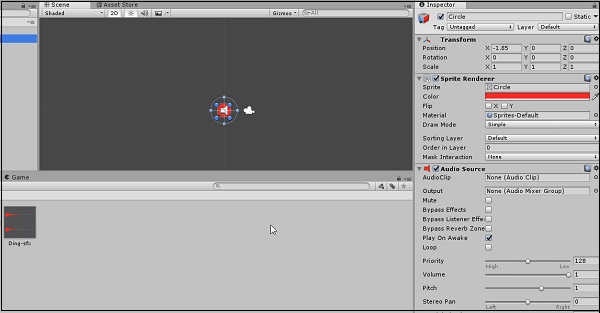
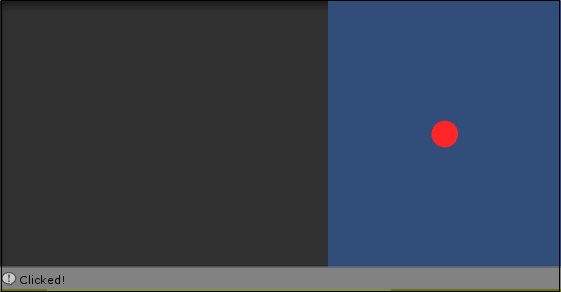
Let us try making a button that plays a sound when it is clicked. To get started, we will Create a Circle sprite, and make it red.
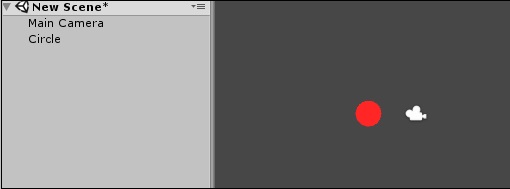
Now, let us attach an Audio Source to this sprite.
For the object to play a sound, we have to give it one. Let us use this sound effect for our purpose.
http://www.orangefreesounds.com/ding-sfx/
Download the sound effect, and drag it into the Assets.

When Unity imports this asset as a sound file, it automatically is converted into an AudioClip. Therefore, you can drag this sound clip from the Assets directly onto the Audio Clip slot in our sprites Audio Source.
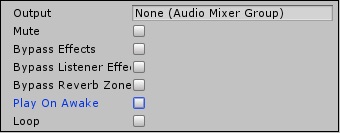
After you drag the sound clip from the Assets directly onto the Audio Clip slot in our sprites Audio Source, remember to unselect Play on Awake in the Audio Source properties; not doing so will make the sound play the moment the game starts.
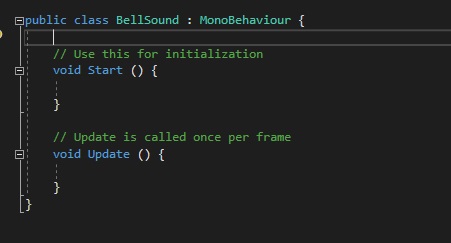
Now, let us jump into our code. Create a new script called BellSound and open it up.
Since our Audio Source is controlled through code, we want to first get a reference to it. We will use the GetComponent method like before.
public class BellSound : MonoBehaviour {
   AudioSource mySource;
   // Use this for initialization
   void Start () {
      mySource = GetComponent<AudioSource>();
}
Now, let us set up the method to detect the object being clicked. MonoBehaviour gives us just the method we need for it, named OnMouseDown. The method is called whenever the mouse clicks in the range of a collider of that gameObject.
Since we have not attached a collider to our button yet, let us do so now.
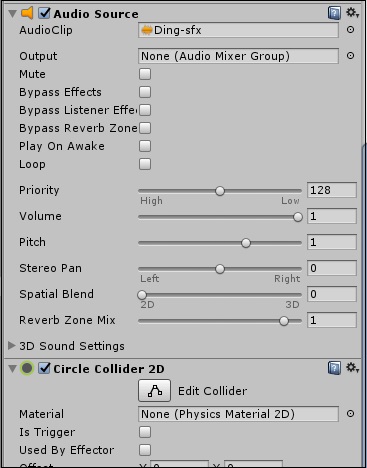
We will not need a Rigidbody for this one; neither do we need to access this collider by code. It just has to be there for the method to work.
Let us test the method and see if it is working. Write the following code in your script, and attach it to the button.
void OnMouseDown() {
   Debug.Log(Clicked!);
}
Once you save the script and attach it, play the game. Clicking on the button should spawn a message in the Console.
You are now one step away from playing the sound. All you have to do now is call the Play method in the Audio Source instance.
void OnMouseDown() {
   mySource.Play();
}
Save your script, and run it in the game. Click on the button, and you should hear the sound play!
Note − Consider making a button that goes up in pitch every time you click on it. Use mySource.pitch and a counter and see if you can figure it out.)
