- Unity - Home
- Unity - Introduction
- Unity - Installation and Setting Up
- Unity - Creating Sprites
- Unity - Modifying Sprites
- Transforms and Object Parenting
- Unity - Internal Assets
- Unity - Saving and Loading Scenes
- Unity - Basic Movement Scripting
- Unity - Understanding Collisions
- Unity - Rigidbodies and Physics
- Unity - Custom Collision Boundaries
- Understanding Prefabs and Instantiation
- Unity - GameObject Destruction
- Unity - Coroutines
- Unity - The Console
- Unity - Introduction to Audio
- Unity - Starting with UI
- Unity - The Button
- Unity - Text Element
- Unity - The Slider
- Unity - Materials and Shaders
- Unity - The Particle System
- Unity - Using the Asset Store
Unity - Basic Movement Scripting
In this lesson, we will write code that makes a gameObject move up, down, left and right based on the users input. This should help us understand the workflow of Unity scripting more easily.
Remember that every GameObject has at least one component − Transform. What is special is that the Transform of a gameObject also shows up as variables in the scripting side of Unity so we can modify it via code. This is not restricted to the Transform either; all components in Unity have properties, which are accessible through variables in scripting.
Let us start with our movement script. Create a new script, and name it Movement.
Now, open the script and you should see the same stuff you saw in the last lesson.
Let us create a public float variable named speed. Making a variable public in Unity has a great advantage −
The variable shows up as a modifiable field inside the editor, so you dont have to manually adjust the values in code.
public class Movement : MonoBehaviour {
   public float speed;
}
If we save this script without touching the other methods, it should compile in Unity.
(You can see when it is compiling by the  icon in the bottom right corner.)
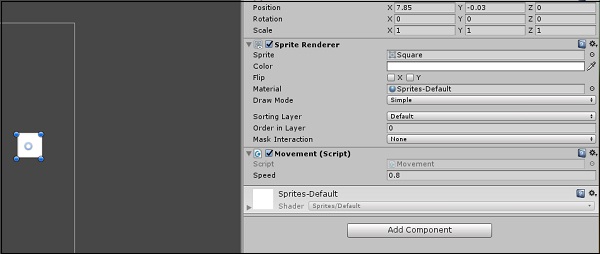
Next, drag and drop the script from the Assets onto the GameObject. If you do it correctly, this is what you should see in the GameObjects properties −

Since the speed value is adjustable and need not be changed in code all the time, we can use update() method instead of start().
Let us now consider the objectives for the Update method −
Check for the user input.
If there is a user input, read the directions of input.
Change the position values of the objects transform based on its speed and direction. To do so, we will add the following code −
void Update() {
   float h = Input.GetAxisRaw(Horizontal);
   float v = Input.GetAxisRaw(Vertical);

   gameObject.transform.position = new Vector2 (transform.position.x + (h * speed),
      transform.position.y + (v * speed));
Let us now discuss the code in breif.
First of all, we make a floating point variable named h (for horizontal), and its value is given by the Input.GetAxisRaw method. This method returns -1, 0 or 1 depending on which key the player has pressed on the up/down/left/right arrows.
The Input class is responsible for getting input from the user in the form of key presses, mouse input, controller input, and so on. The GetAxisRaw method is slightly harder to understand, so well get back to that later.
Next, we are updating the position of our gameObject to a new position defined by creating a new Vector2. The Vector2 takes 2 parameters, which are its x and y values respectively. For the x value, we provide the sum of the objects current position and its speed, effectively adding some amount every frame the key is pressed to its position.
Save this script and head back to Unity. Unity will automatically update all scripts once it compiles successfully, so you dont have to reattach the script again and again.
Now that you are done, change the value of the speed in the GameObjects properties to say 0.8. This is important because a higher value will make the player move too fast.

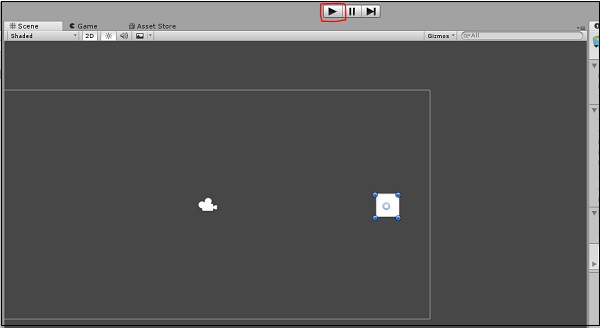
Now, click Play and see your first small game in action!

Try pressing the arrow keys and moving around. To stop the game, simply press Play again. You can even adjust the speed in real-time so you do not have to stop and start it all the time.
In the next lesson, we will learn about rigidbodies and collisions.