- TestRail - Home
- TestRail - Introduction
- TestRail - Features
- TestRail - Free Trial Access
- TestRail - Login
- TestRail - Dashboard
- TestRail - Invite Users
- TestRail - Add A Project
- TestRail - TestCases - Section
- TestRail - TestCases - Case
- TestRail - Import TestCases - CSV
- TestRail - Import TestCases - XML
- TestRail - Export TestCases
- TestRail - Test Runs
- TestRail - Rerun
- TestRail - Customize Table
- TestRail - Copy/Move Test Cases
- TestRail - Milestones
- TestRail - Test Plans & Configuration
- TestRail - To Do & Notifications
- TestRail - Reports
- Tracking Progress & Activity
- TestRail - Add Multiple Test Results
- TestRail - Advanced Search Option
- TestRail - Optimized Printing
- TestRail - Shortcuts & Hotkeys
- TestRail Useful Resources
- TestRail - Quick Guide
- TestRail - Useful Resources
- TestRail - Discussion
TestRail - Add A Project
To add a project, a user must have an Admin role. In the bottom, Create Project icon displays the procedure how to add a project when user brings the cursor there.
Create a Project
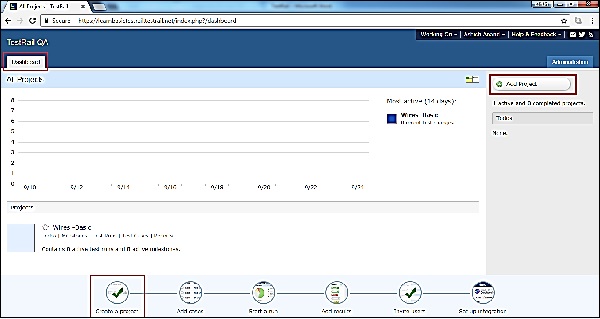
While adding a project into TestRail, the first step is to login as Administrator and Go to the main Dashboard page where all projects are listed. The 1st screen after logging into TestRail.
Click on Add Project button present at right side as displayed in below screenshot
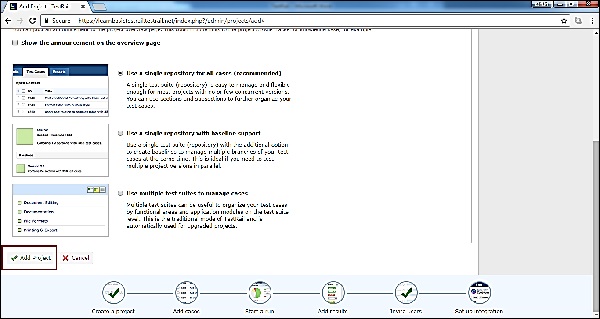
It opens add project form where user needs to enter details in following fields
Name − Project Name
Announcement − If any announcement for the project like release date, start date etc
User can click the checkbox to display announcement at Project Overview page. Select the type of repository based on project and manage cases.

Now click on Add Project as shown below
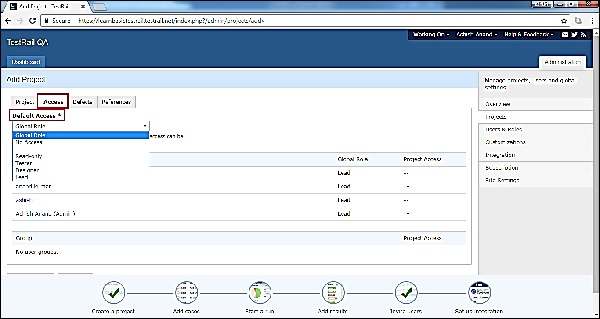
Optionally, user can add details about access to the project as well. To add access details go to next tab and select Default Access as shown in below screenshot
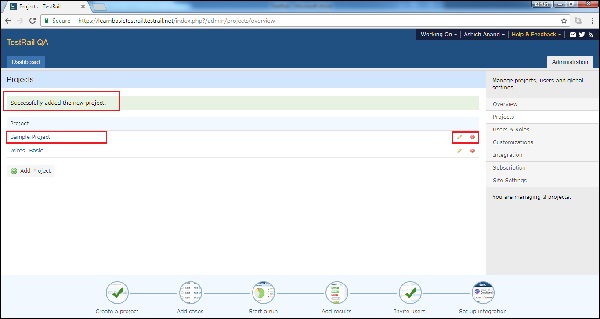
Similarly, user can add details into Defects and References tab. After clicking on Add Project, successful message displays and project gets listed as shown in below screenshot There is Edit and Delete button as well to edit project details and delisted to the project.