- Security Testing - Home
- Security Testing - Overview
- Security Testing - Process
- Security Testing - Malicious Software
- HTTP Protocol Basics
- HTTPS Protocol Basics
- Encoding and Decoding
- Security Testing - Cryptography
- Security Testing - Same Origin Policy
- Security Testing - Cookies
- Hacking Web Applications
- Security Testing - Injection
- Testing Broken Authentication
- Testing Cross Site Scripting
- Insecure Direct Object Reference
- Testing Security Misconfiguration
- Testing Sensitive Data Exposure
- Missing Function Level Access Control
- Cross Site Request Forgery
- Components with Vulnerabilities
- Unvalidated Redirects and Forwards
- Security Testing - Ajax Security
- Testing Security - Web Service
- Security Testing - Buffer Overflows
- Security Testing - Denial of Service
- Testing Malicious File Execution
- Security Testing - Automation Tools
Security Testing - Malicious File Execution
Developers often directly use or concatenate potentially vulnerable input with file or assume that input files are genuine. When the data is not checked properly, this can lead to the vulnerable content being processed or invoked by the web server.
Example
Some of the classic examples include −
- Upload .jsp file into web tree.
- Upload .gif to be resized.
- Upload huge files.
- Upload file containing tags.
- Upload .exe file into web tree.
Hands ON
Step 1 − Launch WebGoat and navigate to Malicious file execution section. The snapshot of the scenario is given below −
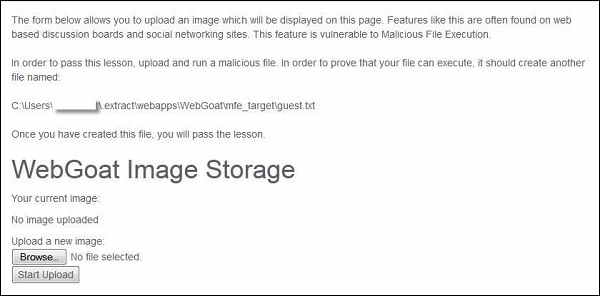
Step 2 − In order to complete this lesson, we need to upload guest.txt in the above said location.
Step 3 − Let us create a jsp file such that the guest.txt file is created on executing the jsp. The Naming of the jsp has no role to play in this context as we are executing the content of the jsp file.
<HTML>
   <% java.io.File file = new
      java.io.File("C:\\Users\\username$\\.extract\\webapps\\WebGoat\\mfe_target\\guest.txt");
      file.createNewFile(); %>
</HTML>
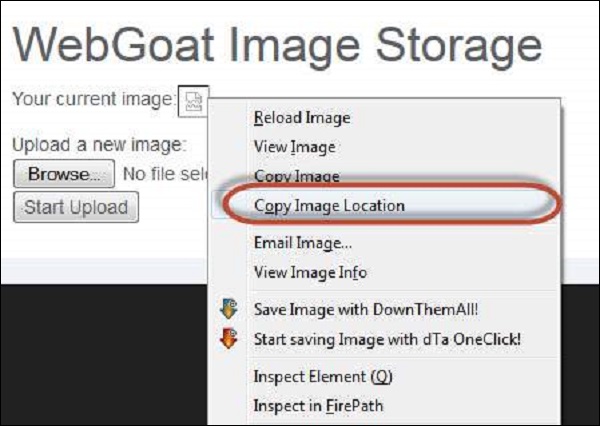
Step 4 − Now upload the jsp file and copy the link location of the same after upload. The upload is expecting an image, but we are uploading a jsp.
Step 5 − By navigating to the jsp file, there will not be any message to the user.
Step 6 − Now refresh the session where you have uploaded the jsp file and you will get the message saying, "* Congratulations. You have successfully completed the lesson".

Preventive Mechanisms
- Secure websites using website permissions.
- Adopt countermeasures for web application security.
- Understand the Built-In user and group accounts in IIS 7.0.
