- SAP GRC - Home
- SAP GRC - Overview
- SAP GRC - Navigation
- SAP GRC - Access Control
- Access Management Work Center
- Access & Authorization Mngmt
- SAP GRC - Authorization
- Access Control Launchpad
- Integration with Access Control
- SAP GRC - Integration with IAM
- SAP GRC - Audit Universe
- Process Control Work Centers
- SAP GRC - SoD Risk Management
- SAP GRC - Risk Management
- SAP GRC - Risk Remediation
- SAP GRC - Mitigation Controls
- SAP GRC - Superuser Privilege
- SAP GRC - Implementing Superuser
- SAP GRC - Enhanced Risk Analysis
- Assigning Mitigation Controls
- SAP GRC - Workflow Integration
- Installation and Configuration
- Data Sources and Business Rules
- SAP GRC - Creating Business Rules
SAP GRC - Mitigation Controls
In SAP GRC 10.0, you can use mitigation controls when it is not possible to separate Segregation of duties SoD from the business process.
Example
In an organization, consider a scenario where a person takes care of roles within business processes that cause a missing SoD conflict.
There are different examples that are possible for mitigation controls −
- Release strategies and authorization limits
- Review of user logs
- Review of exception reports
- Detailed variance analysis
- Establish insurance to cover impact of a security incident
Mitigation Control Types
There are two types of mitigation control under SAP GRC Risk management −
- Preventive
- Detective
Preventive Mitigation Controls
Preventive mitigation control is used to reduce the impact of risk before it actually occurs. There are various activities that you can perform under preventive mitigation control −
- Configuration
- User Exits
- Security
- Defining workflow
- Custom Objects
Detective Mitigation Controls
Detective mitigation control is used when an alert is received and a risk occurs. In this case, the person who is responsible to initiate corrective measure mitigates the risk.
There are various activities that you can perform under detective mitigation control −
- Activity Reports
- Comparison of plan vs actual review
- Budget review
- Alerts
Setting up Migration Controls
Follow these steps to set up migration controls −
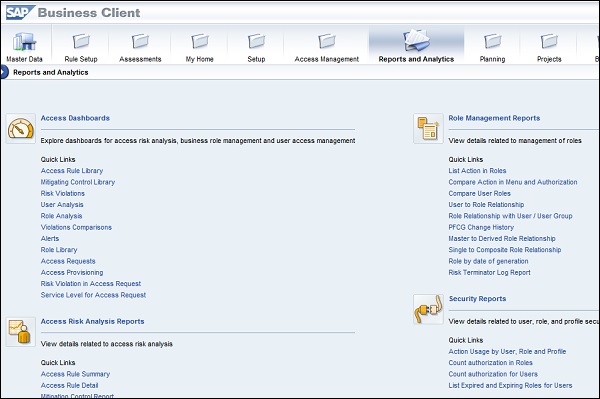
Step 1 − Login to SAP GRC Access control.
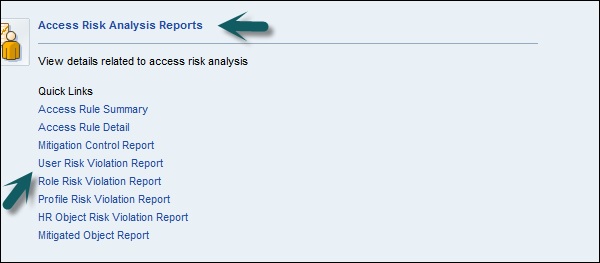
Step 2 − Perform a risk analysis on user level. Enter the below details −
- Report Type
- Report Format
Step 3 − Click Execute
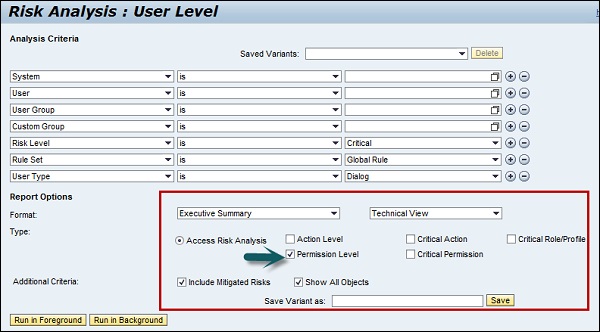
Step 4 − You can toggle between different report types as in the following screenshot −
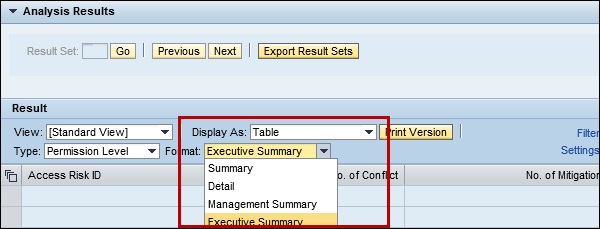
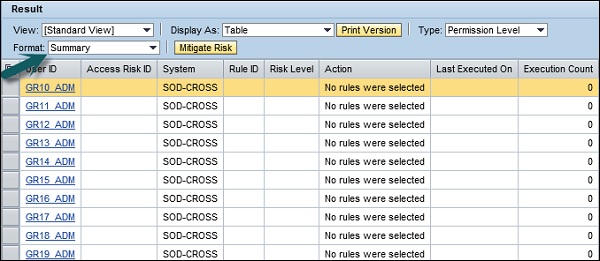
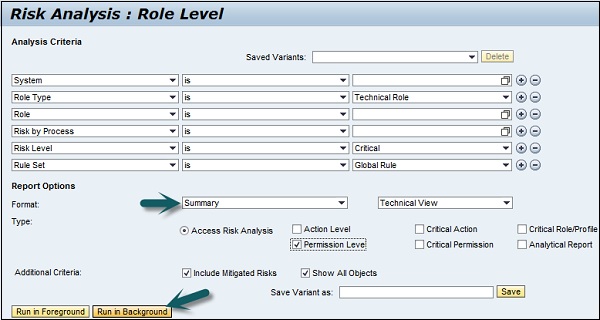
Step 5 − Logon to SAP GRC Access Control and schedule a risk analysis background job on role level.
Enter the following details −
- Report Type − Permission Level
- Report Format − Summary
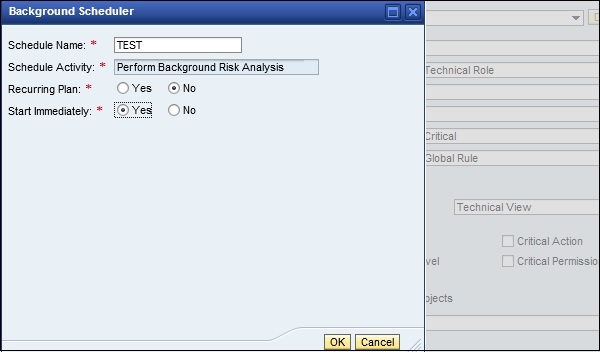
Step 6 − Click Run in Background as shown in the following screenshot −
Step 7 − In the next window, you can select Start Immediately. Then, click OK.