- SAP GRC - Home
- SAP GRC - Overview
- SAP GRC - Navigation
- SAP GRC - Access Control
- Access Management Work Center
- Access & Authorization Mngmt
- SAP GRC - Authorization
- Access Control Launchpad
- Integration with Access Control
- SAP GRC - Integration with IAM
- SAP GRC - Audit Universe
- Process Control Work Centers
- SAP GRC - SoD Risk Management
- SAP GRC - Risk Management
- SAP GRC - Risk Remediation
- SAP GRC - Mitigation Controls
- SAP GRC - Superuser Privilege
- SAP GRC - Implementing Superuser
- SAP GRC - Enhanced Risk Analysis
- Assigning Mitigation Controls
- SAP GRC - Workflow Integration
- Installation and Configuration
- Data Sources and Business Rules
- SAP GRC - Creating Business Rules
SAP GRC - Installation and Configuration
When you install SAP GRC, there are various configuration and settings that you need to perform in GRC. The key activities include −
Creating connectors in GRC
Configuring AMF to use the connectors
Creating callback connectors
Creating connections in GRC is standard process of creating RFC connection using T-Code − SM59
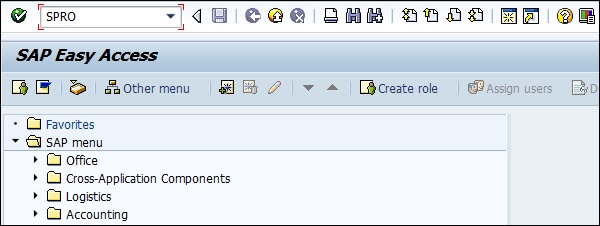
SAP GRC is available in SAP Easy Access → under Governance Risk Compliance folder.
Step 1 − Open SAP Easy access menu and use T-Code − SPRO
Step 2 − Go to Governance, Risk and Compliance under SAP Reference IMG → Common Component Settings → Integration Framework → Create Connectors
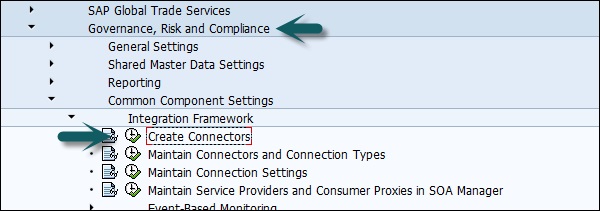
Step 3 − Create connector is shortcut for creating SM59 connection.
Step 4 − To see existing connections, go to Maintain Connectors and Connection Types −
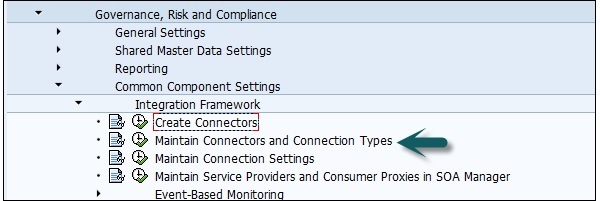
You can see connector types as shown below. These connector types can be used for configuration for different purposes −
Local system connectors are used to integrate with the SAP BusinessObjects Access Control application for monitoring segregation of duty violations
Web service connectors are used for external partner data sources (see section)
SAP system connectors are used in all other cases.
Step 5 − Go to Connection Type Definition tab −

Step 6 − Define which of the connectors previously defined in SM59 can be used in monitoring. Go to define Connectors
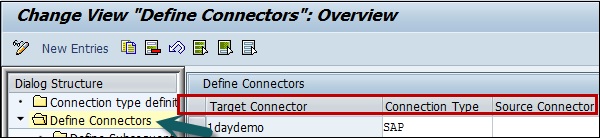
Step 7 − In the screen you can see a connector name SMEA5_100. This is a connector which shows a connector to an ECC system.
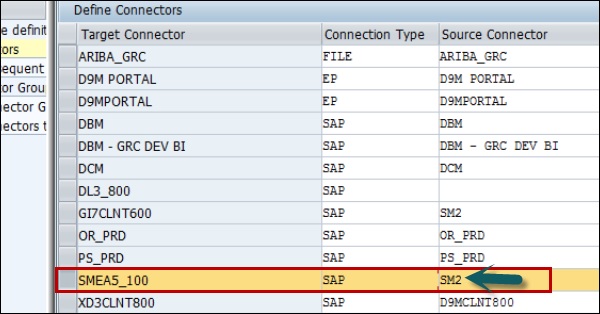
The third column that lists the name of a connector which is defined in the monitored system, and which is configured to point back to the GRC system being configured here.
SMEA5_100 is another connector in the GRC system and it points to an ERP system which is to be monitored. SM2 is a connector on the ECC system and it points back to GRC system.
Step 8 − Define Connector Group Screen on the left side.
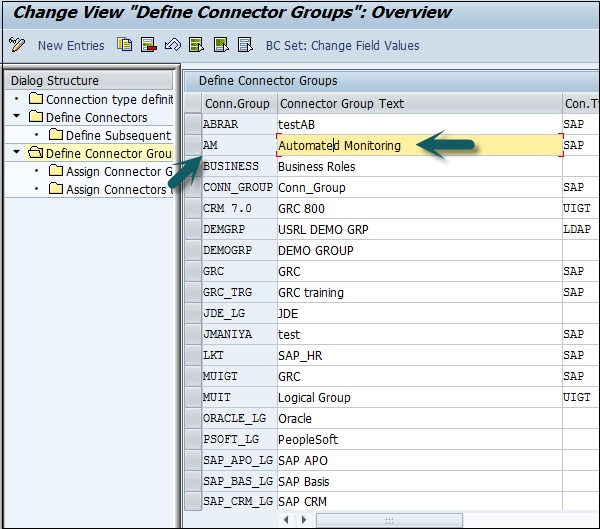
Step 9 − Here you have to ensure that all the connector configurations for automated monitoring should belong to the configuration group called Automated Monitoring as shown above under define automated monitoring connector group.
Step 10 − Go to assign connectors to connector group on the left side.
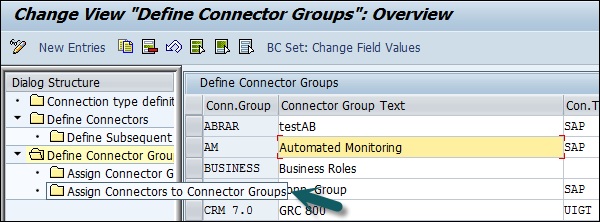
Step 11 − Assign the connector to AM connector group as mentioned in the above screenshot.
Step 12 − Go to Maintain Connection Settings in main menu as in the following screenshot.

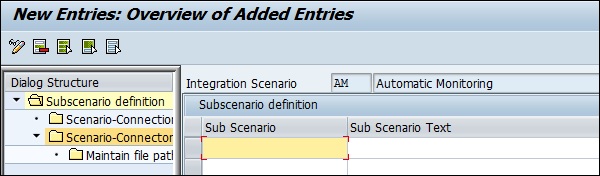
Step 13 − You need to enter the integration scenario you want, enter AM as in the following screenshot −
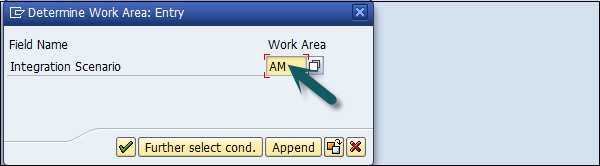
Step 14 − Click on the green tick mark as shown in the above screenshot; you will be directed to the following screen with nine sub-scenarios.
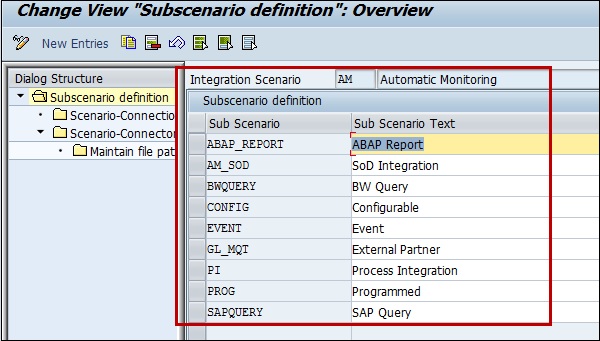
The highlighted box shows nine entries called sub-scenarios and they represent the different types of data sources and business rules supported under Process Control 10.
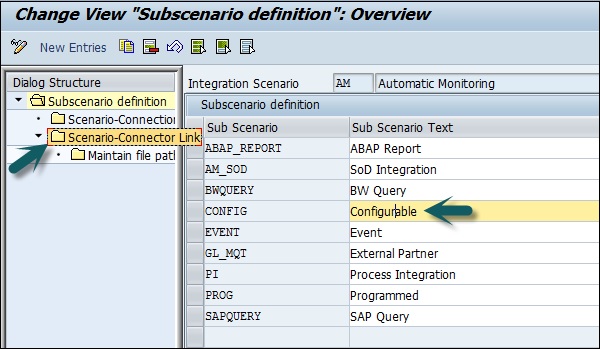
Step 15 − For the System to be monitored, you need to link the corresponding connector to that sub-scenario.
Step 16 − Select the sub-scenario you want configurable and then choose Scenario Connector Link in the left side as shown below −
Step 17 − You will be directed to the following screen −

Step 18 − Now the connector you want to use for that scenario is not already in the list for that sub-scenario,
- You can click on New Entries button at the top to add it.
- You can follow these recommendations to add subscenarios −
- ABAP Applications − ABAP report, SAP query, configurable program
- SAP BW − BW query
- Non SAP System − External Partner
- Process Integrator − PI
- GRC System − SoD integration