- Rexx - Home
- Rexx - Overview
- Rexx - Environment
- Rexx - Installation
- Rexx - Installation of Plugin-Ins
- Rexx - Basic Syntax
- Rexx - Datatypes
- Rexx - Variables
- Rexx - Operators
- Rexx - Arrays
- Rexx - Loops
- Rexx - Decision Making
- Rexx - Numbers
- Rexx - Strings
- Rexx - Functions
- Rexx - Stacks
- Rexx - File I/O
- Rexx - Functions For Files
- Rexx - Subroutines
- Rexx - Built-In Functions
- Rexx - System Commands
- Rexx - XML
- Rexx - Regina
- Rexx - Parsing
- Rexx - Signals
- Rexx - Debugging
- Rexx - Error Handling
- Rexx - Object Oriented
- Rexx - Portability
- Rexx - Extended Functions
- Rexx - Instructions
- Rexx - Implementations
- Rexx - Netrexx
- Rexx - Brexx
- Rexx - Databases
- Handheld & Embedded
- Rexx - Performance
- Rexx - Best Programming Practices
- Rexx - Graphical User Interface
- Rexx - Reginald
- Rexx - Web Programming
Rexx - Installation
The following steps will explain in detail how Rexx can be installed on a Windows system.
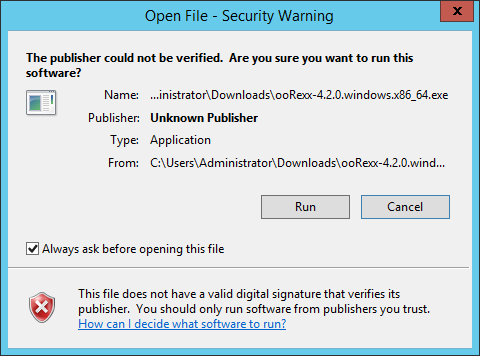
Step 1 − Launch the Installer downloaded in the earlier section. After the installer starts, click on the Run button.
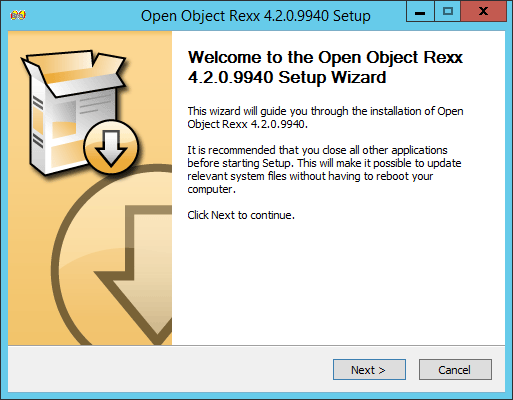
Step 2 − Click the next button on the following screen to proceed with the installation.
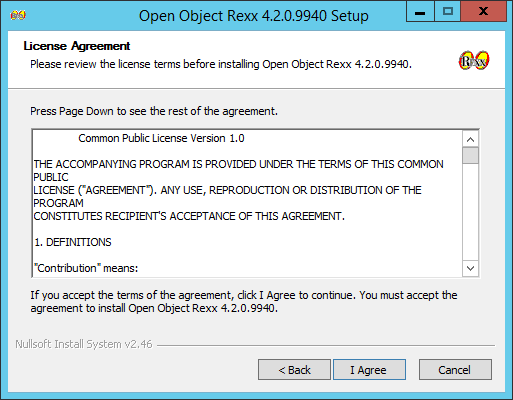
Step 3 − Click on the I Agree button to proceed.
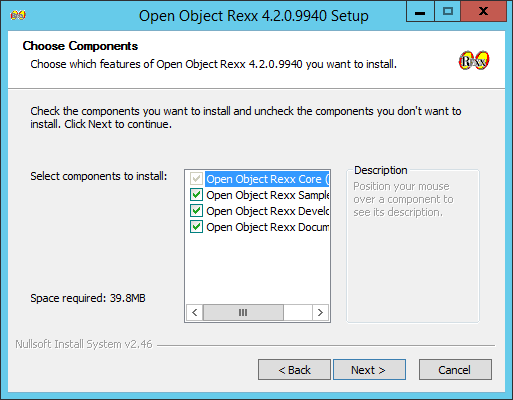
Step 4 − Accept the default components and then click on the next button.
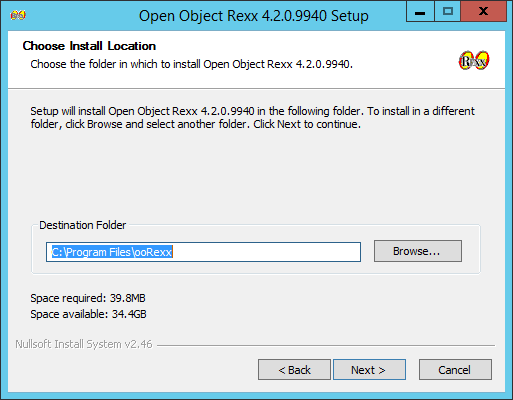
Step 5 − Choose the installation location and click on the Next button.
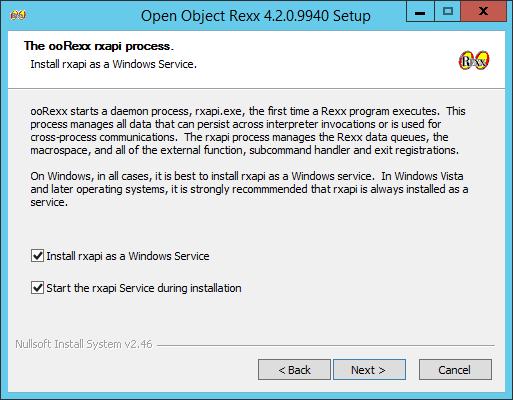
Step 6 − Accept the default processes which will be installed and click on the Next button.
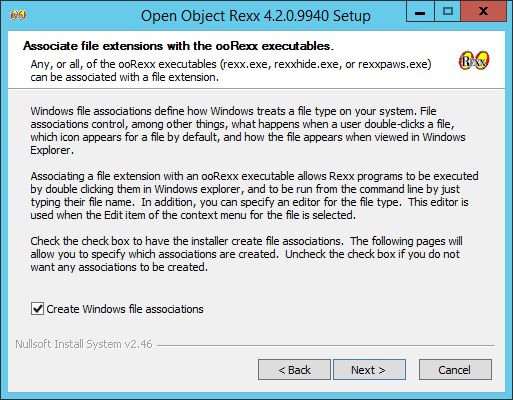
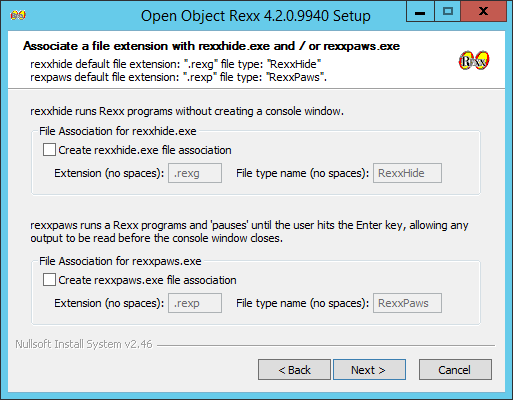
Step 7 − Choose the default file associations and click on the Next button.
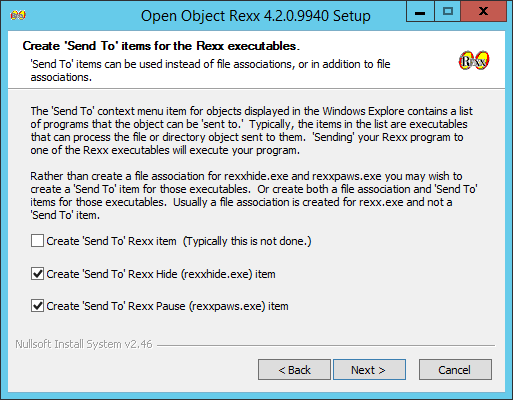
Step 8 − Click on the check boxes of send Rexx items to the executables and then click on the Next button as shown in the following screenshot.
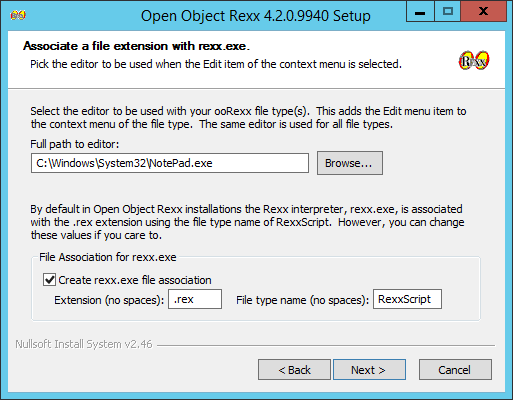
Step 9 − In the next screen, choose the editor for working with Rexx files. Keep the notepad as the default option. Also accept the default extension for each Rexx file.
Step 10 − Accept the default settings on the following screen that comes up and click on the Next button to proceed further with the installation.
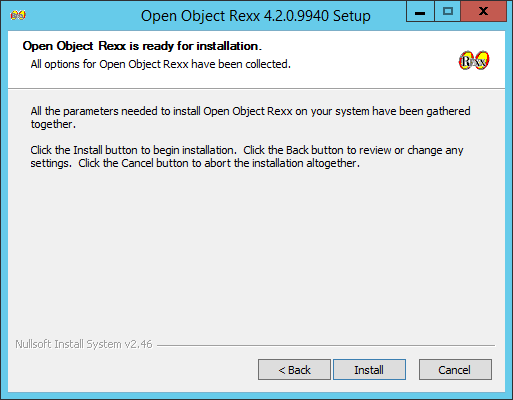
Step 11 − Finally click on the Install button to proceed with the installation.
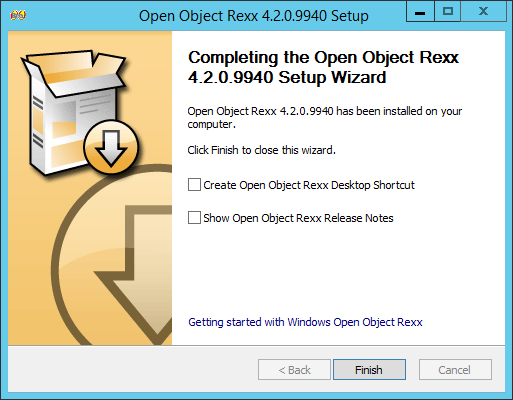
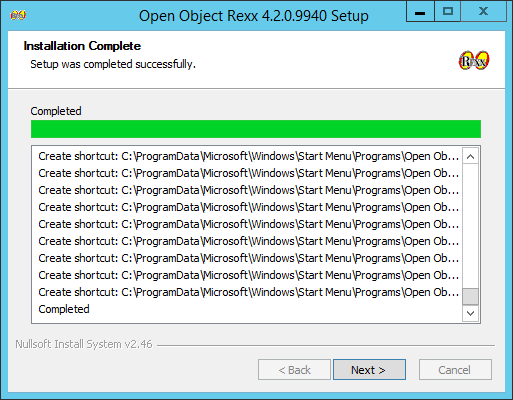
Step 12 − Once the installation is complete, you need to click on the Next button to proceed further.
Step 13 − Click on the Finish button to complete the installation.