
Article Categories
- All Categories
-
 Data Structure
-
 Networking
-
 RDBMS
RDBMS
-
 Operating System
-
 Java
Java
-
 MS Excel
-
 iOS
iOS
-
 HTML
HTML
-
 CSS
CSS
-
 Android
-
 Python
-
 C Programming
-
 C++
C++
-
 C#
C#
-
 MongoDB
-
 MySQL
MySQL
-
 Javascript
-
 PHP
PHP
-
 Economics & Finance
Performance Monitoring with Monitorix on Ubuntu 16.04
Monitorix is a free, open-source, lightweight system monitoring tool designed to monitor as many services and system resources as possible. It has been created for production Linux/UNIX servers but due to its simplicity and small size, it can also be used on embedded devices. This article explains how to install and configure Monitorix on Ubuntu 16.04.
Features of Monitorix
Monitorix provides comprehensive monitoring capabilities including CPU usage, memory consumption, disk I/O, network traffic, system load, and various services. It generates detailed graphs and reports accessible through a web interface, making it easy to track system performance over time.
Adding the Monitorix Repository
To add the Monitorix Repository, open the /etc/apt/sources.list file −
$ sudo nano /etc/apt/sources.list
The file will contain Ubuntu's default repositories. Place the cursor at the end of the file and add the following line −
deb http://apt.izzysoft.de/ubuntu generic universe
Save the file and exit.
Adding the PGP Key
Once the repository is added, download and install the PGP key to verify package authenticity −
$ wget http://apt.izzysoft.de/izzysoft.asc
--2016-05-24 11:35:47-- http://apt.izzysoft.de/izzysoft.asc
Resolving apt.izzysoft.de (apt.izzysoft.de)... 144.76.109.57
Connecting to apt.izzysoft.de (apt.izzysoft.de)|144.76.109.57|:80... connected.
HTTP request sent, awaiting response... 200 OK
Length: 1692 (1.7K) [text/plain]
Saving to: 'izzysoft.asc'

izzysoft.asc 100%[=======================================================>] 1.65K --.-KB/s in 0s
2016-05-24 11:35:47 (212 MB/s) - 'izzysoft.asc' saved [1692/1692]
Add the downloaded key to the system −
$ sudo apt-key add izzysoft.asc
OK
Update the package repositories −
$ sudo apt-get update
Installing Monitorix
Install Monitorix along with Apache utilities for web authentication −
$ sudo apt-get -y install monitorix apache2-utils
Reading package lists... Done
Building dependency tree
Reading state information... Done
The following additional packages will be installed:
  libconfig-general-perl libdbi-perl libdbi1 libemail-date-format-perl
  libhttp-server-simple-perl libmime-lite-perl libmime-types-perl
  librrd4 librrds-perl libxml-libxml-perl rrdtool
The following NEW packages will be installed:
  monitorix libconfig-general-perl libdbi-perl...
Configuring Monitorix
Open the main configuration file −
$ sudo nano /etc/monitorix/monitorix.conf
Locate the authentication section and modify it to enable password protection −
<auth>
    enabled = y
    msg = Monitorix: Restricted access
    htpasswd = /var/lib/monitorix/htpasswd
</auth>
Save the file and restart the Monitorix service −
$ sudo service monitorix restart
Setting Up Web Authentication
Create a username and password for web access. This example uses "admin" as the username −
$ sudo htpasswd -d -c /var/lib/monitorix/htpasswd admin
New password:
Re-type new password:
Adding password for user admin
Accessing the Web Interface
Open your browser and navigate to http://localhost:8080/monitorix/. You will see an authentication dialog −
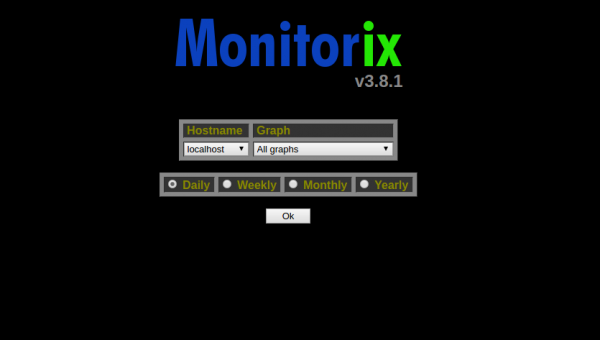
After entering your credentials, you will access the main monitoring dashboard −

Key Monitoring Features
| Category | Monitors |
|---|---|
| System | CPU usage, memory, load average, processes |
| Storage | Disk I/O, filesystem usage, temperature |
| Network | Interface traffic, port usage, connections |
| Services | Apache, MySQL, Postfix, DNS, FTP |
Conclusion
Monitorix provides a lightweight yet comprehensive monitoring solution for Ubuntu systems. Its web-based interface makes it easy to track system performance metrics and identify potential issues. The tool is particularly useful for system administrators who need reliable monitoring without the complexity of larger monitoring frameworks.

313 Views
