- Home
- Background and Introduction
- Concepts
- Web Design and Parallax Scroll
- CSS Techniques
- JavaScript Techniques
- jQuery Techniques
- Bootstrap Techniques
- Conclusion
JavaScript Techniques
To create Parallax effect, the most popular method is using JavaScript. From this chapter onwards we will discuss the concepts of JavaScript and some of the libraries used to achieve Parallax scrolling.
Utilizing pure JavaScript makes sense to keep the website performance optimal. There are many other advantages of using libraries from an aspect of performance. However, to understand the code organization better, we will start with pure JavaScript parallax implementation. Fun fact, sometimes pure JavaScript is also called vanilla JavaScript.
Parallax Scrolling using Pure JavaScript
First, create main HTML file with code shown below. The HTML page will just consist of four heading text.
<html>
<head>
<link rel = "stylesheet" href = "styles.css">
<script src = "myscripts.js"></script>
</head>
<body>
<section class = "parallax">
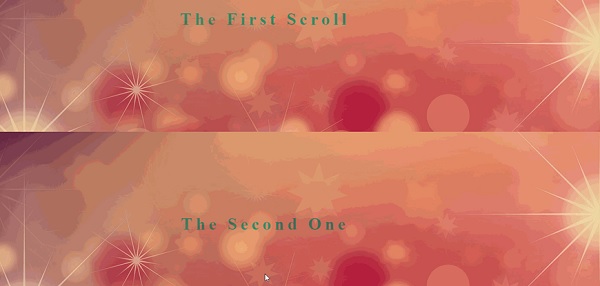
<h1>The First Scroll</h1>
</section>
<section class = "parallax">
<h1>The Second One</h1>
</section>
<section class = "parallax">
<h1>GoingOn !!</h1>
</section>
<section class = "parallax">
<h1>And we've reached the bottom!!</h1>
</section>
</body>
</html>
Observe that in line number 4, for this example, we are using myscripts.js file which will be stored in the same folder as the HTML file and CSS file.
Now, let us prepare our CSS file as shown below.
header {
   height: 4em;
   background: #845;
}

.parallax {
   background-repeat: no-repeat;
   background-size: cover;
}

.parallax h1 {
   text-align: center;
   margin: 0;
   font-size: 2.5em;
   letter-spacing: .2em;
   color: red;
   padding: 10rem 0;
   mix-blend-mode: exclusion;
}

.parallax:nth-of-type(1) {
   background: url(https://pixabay.com/get/ea35b10621f0083ed1534705fb0938c9bd22ffd41cb2114296f0c679a4/background-3009949_1920.jpg);
}

.parallax:nth-of-type(1) h1 {
   padding: 15rem 0;
}

.parallax:nth-of-type(2) {
   background: url(https://pixabay.com/get/ea35b10621f0083ed1534705fb0938c9bd22ffd41cb2114296f0c679a4/background-3009949_1920.jpg);
}

.parallax:nth-of-type(2) h1 {
   padding: 12rem 0;
}

.parallax:nth-of-type(3) {
   background: url(https://pixabay.com/get/ea35b10621f0083ed1534705fb0938c9bd22ffd41cb2114296f0c679a4/background-3009949_1920.jpg);
}

.parallax:nth-of-type(4) {
   background: url(https://pixabay.com/get/ea35b10621f0083ed1534705fb0938c9bd22ffd41cb2114296f0c679a4/background-3009949_1920.jpg);
}
Now comes the JavaScript part, create a file in notepad and save it as myscripts.js.
function $$(selector, context) {
   context = context || document;
   var elements = context.querySelectorAll(selector);
   return Array.prototype.slice.call(elements);
}
window.addEventListener("scroll", function() {
   var scrolledHeight= window.pageYOffset;

   $$(".parallax").forEach(function(el,index,array) {
      var limit = el.offsetTop+ el.offsetHeight;

      if(scrolledHeight > el.offsetTop && scrolledHeight &l;= limit) {
         el.style.backgroundPositionY=  (scrolledHeight - el.offsetTop) /1.5+ "px";
      } else {
         el.style.backgroundPositionY=  "0";
      }
   });
});
Analysis of Code
Let us analyze the JavaScript code.
Code from line number 1 to 4 represents the helper function.
In line 6, we select our parallax element and add scroll event to the window. To determine how much area is scrolled, we are using scrolledHeight property. As the screen scrolls down, backgroundPositionY is updated for the parallax element.
To slow down the parallax effect, we divided by 1.5, this number can be changed to any number you want.
Now, you will be able to see the page scrolling down as provided in below screenshot.
Using ScrollMagic JavaScript Library
As discussed in the previous section, while we can use pure JavaScript to create parallax effect, there are some powerful JavaScript libraries which will enhance the user experience. ScrollMagic is one such library for creating parallax scroll interactions.
Let us discuss more about this with the help of an example as given below −
Note − In this example, to keep it simple, we will have the CSS stored in HTML file. Also, the JavaScript code will be present in the same document. In a nutshell, we will create only one HTML file and it will have ScrollMagic libraries referenced along with the required CSS.
<html>
   <head>
      <script src = "https://cdnjs.cloudflare.com/ajax/libs/gsap/2.0.1/TweenMax.min.js"></script>
      <script src = "http://cdnjs.cloudflare.com/ajax/libs/ScrollMagic/2.0.5/ScrollMagic.js"></script>
      <script src = "http://cdnjs.cloudflare.com/ajax/libs/ScrollMagic/2.0.5/plugins/animation.gsap.js"></script>
      <script src = "http://cdnjs.cloudflare.com/ajax/libs/ScrollMagic/2.0.5/plugins/debug.addIndicators.js"></script>
   </head>

   <body>
      <style type = "text/css">
         .parallaxParent {
            height: 100vh;
            overflow: hidden;
         }
         .parallaxParent > * {
            height: 200%;
            position: relative;
            top: -100%;
         }
      </style>
      <div class = "spacing0"></div>

      <div id = "parallax1" class = "parallaxParent">
         <div style = "background-image: url(https://cdn.pixabay.com/photo/2015/05/16/19/13/stones-770264_640.jpg);"></div>
      </div>

      <div class = "spacing1">
         <div style = "background-color:cyan">
         <p>These are bricks</p>
         </div>
      </div>

      <div class = "spacing0"></div>
      <div id="parallax2" class = "parallaxParent">
         <div style = "background-image: url(https://cdn.pixabay.com/photo/2015/05/16/19/13/stones-770264_640.jpg);"></div>
      </div>

      <div class = "spacing1">
         <div style = "background-color:yellow">
            <p>Some More Bricks</p>
         </div>
      </div>

      <div class = "spacing0"></div>
      <div id = "parallax3" class = "parallaxParent">
         <div style = "background-image: url(https://cdn.pixabay.com/photo/2015/05/16/19/13/stones-770264_640.jpg);"></div>
      </div>
      <div class = "spacing2"></div>

      <script>
         // init controller
         var controller = new ScrollMagic.Controller({
            globalSceneOptions: {triggerHook: "onEnter", duration: "200%"}});

         // build scenes
         new ScrollMagic.Scene({triggerElement: "#parallax1"})
            .setTween("#parallax1 > div", {y: "80%", ease: Linear.easeNone})
            .addIndicators()
            .addTo(controller);

         new ScrollMagic.Scene({triggerElement: "#parallax2"})
            .setTween("#parallax2 > div", {y: "80%", ease: Linear.easeNone})
            .addIndicators()
            .addTo(controller);

         new ScrollMagic.Scene({triggerElement: "#parallax3"})
            .setTween("#parallax3 > div", {y: "80%", ease: Linear.easeNone})
            .addIndicators()
            .addTo(controller);
      </script>
   </body>

</html>
As shown in the above code, we have required JavaScript libraries references from line 3 to 6. The CSS code is specified from line 9 to 19.
Content Delivery Network
Script references from line 3 to 6 point to ScrollMagic Content Delivery Network (CDN) URLs. Using a CDN makes sense in modern website development, as you get to load the required libraries without slowing down your website.
If there are customizations required in the libraries, one would have to host the libraries on their respective server to utilize these effects. If you are using basic functionalities from a library, it is efficient to use the CDN URL.
The HTML code above shows an image separated by 2 divisions. First division appears with a heading These are bricks and second division appears with Some More Bricks.
Notice that in the CSS code from line 9 to 19, we are only specifying the position and style for the respective parallax div.
The work of creating this soft parallax scene is done by ScrollMagic library. If you refer to script code from line 43 to 62, ScrollMagic controller is invoked and a scene is created.
The scenes guide the DOM to create parallax effect when 80% of the screen is occupied. JavaScript is used to understand the scroll trigger. As a result, what you get is a floating experience on this page.
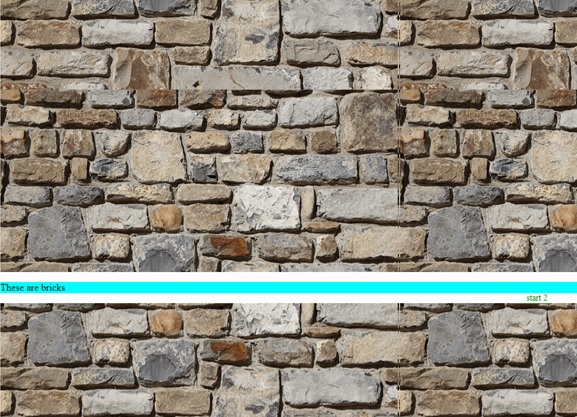
Note − Considering above image as a GIF image, you will not get to observe the smooth effect of the text divisions.
Trigger Animations
The possibilities of creating varied user experience are endless with ScrollMagic Library. Observe the code snippets given below to trigger animations on scroll.
Note that for this you need two files *minus; one HTML file and one CSS file.
Create HTML file with the code shown below −
<html>
   <head>
      <link rel = "stylesheet" href = "style.css">

      <script src = "https://cdnjs.cloudflare.com/ajax/libs/gsap/2.0.1/TweenMax.min.js"></script>
      <script src = "http://cdnjs.cloudflare.com/ajax/libs/ScrollMagic/2.0.5/ScrollMagic.js"></script>
      <script src = "http://cdnjs.cloudflare.com/ajax/libs/ScrollMagic/2.0.5/plugins/animation.gsap.js"></script>
      <script src = "http://cdnjs.cloudflare.com/ajax/libs/ScrollMagic/2.0.5/plugins/debug.addIndicators.js"></script>
   </head>

   <body>
      <div class = "spacing0"></div>
      <div id = "parallax1" class = "parallaxParent">
         <div style = "background-image: url(https://cdn.pixabay.com/photo/2015/05/16/19/13/stones-770264_640.jpg);"></div>
      </div>

      <div style = "height:450px;"></div>
      <div id = "square" class = "square">This is it!</div>
      <div style = "height:450px;"></div>

      <script>
         var controller = new ScrollMagic.Controller();
         var scene = new ScrollMagic.Scene({triggerElement: "#parallax1"})
            .setTween("#parallax1 > div", {y: "40%", ease: Linear.easeNone})
            .addTo(controller);

         var scene = new ScrollMagic.Scene({triggerElement: '.square'})
            .setClassToggle('.square', 'show')
            .addTo(controller);
      </script>
   </body>

</html>
Now, create a CSS file with the following code in it.
.square {
   background: aqua;
   margin: 0 auto;
   display: block;
   padding: 40px 0;
   text-align: center;
   color: #000;
   font-size: 40px;
   font-weight: bold;
   opacity: 0;
   transition: .3s;
   width: 0%;
}
.square.show{
   opacity: 1;
   width: 100%;
}
.parallaxParent {
   height: 100vh;
   overflow: hidden;
}
.parallaxParent > * {
   height: 200%;
   position: relative;
   top: -100%;
}
Analysis of Code
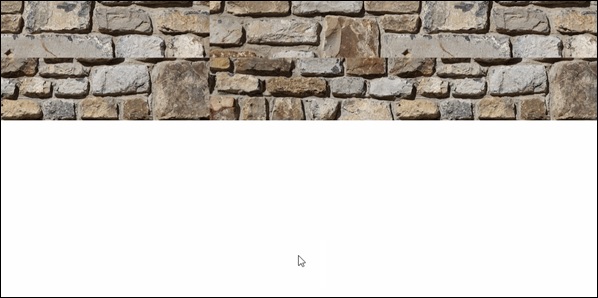
Referring to HTML code, the ScrollMagic code starts from line 17 and continues till line 25. In this section, we are creating two ScrollMagic scenes. First scene is for the brick image and the other is for the banner animation.
As specified in setTween function on line 20, when the scroll action happens at 40% of screen size, the next scene starts which shows up the banner This is it!
The opacity of the div with id - square is controlled in the CSS file on line 10 and line 15.
As a result, you will get to see below animation on the page.
Horizontal Scrolling
We can also apply parallax scrolling and achieve a horizontal scroll. The library ScrollMagic can be used to create a horizontal effect of scrolling. See the code below.
Although the code is straight forward to create horizontal scrolling effect, we will need jquery reference for achieving the horizontal movement of screens. Details of jQuery are provided in next chapter, for now, just follow the code as given below.
We will create three separate files HTML file for the main code, CSS file for styles and JS file for ScrollMagic function calls.
Here is the code for HTML document.
<html>
<head>
<link rel = "stylesheet" href = "style.css">
</head>
<script src = 'http://cdnjs.cloudflare.com/ajax/libs/jquery/2.1.3/jquery.min.js'></script>
<script src = 'http://cdnjs.cloudflare.com/ajax/libs/gsap/1.18.0/TweenMax.min.js'></script>
<script src = 'https://cdnjs.cloudflare.com/ajax/libs/ScrollMagic/2.0.2/ScrollMagic.min.js'></script>
<script src = 'https://cdnjs.cloudflare.com/ajax/libs/ScrollMagic/2.0.2/plugins/animation.gsap.js'></script>
<script src = 'https://cdnjs.cloudflare.com/ajax/libs/ScrollMagic/2.0.2/plugins/debug.addIndicators.min.js'></script>
<script src = "animation.js"></script>
<body>
<div class = "wrapper" id = "js-wrapper">
<div class = "sections" id = "js-slideContainer">
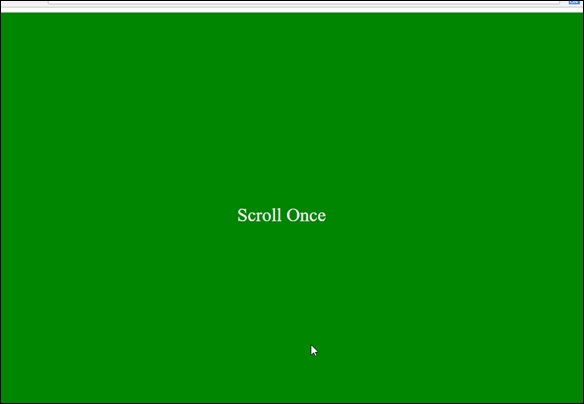
<section class = "section">
<span class = "section__title" id = "title1">Scroll Once</span>
<span id = "trigger--title1"></span>
</section>
<section class = "section">
<span class = "section__title" id = "title2">Do It Again</span>
<span id = "trigger--title2"></span>
</section>
<section class = "section">
<span class = "section__title" id = "title3">Thank You!</span>
<span id = "trigger--title3"></span>
</div>
</div>
</body>
</html>
Observe that we have three sections, which will appear after scrolling. The three sections are denoted by ids title1, title2 and title3 on lines 15,19 and 23 respectively.
The code for CSS document is given below −
body {
   font-family: serif;
}

body, html {
   height: 100%;
}

.wrapper {
   width: 100%;
   height: 100%;
   overflow: hidden;
}

.section {
   height: 100%;
   width: calc( 100% / 5 );
   float: left;
   position: relative;
}

.section:nth-child(1) {
   background: green;
}

.section:nth-child(2) {
   background: orange;
}

.section:nth-child(3) {
   background: red;
}

.sections {
   width: 500%;
   height: 100%;
}

.section__title {
   position: absolute;
   top: 50%;
   left: 50%;
   font-size: 30px;
   color: #fff;
}
Analysis of Code
The background colors for the three screens (or sections) are provided on lines 10, 22 and 25.
We are calculating the relative width of each screen in the code beginning on line 13.
The JavaScript code for the ScrollMagic is given below −
$(function () {
   var controller = new ScrollMagic.Controller();
   var horizontalSlide = new TimelineMax()
      .to("#js-slideContainer", 1,   {x: "-20%"})
      .to("#js-slideContainer", 1,   {x: "-40%"})

   new ScrollMagic.Scene({
      triggerElement: "#js-wrapper",
      triggerHook: "onLeave",
      duration: "400%"
   })
   .setPin("#js-wrapper")
   .setTween(horizontalSlide)
   .addTo(controller);
});
Notice the triggerHook property on line 8. This property is responsible for providing the scroll effect as the user reaches the completion of scroll event. The function TimelineMax is responsible for providing the horizontal scroll effect to our screens.
Once created the respective files, you will be able to see the horizontal scroll animation as shown below.