- Mobile Testing - Home
- Mobile Testing - Overview
- Mobile Testing - Platforms
- Mobile Testing - Device Types
- Native Vs Hybrid Vs Mobileweb
- Mobile Testing - Device Vs Application
- Emulator Vs Simulator
- Mobile Testing - Application
- Mobile Testing - UI
- Mobile Testing - Planning & Tools
- Hardware Perspective
- Mobile Device Testing - Types
- Mobile Testing - Framework Overview
- Mobile Testing - Android Frameworks
- Mobile Testing - IOS Frameworks
- Robotium Framework
- Selendroid Framework
- Mobile Testing - Appium Framework
- Mobile Testing - Zucchini Framework
Mobile Testing - Appium Framework
Appium is an open-source test automation framework for testing native and hybrid apps and mobile web apps. It drives iOS and Android apps using the WebDriver protocol.
Advantages of Appium
Its free and (mostly) open source.
It has a very well supported and active Google group.
Its in the Selenium 3 spec so should be future proof.
It supports both Android and iOS.
It does not require anything to be installed on the device no server or code changes required.
Drawbacks of Appium
- No support for intelligent waits.
- On iOS, you can only execute one test at a time per Mac.
- Limited support for gestures.
- Limited support for Android < 4.1
How to Use Appium
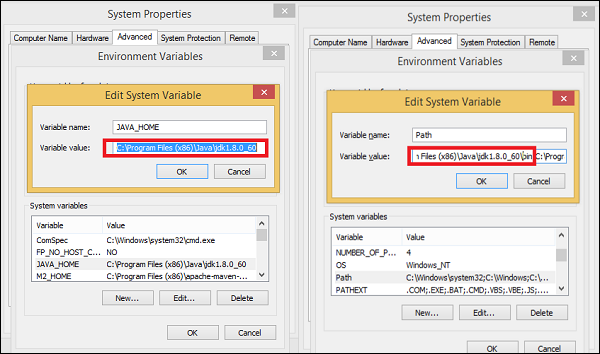
Step 1 − The prerequisites to use Appium is Java SDK (minimum 1.6). If you dont have Java installed on your system, then follow the steps given below.
Download JDK and JRE from Oracle JavaSE
Accept license agreement.
Install JDK and JRE.
Set environment variable as shown in the screenshot below.
Step 2 − Download Android Studio from SDK (It will take time because of the size of the file).
- Double click the exe and run the installer.
- Continue with all default options.
- Set the ANDROID_HOME.
Step 3 − Install Android images and tools.
- Click on SDK Manager −
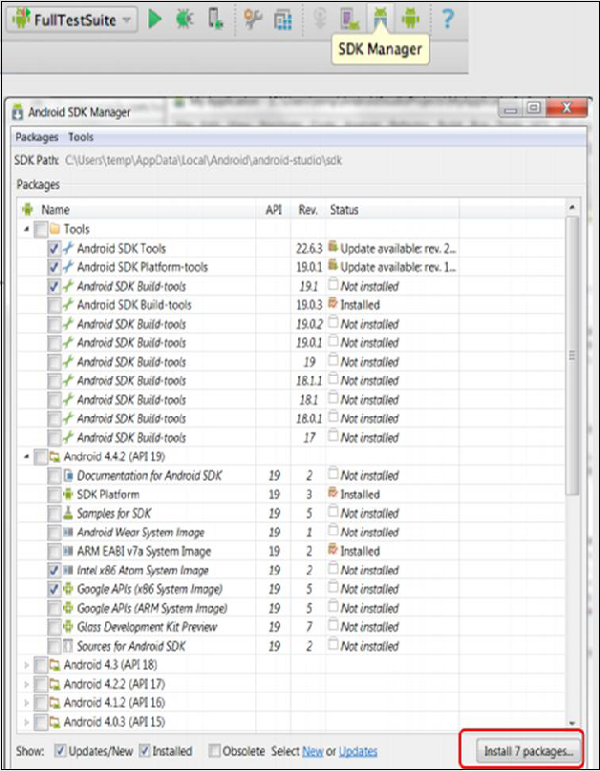
Select the necessary package. For example, if we are building an App for Android 4.4.2, then make sure the following packages are checked under the Tools section −
- Android SDK Tools rev 22.6.3
- Android Platform-tools rev 19.0.1
- Android SDK Build-tools rev 19.1
Step 4 − Create Android Virtual Devices −
Open Android Studio and click AVD Manager in the toolbar. AVDs allow us to test and run our Android apps.
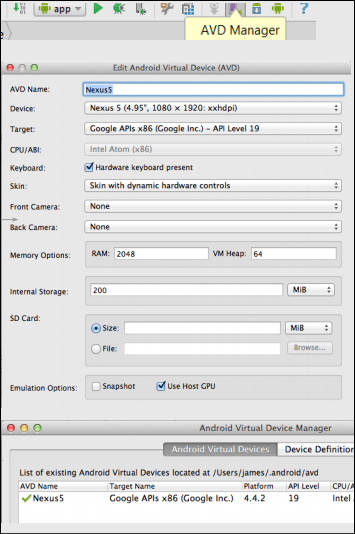
Use the following settings for a Nexus5 AVD −
Device: Nexus 5 (4.95, 1080 x 1920; xxhdpi)
Target: Google APIs x86 (Google Inc.) - API Level 19
Make sure you select the target with Google APIs in the name.
CPU: Intel Atom (x86)
Check the box for Use Host GPU
Click OK.
You should now see the AVD you created in the AVD Manager, where you can start it, delete it, or create another one!
Step 5 − Download Appium jar files from Appium
Test an App with Appium
To test an App with Appium, follow the steps given below −
Step 1 − Create a test Project in the Android Studio named as RobotiumTest.
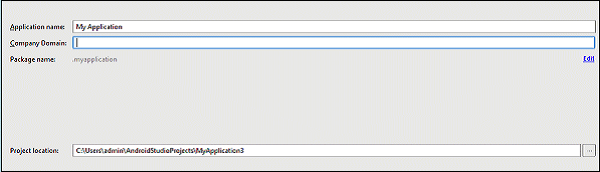
Choose all the default options until you reach to the main page.
Step 2 − Add the Appium jars into your project. Click Project → App → copy all the jars in lib. Select the copied jars except Selenium, Java client and Junit Jar, then right-click on it and click on "Add as Library".
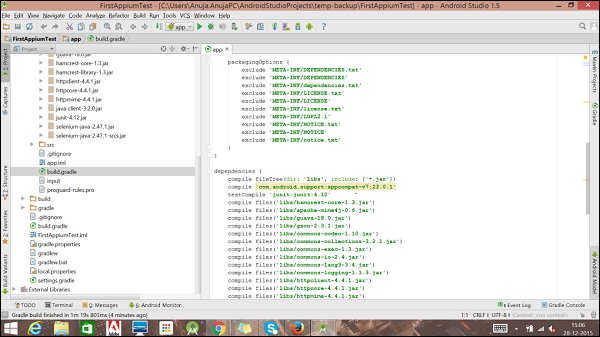
Step 3 − Click on build.gradle in the App. You will see all the libraries added, as shown in the following screenshot.
Step 4 − Now create a Java class as shown below −
AppiumDriver driver;
@Before

public void testCaseSetup()throws Exception {
   //service.start();
   //reader.readFile();

   DesiredCapabilities cap = new DesiredCapabilities();

   cap.setCapability(MobileCapabilityType.PLATFORM_NAME,"Android");
   cap.setCapability(MobileCapabilityType.DEVICE_NAME, "Android device");
   cap.setCapability(MobileCapabilityType.NEW_COMMAND_TIMEOUT, "4000");
   cap.setCapability(MobileCapabilityType.APP, "c://apk//sample.apk");

   driver = new AndroidDriver<MobileElement>("http://127.0.0.1:4444/wd/hub",cap);
}

@Test
public void testcase1()throws Exception {
   driver.findElementByID("Example").click();
   Asser.assertTrue(driver.findElementByID("Example").isDisplayed));
}

@After
public void testCaseTearDown() {
   driver.quit();
}
Step 5 − Running the Test case.
- Click on build variant and select Unit Testing.
- Start the Appium server with the specific port "4444".
- Download the Appium for Windows from here.
- Double click on the .exe and install Appium.
- Click on the icon to up the UI.
- Change the port if required, as shown below.
- Click the Play button to start the server.

- Connect the device with USB debugging on or start an emulator.
- Right-click the test class and click on "Run".
