- JSF - Home
- JSF - Overview
- JSF - Environment Setup
- JSF - Architecture
- JSF - Life Cycle
- JSF - First Application
- JSF - Managed Beans
- JSF - Page Navigation
- JSF - Basic Tags
- JSF - Facelet Tags
- JSF - Convertor Tags
- JSF - Validator Tags
- JSF - DataTable
- JSF - Composite Components
- JSF - Ajax
- JSF - Event Handling
- JSF - JDBC Integration
- JSF - Spring Integration
- JSF - Expression Language
- JSF - Internationalization
JSF - Quick Guide
JSF - Overview
What is JSF?
JavaServer Faces (JSF) is a MVC web framework that simplifies the construction of User Interfaces (UI) for server-based applications using reusable UI components in a page. JSF provides a facility to connect UI widgets with data sources and to server-side event handlers. The JSF specification defines a set of standard UI components and provides an Application Programming Interface (API) for developing components. JSF enables the reuse and extension of the existing standard UI components.
Benefits
JSF reduces the effort in creating and maintaining applications, which will run on a Java application server and will render application UI on to a target client. JSF facilitates Web application development by −
- Providing reusable UI components
- Making easy data transfer between UI components
- Managing UI state across multiple server requests
- Enabling implementation of custom components
- Wiring client-side event to server-side application code
JSF UI Component Model
JSF provides the developers with the capability to create Web application from collections of UI components that can render themselves in different ways for multiple client types (for example - HTML browser, wireless, or WAP device).
JSF provides −
Core library
A set of base UI components - standard HTML input elements
Extension of the base UI components to create additional UI component libraries or to extend existing components
Multiple rendering capabilities that enable JSF UI components to render themselves differently depending on the client types
JSF - Environment Setup
This chapter will guide you on how to prepare a development environment to start your work with JSF Framework. You will learn how to setup JDK, Eclipse, Maven, and Tomcat on your machine before you set up JSF Framework.
System Requirement
JSF requires JDK 1.5 or higher so the very first requirement is to have JDK installed on your machine.
| JDK | 1.5 or above |
| Memory | No minimum requirement |
| Disk Space | No minimum requirement |
| Operating System | No minimum requirement |
Environment Setup for JSF Application Development
Follow the given steps to setup your environment to start with JSF application development.
Step 1: Verify Java installation on your machine
Open console and execute the following Java command.
| OS | Task | Command |
|---|---|---|
| Windows | Open Command Console | c:\> java -version |
| Linux | Open Command Terminal | $ java -version |
| Mac | Open Terminal | machine:~ joseph$ java -version |
Let's verify the output for all the operating systems −
| OS | Generated Output |
|---|---|
| Windows | java version "1.6.0_21" Java(TM) SE Runtime Environment (build 1.6.0_21-b07) Java HotSpot(TM) Client VM (build 17.0-b17, mixed mode, sharing) |
| Linux | java version "1.6.0_21" Java(TM) SE Runtime Environment (build 1.6.0_21-b07) Java HotSpot(TM) Client VM (build 17.0-b17, mixed mode, sharing) |
| Mac | java version "1.6.0_21" Java(TM) SE Runtime Environment (build 1.6.0_21-b07) Java HotSpot(TM)64-Bit Server VM (build 17.0-b17, mixed mode, sharing) |
Step 2: Set Up Java Development Kit (JDK)
If you do not have Java installed then you can install the Java Software Development Kit (SDK) from Oracle's Java site − Java SE Downloads. You will find instructions for installing JDK in downloaded files, follow the given instructions to install and configure the setup. Finally, set PATH and JAVA_HOME environment variables to refer to the directory that contains java and javac, typically java_install_dir/bin and java_install_dir respectively.
Set the JAVA_HOME environment variable to point to the base directory location where Java is installed on your machine.
For example −
| OS | Output |
|---|---|
| Windows | Set the environment variable JAVA_HOME to C:\Program Files\Java\jdk1.6.0_21 |
| Linux | Export JAVA_HOME=/usr/local/java-current |
| Mac | Export JAVA_HOME=/Library/Java/Home |
Append Java compiler location to System Path.
| OS | Output |
|---|---|
| Windows | Append the string ;%JAVA_HOME%\bin to the end of the system variable, Path. |
| Linux | Export PATH=$PATH:$JAVA_HOME/bin/ |
| Mac | Not required |
Alternatively, if you use an Integrated Development Environment (IDE) like Borland JBuilder, Eclipse, IntelliJ IDEA, or Sun ONE Studio, compile and run a simple program to confirm that the IDE knows where you installed Java. Otherwise, carry out a proper setup according to the given document of the IDE.
Step 3: Set Up Eclipse IDE
All the examples in this tutorial have been written using Eclipse IDE. Hence, we suggest you should have the latest version of Eclipse installed on your machine based on your operating system.
To install Eclipse IDE, download the latest Eclipse binaries with WTP support from https://www.eclipse.org/downloads/. Once you download the installation, unpack the binary distribution into a convenient location. For example, in C:\eclipse on Windows, or /usr/local/eclipse on Linux/Unix and finally set PATH variable appropriately.
Eclipse can be started by executing the following commands on Windows machine, or you can simply double-click on eclipse.exe
%C:\eclipse\eclipse.exe
Eclipse can be started by executing the following commands on Unix (Solaris, Linux, etc.) machine −
$/usr/local/eclipse/eclipse
After a successful startup, if everything is fine then it will display the following result.
*Note − Install m2eclipse plugin to eclipse using the following eclipse software update site
m2eclipse Plugin - https://m2eclipse.sonatype.org/update/.
This plugin enables the developers to run maven commands within eclipse with embedded/external maven installation.
Step 4: Download Maven archive
Download Maven 2.2.1 from https://maven.apache.org/download.html
| OS | Archive name |
|---|---|
| Windows | apache-maven-2.0.11-bin.zip |
| Linux | apache-maven-2.0.11-bin.tar.gz |
| Mac | apache-maven-2.0.11-bin.tar.gz |
Step 5: Extract the Maven archive
Extract the archive to the directory you wish to install Maven 2.2.1. The subdirectory apache-maven-2.2.1 will be created from the archive.
| OS | Location (can be different based on your installation) |
|---|---|
| Windows | C:\Program Files\Apache Software Foundation\apache-maven-2.2.1 |
| Linux | /usr/local/apache-maven |
| Mac | /usr/local/apache-maven |
Step 6: Set Maven environment variables
Add M2_HOME, M2, MAVEN_OPTS to environment variables.
| OS | Output |
|---|---|
| Windows | Set the environment variables using system properties. M2_HOME=C:\Program Files\Apache Software Foundation\apachemaven-2.2.1 M2=%M2_HOME%\bin MAVEN_OPTS=-Xms256m -Xmx512m |
| Linux | Open command terminal and set environment variables. export M2_HOME=/usr/local/apache-maven/apache-maven-2.2.1 export M2=%M2_HOME%\bin export MAVEN_OPTS=-Xms256m -Xmx512m |
| Mac | Open command terminal and set environment variables. export M2_HOME=/usr/local/apache-maven/apache-maven-2.2.1 export M2=%M2_HOME%\bin export MAVEN_OPTS=-Xms256m -Xmx512m |
Step 7: Add Maven bin directory location to system path
Now append M2 variable to System Path.
| OS | Output |
|---|---|
| Windows | Append the string ;%M2% to the end of the system variable, Path. |
| Linux | export PATH=$M2:$PATH |
| Mac | export PATH=$M2:$PATH |
Step 8: Verify Maven installation.
Open console, execute the following mvn command.
| OS | Task | Command |
|---|---|---|
| Windows | Open Command Console | c:\> mvn --version |
| Linux | Open Command Terminal | $ mvn --version |
| Mac | Open Terminal | machine:~ joseph$ mvn --version |
Finally, verify the output of the above commands, which should be as shown in the following table.
| OS | Output |
|---|---|
| Windows | Apache Maven 2.2.1 (r801777; 2009-08-07 00:46:01+0530) Java version: 1.6.0_21 Java home: C:\Program Files\Java\jdk1.6.0_21\jre |
| Linux | Apache Maven 2.2.1 (r801777; 2009-08-07 00:46:01+0530) Java version: 1.6.0_21 Java home: C:\Program Files\Java\jdk1.6.0_21\jre |
| Mac | Apache Maven 2.2.1 (r801777; 2009-08-07 00:46:01+0530) Java version: 1.6.0_21 Java home: C:\Program Files\Java\jdk1.6.0_21\jre |
Step 9: Set Up Apache Tomcat
You can download the latest version of Tomcat from https://tomcat.apache.org/. Once you download the installation, unpack the binary distribution into a convenient location. For example, in C:\apache-tomcat-6.0.33 on Windows, or /usr/local/apache-tomcat-6.0.33 on Linux/Unix and set CATALINA_HOME environment variable pointing to the installation locations.
Tomcat can be started by executing the following commands on Windows machine, or you can simply double-click on startup.bat
%CATALINA_HOME%\bin\startup.bat
or
C:\apache-tomcat-6.0.33\bin\startup.bat
Tomcat can be started by executing the following commands on Unix (Solaris, Linux, etc.) machine.
$CATALINA_HOME/bin/startup.sh
or
/usr/local/apache-tomcat-6.0.33/bin/startup.sh
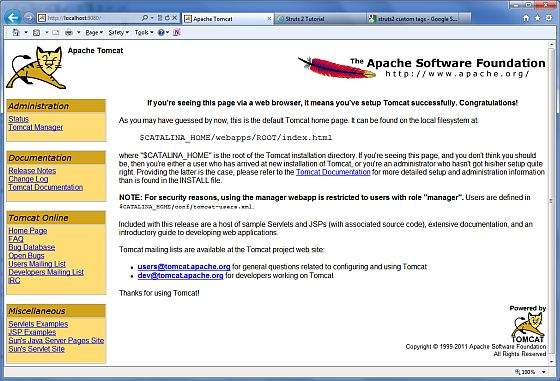
After a successful startup, the default web applications included with Tomcat will be available by visiting http://localhost:8080/. If everything is fine, then it will display the following result.
Further information about configuring and running Tomcat can be found in the documentation included here, as well as on the Tomcat web site − http://tomcat.apache.org
Tomcat can be stopped by executing the following commands on Windows machine.
%CATALINA_HOME%\bin\shutdown
or
C:\apache-tomcat-5.5.29\bin\shutdown
Tomcat can be stopped by executing the following commands on Unix (Solaris, Linux, etc.) machine.
$CATALINA_HOME/bin/shutdown.sh
or
/usr/local/apache-tomcat-5.5.29/bin/shutdown.sh
JSF - Architecture
JSF technology is a framework for developing, building server-side User Interface Components and using them in a web application. JSF technology is based on the Model View Controller (MVC) architecture for separating logic from presentation.
What is MVC Design Pattern?
MVC design pattern designs an application using three separate modules −
| S.No | Module & Description |
|---|---|
| 1 | Model Carries Data and login |
| 2 | View Shows User Interface |
| 3 | Controller Handles processing of an application. |
The purpose of MVC design pattern is to separate model and presentation enabling developers to focus on their core skills and collaborate more clearly.
Web designers have to concentrate only on view layer rather than model and controller layer. Developers can change the code for model and typically need not change view layer. Controllers are used to process user actions. In this process, layer model and views may be changed.
JSF Architecture
JSF application is similar to any other Java technology-based web application; it runs in a Java servlet container, and contains −
JavaBeans components as models containing application-specific functionality and data
A custom tag library for representing event handlers and validators
A custom tag library for rendering UI components
UI components represented as stateful objects on the server
Server-side helper classes
Validators, event handlers, and navigation handlers
Application configuration resource file for configuring application resources
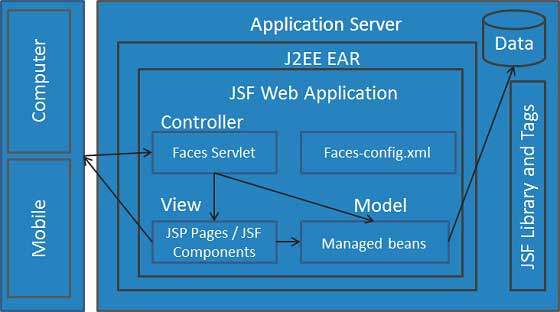
There are controllers which can be used to perform user actions. UI can be created by web page authors and the business logic can be utilized by managed beans.
JSF provides several mechanisms for rendering an individual component. It is upto the web page designer to pick the desired representation, and the application developer doesn't need to know which mechanism was used to render a JSF UI component.
JSF - Life Cycle
JSF application life cycle consists of six phases which are as follows −
- Restore view phase
- Apply request values phase; process events
- Process validations phase; process events
- Update model values phase; process events
- Invoke application phase; process events
- Render response phase
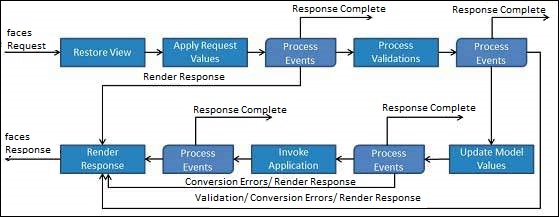
The six phases show the order in which JSF processes a form. The list shows the phases in their likely order of execution with event processing at each phase.
Phase 1: Restore view
JSF begins the restore view phase as soon as a link or a button is clicked and JSF receives a request.
During this phase, JSF builds the view, wires event handlers and validators to UI components and saves the view in the FacesContext instance. The FacesContext instance will now contain all the information required to process a request.
Phase 2: Apply request values
After the component tree is created/restored, each component in the component tree uses the decode method to extract its new value from the request parameters. Component stores this value. If the conversion fails, an error message is generated and queued on FacesContext. This message will be displayed during the render response phase, along with any validation errors.
If any decode methods event listeners called renderResponse on the current FacesContext instance, the JSF moves to the render response phase.
Phase 3: Process validation
During this phase, JSF processes all validators registered on the component tree. It examines the component attribute rules for the validation and compares these rules to the local value stored for the component.
If the local value is invalid, JSF adds an error message to the FacesContext instance, and the life cycle advances to the render response phase and displays the same page again with the error message.
Phase 4: Update model values
After the JSF checks that the data is valid, it walks over the component tree and sets the corresponding server-side object properties to the components' local values. JSF will update the bean properties corresponding to the input component's value attribute.
If any updateModels methods called renderResponse on the current FacesContext instance, JSF moves to the render response phase.
Phase 5: Invoke application
During this phase, JSF handles any application-level events, such as submitting a form/linking to another page.
Phase 6: Render response
During this phase, JSF asks container/application server to render the page if the application is using JSP pages. For initial request, the components represented on the page will be added to the component tree as JSP container executes the page. If this is not an initial request, the component tree is already built so components need not be added again. In either case, the components will render themselves as the JSP container/Application server traverses the tags in the page.
After the content of the view is rendered, the response state is saved so that subsequent requests can access it and it is available to the restore view phase.
JSF - First Application
To create a simple JSF application, we'll use maven-archetype-webapp plugin. In the following example, we'll create a maven-based web application project in C:\JSF folder.
Create Project
Let's open command console, go the C:\ > JSF directory and execute the following mvn command.
C:\JSF>mvn archetype:create
-DgroupId = com.tutorialspoint.test
-DartifactId = helloworld
-DarchetypeArtifactId = maven-archetype-webapp
Maven will start processing and will create the complete java web application project structure.
[INFO] Scanning for projects...
[INFO] Searching repository for plugin with prefix: 'archetype'.
[INFO] -------------------------------------------------------------
[INFO] Building Maven Default Project
[INFO]    task-segment: [archetype:create] (aggregator-style)
[INFO] -------------------------------------------------------------
[INFO] [archetype:create {execution: default-cli}]
[INFO] Defaulting package to group ID: com.tutorialspoint.test
[INFO] artifact org.apache.maven.archetypes:maven-archetype-webapp:
checking for updates from central
[INFO] -------------------------------------------------------------
[INFO] Using following parameters for creating project
from Old (1.x) Archetype: maven-archetype-webapp:RELEASE
[INFO] -------------------------------------------------------------
[INFO] Parameter: groupId, Value: com.tutorialspoint.test
[INFO] Parameter: packageName, Value: com.tutorialspoint.test
[INFO] Parameter: package, Value: com.tutorialspoint.test
[INFO] Parameter: artifactId, Value: helloworld
[INFO] Parameter: basedir, Value: C:\JSF
[INFO] Parameter: version, Value: 1.0-SNAPSHOT
[INFO] project created from Old (1.x) Archetype in dir:
C:\JSF\helloworld
[INFO] -------------------------------------------------------------
[INFO] BUILD SUCCESSFUL
[INFO] -------------------------------------------------------------
[INFO] Total time: 7 seconds
[INFO] Finished at: Mon Nov 05 16:05:04 IST 2012
[INFO] Final Memory: 12M/84M
[INFO] -------------------------------------------------------------
Now go to C:/JSF directory. You'll see a Java web application project created, named helloworld (as specified in artifactId). Maven uses a standard directory layout as shown in the following screenshot.
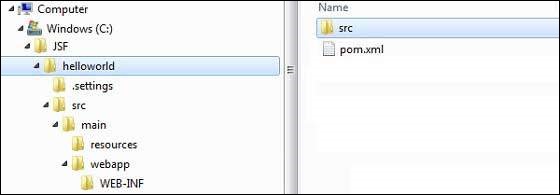
Using the above example, we can understand the following key concepts.
| S.No | Folder Structure & Description |
|---|---|
| 1 | helloworld Contains src folder and pom.xml |
| 2 | src/main/wepapp Contains WEB-INF folder and index.jsp page |
| 3 | src/main/resources It contains images/properties files (In the above example, we need to create this structure manually) |
Add JSF Capability to Project
Add the following JSF dependencies.
<dependencies>
   <dependency>
      <groupId>com.sun.faces</groupId>
      <artifactId>jsf-api</artifactId>
      <version>2.1.7</version>
   </dependency>

   <dependency>
      <groupId>com.sun.faces</groupId>
      <artifactId>jsf-impl</artifactId>
      <version>2.1.7</version>
   </dependency>

</dependencies>
Complete POM.xml
<project xmlns = "http://maven.apache.org/POM/4.0.0"
   xmlns:xsi = "http://www.w3.org/2001/XMLSchema-instance"
   xsi:schemaLocation = "http://maven.apache.org/POM/4.0.0
   http://maven.apache.org/maven-v4_0_0.xsd">

   <modelVersion>4.0.0</modelVersion>
   <groupId>com.tutorialspoint.test</groupId>
   <artifactId>helloworld</artifactId>
   <packaging>war</packaging>
   <version>1.0-SNAPSHOT</version>
   <name>helloworld Maven Webapp</name>
   <url>http://maven.apache.org</url>

   <dependencies>
      <dependency>
         <groupId>junit</groupId>
         <artifactId>junit</artifactId>
         <version>3.8.1</version>
         <scope>test</scope>
      </dependency>

      <dependency>
         <groupId>com.sun.faces</groupId>
         <artifactId>jsf-api</artifactId>
         <version>2.1.7</version>
      </dependency>

      <dependency>
         <groupId>com.sun.faces</groupId>
         <artifactId>jsf-impl</artifactId>
         <version>2.1.7</version>
      </dependency>

   </dependencies>

   <build>
      <finalName>helloworld</finalName>
      <plugins>
         <plugin>
            <groupId>org.apache.maven.plugins</groupId>
            <artifactId>maven-compiler-plugin</artifactId>
            <version>2.3.1</version>

            <configuration>
               <source>1.6</source>
               <target>1.6</target>
            </configuration>
         </plugin>
      </plugins>

   </build>
</project>
Prepare Eclipse Project
Let's open the command console. Go the C:\ > JSF > helloworld directory and execute the following mvn command.
C:\JSF\helloworld>mvn eclipse:eclipse -Dwtpversion = 2.0
Maven will start processing, create the eclipse ready project, and will add wtp capability.
Downloading: http://repo.maven.apache.org/org/apache/maven/plugins/
maven-compiler-plugin/2.3.1/maven-compiler-plugin-2.3.1.pom
5K downloaded  (maven-compiler-plugin-2.3.1.pom)
Downloading: http://repo.maven.apache.org/org/apache/maven/plugins/
maven-compiler-plugin/2.3.1/maven-compiler-plugin-2.3.1.jar
29K downloaded  (maven-compiler-plugin-2.3.1.jar)
[INFO] Searching repository for plugin with prefix: 'eclipse'.
[INFO] ------------------------------------------------------------
[INFO] Building helloworld Maven Webapp
[INFO]    task-segment: [eclipse:eclipse]
[INFO] ------------------------------------------------------------
[INFO] Preparing eclipse:eclipse
[INFO] No goals needed for project - skipping
[INFO] [eclipse:eclipse {execution: default-cli}]
[INFO] Adding support for WTP version 2.0.
[INFO] Using Eclipse Workspace: null
[INFO] Adding default classpath container: org.eclipse.jdt.
launching.JRE_CONTAINER
Downloading: http://repo.maven.apache.org/
com/sun/faces/jsf-api/2.1.7/jsf-api-2.1.7.pom
12K downloaded  (jsf-api-2.1.7.pom)
Downloading: http://repo.maven.apache.org/
com/sun/faces/jsf-impl/2.1.7/jsf-impl-2.1.7.pom
10K downloaded  (jsf-impl-2.1.7.pom)
Downloading: http://repo.maven.apache.org/
com/sun/faces/jsf-api/2.1.7/jsf-api-2.1.7.jar
619K downloaded  (jsf-api-2.1.7.jar)
Downloading: http://repo.maven.apache.org/
com/sun/faces/jsf-impl/2.1.7/jsf-impl-2.1.7.jar
1916K downloaded  (jsf-impl-2.1.7.jar)
[INFO] Wrote settings to C:\JSF\helloworld\.settings\
org.eclipse.jdt.core.prefs
[INFO] Wrote Eclipse project for "helloworld" to C:\JSF\helloworld.
[INFO]
[INFO] -----------------------------------------------------------
[INFO] BUILD SUCCESSFUL
[INFO] -----------------------------------------------------------
[INFO] Total time: 6 minutes 7 seconds
[INFO] Finished at: Mon Nov 05 16:16:25 IST 2012
[INFO] Final Memory: 10M/89M
[INFO] -----------------------------------------------------------
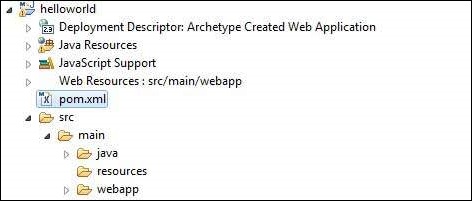
Import Project in Eclipse
Following are the steps −
Import project in eclipse using Import wizard.
Go to File → Import... → Existing project into workspace.
Select root directory to helloworld.
Keep Copy projects into workspace to be checked.
Click Finish button.
Eclipse will import and copy the project in its workspace C:\ → Projects → Data → WorkSpace.
Configure Faces Servlet in web.xml
Locate web.xml in webapp → WEB-INF folder and update it as shown below.
<?xml version = "1.0" encoding = "UTF-8"?>
<web-app xmlns:xsi = "http://www.w3.org/2001/XMLSchema-instance"
   xmlns = "http://java.sun.com/xml/ns/javaee"
   xmlns:web = "http://java.sun.com/xml/ns/javaee/web-app_2_5.xsd"
   xsi:schemaLocation = "http://java.sun.com/xml/ns/javaee
   http://java.sun.com/xml/ns/javaee/web-app_2_5.xsd"
   id = "WebApp_ID" version="2.5">

   <welcome-file-list>
      <welcome-file>faces/home.xhtml</welcome-file>
   </welcome-file-list>

   <!--
      FacesServlet is main servlet responsible to handle all request.
      It acts as central controller.
      This servlet initializes the JSF components before the JSP is displayed.
   -->

   <servlet>
      <servlet-name>Faces Servlet</servlet-name>
      <servlet-class>javax.faces.webapp.FacesServlet</servlet-class>
      <load-on-startup>1</load-on-startup>
   </servlet>

   <servlet-mapping>
      <servlet-name>Faces Servlet</servlet-name>
      <url-pattern>/faces/*</url-pattern>
   </servlet-mapping>

   <servlet-mapping>
      <servlet-name>Faces Servlet</servlet-name>
      <url-pattern>*.jsf</url-pattern>
   </servlet-mapping>

   <servlet-mapping>
      <servlet-name>Faces Servlet</servlet-name>
      <url-pattern>*.faces</url-pattern>
   </servlet-mapping>

   <servlet-mapping>
      <servlet-name>Faces Servlet</servlet-name>
      <url-pattern>*.xhtml</url-pattern>
   </servlet-mapping>

</web-app>
Create a Managed Bean
Create a package structure under src → main → java as com → tutorialspoint → test. Create HelloWorld.java class in this package. Update the code of HelloWorld.java as shown below.
package com.tutorialspoint.test;

import javax.faces.bean.ManagedBean;

@ManagedBean(name = "helloWorld", eager = true)
public class HelloWorld {

   public HelloWorld() {
      System.out.println("HelloWorld started!");
   }

   public String getMessage() {
      return "Hello World!";
   }
}
Create a JSF page
Create a page home.xhtml under webapp folder. Update the code of home.xhtml as shown below.
<!DOCTYPE html PUBLIC "-//W3C//DTD XHTML 1.0 Transitional//EN"
   "http://www.w3.org/TR/xhtml1/DTD/xhtml1-transitional.dtd">

<html xmlns = "http://www.w3.org/1999/xhtml">
   <head>
      <title>JSF Tutorial!</title>
   </head>

   <body>
      #{helloWorld.getMessage()}
   </body>
</html>
Build the Project
Following are the steps.
Select helloworld project in eclipse
Use Run As wizard
Select Run As → Maven package
Maven will start building the project and will create helloworld.war under C:\ → Projects → Data → WorkSpace → helloworld → target folder.
[INFO] Scanning for projects...
[INFO] -----------------------------------------------------
[INFO] Building helloworld Maven Webapp
[INFO]
[INFO] Id: com.tutorialspoint.test:helloworld:war:1.0-SNAPSHOT
[INFO] task-segment: [package]
[INFO] -----------------------------------------------------
[INFO] [resources:resources]
[INFO] Using default encoding to copy filtered resources.
[INFO] [compiler:compile]
[INFO] Nothing to compile - all classes are up to date
[INFO] [resources:testResources]
[INFO] Using default encoding to copy filtered resources.
[INFO] [compiler:testCompile]
[INFO] No sources to compile
[INFO] [surefire:test]
[INFO] Surefire report directory:
C:\Projects\Data\WorkSpace\helloworld\target\surefire-reports

-------------------------------------------------------
 T E S T S
-------------------------------------------------------
There are no tests to run.

Results :

Tests run: 0, Failures: 0, Errors: 0, Skipped: 0

[INFO] [war:war]
[INFO] Packaging webapp
[INFO] Assembling webapp[helloworld] in
[C:\Projects\Data\WorkSpace\helloworld\target\helloworld]
[INFO] Processing war project
[INFO] Webapp assembled in[150 msecs]
[INFO] Building war:
C:\Projects\Data\WorkSpace\helloworld\target\helloworld.war
[INFO] ------------------------------------------------
[INFO] BUILD SUCCESSFUL
[INFO] ------------------------------------------------
[INFO] Total time: 3 seconds
[INFO] Finished at: Mon Nov 05 16:34:46 IST 2012
[INFO] Final Memory: 2M/15M
[INFO] ------------------------------------------------
Deploy WAR file
Following are the steps.
Stop the tomcat server.
Copy the helloworld.war file to tomcat installation directory → webapps folder.
Start the tomcat server.
Look inside webapps directory, there should be a folder helloworld got created.
Now helloworld.war is successfully deployed in Tomcat Webserver root.
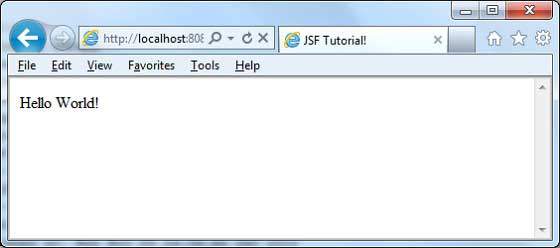
Run Application
Enter a url in web browser: http://localhost:8080/helloworld/home.jsf to launch the application.
Server name (localhost) and port (8080) may vary as per your tomcat configuration.
JSF - Managed Beans
Managed Bean is a regular Java Bean class registered with JSF. In other words, Managed Beans is a Java bean managed by JSF framework. Managed bean contains the getter and setter methods, business logic, or even a backing bean (a bean contains all the HTML form value).
Managed beans works as Model for UI component. Managed Bean can be accessed from JSF page.
In JSF 1.2, a managed bean had to register it in JSF configuration file such as facesconfig.xml. From JSF 2.0 onwards, managed beans can be easily registered using annotations. This approach keeps beans and its registration at one place hence it becomes easier to manage.
Using XML Configuration
<managed-bean>
   <managed-bean-name>helloWorld</managed-bean-name>
   <managed-bean-class>com.tutorialspoint.test.HelloWorld</managed-bean-class>
   <managed-bean-scope>request</managed-bean-scope>
</managed-bean>

<managed-bean>
   <managed-bean-name>message</managed-bean-name>
   <managed-bean-class>com.tutorialspoint.test.Message</managed-bean-class>
   <managed-bean-scope>request</managed-bean-scope>
</managed-bean>
Using Annotation
@ManagedBean(name = "helloWorld", eager = true)
@RequestScoped
public class HelloWorld {
   @ManagedProperty(value = "#{message}")
   private Message message;
   ...
}
@ManagedBean Annotation
@ManagedBean marks a bean to be a managed bean with the name specified in name attribute. If the name attribute is not specified, then the managed bean name will default to class name portion of the fully qualified class name. In our case, it would be helloWorld.
Another important attribute is eager. If eager = "true" then managed bean is created before it is requested for the first time otherwise "lazy" initialization is used in which bean will be created only when it is requested.
Scope Annotations
Scope annotations set the scope into which the managed bean will be placed. If the scope is not specified, then bean will default to request scope. Each scope is briefly discussed in the following table.
| S.No | Scope & Description |
|---|---|
| 1 | @RequestScoped Bean lives as long as the HTTP request-response lives. It gets created upon a HTTP request and gets destroyed when the HTTP response associated with the HTTP request is finished. |
| 2 | @NoneScoped Bean lives as long as a single EL evaluation. It gets created upon an EL evaluation and gets destroyed immediately after the EL evaluation. |
| 3 | @ViewScoped Bean lives as long as the user is interacting with the same JSF view in the browser window/tab. It gets created upon a HTTP request and gets destroyed once the user postbacks to a different view. |
| 4 | @SessionScoped Bean lives as long as the HTTP session lives. It gets created upon the first HTTP request involving this bean in the session and gets destroyed when the HTTP session is invalidated. |
| 5 | @ApplicationScoped Bean lives as long as the web application lives. It gets created upon the first HTTP request involving this bean in the application (or when the web application starts up and the eager=true attribute is set in @ManagedBean) and gets destroyed when the web application shuts down. |
| 6 | @CustomScoped Bean lives as long as the bean's entry in the custom Map, which is created for this scope lives. |
@ManagedProperty Annotation
JSF is a simple static Dependency Injection (DI) framework. Using @ManagedProperty annotation, a managed bean's property can be injected in another managed bean.
Example Application
Let us create a test JSF application to test the above annotations for managed beans.
| Step | Description |
|---|---|
| 1 | Create a project with a name helloworld under a package com.tutorialspoint.test as explained in the JSF - Create Application chapter. |
| 2 | Modify HelloWorld.java as explained below. Keep the rest of the files unchanged. |
| 3 | Create Message.java under a package com.tutorialspoint.test as explained below. |
| 4 | Compile and run the application to make sure business logic is working as per the requirements. |
| 5 | Finally, build the application in the form of war file and deploy it in Apache Tomcat Webserver. |
| 6 | Launch your web application using appropriate URL as explained below in the last step. |
HelloWorld.java
package com.tutorialspoint.test;

import javax.faces.bean.ManagedBean;
import javax.faces.bean.ManagedProperty;
import javax.faces.bean.RequestScoped;

@ManagedBean(name = "helloWorld", eager = true)
@RequestScoped
public class HelloWorld {
   @ManagedProperty(value = "#{message}")
   private Message messageBean;
   private String message;

   public HelloWorld() {
      System.out.println("HelloWorld started!");
   }

   public String getMessage() {

      if(messageBean != null) {
         message = messageBean.getMessage();
      }
      return message;
   }

   public void setMessageBean(Message message) {
      this.messageBean = message;
   }
}
Message.java
package com.tutorialspoint.test;

import javax.faces.bean.ManagedBean;
import javax.faces.bean.RequestScoped;

@ManagedBean(name = "message", eager = true)
@RequestScoped
public class Message {
   private String message = "Hello World!";

   public String getMessage() {
      return message;
   }
   public void setMessage(String message) {
      this.message = message;
   }
}
home.xhtml
<!DOCTYPE html PUBLIC "-//W3C//DTD XHTML 1.0 Transitional//EN"
   "http://www.w3.org/TR/xhtml1/DTD/xhtml1-transitional.dtd">

<html xmlns = "http://www.w3.org/1999/xhtml">
   <head>
      <title>JSF Tutorial!</title>
   </head>

   <body>
      #{helloWorld.message}
   </body>
</html>
Once you are ready with all the changes done, let us compile and run the application as we did in JSF - Create Application chapter. If everything is fine with your application, this will produce the following result.
JSF - Page Navigation
Navigation rules are those rules provided by JSF Framework that describes which view is to be shown when a button or a link is clicked.
Navigation rules can be defined in JSF configuration file named faces-config.xml. They can be defined in managed beans.
Navigation rules can contain conditions based on which the resulted view can be shown. JSF 2.0 provides implicit navigation as well in which there is no need to define navigation rules as such.
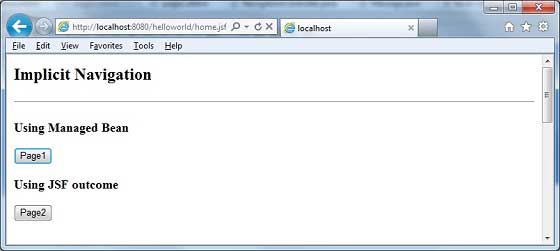
Implicit Navigation
JSF 2.0 provides auto view page resolver mechanism named implicit navigation. In this case, you only need to put view name in action attribute and JSF will search the correct view page automatically in the deployed application.
Auto Navigation in JSF Page
Set view name in action attribute of any JSF UI Component.
<h:form>
   <h3>Using JSF outcome</h3>
   <h:commandButton action = "page2" value = "Page2" />
</h:form>
Here, when Page2 button is clicked, JSF will resolve the view name, page2 as page2.xhtml extension, and find the corresponding view file page2.xhtml in the current directory.

Auto Navigation in Managed Bean
Define a method in managed bean to return a view name.
@ManagedBean(name = "navigationController", eager = true)
@RequestScoped

public class NavigationController implements Serializable {
   public String moveToPage1() {
      return "page1";
   }
}
Get view name in action attribute of any JSF UI Component using managed bean.
<h:form>
   <h3> Using Managed Bean</h3>
   <h:commandButton action = "#{navigationController.moveToPage1}"
   value = "Page1" /glt;
</h:form>
Here, when Page1 button is clicked, JSF will resolve the view name, page1 as page1.xhtml extension, and find the corresponding view file page1.xhtml in the current directory.
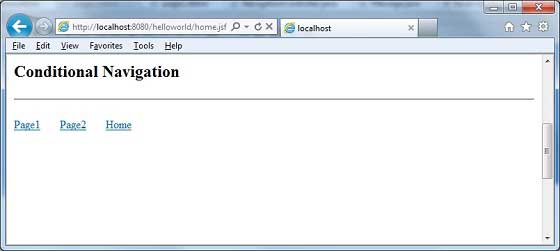
Conditional Navigation
Using managed bean, we can very easily control the navigation. Look at the following code in a managed bean.
@ManagedBean(name = "navigationController", eager = true)
@RequestScoped

public class NavigationController implements Serializable {
   //this managed property will read value from request parameter pageId
   @ManagedProperty(value = "#{param.pageId}")
   private String pageId;

   //condional navigation based on pageId
   //if pageId is 1 show page1.xhtml,
   //if pageId is 2 show page2.xhtml
   //else show home.xhtml

   public String showPage() {
      if(pageId == null) {
         return "home";
      }

      if(pageId.equals("1")) {
         return "page1";
      }else if(pageId.equals("2")) {
         return "page2";
      }else {
         return "home";
      }
   }
}
Pass pageId as a request parameter in JSF UI Component.
<h:form>
   <h:commandLink action = "#{navigationController.showPage}" value = "Page1">
      <f:param name = "pageId" value = "1" />
   </h:commandLink>
   <h:commandLink action = "#{navigationController.showPage}" value = "Page2">
      <f:param name = "pageId" value = "2" />
   </h:commandLink>
   <h:commandLink action = "#{navigationController.showPage}" value = "Home">
      <f:param name = "pageId" value = "3" />
   </h:commandLink>
</h:form>
Here, when "Page1" button is clicked.
JSF will create a request with parameter pageId = 1
Then JSF will pass this parameter to managed property pageId of navigationController
Now navigationController.showPage() is called which will return view as page1 after checking the pageId
JSF will resolve the view name, page1 as page1.xhtml extension
Find the corresponding view file page1.xhtml in the current directory
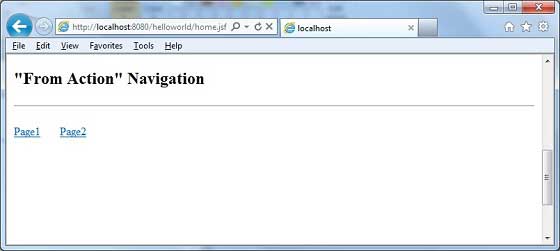
Resolving Navigation Based on from-action
JSF provides navigation resolution option even if managed bean different methods returns the same view name.
Look at the following code in a managed bean.
public String processPage1() {
   return "page";
}
public String processPage2() {
   return "page";
}
To resolve views, define the following navigation rules in faces-config.xml
<navigation-rule>
   <from-view-id>home.xhtml</from-view-id>

   <navigation-case>
      <from-action>#{navigationController.processPage1}</from-action>
      <from-outcome>page</from-outcome>
      <to-view-id>page1.jsf</to-view-id>
   </navigation-case>

   <navigation-case>
      <from-action>#{navigationController.processPage2}</from-action>
      <from-outcome>page</from-outcome>
      <to-view-id>page2.jsf</to-view-id>
   </navigation-case>

</navigation-rule>
Here, when Page1 button is clicked −
navigationController.processPage1() is called which will return view as page
JSF will resolve the view name, page1 as view name is page and from-action in faces-config is navigationController.processPage1
Find the corresponding view file page1.xhtml in the current directory
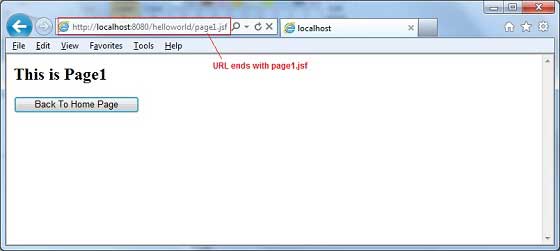
Forward vs Redirect
JSF by default performs a server page forward while navigating to another page and the URL of the application does not change.
To enable the page redirection, append faces-redirect=true at the end of the view name.
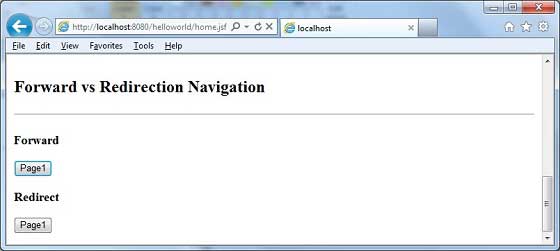
<h:form>
   <h3>Forward</h3>
   <h:commandButton action = "page1" value = "Page1" />
   <h3>Redirect</h3>
   <h:commandButton action = "page1?faces-redirect = true" value = "Page1" />
</h:form>
Here, when Page1 button under Forward is clicked, you will get the following result.
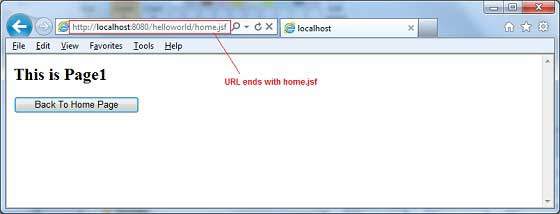
Here when Page1 button under Redirect is clicked, you will get the following result.
Example Application
Let us create a test JSF application to test all of the above navigation examples.
| Step | Description |
|---|---|
| 1 | Create a project with a name helloworld under a package com.tutorialspoint.test as explained in the JSF - Create Application chapter. |
| 2 | Create NavigationController.java under a package com.tutorialspoint.test as explained below. |
| 3 | Create faces-config.xml under a WEB-INF folder and updated its contents as explained below. |
| 4 | Update web.xml under a WEB-INF folder as explained below. |
| 5 | Create page1.xhtml and page2.xhtml and modify home.xhtml under a webapp folder as explained below. |
| 6 | Compile and run the application to make sure business logic is working as per the requirements. |
| 7 | Finally, build the application in the form of war file and deploy it in Apache Tomcat Webserver. |
| 8 | Launch your web application using appropriate URL as explained below in the last step. |
NavigationController.java
package com.tutorialspoint.test;

import java.io.Serializable;

import javax.faces.bean.ManagedBean;
import javax.faces.bean.ManagedProperty;
import javax.faces.bean.RequestScoped;

@ManagedBean(name = "navigationController", eager = true)
@RequestScoped
public class NavigationController implements Serializable {
   private static final long serialVersionUID = 1L;
   @ManagedProperty(value = "#{param.pageId}")
   private String pageId;

   public String moveToPage1() {
      return "page1";
   }

   public String moveToPage2() {
      return "page2";
   }

   public String moveToHomePage() {
      return "home";
   }

   public String processPage1() {
      return "page";
   }

   public String processPage2() {
      return "page";
   }

   public String showPage() {
      if(pageId == null) {
         return "home";
      }

      if(pageId.equals("1")) {
         return "page1";
      }else if(pageId.equals("2")) {
         return "page2";
      }else {
         return "home";
      }
   }

   public String getPageId() {
      return pageId;
   }

   public void setPageId(String pageId) {
      this.pageId = pageId;
   }
}
faces-config.xml
<?xml version = "1.0" encoding = "UTF-8"?>

<faces-config
   xmlns = "http://java.sun.com/xml/ns/javaee"
   xmlns:xsi = "http://www.w3.org/2001/XMLSchema-instance"
   xsi:schemaLocation = "http://java.sun.com/xml/ns/javaee
   http://java.sun.com/xml/ns/javaee/web-facesconfig_2_0.xsd"
   version = "2.0">

   <navigation-rule>
      <from-view-id>home.xhtml</from-view-id>
      <navigation-case>
         <from-action>#{navigationController.processPage1}</from-action>
         <from-outcome>page</from-outcome>
         <to-view-id>page1.jsf</to-view-id>
      </navigation-case>
      <navigation-case>
         <from-action>#{navigationController.processPage2}</from-action>
         <from-outcome>page</from-outcome>
         <to-view-id>page2.jsf</to-view-id>
      </navigation-case>
   </navigation-rule>

</faces-config>
web.xml
<!DOCTYPE web-app PUBLIC
   "-//Sun Microsystems, Inc.//DTD Web Application 2.3//EN"
   "http://java.sun.com/dtd/web-app_2_3.dtd" >

<web-app>
   <display-name>Archetype Created Web Application</display-name>

   <context-param>
      <param-name>javax.faces.PROJECT_STAGE</param-name>
      <param-value>Development</param-value>
   </context-param>
   <context-param>
      <param-name>javax.faces.CONFIG_FILES</param-name>
      <param-value>/WEB-INF/faces-config.xml</param-value>
   </context-param>

   <servlet>
      <servlet-name>Faces Servlet</servlet-name>
      <servlet-class>javax.faces.webapp.FacesServlet</servlet-class>
   </servlet>
   <servlet-mapping>
      <servlet-name>Faces Servlet</servlet-name>
      <url-pattern>*.jsf</url-pattern>
   </servlet-mapping>

</web-app>
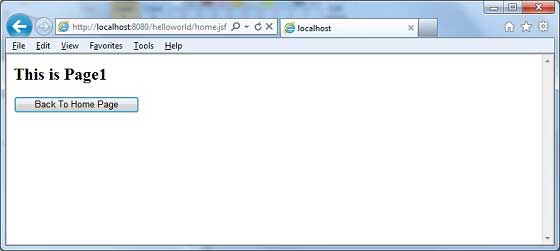
page1.xhtml
<?xml version = "1.0" encoding = "UTF-8"?>
<!DOCTYPE html PUBLIC "-//W3C//DTD XHTML 1.0 Transitional//EN"
   "http://www.w3.org/TR/xhtml1/DTD/xhtml1-transitional.dtd">
<html xmlns = "http://www.w3.org/1999/xhtml"
   xmlns:h = "http://java.sun.com/jsf/html">

   <h:body>
      <h2>This is Page1</h2>
      <h:form>
         <h:commandButton action = "home?faces-redirect = true"
            value = "Back To Home Page" />
      </h:form>
   </h:body>
</html>
page2.xhtml
<?xml version = "1.0" encoding = "UTF-8"?>
<!DOCTYPE html PUBLIC "-//W3C//DTD XHTML 1.0 Transitional//EN"
   "http://www.w3.org/TR/xhtml1/DTD/xhtml1-transitional.dtd">
<html xmlns = "http://www.w3.org/1999/xhtml"
   xmlns:h = "http://java.sun.com/jsf/html">

   <h:body>
      <h2>This is Page2</h2>
      <h:form>
         <h:commandButton action = "home?faces-redirect = true"
            value = "Back To Home Page" />
      </h:form>
   </h:body>
</html>
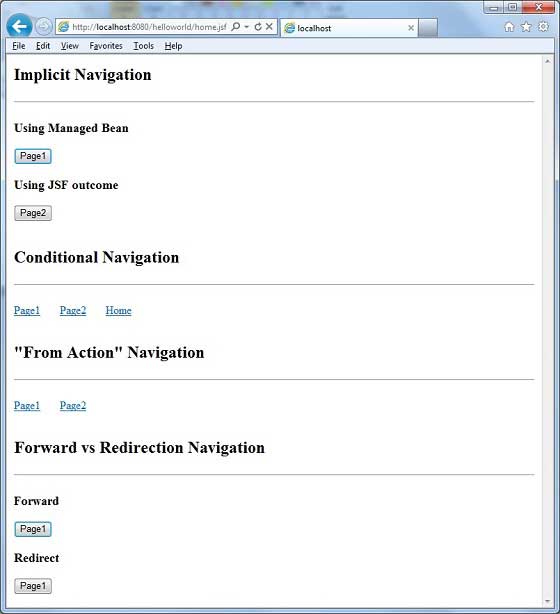
home.xhtml
<?xml version = "1.0" encoding = "UTF-8"?>
<!DOCTYPE html PUBLIC "-//W3C//DTD XHTML 1.0 Transitional//EN"
"http://www.w3.org/TR/xhtml1/DTD/xhtml1-transitional.dtd">

<html xmlns = "http://www.w3.org/1999/xhtml"
   xmlns:f = "http://java.sun.com/jsf/core"
   xmlns:h = "http://java.sun.com/jsf/html">

   <h:body>
      <h2>Implicit Navigation</h2>
      <hr />

      <h:form>
         <h3>Using Managed Bean</h3>
         <h:commandButton action = "#{navigationController.moveToPage1}"
            value = "Page1" />
         <h3>Using JSF outcome</h3>
         <h:commandButton action = "page2" value = "Page2" />
      </h:form>
      <br/>

      <h2>Conditional Navigation</h2>
      <hr />
      <h:form>
         <h:commandLink action = "#{navigationController.showPage}"
            value="Page1">
            <f:param name = "pageId" value = "1" />
         </h:commandLink>


         <h:commandLink action = "#{navigationController.showPage}"
            value="Page2">
            <f:param name = "pageId" value = "2" />
         </h:commandLink>


         <h:commandLink action = "#{navigationController.showPage}"
            value = "Home">
            <f:param name = "pageId" value = "3" />
         </h:commandLink>
      </h:form>
      <br/>

      <h2>"From Action" Navigation</h2>
      <hr />

      <h:form>
         <h:commandLink action = "#{navigationController.processPage1}"
         value = "Page1" />

         <h:commandLink action = "#{navigationController.processPage2}"
         value = "Page2" />

      </h:form>
      <br/>

      <h2>Forward vs Redirection Navigation</h2>
      <hr />
      <h:form>
         <h3>Forward</h3>
         <h:commandButton action = "page1" value = "Page1" />
         <h3>Redirect</h3>
         <h:commandButton action = "page1?faces-redirect = true"
         value = "Page1" />
      </h:form>
   </h:body>
</html>
Once you are ready with all the changes done, let us compile and run the application as we did in JSF - Create Application chapter. If everything is fine with your application, this will produce the following result.
JSF - Basic Tags
In this chapter, you will learn about various types of basic JSF tags.
JSF provides a standard HTML tag library. These tags get rendered into corresponding html output.
For these tags you need to use the following namespaces of URI in html node.
<html
   xmlns = "http://www.w3.org/1999/xhtml"
   xmlns:h = "http://java.sun.com/jsf/html">
Following are the important Basic Tags in JSF 2.0.
| S.No | Tag & Description |
|---|---|
| 1 | h:inputText
Renders a HTML input of type="text", text box. |
| 2 | h:inputSecret
Renders a HTML input of type="password", text box. |
| 3 | h:inputTextarea
Renders a HTML textarea field. |
| 4 | h:inputHidden
Renders a HTML input of type="hidden". |
| 5 | h:selectBooleanCheckbox
Renders a single HTML check box. |
| 6 | h:selectManyCheckbox
Renders a group of HTML check boxes. |
| 7 | h:selectOneRadio
Renders a single HTML radio button. |
| 8 | h:selectOneListbox
Renders a HTML single list box. |
| 9 | h:selectManyListbox
Renders a HTML multiple list box. |
| 10 | h:selectOneMenu
Renders a HTML combo box. |
| 11 | h:outputText
Renders a HTML text. |
| 12 | h:outputFormat
Renders a HTML text. It accepts parameters. |
| 13 | h:graphicImage
Renders an image. |
| 14 | h:outputStylesheet
Includes a CSS style sheet in HTML output. |
| 15 | h:outputScript
Includes a script in HTML output. |
| 16 | h:commandButton
Renders a HTML input of type="submit" button. |
| 17 | h:Link
Renders a HTML anchor. |
| 18 | h:commandLink
Renders a HTML anchor. |
| 19 | h:outputLink
Renders a HTML anchor. |
| 20 | h:panelGrid
Renders an HTML Table in form of grid. |
| 21 | h:message
Renders message for a JSF UI Component. |
| 22 | h:messages
Renders all message for JSF UI Components. |
| 23 | f:param
Pass parameters to JSF UI Component. |
| 24 | f:attribute
Pass attribute to a JSF UI Component. |
| 25 | f:setPropertyActionListener
Sets value of a managed bean's property. |
JSF - Facelets Tags
JSF provides special tags to create common layout for a web application called facelets tags. These tags provide flexibility to manage common parts of multiple pages at one place.
For these tags, you need to use the following namespaces of URI in html node.
<html
   xmlns = "http://www.w3.org/1999/xhtml"
   xmlns:ui = "http://java.sun.com/jsf/facelets">
Following are important Facelets Tags in JSF 2.0.
| S.No | Tag & Description |
|---|---|
| 1 | Templates
We'll demonstrate how to use templates using the following tags
|
| 2 | Parameters
We'll demonstrate how to pass parameters to a template file using the following tag
|
| 3 | Custom
We'll demonstrate how to create custom tags |
| 4 | Remove
We'll demonstrate capability to remove JSF code from generated HTML page |
JSF - Convertor Tags
JSF provides inbuilt convertors to convert its UI component's data to object used in a managed bean and vice versa. For example, these tags can convert a text into date object and can validate the format of input as well.
For these tags, you need to use the following namespaces of URI in html node.
<html
   xmlns = "http://www.w3.org/1999/xhtml"
   xmlns:f = "http://java.sun.com/jsf/core">
Following are important Convertor Tags in JSF 2.0 −
| S.No | Tag & Description |
|---|---|
| 1 | f:convertNumber
Converts a String into a Number of desired format |
| 2 | f:convertDateTime
Converts a String into a Date of desired format |
| 3 | Custom Convertor
Creating a custom convertor |
JSF - Validator Tags
JSF provides inbuilt validators to validate its UI components. These tags can validate the length of the field, the type of input which can be a custom object.
For these tags you need to use the following namespaces of URI in html node.
<html
   xmlns = "http://www.w3.org/1999/xhtml"
   xmlns:f = "http://java.sun.com/jsf/core">
Following are important Validator Tags in JSF 2.0−
| S.No | Tag & Description |
|---|---|
| 1 | f:validateLength
Validates the length of a string |
| 2 | f:validateLongRange
Validates the range of a numeric value |
| 3 | f:validateDoubleRange
Validates the range of a float value |
| 4 | f:validateRegex
Validates JSF component with a given regular expression |
| 5 | Custom Validator
Creates a custom validator |
JSF - DataTable
JSF provides a rich control named DataTable to render and format html tables.
DataTable can iterate over a collection or array of values to display data.
DataTable provides attributes to modify its data in an easy way.
HTML Header
<html
   xmlns = "http://www.w3.org/1999/xhtml"
   xmlns:h = "http://java.sun.com/jsf/html">
</html>
Following are important DataTable operations in JSF 2.0 −
| S.No | Tag & Description |
|---|---|
| 1 | Display DataTable
How to display a dataTable |
| 2 | Add data
How to add a new row in a dataTable |
| 3 | Edit data
How to edit a row in a dataTable |
| 4 | Delete data
How to delete a row in dataTable |
| 5 | Using DataModel
Use DataModel to display row numbers in a dataTable |
JSF - Composite Components
JSF provides the developers with a powerful capability to define their own custom components, which can be used to render custom contents.
Define Custom Component
Defining a custom component in JSF is a two-step process.
| Step | Description |
|---|---|
| 1a | Create a resources folder. Create a xhtml file in resources folder with a composite namespace. |
| 1b | Use composite tags composite:interface, composite:attribute and composite:implementation, to define content of the composite component. Use cc.attrs in composite:implementation to get variable defined using composite:attribute in composite:interface. |
Step 1a: Create Custom Component : loginComponent.xhtml
Create a folder tutorialspoint in resources folder and create a file loginComponent.xhtml in it.
Use composite namespace in html header.
<html xmlns = "http://www.w3.org/1999/xhtml"
   xmlns:h = "http://java.sun.com/jsf/html"
   xmlns:f = "http://java.sun.com/jsf/core"
   xmlns:composite = "http://java.sun.com/jsf/composite">
...
</html>
Step 1b: Use Composite Tags : loginComponent.xhtml
Following table describes the use of composite tags.
| S.No | Tag & Description |
|---|---|
| 1 | composite:interface Declares configurable values to be used in composite:implementation. |
| 2 | composite:attribute Configuration values are declared using this tag. |
| 3 | composite:implementation Declares JSF component. Can access the configurable values defined in composite:interface using #{cc.attrs.attribute-name} expression. |
<composite:interface>
   <composite:attribute name = "usernameLabel" />
   <composite:attribute name = "usernameValue" />
</composite:interface>

<composite:implementation>
<h:form>
   #{cc.attrs.usernameLabel} :
   <h:inputText id = "username" value = "#{cc.attrs.usernameValue}" />
</h:form>
Use Custom Component
Using a custom component in JSF is a simple process.
| Step | Description |
|---|---|
| 2a | Create a xhtml file and use custom component's namespace. Namespace will the http://java.sun.com/jsf/<folder-name> where folder-name is folder in resources directory containing the custom component |
| 2b | Use the custom component as normal JSF tags |
Step 2a: Use Custom Namespace: home.xhtml
<html xmlns = "http://www.w3.org/1999/xhtml"
   xmlns:h = "http://java.sun.com/jsf/html"
   xmlns:ui = "http://java.sun.com/jsf/facelets">
   xmlns:tp = "http://java.sun.com/jsf/composite/tutorialspoint">
Step 2b: Use Custom Tag: home.xhtml and Pass Values
<h:form>
   <tp:loginComponent
      usernameLabel = "Enter User Name: "
      usernameValue = "#{userData.name}" />
</h:form>
Example Application
Let us create a test JSF application to test the custom component in JSF.
| Step | Description |
|---|---|
| 1 | Create a project with a name helloworld under a package com.tutorialspoint.test as explained in the JSF - First Application chapter. |
| 2 | Create resources folder under src → main folder. |
| 3 | Create tutorialspoint folder under src → main → resources folder. |
| 4 | Create loginComponent.xhtml file under src → main → resources → tutorialspoint folder. |
| 5 | Modify UserData.java file as explained below. |
| 6 | Modify home.xhtml as explained below. Keep the rest of the files unchanged. |
| 7 | Compile and run the application to make sure the business logic is working as per the requirements. |
| 8 | Finally, build the application in the form of war file and deploy it in Apache Tomcat Webserver. |
| 9 | Launch your web application using appropriate URL as explained below in the last step. |
loginComponent.xhtml
<?xml version = "1.0" encoding = "UTF-8"?>
<!DOCTYPE html PUBLIC "-//W3C//DTD XHTML 1.0 Transitional//EN"
"http://www.w3.org/TR/xhtml1/DTD/xhtml1-transitional.dtd">

<html xmlns = "http://www.w3.org/1999/xhtml"
   xmlns:h = "http://java.sun.com/jsf/html"
   xmlns:f = "http://java.sun.com/jsf/core"
   xmlns:composite = "http://java.sun.com/jsf/composite">

   <composite:interface>
      <composite:attribute name = "usernameLabel" />
      <composite:attribute name = "usernameValue" />
      <composite:attribute name = "passwordLabel" />
      <composite:attribute name = "passwordValue" />
      <composite:attribute name = "loginButtonLabel" />
      <composite:attribute name = "loginButtonAction"
         method-signature = "java.lang.String login()" />
   </composite:interface>

   <composite:implementation>
      <h:form>
         <h:message for = "loginPanel" style = "color:red;" />

         <h:panelGrid columns = "2" id = "loginPanel">
            #{cc.attrs.usernameLabel} :
            <h:inputText id = "username" value = "#{cc.attrs.usernameValue}" />
            #{cc.attrs.passwordLabel} :
            <h:inputSecret id = "password" value = "#{cc.attrs.passwordValue}" />
         </h:panelGrid>

         <h:commandButton action = "#{cc.attrs.loginButtonAction}"
            value = "#{cc.attrs.loginButtonLabel}"/>
      </h:form>
   </composite:implementation>
</html>
UserData.java
package com.tutorialspoint.test;

import java.io.Serializable;

import javax.faces.bean.ManagedBean;
import javax.faces.bean.SessionScoped;

@ManagedBean(name = "userData", eager = true)
@SessionScoped
public class UserData implements Serializable {
   private static final long serialVersionUID = 1L;
   private String name;
   private String password;

   public String getName() {
      return name;
   }

   public void setName(String name) {
      this.name = name;
   }

   public String getPassword() {
      return password;
   }

   public void setPassword(String password) {
      this.password = password;
   }

   public String login() {
      return "result";
   }
}
home.xhtml
<?xml version = "1.0" encoding = "UTF-8"?>
<!DOCTYPE html PUBLIC "-//W3C//DTD XHTML 1.0 Transitional//EN"
"http://www.w3.org/TR/xhtml1/DTD/xhtml1-transitional.dtd">

<html xmlns = "http://www.w3.org/1999/xhtml"
   xmlns:h = "http://java.sun.com/jsf/html"
   xmlns:f = "http://java.sun.com/jsf/core"
   xmlns:tp = "http://java.sun.com/jsf/composite/tutorialspoint">

   <h:head>
      <title>JSF tutorial</title>
   </h:head>

   <h:body>
      <h2>Custom Component Example</h2>

      <h:form>
      <tp:loginComponent
         usernameLabel = "Enter User Name: "
         usernameValue = "#{userData.name}"
         passwordLabel = "Enter Password: "
         passwordValue = "#{userData.password}"
         loginButtonLabel = "Login"
         loginButtonAction = "#{userData.login}" />
      </h:form>
   </h:body>
</html>
Once you are ready with all the changes done, let us compile and run the application as we did in JSF - First Application chapter. If everything is fine with your application, this will produce the following result.

JSF - Ajax
AJAX stands for Asynchronous JavaScript and Xml.
Ajax is a technique to use HTTPXMLObject of JavaScript to send data to the server and receive data from the server asynchronously. Thus using Ajax technique, javascript code exchanges data with the server, updates parts of the web page without reloading the whole page.
JSF provides execellent support for making ajax call. It provides f:ajax tag to handle ajax calls.
JSF Tag
<f:ajax execute = "input-component-name" render = "output-component-name" />
Tag Attributes
| S.No | Attribute & Description |
|---|---|
| 1 | disabled If true, the Ajax behavior will be applied to any parent or child components. If false, the Ajax behavior will be disabled. |
| 2 | Event The event that will invoke Ajax requests, for example "click", "change", "blur", "keypress", etc. |
| 3 | Execute A space-separated list of IDs for components that should be included in the Ajax request. |
| 4 | Immediate If "true" behavior events generated from this behavior are broadcast during Apply Request Values phase. Otherwise, the events will be broadcast during Invoke Applications phase. |
| 5 | Listener An EL expression for a method in a backing bean to be called during the Ajax request. |
| 6 | Onerror The name of a JavaScript callback function that will be invoked if there is an error during the Ajax request. |
| 7 | Onevent The name of a JavaScript callback function that will be invoked to handle UI events. |
| 8 | Render A space-separated list of IDs for components that will be updated after an Ajax request. |
Example Application
Let us create a test JSF application to test the custom component in JSF.
| Step | Description |
|---|---|
| 1 | Create a project with a name helloworld under a package com.tutorialspoint.test as explained in the JSF - First Application chapter. |
| 2 | Modify UserData.java file as explained below. |
| 3 | Modify home.xhtml as explained below. Keep the rest of the files unchanged. |
| 4 | Compile and run the application to make sure the business logic is working as per the requirements. |
| 5 | Finally, build the application in the form of war file and deploy it in Apache Tomcat Webserver. |
| 6 | Launch your web application using appropriate URL as explained below in the last step. |
UserData.java
package com.tutorialspoint.test;

import java.io.Serializable;

import javax.faces.bean.ManagedBean;
import javax.faces.bean.SessionScoped;

@ManagedBean(name = "userData", eager = true)
@SessionScoped
public class UserData implements Serializable {
   private static final long serialVersionUID = 1L;
   private String name;

   public String getName() {
      return name;
   }

   public void setName(String name) {
      this.name = name;
   }

   public String getWelcomeMessage() {
      return "Hello " + name;
   }
}
home.xhtml
<?xml version = "1.0" encoding = "UTF-8"?>
<!DOCTYPE html PUBLIC "-//W3C//DTD XHTML 1.0 Transitional//EN"
"http://www.w3.org/TR/xhtml1/DTD/xhtml1-transitional.dtd">
<html xmlns = "http://www.w3.org/1999/xhtml"
xmlns:h = "http://java.sun.com/jsf/html"
xmlns:f = "http://java.sun.com/jsf/core"
xmlns:tp = "http://java.sun.com/jsf/composite/tutorialspoint">
<h:head>
<title>JSF tutorial</title>
</h:head>
<h:body>
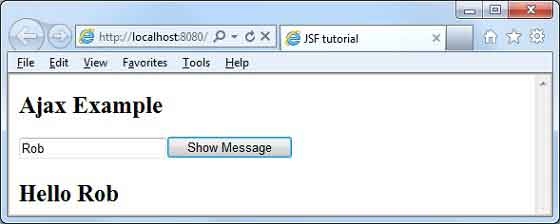
<h2>Ajax Example</h2>
<h:form>
<h:inputText id = "inputName" value = "#{userData.name}"></h:inputText>
<h:commandButton value = "Show Message">
<f:ajax execute = "inputName" render = "outputMessage" />
</h:commandButton>
<h2><h:outputText id = "outputMessage"
value = "#{userData.welcomeMessage != null ?
userData.welcomeMessage : ''}"
/></h2>
</h:form>
</h:body>
</html>
Once you are ready with all the changes done, let us compile and run the application as we did in JSF - First Application chapter. If everything is fine with your application, this will produce the following result.
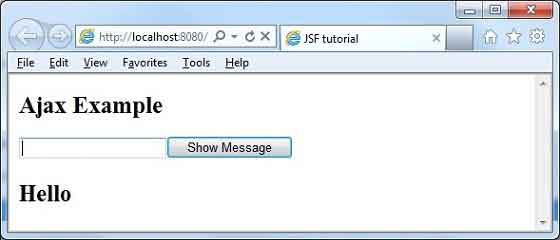
Enter the name and press the Show Message button. You will see the following result without page refresh/form submit.
JSF - Event Handling
When a user clicks a JSF button or link or changes any value in the text field, JSF UI component fires an event, which will be handled by the application code. To handle such an event, an event handler is to be registered in the application code or managed bean.
When a UI component checks that a user event has occured, it creates an instance of the corresponding event class and adds it to an event list. Then, Component fires the event, i.e., checks the list of listeners for that event and calls the event notification method on each listener or handler.
JSF also provide system level event handlers, which can be used to perform some tasks when the application starts or is stopping.
Following are some important Event Handler in JSF 2.0 −
| S.No | Event Handlers & Description |
|---|---|
| 1 | valueChangeListener
Value change events get fired when the user make changes in input components. |
| 2 | actionListener
Action events get fired when the user clicks a button or link component. |
| 3 | Application Events
Events firing during JSF lifecycle: PostConstructApplicationEvent, PreDestroyApplicationEvent , PreRenderViewEvent. |
JSF - JDBC Integration
In this article, we'll demonstrate how to integrate database in JSF using JDBC.
Following are the database requirements to run this example.
| S.No | Software & Description |
|---|---|
| 1 | PostgreSQL 9.1
Open Source and lightweight database |
| 2 | PostgreSQL JDBC4 Driver
JDBC driver for PostgreSQL 9.1 and JDK 1.5 or above |
Put PostgreSQL JDBC4 Driver jar in tomcat web server's lib directory.
Database SQL Commands
create user user1;
create database testdb with owner = user1;

CREATE TABLE IF NOT EXISTS authors (
    id int PRIMARY KEY,
    name VARCHAR(25)
);

INSERT INTO authors(id, name) VALUES(1, 'Rob Bal');
INSERT INTO authors(id, name) VALUES(2, 'John Carter');
INSERT INTO authors(id, name) VALUES(3, 'Chris London');
INSERT INTO authors(id, name) VALUES(4, 'Truman De Bal');
INSERT INTO authors(id, name) VALUES(5, 'Emile Capote');
INSERT INTO authors(id, name) VALUES(7, 'Breech Jabber');
INSERT INTO authors(id, name) VALUES(8, 'Bob Carter');
INSERT INTO authors(id, name) VALUES(9, 'Nelson Mand');
INSERT INTO authors(id, name) VALUES(10, 'Tennant Mark');

alter user user1 with password 'user1';

grant all on authors to user1;
Example Application
Let us create a test JSF application to test JDBC integration.
| Step | Description |
|---|---|
| 1 | Create a project with a name helloworld under a package com.tutorialspoint.test as explained in the JSF - First Application chapter. |
| 2 | Create resources folder under src → main folder. |
| 3 | Create css folder under src → main → resources folder. |
| 4 | Create styles.css file under src → main → resources → css folder. |
| 5 | Modify styles.css file as explained below. |
| 6 | Modify pom.xml as explained below. |
| 7 | Create Author.java under package com.tutorialspoint.test as explained below. |
| 8 | Create UserData.java under package com.tutorialspoint.test as explained below. |
| 9 | Modify home.xhtml as explained below. Keep the rest of the files unchanged. |
| 10 | Compile and run the application to make sure the business logic is working as per the requirements. |
| 11 | Finally, build the application in the form of war file and deploy it in Apache Tomcat Webserver. |
| 12 | Launch your web application using appropriate URL as explained below in the last step. |
styles.css
.authorTable {
   border-collapse:collapse;
   border-bottom:1px solid #000000;
}

.authorTableHeader {
   text-align:center;
   background:none repeat scroll 0 0 #B5B5B5;
   border-bottom:1px solid #000000;
   border-top:1px solid #000000;
   padding:2px;
}

.authorTableOddRow {
   text-align:center;
   background:none repeat scroll 0 0 #FFFFFFF;
}

.authorTableEvenRow {
   text-align:center;
   background:none repeat scroll 0 0 #D3D3D3;
}
pom.xml
<project xmlns = "http://maven.apache.org/POM/4.0.0"
   xmlns:xsi = "http://www.w3.org/2001/XMLSchema-instance"
   xsi:schemaLocation = "http://maven.apache.org/POM/4.0.0
   http://maven.apache.org/maven-v4_0_0.xsd">

   <modelVersion>4.0.0</modelVersion>
   <groupId>com.tutorialspoint.test</groupId>
   <artifactId>helloworld</artifactId>
   <packaging>war</packaging>
   <version>1.0-SNAPSHOT</version>
   <name>helloworld Maven Webapp</name>
   <url>http://maven.apache.org</url >

   <dependencies>
      <dependency>
         <groupId>junit</groupId>
         <artifactId>junit</artifactId>
         <version>3.8.1</version>
         <scope>test</scope>
      </dependency>

      <dependency>
         <groupId>com.sun.faces</groupId>
         <artifactId>jsf-api</artifactId>
         <version>2.1.7</version>
      </dependency>

      <dependency>
         <groupId>com.sun.faces</groupId>
         <artifactId>jsf-impl</artifactId>
         <version>2.1.7</version>
      </dependency>

      <dependency>
         <groupId>javax.servlet</groupId>
         <artifactId>jstl</artifactId>
         <version>1.2</version>
      </dependency>

      <dependency>
        <groupId>postgresql</groupId>
        <artifactId>postgresql</artifactId>
        <version>9.1-901.jdbc4</version>
     </dependency>
   </dependencies>

   <build>
      <finalName>helloworld</finalName>
      <plugins>
         <plugin>
            <groupId>org.apache.maven.plugins</groupId>
            <artifactId>maven-compiler-plugin</artifactId>
            <version>2.3.1</version>
            <configuration>
               <source>1.6</source>
               <target>1.6</target>
            </configuration>
         </plugin>

         <plugin>
            <artifactId>maven-resources-plugin</artifactId>
            <version>2.6</version>
            <executions>
               <execution>
                  <id>copy-resources</id>
                  <phase>validate</phase>
                  <goals>
                     <goal>copy-resources</goal>
                  </goals>

                  <configuration>
                     <outputDirectory>${basedir}/target/helloworld/resources
                        </outputDirectory>
                     <resources>
                        <resource>
                           <directory>src/main/resources</directory>
                           <filtering>true</filtering>
                        </resource>
                     </resources>
                  </configuration>
               </execution>
            </executions>
         </plugin>

      </plugins>
   </build>
</project>
Author.java
package com.tutorialspoint.test;

public class Author {
   int id;
   String name;

   public String getName() {
      return name;
   }

   public void setName(String name) {
      this.name = name;
   }

   public int getId() {
      return id;
   }

   public void setId(int id) {
      this.id = id;
   }
}
UserData.java
package com.tutorialspoint.test;

import java.io.Serializable;

import java.sql.Connection;
import java.sql.DriverManager;
import java.sql.PreparedStatement;
import java.sql.ResultSet;
import java.sql.SQLException;

import java.util.ArrayList;
import java.util.List;

import javax.faces.bean.ManagedBean;
import javax.faces.bean.SessionScoped;
import javax.faces.event.ComponentSystemEvent;

@ManagedBean(name = "userData", eager = true)
@SessionScoped
public class UserData implements Serializable {
   private static final long serialVersionUID = 1L;

   public List<Author> getAuthors() {
      ResultSet rs = null;
      PreparedStatement pst = null;
      Connection con = getConnection();
      String stm = "Select * from authors";
      List<Author> records = new ArrayList<Author>();

      try {
         pst = con.prepareStatement(stm);
         pst.execute();
         rs = pst.getResultSet();

         while(rs.next()) {
            Author author = new Author();
            author.setId(rs.getInt(1));
            author.setName(rs.getString(2));
            records.add(author);
         }
      } catch (SQLException e) {
         e.printStackTrace();
      }
      return records;
   }

   public Connection getConnection() {
      Connection con = null;
      String url = "jdbc:postgresql://localhost/testdb";
      String user = "user1";
      String password = "user1";

      try {
         con = DriverManager.getConnection(url, user, password);
         System.out.println("Connection completed.");
      } catch (SQLException ex) {
         System.out.println(ex.getMessage());
      }

      finally {
      }
      return con;
   }
}
home.xhtml
<?xml version = "1.0" encoding = "UTF-8"?>
<!DOCTYPE html PUBLIC "-//W3C//DTD XHTML 1.0 Transitional//EN"
"http://www.w3.org/TR/xhtml1/DTD/xhtml1-transitional.dtd">
<html xmlns = "http://www.w3.org/1999/xhtml"
xmlns:f = "http://java.sun.com/jsf/core"
xmlns:h = "http://java.sun.com/jsf/html">
<h:head>
<title>JSF Tutorial!</title>
<h:outputStylesheet library = "css" name = "styles.css" />
</h:head>
<h:body>
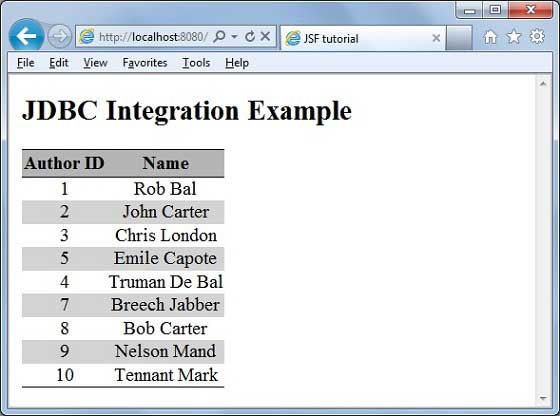
<h2>JDBC Integration Example</h2>
<h:dataTable value = "#{userData.authors}" var = "c"
styleClass = "authorTable"
headerClass = "authorTableHeader"
rowClasses = "authorTableOddRow,authorTableEvenRow">
<h:column><f:facet name = "header">Author ID</f:facet>
#{c.id}
</h:column>
<h:column><f:facet name = "header">Name</f:facet>
#{c.name}
</h:column>
</h:dataTable>
</h:body>
</html>
Once you are ready with all the changes done, let us compile and run the application as we did in JSF - First Application chapter. If everything is fine with your application, this will produce the following result.
JSF - Spring Integration
Spring provides special class DelegatingVariableResolver to integrate JSF and Spring together in a seamless manner.
Following steps are required to integrate Spring Dependency Injection (IOC) feature in JSF.
Step 1: Add DelegatingVariableResolver
Add a variable-resolver entry in faces-config.xml to point to spring class DelegatingVariableResolver.
<faces-config>
   <application>
   <variable-resolver>
      org.springframework.web.jsf.DelegatingVariableResolver
   </variable-resolver>
   ...
</faces-config>
Step 2: Add Context Listeners
Add ContextLoaderListener and RequestContextListener listener provided by spring framework in web.xml.
<web-app>
   ...
   <!-- Add Support for Spring -->
   <listener>
      <listener-class>
         org.springframework.web.context.ContextLoaderListener
      </listener-class>
   </listener>

   <listener>
      <listener-class>
         org.springframework.web.context.request.RequestContextListener
      </listener-class>
   </listener>
   ...
</web-app>
Step 3: Define Dependency
Define bean(s) in applicationContext.xml which will be used as dependency in managed bean.
<beans>
   <bean id = "messageService"
      class = "com.tutorialspoint.test.MessageServiceImpl">
      <property name = "message" value = "Hello World!" />
   </bean>
</beans>
Step 4: Add Dependency
DelegatingVariableResolver first delegates value lookups to the default resolver of the JSF and then to Spring's WebApplicationContext. This allows one to easily inject springbased dependencies into one's JSF-managed beans.
We've injected messageService as spring-based dependency here.
<faces-config>
   ...
   <managed-bean>
      <managed-bean-name>userData</managed-bean-name>
      <managed-bean-class>com.tutorialspoint.test.UserData</managed-bean-class>
      <managed-bean-scope>request</managed-bean-scope>

      <managed-property>
         <property-name>messageService</property-name>
         <value>#{messageService}</value>
      </managed-property>
   </managed-bean>
</faces-config>
Step 5: Use Dependency
//jsf managed bean
public class UserData {

   //spring managed dependency
   private MessageService messageService;

   public void setMessageService(MessageService messageService) {
      this.messageService = messageService;
   }

   public String getGreetingMessage() {
      return messageService.getGreetingMessage();
   }
}
Example Application
Let us create a test JSF application to test spring integration.
| Step | Description |
|---|---|
| 1 | Create a project with a name helloworld under a package com.tutorialspoint.test as explained in the JSF - First Application chapter. |
| 2 | Modify pom.xml as explained below. |
| 3 | Create faces-config.xml in WEB-INF folder as explained below. |
| 4 | Modify web.xml as explained below. |
| 5 | Create applicationContext.xml in WEB-INF folder as explained below. |
| 6 | Create MessageService.java under package com.tutorialspoint.test as explained below. |
| 7 | Create MessageServiceImpl.java under package com.tutorialspoint.test as explained below. |
| 8 | Create UserData.java under package com.tutorialspoint.test as explained below. |
| 9 | Modify home.xhtml as explained below. Keep the rest of the files unchanged. |
| 10 | Compile and run the application to make sure the business logic is working as per the requirements. |
| 11 | Finally, build the application in the form of war file and deploy it in Apache Tomcat Webserver. |
| 12 | Launch your web application using appropriate URL as explained below in the last step. |
pom.xml
<project xmlns = "http://maven.apache.org/POM/4.0.0"
   xmlns:xsi = "http://www.w3.org/2001/XMLSchema-instance"
   xsi:schemaLocation = "http://maven.apache.org/POM/4.0.0
   http://maven.apache.org/maven-v4_0_0.xsd">

   <modelVersion>4.0.0</modelVersion>
   <groupId>com.tutorialspoint.test</groupId>
   <artifactId>helloworld</artifactId>
   <packaging>war</packaging>
   <version>1.0-SNAPSHOT</version>
   <name>helloworld Maven Webapp</name>
   <url>http://maven.apache.org</url>

   <dependencies>
      <dependency>
         <groupId>junit</groupId>
         <artifactId>junit</artifactId>
         <version>3.8.1</version>
         <scope>test</scope>
      </dependency>

      <dependency>
         <groupId>com.sun.faces</groupId>
         <artifactId>jsf-api</artifactId>
         <version>2.1.7</version>
      </dependency>

      <dependency>
         <groupId>com.sun.faces</groupId>
         <artifactId>jsf-impl</artifactId>
         <version>2.1.7</version>
      </dependency>

      <dependency>
         <groupId>javax.servlet</groupId>
         <artifactId>jstl</artifactId>
         <version>1.2</version>
      </dependency>

      <dependency>
         <groupId>org.springframework</groupId>
         <artifactId>spring-core</artifactId>
         <version>3.1.2.RELEASE</version>
      </dependency>

      <dependency>
         <groupId>org.springframework</groupId>
         <artifactId>spring-web</artifactId>
         <version>3.1.2.RELEASE</version>
      </dependency>
   </dependencies>

   <build>
      <finalName>helloworld</finalName>
      <plugins>
         <plugin>
            <groupId>org.apache.maven.plugins</groupId>
            <artifactId>maven-compiler-plugin</artifactId>
            <version>2.3.1</version>
            <configuration>
               <source>1.6</source>
               <target>1.6</target>
            </configuration>
         </plugin>

         <plugin>
            <artifactId>maven-resources-plugin</artifactId>
            <version>2.6</version>

            <executions>
               <execution>
                  <id>copy-resources</id>
                  <phase>validate</phase>
                  <goals>
                     <goal>copy-resources</goal>
                  </goals>

                  <configuration>
                     <outputDirectory>${basedir}/target/helloworld/resources
                        </outputDirectory>
                     <resources>
                        <resource>
                           <directory>src/main/resources</directory>
                           <filtering>true</filtering>
                        </resource>
                     </resources>
                  </configuration>
               </execution>
            </executions>

         </plugin>
      </plugins>
   </build>
</project>
faces-config.xml
<?xml version = "1.0" encoding = "UTF-8"?>
<faces-config
   xmlns = "http://java.sun.com/xml/ns/javaee"
   xmlns:xsi = "http://www.w3.org/2001/XMLSchema-instance"
   xsi:schemaLocation = "http://java.sun.com/xml/ns/javaee
   http://java.sun.com/xml/ns/javaee/web-facesconfig_2_0.xsd"
   version = "2.0">

   <application>
      <variable-resolver>
         org.springframework.web.jsf.DelegatingVariableResolver
      </variable-resolver>
   </application>

   <managed-bean>
      <managed-bean-name>userData</managed-bean-name>
      <managed-bean-class>com.tutorialspoint.test.UserData</managed-bean-class>
      <managed-bean-scope>request</managed-bean-scope>
      <managed-property>
         <property-name>messageService</property-name>
         <value>#{messageService}</value>
      </managed-property>
   </managed-bean>
</faces-config>
web.xml
<!DOCTYPE web-app PUBLIC
   "-//Sun Microsystems, Inc.//DTD Web Application 2.3//EN"
   "http://java.sun.com/dtd/web-app_2_3.dtd" >

<web-app>
   <display-name>Archetype Created Web Application</display-name>

   <context-param>
      <param-name>javax.faces.PROJECT_STAGE</param-name>
      <param-value>Development</param-value>
   </context-param>

   <!-- Add Support for Spring -->
   <listener>
      <listener-class>
         org.springframework.web.context.ContextLoaderListener
      </listener-class>
   </listener>

   <listener>
      <listener-class>
         org.springframework.web.context.request.RequestContextListener
      </listener-class>
   </listener>

   <servlet>
      <servlet-name>Faces Servlet</servlet-name>
      <servlet-class>javax.faces.webapp.FacesServlet</servlet-class>
   </servlet>

   <servlet-mapping>
      <servlet-name>Faces Servlet</servlet-name>
      <url-pattern>*.jsf</url-pattern>
   </servlet-mapping>
</web-app>
applicationContext.xml
<?xml version = "1.0" encoding = "UTF-8"?>
<!DOCTYPE beans PUBLIC "-//SPRING//DTD BEAN 2.0//EN"
   "http://www.springframework.org/dtd/spring-beans-2.0.dtd">

<beans>
   <bean id = "messageService"
      class = "com.tutorialspoint.test.MessageServiceImpl">
      <property name = "message" value = "Hello World!" />
   </bean>
</beans>
MessageService.java
package com.tutorialspoint.test;

public interface MessageService {
   String getGreetingMessage();
}
MessageServiceImpl.java
package com.tutorialspoint.test;

public class MessageServiceImpl implements MessageService {
   private String message;

   public String getGreetingMessage() {
      return message;
   }

   public String getMessage() {
      return message;
   }
   public void setMessage(String message) {
      this.message = message;
   }
}
UserData.java
package com.tutorialspoint.test;

import java.io.Serializable;

public class UserData implements Serializable {

   private static final long serialVersionUID = 1L;
	private MessageService messageService;

   public MessageService getMessageService() {
      return messageService;
   }

   public void setMessageService(MessageService messageService) {
      this.messageService = messageService;
   }

   public String getGreetingMessage() {
      return messageService.getGreetingMessage();
   }
}
home.xhtml
<?xml version = "1.0" encoding = "UTF-8"?>
<!DOCTYPE html PUBLIC "-//W3C//DTD XHTML 1.0 Transitional//EN"
"http://www.w3.org/TR/xhtml1/DTD/xhtml1-transitional.dtd">

<html xmlns = "http://www.w3.org/1999/xhtml"
   xmlns:f = "http://java.sun.com/jsf/core"
   xmlns:h = "http://java.sun.com/jsf/html">

   <h:head>
      <title>JSF Tutorial!</title>
   </h:head>

   <h:body>
      <h2>Spring Integration Example</h2>
      #{userData.greetingMessage}
   </h:body>
</html>
Once you are ready with all the changes done, let us compile and run the application as we did in JSF - First Application chapter. If everything is fine with your application, this will produce the following result.
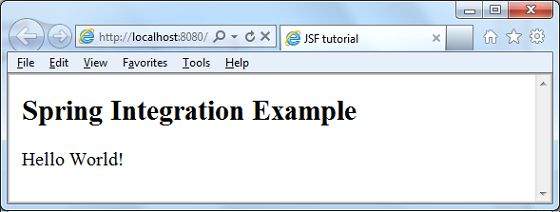
JSF - Expression Language
JSF provides a rich expression language. We can write normal operations using #{operation-expression} notation. Following are some of the advantages of JSF Expression languages.
Can reference bean properties where bean can be an object stored in request, session or application scope or is a managed bean.
Provides easy access to elements of a collection which can be a list, map or an array.
Provides easy access to predefined objects such as a request.
Arithmetic, logical and relational operations can be done using expression language.
Automatic type conversion.
Shows missing values as empty strings instead of NullPointerException.
Example Application
Let us create a test JSF application to test expression language.
| Step | Description |
|---|---|
| 1 | Create a project with a name helloworld under a package com.tutorialspoint.test as explained in the JSF - First Application chapter. |
| 2 | Modify UserData.java under package com.tutorialspoint.test as explained below. |
| 3 | Modify home.xhtml as explained below. Keep the rest of the files unchanged. |
| 4 | Compile and run the application to make sure the business logic is working as per the requirements. |
| 5 | Finally, build the application in the form of war file and deploy it in Apache Tomcat Webserver. |
| 6 | Launch your web application using appropriate URL as explained below in the last step. |
UserData.java
package com.tutorialspoint.test;

import java.io.Serializable;
import java.util.Date;

import javax.faces.bean.ManagedBean;
import javax.faces.bean.SessionScoped;

@ManagedBean(name = "userData", eager = true)
@SessionScoped
public class UserData implements Serializable {
   private static final long serialVersionUID = 1L;
   private Date createTime = new Date();
   private String message = "Hello World!";

   public Date getCreateTime() {
      return(createTime);
   }

   public String getMessage() {
      return(message);
   }
}
home.xhtml
<?xml version = "1.0" encoding = "UTF-8"?>
<!DOCTYPE html PUBLIC "-//W3C//DTD XHTML 1.0 Transitional//EN"
"http://www.w3.org/TR/xhtml1/DTD/xhtml1-transitional.dtd">

<html xmlns = "http://www.w3.org/1999/xhtml"
   xmlns:f = "http://java.sun.com/jsf/core"
   xmlns:h = "http://java.sun.com/jsf/html">

   <h:head>
      <title>JSF Tutorial!</title>
   </h:head>

   <h:body>
      <h2>Expression Language Example</h2>
      Creation time:
      <h:outputText value = "#{userData.createTime}"/>
      <br/><br/>
      Message:
      <h:outputText value = "#{userData.message}"/>
   </h:body>
</html>
Once you are ready with all the changes done, let us compile and run the application as we did in JSF - First Application chapter. If everything is fine with your application, this will produce the following result.
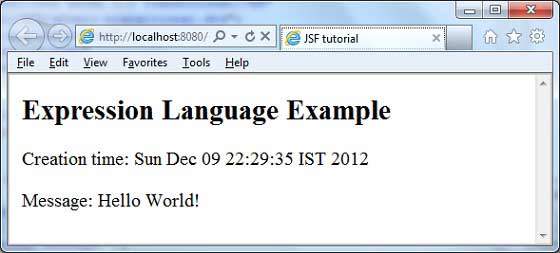
JSF - Internationalization
Internationalization is a technique in which status messages, GUI component labels, currency, date are not hardcoded in the program. Instead, they are stored outside the source code in resource bundles and retrieved dynamically. JSF provides a very convenient way to handle resource bundle.
Following steps are required to internalize a JSF application.
Step 1: Define properties files
Create properties file for each locale. Name should be in <file-name>_<locale>.properties format.
Default locale can be omitted in file name.
messages.properties
greeting = Hello World!
messages_fr.properties
greeting = Bonjour tout le monde!
Step 2: Update faces-config.xml
faces-config.xml
<application>
   <locale-config>
      <default-locale>en</default-locale>
      <supported-locale>fr</supported-locale>
   </locale-config>

   <resource-bundle>
      <base-name>com.tutorialspoint.messages</base-name>
      <var>msg</var>
   </resource-bundle>
</application>
Step 3: Use resource-bundle var
home.xhtml
<h:outputText value = "#{msg['greeting']}" />
Example Application
Let us create a test JSF application to test internationalization in JSF.
| Step | Description |
|---|---|
| 1 | Create a project with a name helloworld under a package com.tutorialspoint.test as explained in the JSF - First Application chapter. |
| 2 | Create resources folder under src → mai folder. |
| 3 | Create com folder under src → main → resources folder. |
| 4 | Create tutorialspoint folder under src → main → resources → com folder. |
| 5 | Create messages.properties file under src → main → resources → com → tutorialspoint folder. Modify it as explained below. |
| 6 | Create messages_fr.properties file under src → main → resources → com → tutorialspoint folder. Modify it as explained below. |
| 7 | Create faces-config.xml in WEB-INFf older as explained below. |
| 8 | Create UserData.java under package com.tutorialspoint.test as explained below. |
| 9 | Modify home.xhtml as explained below. Keep the rest of the files unchanged. |
| 10 | Compile and run the application to make sure the business logic is working as per the requirements. |
| 11 | Finally, build the application in the form of war file and deploy it in Apache Tomcat Webserver. |
| 12 | Launch your web application using appropriate URL as explained below in the last step. |
messages.properties
greeting = Hello World!
messages_fr.properties
greeting = Bonjour tout le monde!
faces-config.xml
<?xml version = "1.0" encoding = "UTF-8"?>
<faces-config
   xmlns = "http://java.sun.com/xml/ns/javaee"
   xmlns:xsi = "http://www.w3.org/2001/XMLSchema-instance"
   xsi:schemaLocation = "http://java.sun.com/xml/ns/javaee
   http://java.sun.com/xml/ns/javaee/web-facesconfig_2_0.xsd"
   version = "2.0">

   <application>
      <locale-config>
         <default-locale>en</default-locale>
         <supported-locale>fr</supported-locale>
      </locale-config>

      <resource-bundle>
         <base-name>com.tutorialspoint.messages</base-name>
         <var>msg</var>
      </resource-bundle>
   </application>
</faces-config>
UserData.java
package com.tutorialspoint.test;

import java.io.Serializable;
import java.util.LinkedHashMap;
import java.util.Locale;
import java.util.Map;

import javax.faces.bean.ManagedBean;
import javax.faces.bean.SessionScoped;
import javax.faces.context.FacesContext;
import javax.faces.event.ValueChangeEvent;

@ManagedBean(name = "userData", eager = true)
@SessionScoped
public class UserData implements Serializable {
   private static final long serialVersionUID = 1L;
   private String locale;

   private static Map<String,Object> countries;
      static {

      countries = new LinkedHashMap<String,Object>();
      countries.put("English", Locale.ENGLISH);
      countries.put("French", Locale.FRENCH);
   }

   public Map<String, Object> getCountries() {
      return countries;
   }

   public String getLocale() {
      return locale;
   }

   public void setLocale(String locale) {
      this.locale = locale;
   }

   //value change event listener
   public void localeChanged(ValueChangeEvent e) {
      String newLocaleValue = e.getNewValue().toString();

      for (Map.Entry<String, Object> entry : countries.entrySet()) {

         if(entry.getValue().toString().equals(newLocaleValue)) {
            FacesContext.getCurrentInstance()
               .getViewRoot().setLocale((Locale)entry.getValue());
         }
      }
   }
}
home.xhtml
<?xml version = "1.0" encoding = "UTF-8"?>
<!DOCTYPE html PUBLIC "-//W3C//DTD XHTML 1.0 Transitional//EN"
"http://www.w3.org/TR/xhtml1/DTD/xhtml1-transitional.dtd">

<html xmlns = "http://www.w3.org/1999/xhtml"
xmlns:h = "http://java.sun.com/jsf/html"
xmlns:f = "http://java.sun.com/jsf/core">

   <h:head>
      <title>JSF tutorial</title>
   </h:head>

   <h:body>
      <h2>Internalization Language Example</h2>

      <h:form>
         <h3><h:outputText value = "#{msg['greeting']}" /></h3>

         <h:panelGrid columns = "2">
            Language :
            <h:selectOneMenu value = "#{userData.locale}" onchange = "submit()"
               valueChangeListener = "#{userData.localeChanged}">
               <f:selectItems value = "#{userData.countries}" />
            </h:selectOneMenu>
         </h:panelGrid>

      </h:form>
   </h:body>
</html>
Once you are ready with all the changes done, let us compile and run the application as we did in JSF - First Application chapter. If everything is fine with your application, this will produce the following result.
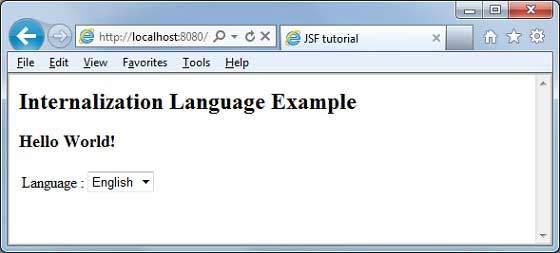
Change language from dropdown. You will see the following output.

