- JSF - Home
- JSF - Overview
- JSF - Environment Setup
- JSF - Architecture
- JSF - Life Cycle
- JSF - First Application
- JSF - Managed Beans
- JSF - Page Navigation
- JSF - Basic Tags
- JSF - Facelet Tags
- JSF - Convertor Tags
- JSF - Validator Tags
- JSF - DataTable
- JSF - Composite Components
- JSF - Ajax
- JSF - Event Handling
- JSF - JDBC Integration
- JSF - Spring Integration
- JSF - Expression Language
- JSF - Internationalization
JSF - Ajax
AJAX stands for Asynchronous JavaScript and Xml.
Ajax is a technique to use HTTPXMLObject of JavaScript to send data to the server and receive data from the server asynchronously. Thus using Ajax technique, javascript code exchanges data with the server, updates parts of the web page without reloading the whole page.
JSF provides execellent support for making ajax call. It provides f:ajax tag to handle ajax calls.
JSF Tag
<f:ajax execute = "input-component-name" render = "output-component-name" />
Tag Attributes
| S.No | Attribute & Description |
|---|---|
| 1 | disabled If true, the Ajax behavior will be applied to any parent or child components. If false, the Ajax behavior will be disabled. |
| 2 | Event The event that will invoke Ajax requests, for example "click", "change", "blur", "keypress", etc. |
| 3 | Execute A space-separated list of IDs for components that should be included in the Ajax request. |
| 4 | Immediate If "true" behavior events generated from this behavior are broadcast during Apply Request Values phase. Otherwise, the events will be broadcast during Invoke Applications phase. |
| 5 | Listener An EL expression for a method in a backing bean to be called during the Ajax request. |
| 6 | Onerror The name of a JavaScript callback function that will be invoked if there is an error during the Ajax request. |
| 7 | Onevent The name of a JavaScript callback function that will be invoked to handle UI events. |
| 8 | Render A space-separated list of IDs for components that will be updated after an Ajax request. |
Example Application
Let us create a test JSF application to test the custom component in JSF.
| Step | Description |
|---|---|
| 1 | Create a project with a name helloworld under a package com.tutorialspoint.test as explained in the JSF - First Application chapter. |
| 2 | Modify UserData.java file as explained below. |
| 3 | Modify home.xhtml as explained below. Keep the rest of the files unchanged. |
| 4 | Compile and run the application to make sure the business logic is working as per the requirements. |
| 5 | Finally, build the application in the form of war file and deploy it in Apache Tomcat Webserver. |
| 6 | Launch your web application using appropriate URL as explained below in the last step. |
UserData.java
package com.tutorialspoint.test;

import java.io.Serializable;

import javax.faces.bean.ManagedBean;
import javax.faces.bean.SessionScoped;

@ManagedBean(name = "userData", eager = true)
@SessionScoped
public class UserData implements Serializable {
   private static final long serialVersionUID = 1L;
   private String name;

   public String getName() {
      return name;
   }

   public void setName(String name) {
      this.name = name;
   }

   public String getWelcomeMessage() {
      return "Hello " + name;
   }
}
home.xhtml
<?xml version = "1.0" encoding = "UTF-8"?>
<!DOCTYPE html PUBLIC "-//W3C//DTD XHTML 1.0 Transitional//EN"
"http://www.w3.org/TR/xhtml1/DTD/xhtml1-transitional.dtd">

<html xmlns = "http://www.w3.org/1999/xhtml"
   xmlns:h = "http://java.sun.com/jsf/html"
   xmlns:f = "http://java.sun.com/jsf/core"
   xmlns:tp = "http://java.sun.com/jsf/composite/tutorialspoint">

   <h:head>
      <title>JSF tutorial</title>
   </h:head>

   <h:body>
      <h2>Ajax Example</h2>

      <h:form>
         <h:inputText id = "inputName" value = "#{userData.name}"></h:inputText>
         <h:commandButton value = "Show Message">
            <f:ajax execute = "inputName" render = "outputMessage" />
         </h:commandButton>
         <h2><h:outputText id = "outputMessage"
            value = "#{userData.welcomeMessage != null ?
            userData.welcomeMessage : ''}"
         /></h2>
      </h:form>
   </h:body>
</html>
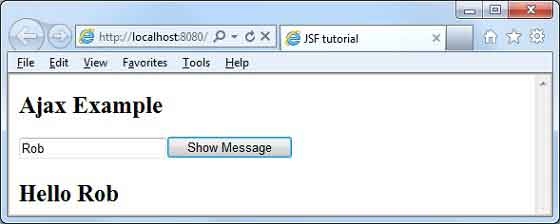
Once you are ready with all the changes done, let us compile and run the application as we did in JSF - First Application chapter. If everything is fine with your application, this will produce the following result.
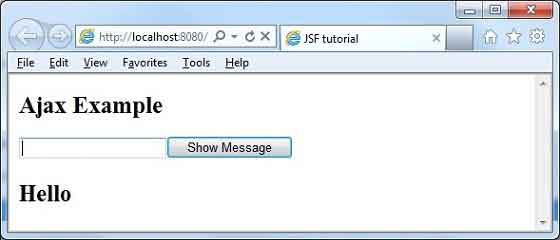
Enter the name and press the Show Message button. You will see the following result without page refresh/form submit.