- JSF - Home
- JSF - Overview
- JSF - Environment Setup
- JSF - Architecture
- JSF - Life Cycle
- JSF - First Application
- JSF - Managed Beans
- JSF - Page Navigation
- JSF - Basic Tags
- JSF - Facelet Tags
- JSF - Convertor Tags
- JSF - Validator Tags
- JSF - DataTable
- JSF - Composite Components
- JSF - Ajax
- JSF - Event Handling
- JSF - JDBC Integration
- JSF - Spring Integration
- JSF - Expression Language
- JSF - Internationalization
Selected Reading
JSF - f:param
f:param tag provides the options to pass parameters to a component or pass request parameters.
JSF Tag
Pass parameter to a UI component
<h:outputFormat value = "Hello {0}!.">
   <f:param value = "World" />
</h:outputFormat>
Pass request parameter
<h:commandButton id = "submit"
   value = "Show Message" action = "#{userData.showResult}">
   <f:param name = "username" value = "JSF 2.0 User" />
</h:commandButton>
Tag Attributes
| S.No | Attribute & Description |
|---|---|
| 1 | id Identifier for a component |
| 2 | binding Reference to the component that can be used in a backing bean |
| 3 | name An optional name for this parameter component |
| 4 | value The value stored in this component |
Example Application
Let us create a test JSF application to test the above tag.
| Step | Description |
|---|---|
| 1 | Create a project with a name helloworld under a package com.tutorialspoint.test as explained in the JSF - First Application chapter. |
| 2 | Modify home.xhtml as explained below. Keep rest of the files unchanged. |
| 3 | Create result.xhtml in the webapps directory as explained below. |
| 4 | Create UserData.java as a managed bean under package com.tutorialspoint.test as explained below. |
| 5 | Compile and run the application to make sure business logic is working as per the requirements. |
| 6 | Finally, build the application in the form of war file and deploy it in Apache Tomcat Webserver. |
| 7 | Launch your web application using appropriate URL as explained below in the last step. |
UserData.java
package com.tutorialspoint.test;

import java.io.Serializable;

import javax.faces.bean.ManagedBean;
import javax.faces.bean.SessionScoped;

@ManagedBean(name = "userData", eager = true)
@SessionScoped
public class UserData implements Serializable {
   private static final long serialVersionUID = 1L;
   public String data = "1";

   public String getData() {
      return data;
   }

   public void setData(String data) {
      this.data = data;
   }

   public String showResult() {
      FacesContext fc = FacesContext.getCurrentInstance();
      Map<String,String> params =
         fc.getExternalContext().getRequestParameterMap();
      data =  params.get("username");
      return "result";
   }
}
home.xhtml
<!DOCTYPE html PUBLIC "-//W3C//DTD XHTML 1.0 Transitional//EN"
   "http://www.w3.org/TR/xhtml1/DTD/xhtml1-transitional.dtd">

<html xmlns = "http://www.w3.org/1999/xhtml">
   <head>
      <title>JSF Tutorial!</title>
   </head>

   <body>
      <h2>f:param example</h2>
      <hr />

      <h:form>
         <h:outputFormat value = "Hello {0}!.">
            <f:param value = "World" />
         </h:outputFormat>
         <br/>

         <h:commandButton id = "submit"
            value = "Show Message" action = "#{userData.showResult}">
            <f:param name = "username" value = "JSF 2.0 User" />
         </h:commandButton>
      </h:form>

   </body>
</html>
result.xhtml
<?xml version = "1.0" encoding = "UTF-8"?>
<!DOCTYPE html PUBLIC "-//W3C//DTD XHTML 1.0 Transitional//EN"
"http://www.w3.org/TR/xhtml1/DTD/xhtml1-transitional.dtd">

<html xmlns = "http://www.w3.org/1999/xhtml"
   xmlns:f = "http://java.sun.com/jsf/core"
   xmlns:h = "http://java.sun.com/jsf/html"
   xmlns:ui = "http://java.sun.com/jsf/facelets">

   <head>
      <title>JSF Tutorial!</title>
   </head>

   <h:body>
      <h2>Result</h2>
      <hr />
      #{userData.data}
   </h:body>
</html>
Once you are ready with all the changes done, let us compile and run the application as we did in JSF - First Application chapter. If everything is fine with your application, this will produce the following result.
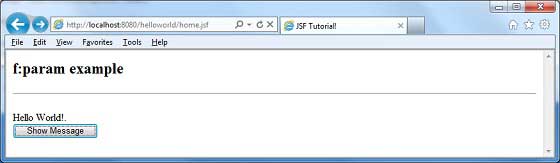
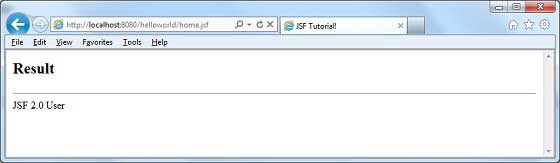
Press Show Message button and you'll see the following result.
jsf_basic_tags.htm

Advertisements