
Article Categories
- All Categories
-
 Data Structure
-
 Networking
-
 RDBMS
RDBMS
-
 Operating System
-
 Java
Java
-
 MS Excel
-
 iOS
iOS
-
 HTML
HTML
-
 CSS
CSS
-
 Android
-
 Python
-
 C Programming
-
 C++
C++
-
 C#
C#
-
 MongoDB
-
 MySQL
MySQL
-
 Javascript
-
 PHP
PHP
-
 Economics & Finance
How to use the Vstack function to combine Multiple Sheets in Excel?
Introduction
When working with extensive datasets, manually stacking data row-wise through copy paste option wastes lots of users' time. Sometimes, large data resides in multiple sheets and users intend to stack all the compiled data on one another. Microsoft 365 is full of bundled features that provide flexibility and scalability to the users to become proficient in their analytics work. The primary objective of the vstack() function which is exclusive to Office 365, is to quickly stack two datasets from distinct worksheets on top of each other.
Example 1: To stack the two arrays in a single array by using VStack() function
Step 1
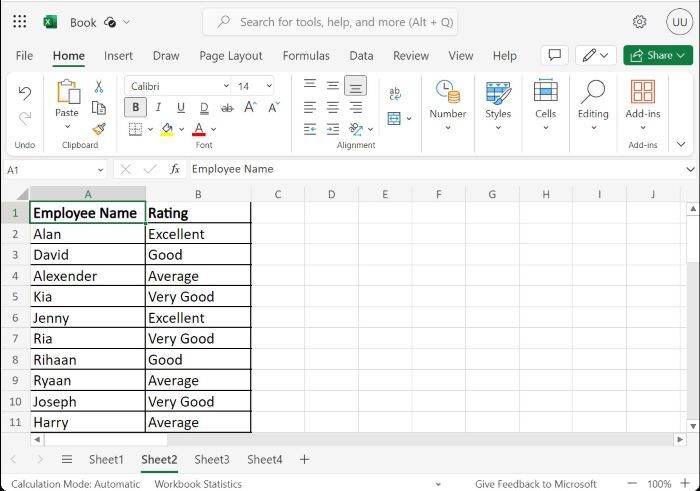
In this article, users will understand the process of using vstack function. Users must create tables in the two distinct worksheets. In Sheet 2, create a table containing two columns named "Employee Name" and "Rating". Write the certain entries in both columns as shown below image
Step 2
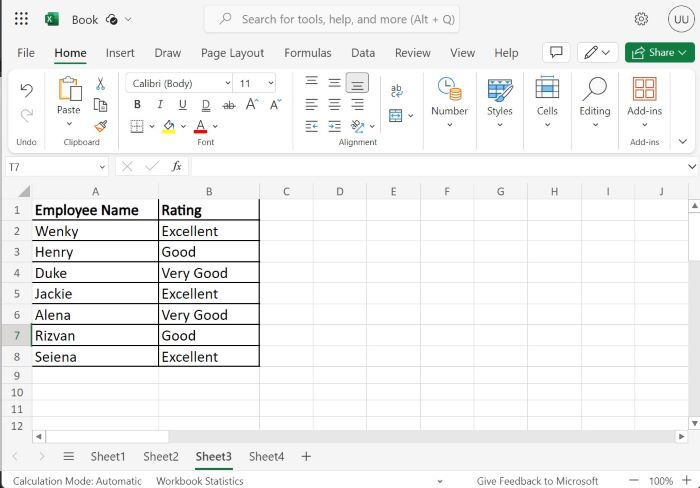
Similarly, develop a second table in another worksheet Sheet3 as shown below
Step 3
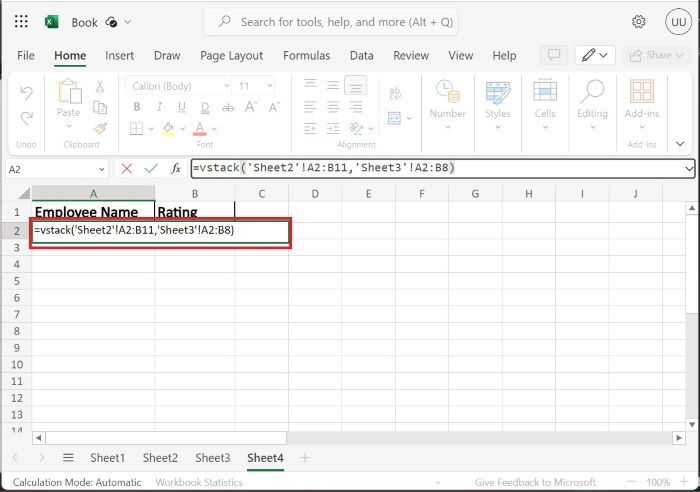
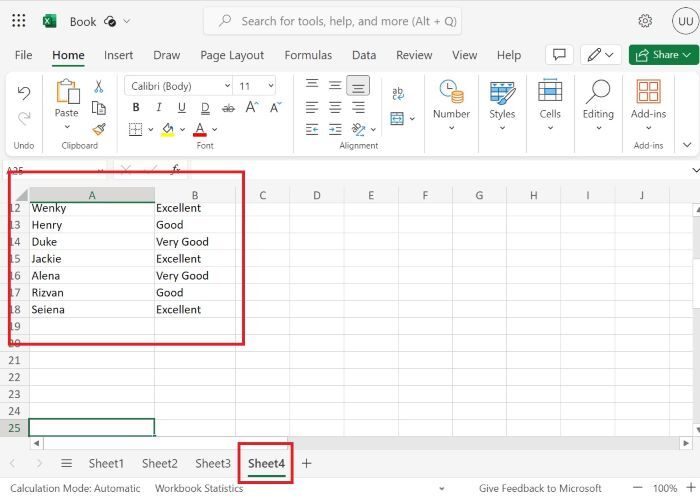
Move to sheet 4 and write the column headings "Employee Name" and "Rating" in the A1 and B1 cells. Enter the formula =vstack(?Sheet2?!A2:B11, ?Sheet3?!A2:B8) in the A2 cell. The first argument of the stack () function specifies the range of array1 and the second argument represents the range of array2.
Step 4
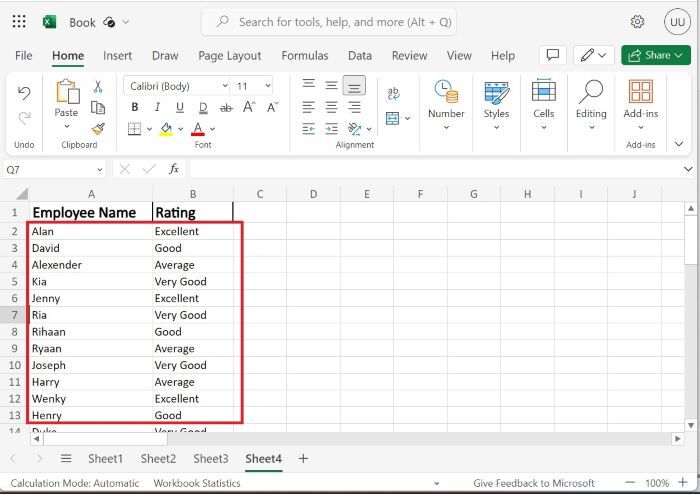
And, press the "Enter" tab to display the output
Conclusion
We may conclude that the dataset of both worksheets named Sheets2 and Sheets3 is merged into Sheet4 by using the vstack() function. By employing the simple techniques showcased above?we can effortlessly develop a large array with precision and efficiency. Users can also utilize the vstack() function in Excel normal versions like 2019 or 2016 by using the Addin option and browse the vstack file from the specific folder in the computer.

2K+ Views
