
Article Categories
- All Categories
-
 Data Structure
-
 Networking
-
 RDBMS
RDBMS
-
 Operating System
-
 Java
Java
-
 MS Excel
-
 iOS
iOS
-
 HTML
HTML
-
 CSS
CSS
-
 Android
-
 Python
-
 C Programming
-
 C++
C++
-
 C#
C#
-
 MongoDB
-
 MySQL
MySQL
-
 Javascript
-
 PHP
PHP
-
 Economics & Finance
How to use DROP function in Excel 365?
In this type of article, we may create the data using the DROP() function to identify a number of columns and rows from array that is based on the number in the function DROP which we have to set the identified value. The users would have to analyze DROP() function that is available to reduce the number of rows and columns that the users want. This method may be completed utilizing a straightforward way within Microsoft Excel 365 by using the DROP function. Excel 365 facilitates seamless collaboration contributes to increased productivity and ensures smooth project flows, resulting in quicker and more accurate outputs.
DROP function
The DROP() function is utilized to drop the number of columns and rows from the selected array with the identified value.
DROP(array, rows, [columns])
It requires an array that will return several rows and columns.
The users must drop any number of rows with any integer number. The users may also drop row from the end of the array as a negative value.
Users need to eliminate the required number of columns and remove a negative value from the end of the array. It is an optional argument.
DROP function in Excel 365
Step 1
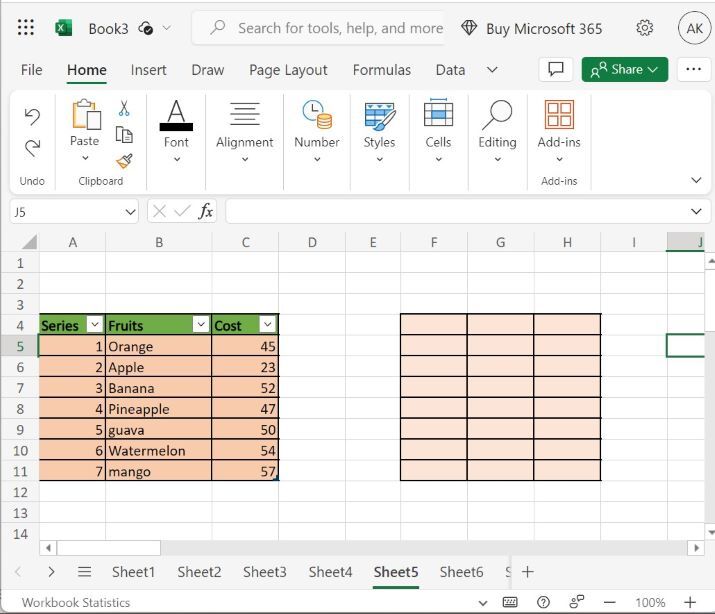
Open the new Microsoft Excel sheet and insert the data from cells A4 to C11 as you need as shown below.
Step 2
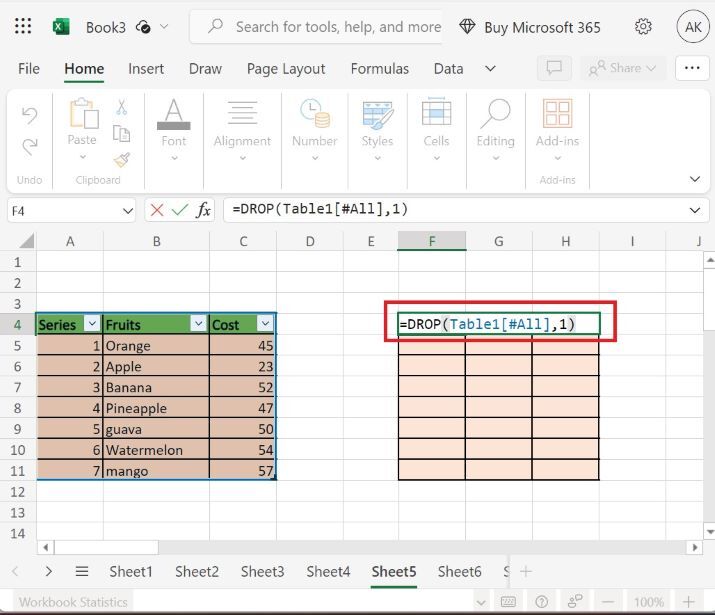
In the Excel sheet, locate the pointer in any cell like A4 to drop row 1 which we have inserted the number of rows and columns. Enter the formula that is =DROP(Table1[#A11],1) to drop the rows and columns according to the integer value in the function then press the Enter key that will display the result as shown below.
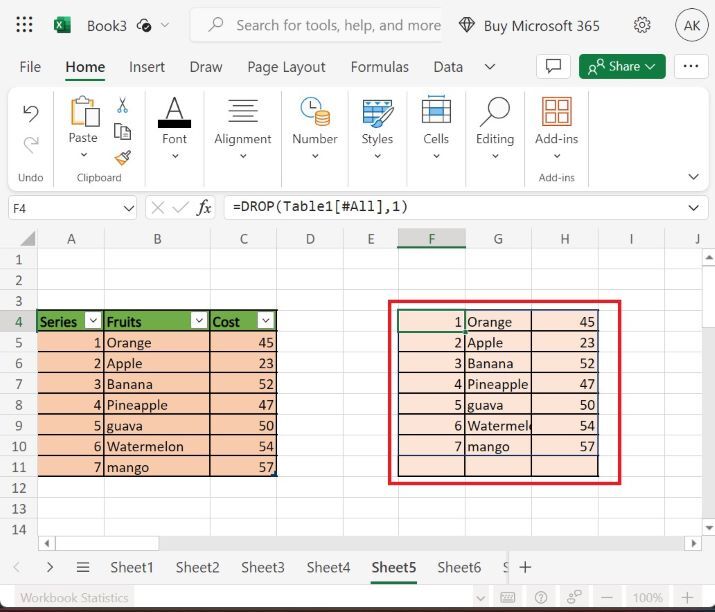
Removal of the first row and first two columns by using DROP function
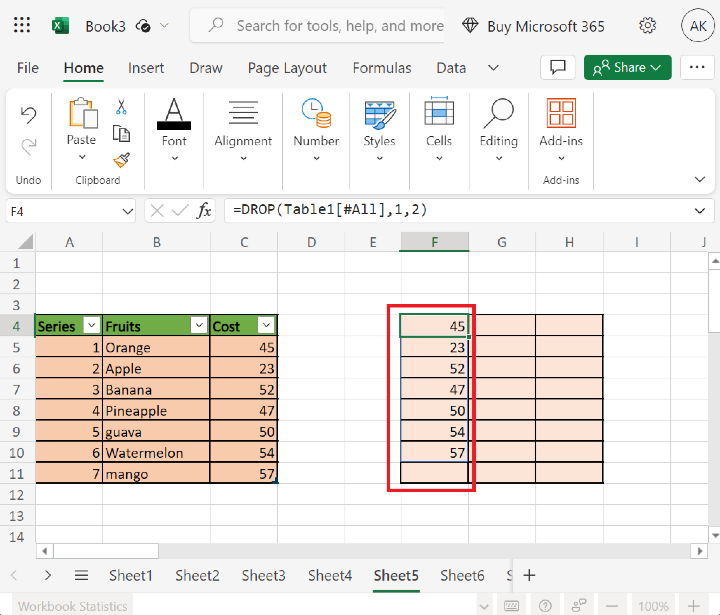
In the Excel sheet, locate the pointer in any cell-like A4 to drop the rows 1 and 2 that we have inserted the number of rows and columns. Enter the formula that is =DROP(Table1[#A11],1,2) to drop the rows and columns according to the integer values in the function then press Enter key that will display the result as shown below.
Therefore, the first heading row and number of two column are eliminated as shown in below images
Conclusion
The users may use the easy instance to show how they can use drop function to drop or delete the number of rows and columns that the users need in the version of Excel 365. The users can use the syntax or function for the rows and columns that will display the result.

476 Views
