 Data Structure
 Networking
 RDBMS
RDBMS Operating System
 Java
Java MS Excel
 iOS
iOS HTML
HTML CSS
CSS Android
 Python
 C Programming
 C++
C++ C#
C# MongoDB
 MySQL
MySQL Javascript
 PHP
PHP
- Selected Reading
- UPSC IAS Exams Notes
- Developer's Best Practices
- Questions and Answers
- Effective Resume Writing
- HR Interview Questions
- Computer Glossary
- Who is Who
How to use Redux with React Native?
Redux is a state-management library for JavaScript programs. It provides a central location to store all state information for an application and a predictable way to alter the state using actions and reducers.
React Native is a framework for building native mobile applications using React. To utilize Redux with React Native, users must integrate the Redux store with their React Native components. To use Redux with ReactNative, we will follow some steps described in short, and later we will discuss the process more descriptively.
First, install the Redux and React-Redux libraries.
To construct a store, use the createStore method of the Redux library. The store contains the application's state.
Use the Provider component from the react-redux package to grant the React Native components access to the store.
To connect the components to the store, use the connect function from the reactredux package. The state will be accessible from the store by those components, who can then send out actions to update the state.
Send out activities to update the state using the dispatch method from the store.
To update the components in response to store changes, use the store's subscribe method.
Steps to use Redux with React Native
-
Install the React-Redux and Redux libraries first ? For Redux to be compatible with React Native, the React-Redux and Redux libraries must be installed. To do this, we can use the yarn or npm package managers.
Below are the commands that need to run to install redux and react-redux.
npm install redux
npm install react-redux
Create Store ? The application's state is stored. A store is created using the createStore function of the Redux library. Then the state is updated by the createStore method depending on actions and receives a reducer function as an argument.
Connect the User's React Native components to the store ? Use the Provider component from the react-redux package to supply the store to the user's components. This component provides access to the store for all other associated components.
Connect the user's components to the store ? Use the connect method in the reactredux package to connect the components to the store. By mapping the state from the store to props and dispatching actions to props, the user can use the connect function to dispatch actions to update the state.
Send actions to modify the state ? We can do so through the store's dispatch function.
Register for store changes ? Use the store's subscribe function to subscribe to changes. Then make any necessary updates to the user's components.
Example
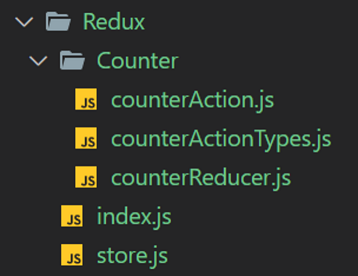
In this example, we will create a redux store and use it in our React-Native application. We will create a store for storing a counter's value. Different files and folders need to be created to implement the redux. Firstly, we need to create a folder named Redux, and below are the files we need to create in that folder.
Folder structure for redux ?

Let's take each file one by one and understand the codes
counterActionTypes.js ? stores all action types
// All Action Types
export const INCREMENT_COUNTER = 'INCREMENT_COUNTER';
export const DECREMENT_COUNTER = 'DECREMENT_COUNTER';
counterAction.js ? stores all actions
import { INCREMENT_COUNTER, DECREMENT_COUNTER } from
'./counterActionTypes';
export const incrementCounterAction = (parameter) => {
   return {
      type: INCREMENT_COUNTER,
      payload: parameter
   }
}
export const decrementCounterAction = () => {
   return {
      type: DECREMENT_COUNTER
   }
}
counterReducer.js ? stores the initial state and the reducer.
import { INCREMENT_COUNTER, DECREMENT_COUNTER } from './counterActionTypes';

//initializing state
const initialState = {
   counter: 0
}
const counterReducer = (state = initialState, action) => {
   switch (action.type) {
      case INCREMENT_COUNTER: return {
         ...state,
         counter: state.counter + action.payload
      }
      case DECREMENT_COUNTER: return {
         ...state,
         counter: state.counter - 1
      }
      default: return state
   }
}
export default counterReducer;
index.js ? stores all actions
// All Actions
import { incrementCounterAction } from './Counter/counterAction';
import { decrementCounterAction } from './Counter/counterAction';
store.js ? store of redux
import { createStore } from 'redux';
import counterReducer from './Counter/counterReducer';

// Passing counterReducer to createStore
const store = createStore(counterReducer);
export default store;
App.js ? the main component of the application
import React from 'react';
import { Provider } from 'react-redux';
import store from './Redux/store';
import MyComponent from './MyComponent';
const App = () => {
   return (
      <Provider store={store}>
         <MyComponent />
      </Provider>
   );
};
export default App;
MyComponent.js ? Component where we use the redux states
import React, { Component } from 'react'
import { Text, View, Button } from 'react-native'
import { connect } from 'react-redux'
import { incrementCounterAction, decrementCounterAction } from
'./Redux/Counter/counterAction';
class MyComponent extends Component {
   render() {
      return (
         <View style={{ justifyContent: 'center', alignItems: 'center' }}>
            <View style={{ marginVertical: 50 }}>
               <Text style = {{ fontSize: 25, fontWeight: 'bold' }}> Counter Value = {this.props.counter} </Text>
            </View>
            <View style = {{ marginVertical: 5 }}>
               <Button title = "Increment +1" style = {{ marginVertical: 50 }} onPress={() => { this.props.increaseCounter(1) }} />
            </View>
            <View style = {{ marginVertical: 5 }}>
               <Button title = "Increment +5" style = {{ marginVertical: 50 }} onPress={() => { this.props.increaseCounter(5) }} />
            </View>
            <View style = {{ marginVertical: 50 }}>
               <Button title = "Decrement -1" onPress={() => { this.props.decreaseCounter() }} />
            </View>
         </View>
      )
   }
}
const mapStateToProps = (state) => {
   return {
      counter: state.counter
   }
}
const mapDispatchToProps = (dispatch) => {
   return {
      increaseCounter: (parameter) => {
         dispatch(incrementCounterAction(parameter))
      },
      decreaseCounter: () => {
         dispatch(decrementCounterAction())
      }
   }
}
export default connect(mapStateToProps, mapDispatchToProps)(MyComponent);
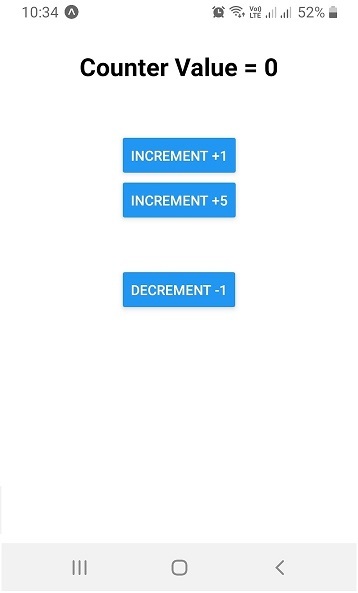
Output
Initial state

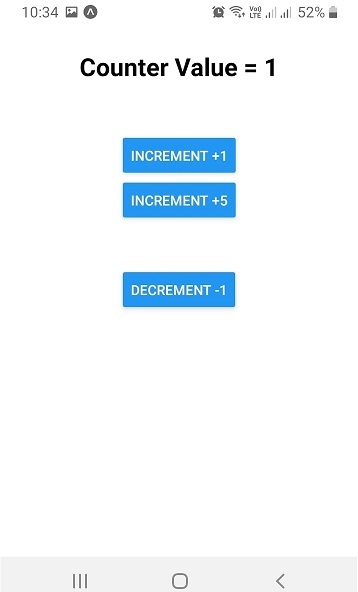
After the "INCREMENT +1" button is clicked.

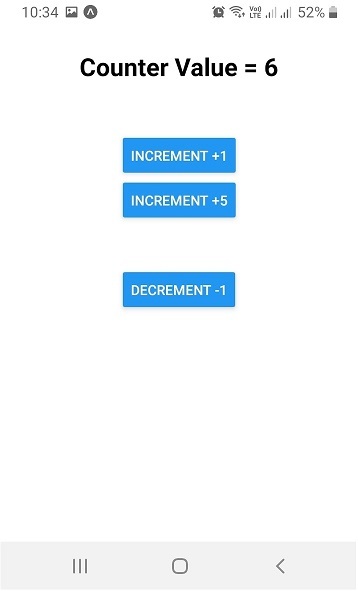
After the "INCREMENT +5" button is clicked.

After the "DECREMENT -1" button is clicked.

This demonstrates how Redux can be used with React Native. Although there would be many additional actions, reducers, and components related to the store in a real-world application, the fundamental concept would still apply.

