 Data Structure
 Networking
 RDBMS
RDBMS Operating System
 Java
Java MS Excel
 iOS
iOS HTML
HTML CSS
CSS Android
 Python
 C Programming
 C++
C++ C#
C# MongoDB
 MySQL
MySQL Javascript
 PHP
PHP
- Selected Reading
- UPSC IAS Exams Notes
- Developer's Best Practices
- Questions and Answers
- Effective Resume Writing
- HR Interview Questions
- Computer Glossary
- Who is Who
How to display Material Chip View in React Native?
To display chips in the UI, we are going to make use of React Native Paper Material Design.
Install react native paper as shown below −
npm install --save-dev react-native-paper
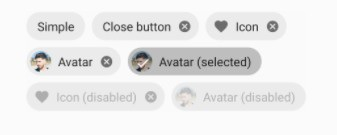
The chip component looks as follows on the UI −

The basic chip component is as follows −
<Chip icon="icontodisplay" onPress={onPressfunc}>Chip Name</Chip>
The basic properties of chip are as follows −
| Props | Description |
|---|---|
| mode | The values for mode are flat and outlined.
With flat mode you will not get a border
and with outlined the border for the chip
will be displayed. |
| icon | The icon to be given to the chip. |
| selected | The values are true/false. If true the chip
will be selected. |
| selectedColor | Color to be given for the selected chip. |
| disabled | To disable the chip. |
| onPress | The function will be called when the user taps on the chip. |
| onClose | The function will be called when user taps on the close button. |
| textStyle | The style to be given to the chip text. |
| style | The style to be given to the chip component. |
Example: To Display Chip
The code that displays chip is as follows −
<SafeAreaView style={styles.container}>
   <Chip icon="camera" disabled onPress={() => console.log('camera')}>Click
      Here</Chip>
      <Chip icon="apple" mode="outlined"selectedColor='green' selected
         onPress={() => console.log('apple')}>Apple Icon</Chip>
</SafeAreaView>
Example
import * as React from 'react';
import { StyleSheet, Text, SafeAreaView } from 'react-native';
import { Chip } from 'react-native-paper';
const MyComponent = () => (
   <SafeAreaView style={styles.container}>
      <Chip icon="camera" style={styles.chip} disabled onPress={() =>
         console.log('camera')}>Click Here</Chip>
         <Chip icon="apple" style={styles.chip}
            mode="outlined"selectedColor='green' selected onPress={() =>
            console.log('apple')}>Apple Icon</Chip>
         <Chip icon="calendar-month" style={styles.chip} mode="outlined" selected
            onPress={() => console.log('calendar')}>Select Date</Chip>
      </SafeAreaView>
   );
   export default MyComponent;
   const styles = StyleSheet.create({
   container: {
      flex: 1,
      alignItems: "center",
      justifyContent: "center"
   },
   chip: {
      marginTop:10
   }
});
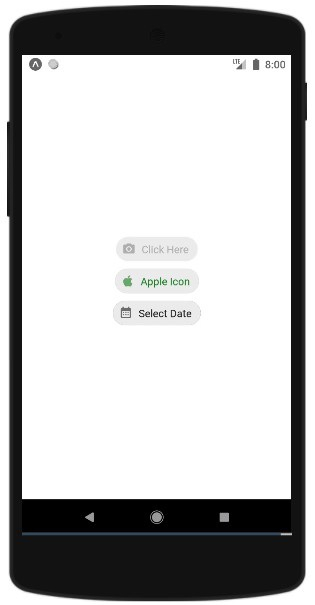
Output


Advertisements
