
Article Categories
- All Categories
-
 Data Structure
-
 Networking
-
 RDBMS
RDBMS
-
 Operating System
-
 Java
Java
-
 MS Excel
-
 iOS
iOS
-
 HTML
HTML
-
 CSS
CSS
-
 Android
-
 Python
-
 C Programming
-
 C++
C++
-
 C#
C#
-
 MongoDB
-
 MySQL
MySQL
-
 Javascript
-
 PHP
PHP
-
 Economics & Finance
How to Remove Text Within Brackets/Parentheses in Excel?
When working with huge datasets or text-heavy documents in Excel, you may have run into circumstances where you needed to remove text that was encased in brackets or brackets in order to clear up the content. Excel provides a number of easy ways to remove annotations, footnotes, or any other textual contents that are encapsulated in these symbols. This step-by-step article will guide you through several methods for removing text enclosed in brackets or brackets that are appropriate for various Excel versions.
By the end of this session, you will have the skills necessary to effectively remove text that is encased in brackets or brackets from your data, cleaning it up and making it easier to read. Let's get going and explore the universe of Excel functions and tricks that will make your data manipulation jobs easier!
Remove Text Within Brackets/Parentheses
Here we will use the find and replace function to complete the task. So let us see a simple process to learn how you can remove text within brackets or parentheses in Excel.
Step 1
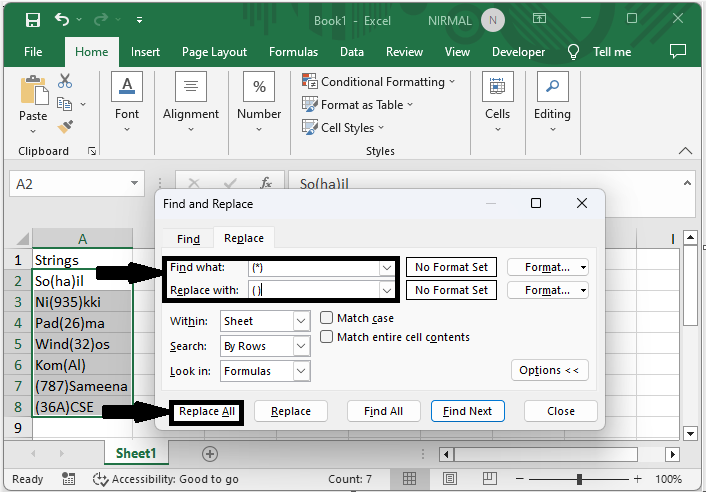
Consider an Excel sheet where you have a list of strings with data in brackets, similar to the below image.

First select the range of cells, then click Ctrl + H to open the Find and Replace function to complete the task.
Select Cells > Ctrl + H.
Step 2
Then enter (*) in the find what box and () in the replace with box, and click Replace All to complete the task.
Find What > Replace With > Replace All.
Then you will see that text within brackets will be removed.
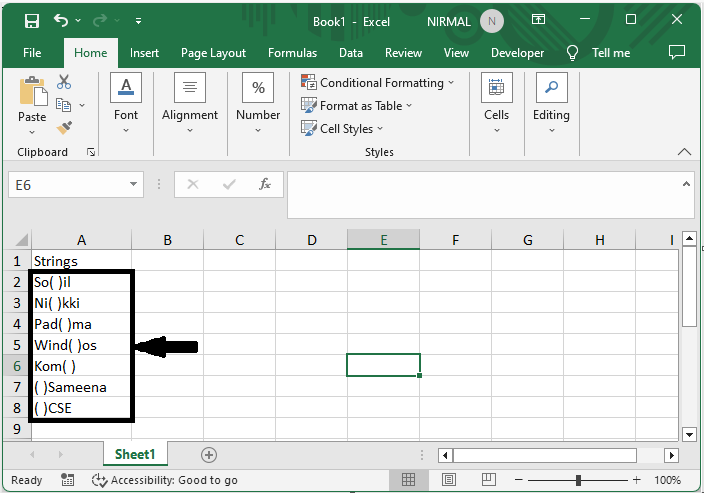
This is how you can remove brackets or paratheses in Excel.
Conclusion
In this tutorial, we have used a simple example to demonstrate how you can remove text within brackets or parentheses in Excel to highlight a particular set of data.

14K+ Views
