
Article Categories
- All Categories
-
 Data Structure
-
 Networking
-
 RDBMS
RDBMS
-
 Operating System
-
 Java
Java
-
 MS Excel
-
 iOS
iOS
-
 HTML
HTML
-
 CSS
CSS
-
 Android
-
 Python
-
 C Programming
-
 C++
C++
-
 C#
C#
-
 MongoDB
-
 MySQL
MySQL
-
 Javascript
-
 PHP
PHP
-
 Economics & Finance
How to integrate a facebook login in swift for iOS App?
Social logins in applications have become a very common thing these days. Facebook login is one of them, in this article we’ll see how we can make use of facebook login, to access basic user information and login to the application.
Implementing facebook login in an application is a series of multiple steps, out of which even a single step can not be skipped.
The first step is to register as a developer on: https://developers.facebook.com/
Once you sign up as a developer and complete the required steps to sign up, you will be taken to dashboard. Which at present looks like as shown below.
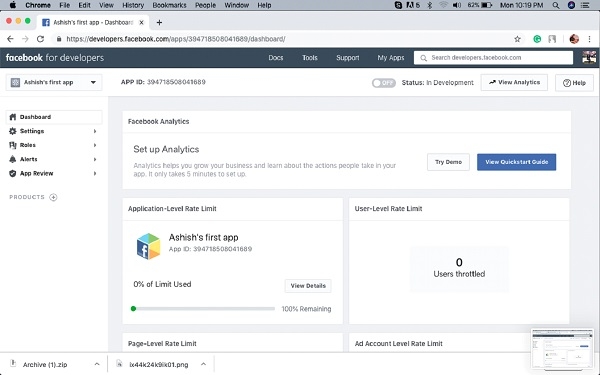
Now from the top left menu, click on the arrow and select create new app, or create test app. Then you’ll get the following screen where you should enter the name of your app.

Once you are done with your project, go to Settings tab on the left side menu, and scroll down to Add Platform option, once you do that you’ll see an option to choose platform.

Select iOS from this menu. It will take you to another page, where you’ll have to enter your project details like: Bundle ID, Iphone Store ID etc.
Make sure that you enable Single Sign on from the menu as well.
This is all that’s required on the developer’s portal.
Now, go to your podfile, and add the following.
pod 'FBSDKCoreKit'
pod 'FBSDKLoginKit'
Install the pod.
<key>CFBundleURLTypes</key>
<array>
   <dict>
      <key>CFBundleURLSchemes</key>
      <array>
         <string>fb{your-app-id}</string>
      </array>
   </dict>
</array>
<key>FacebookAppID</key>
<string>{your-app-id}</string>
<key>FacebookDisplayName</key>
<string>{your-app-name}</string>
<key>LSApplicationQueriesSchemes</key>
<array>
   <string>fbapi</string>
   <string>fb-messenger-share-api</string>
   <string>fbauth2</string>
   <string>fbshareextension</string>
</array>
Now you need to configure your info.plist file
Replace app id and app name with actual values.
Now import login SDK to your view controller and use like this.
import FacebookLogin
func viewDidLoad() {
   let loginButton = LoginButton(readPermissions: [ .publicProfile ])
   loginButton.center = view.center
   view.addSubview(loginButton)
} 
529 Views
