
Article Categories
- All Categories
-
 Data Structure
-
 Networking
-
 RDBMS
RDBMS
-
 Operating System
-
 Java
Java
-
 MS Excel
-
 iOS
iOS
-
 HTML
HTML
-
 CSS
CSS
-
 Android
-
 Python
-
 C Programming
-
 C++
C++
-
 C#
C#
-
 MongoDB
-
 MySQL
MySQL
-
 Javascript
-
 PHP
PHP
-
 Economics & Finance
How to Force or Auto line Break within an Excel Cell?
It is sometimes necessary to insert a line break in Excel to show the entire string inside the cell because the texts are too long to fit inside a cell without spilling out the ends, which looks messy and unattractive. Representing the contents of the particular in various lines instead of one long line is known as "wrapping text". With the help of wrapping text, the users would be capable to eliminate the "truncated column" impact and enhance the readability of the text and printing compatibility. It also assures the users in managing a column that have constant value in the spreadsheet. Users can use a line break to terminate the current line and begin a new one in the same cell.
In this article, we will see that Excel has the ability to wrap text so that it fills multiple lines in a column. Users have the option to manually input a line break or format the cell so that the text automatically wraps.
Let?s start with multiple Approaches
We have provided the solution using different approaches:
By using a Shortcut Key.
By the using Auto line break within a cell (Wrap Text)
By using a Shortcut Key
Users can use the shortcuts to induce any desired line break within a cell.
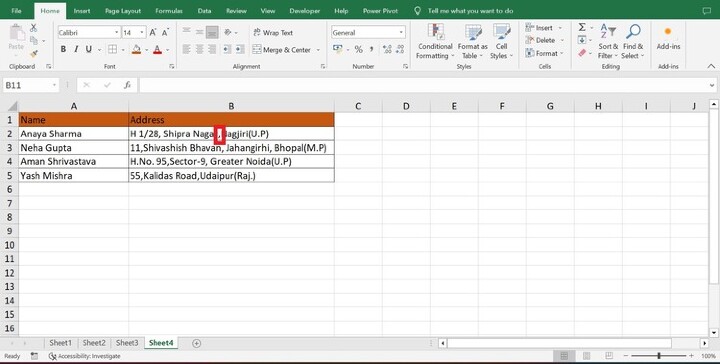
Step 1
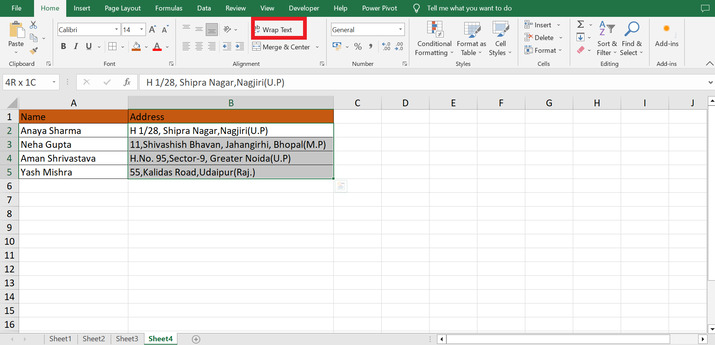
Assume the worksheet along with following data. The worksheet contains two columns named Name and address where various users name and address are filled to showcase an example for force a line break within cell as shown below:

Step 2
Position the cursor on the location of a line break to be forced within the column which is highlighted in below image:
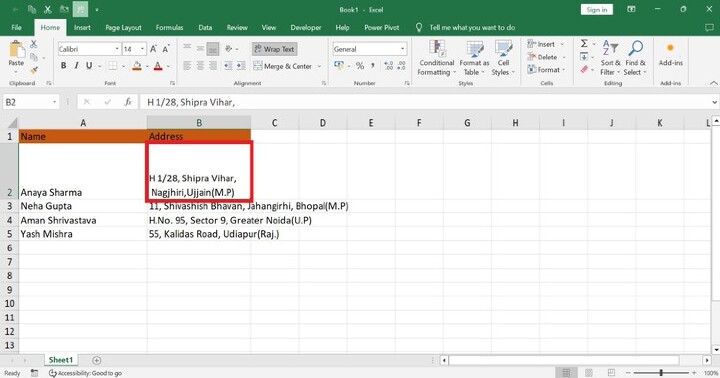
Step 3
Now press combination of the keys Alt + Enter. A line break is now immediately added, which is highlighted in below image. And then press Enter Key and result would be displayed in the Cell B2.
Step 4
The line breaks can then be added one at a time, which is highlighted in below image.
By using Auto line break within a cell (Wrap Text)
The Wrap Text utility can be used to automatically place line breaks in a cell.
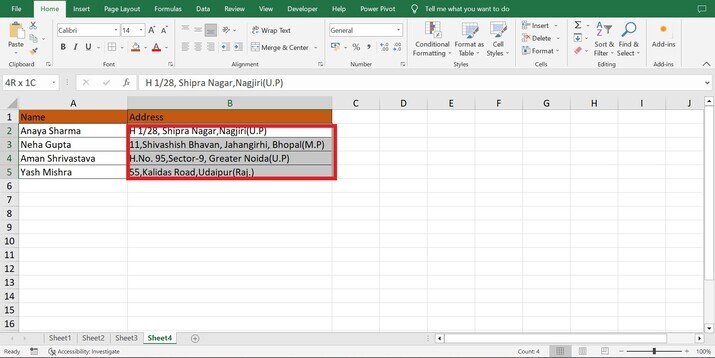
Step 1
Select the cell from B2:B5 in which one can want to wrap texting or auto line breaking in a cell which is highlighted in below image.
Step 2
Now clicking on Home Tab under the Alignment group select the Wrap Text option which is shown below.
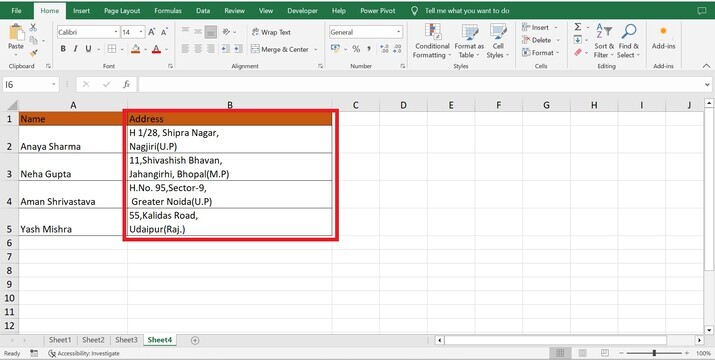
Step 3
After Click on Wrap Text the resulted output is shown in below figure.
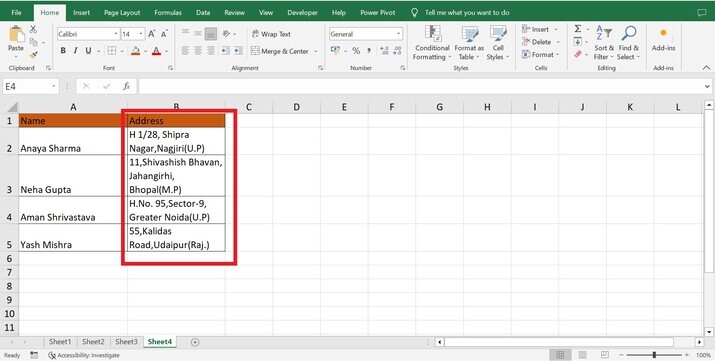
Note: As of now, depending on the column width, all selected cells have automatic line breaks.
Conclusion
In this article, we can see if a text string has multiple sections that want to display on different lines, users may need to place a line break in Excel. When one want to display each part of an address in a separate line and you have an address that would be a suitable example. Wherever your cursor was when users followed the instructions above, a line break would be inserted. What users enter in the cell can now be continued, and it will be displayed in the next line. To see the content show in the next line, make note that the cell must be in the "Wrap text" mode. Users will see all the content in one cell if it is not applied (even if you have the line break). The Home tab of the ribbon contains a choice called "Wrap Text".

6K+ Views
