
Article Categories
- All Categories
-
 Data Structure
-
 Networking
-
 RDBMS
RDBMS
-
 Operating System
-
 Java
Java
-
 MS Excel
-
 iOS
iOS
-
 HTML
HTML
-
 CSS
CSS
-
 Android
-
 Python
-
 C Programming
-
 C++
C++
-
 C#
C#
-
 MongoDB
-
 MySQL
MySQL
-
 Javascript
-
 PHP
PHP
-
 Economics & Finance
How to Create Stopwatch in Excel Worksheet
This tutorial is for you if you've ever needed a straightforward and practical timing tool in Excel. A stopwatch can be a useful addition to your spreadsheet, whether you're tracking time during an exercise programme, estimating the length of a process, or just keeping track of time.
In this tutorial, we'll show you how to use Excel's built?in features and formulae to make a working timer. You can follow along without any programming experience or highly developed Excel skills. We'll start from scratch and walk you through each step, making sure you fully comprehend the procedure.
Creating a Stopwatch in an Excel Worksheet
Here we will first insert three command buttons, then insert VBA code into the sheet to complete the task. So let us see a simple process to know how you can create a stopwatch in an Excel worksheet.
Step 1
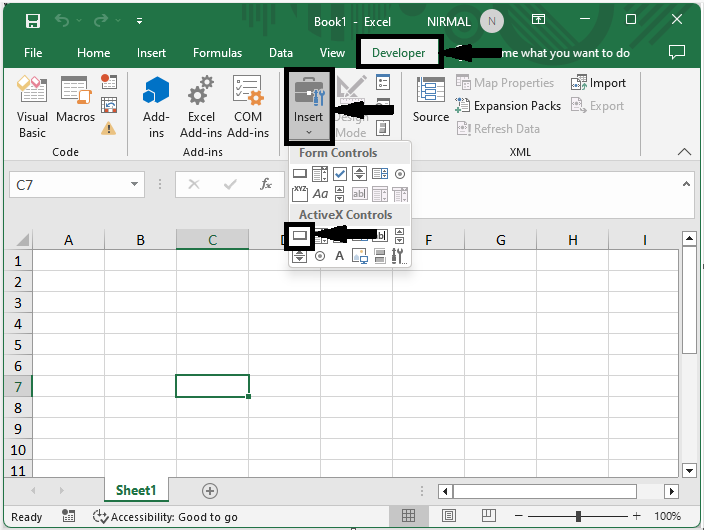
Consider any Excel workbook. First, click on developer, then click on insert, and select the command button under ActiveX controls.
Developer > Insert > Command Button.
Step 2
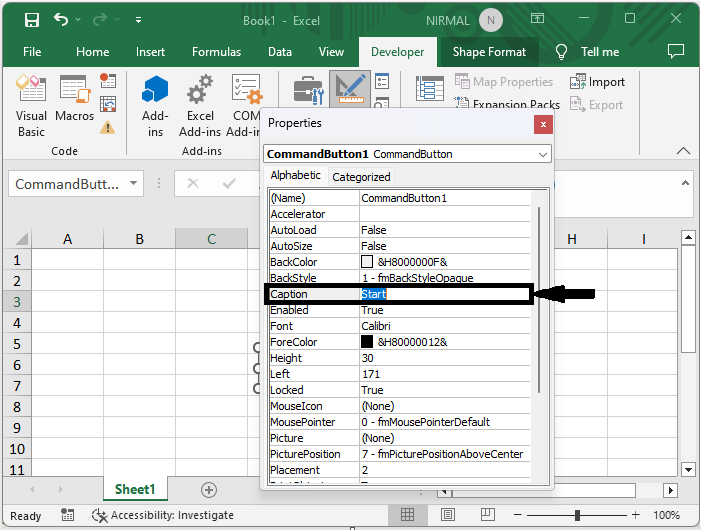
Then draw a command button of an appropriate size. Then right?click on the button and select properties. Then click on caption and enter the value as start.
Draw > Right click > Properties > Caption.
Step 3
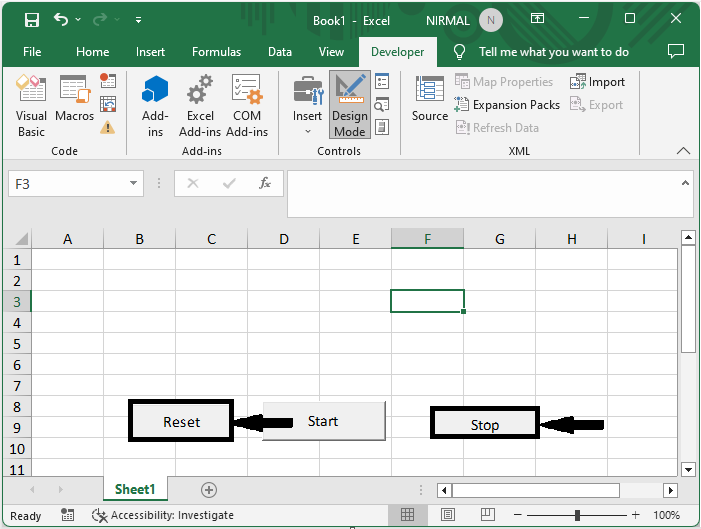
Then repeat the above step to create two new buttons, named stop and reset, and exit the design mode.
Step 4
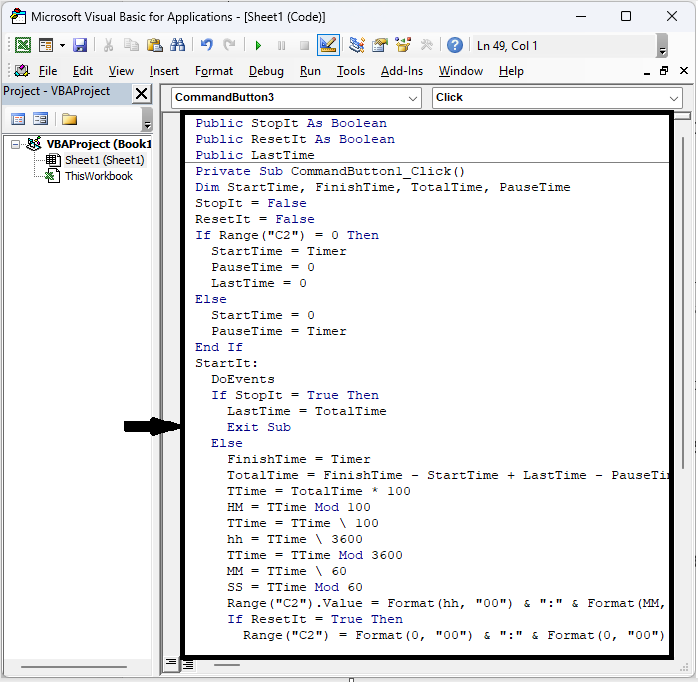
Now Right click on sheet name and select View code to open the VBA application and copy the below code into the text box.
Alt + F11 > Copy.
Example
Public StopIt As Boolean
Public ResetIt As Boolean
Public LastTime
Private Sub CommandButton1_Click()
Dim StartTime, FinishTime, TotalTime, PauseTime
StopIt = False
ResetIt = False
If Range("C2") = 0 Then
  StartTime = Timer
  PauseTime = 0
  LastTime = 0
Else
  StartTime = 0
  PauseTime = Timer
End If
StartIt:
  DoEvents
  If StopIt = True Then
    LastTime = TotalTime
    Exit Sub
  Else
    FinishTime = Timer
    TotalTime = FinishTime - StartTime + LastTime - PauseTime
    TTime = TotalTime * 100
    HM = TTime Mod 100
    TTime = TTime \ 100
    hh = TTime \ 3600
    TTime = TTime Mod 3600
    MM = TTime \ 60
    SS = TTime Mod 60
    Range("C2").Value = Format(hh, "00") & ":" & Format(MM, "00") & ":" & Format(SS, "00") & "." & Format(HM, "00")
    If ResetIt = True Then
      Range("C2") = Format(0, "00") & ":" & Format(0, "00") & ":" & Format(0, "00") & "." & Format(0, "00")
      LastTime = 0
      PauseTime = 0
      End
    End If
    GoTo StartIt
  End If
End Sub
Private Sub CommandButton2_MouseDown(ByVal Button As Integer, ByVal Shift As Integer, ByVal X As Single, ByVal Y As Single)
  StopIt = True
End Sub
Private Sub CommandButton3_Click()
  Range("C2").Value = Format(0, "00") & ":" & Format(0, "00") & ":" & Format(0, "00") & "." & Format(0, "00")
  LastTime = 0
  ResetIt = True
End Sub
In the code c2 is the cell where we are inserting the stop watch.
Step 5
Then use Alt+Q to close the VBA application. then rename the buttons Start, Stop, Reset as CommandButton1, CommandButton1, and CommandButton1 respectively using the name box.
Step 6
Then click on cell C2 and format the cell as text.
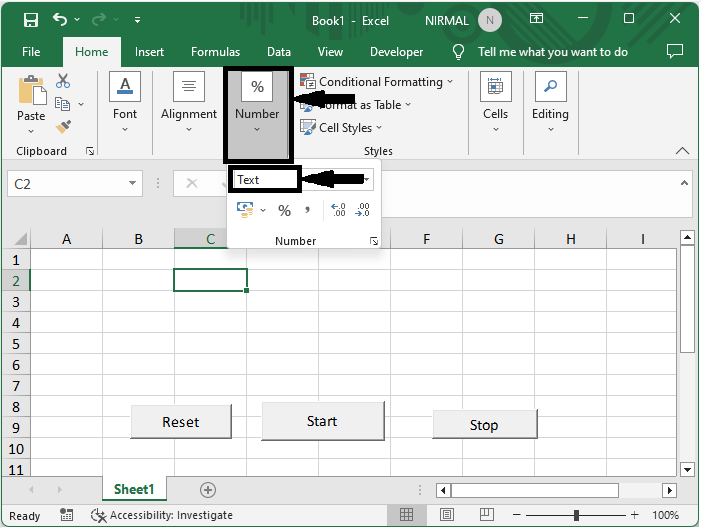
This is how we can create a stopwatch in an Excel work sheet.
Conclusion
In this tutorial, we have used a simple example to demonstrate how you can create a stopwatch in an Excel worksheet to highlight a particular set of data.

3K+ Views
